Autumn Wreath Tutorial
Last year, as part of our family’s Autumn Equinox celebration, the boys and I made an autumn wreath from clippings from our yard. It was so pretty and lasted better and longer than I had really hoped, so I thought this year I’d share a tutorial, in case you’d like to make one for your home.
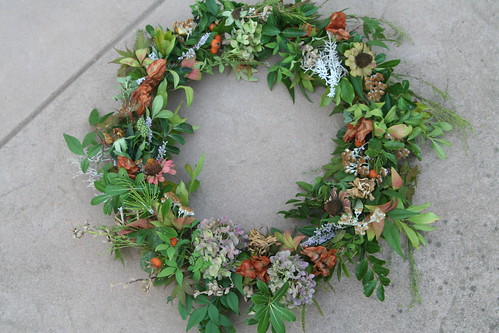
Above is our wreath from today. I wish I could say my kids wanted to help this year, but they didn’t. Also, you might wonder why my Autumn wreath doesn’t have many autumn leaves in it. Here in Northern California the leaves haven’t yet begun to turn pretty colors. Today it was almost 100 degrees F. I found plenty of other bits with splashes of color to use instead of autumn leaves.
Materials
* wreath base made of twigs or vines
* floral picks (short wooden stems with a wire fastened on one end)
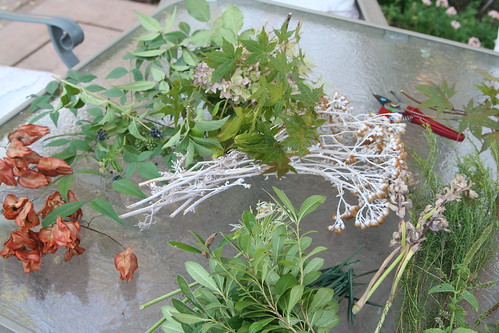
* fresh and dried yard clippings (some examples: Japanese maple, pittosporum, nandina, rose hips, seed pods, dried or drying hydrangea, crepe myrtle, myrtle, dusty miller, mint, rosemary, autumn leaves, mallow, wheat ears, assorted shrubs, etc.)
Tutorial
A long time ago, I used to be a floral designer, but I promise you don’t have to have any floral design experience to do this project. Also, I should say that this is a seasonal wreath that will look nice for several weeks. It will not last forever, as the plant materials will wither and dry out. However, many will retain their shapes and colors. Since we won’t be storing this wreath for use again next year, we are free to construct it fairly loosely.
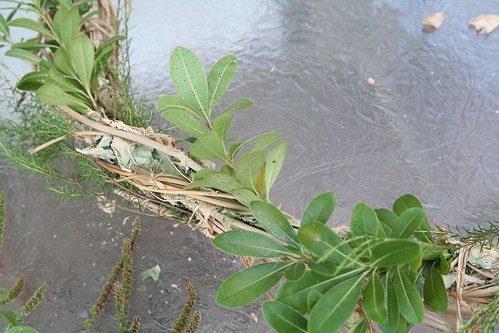
For my wreath base, I used a wisteria vine that I twisted into a wreath earlier this summer when Ian and I were trimming in the yard. Wisteria is leafy and pretty and nicely flexible when you first cut it and it’s fresh. We had so very much of it that I made several wreaths, which subsequently dried up completely. The first thing I did for my autumn wreath project was to pick off a bunch of dried wisteria leaves. You can see how the original green color of the wisteria vines has faded in the next picture.
Choose a single direction in which to add bits of plants to your wreath base. Trust me: You’ll be happier with the finished wreath if it has a directional flow. Mine goes clockwise. It is the direction of the path of the sun in the Northern Hemisphere, and since for me this wreath is a symbol of the changing of the seasons, I’m quite happy with clockwise.
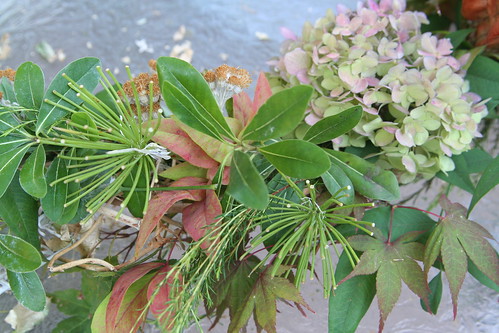
All you have to do is stuff the stem end of your garden clippings into your wreath base, wedging it until if feels secure. That’s it. It’s not complicated at all, but you have to keep doing it until your wreath base is covered up with foliage and other items. I suggest that you choose sturdy kinds of plants to cover the base and provide a foundation for the colorful and more interesting parts to sit on. For my wreath, this was pittosporum. It stays intact as it dries.
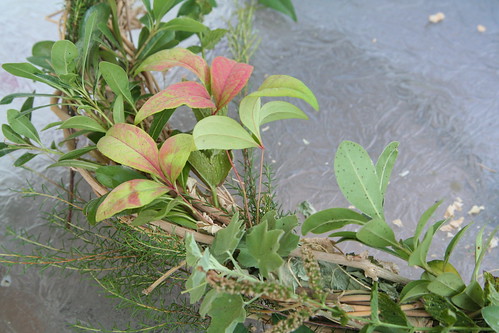
Now add lots of variety to your wreath, using the same technique of inserting the stems into the twisted wreath base. Try to find foliage in a variety of greens, reds, and yellows and with a variety of leaf shapes. Keep working in different places all around the circle, adding the same type of item in two to five different places on the wreath. This will help achieve a balanced look.
As the wreath fills out gradually, you can begin to add your showier items. Unusual shapes or colors, seed pods, flowers, or dried flowers all make wonderful accents. If you have plant items lacking a long enough stem, you can use a floral pick and wrap the wire around the item, securing it to the floral pick. Then insert the pick into the wreath base.
You might wish to choose a particular focal point on the wreath. Often this is either the bottom center or the top center of the wreath. Place some of your favorite plant items there.
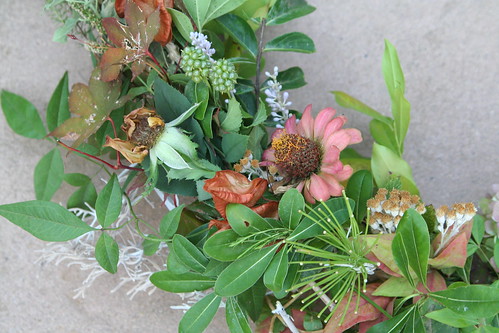
I chose plenty of imperfect items for my wreath, such as leaves with blemishes, flowers that were long past their prime, and fruits (such as rose hips and lantana fruits) that would normally be trimmed and discarded. I wanted to capture this moment in time, this beautiful juncture between the seasons that is the equinox. My garden is a study in paradox right now, with some plants blooming like gangbusters and some going to seed and drying out. To me this is quintessence of the autumn equinox, and reflects the seasons as I know them.
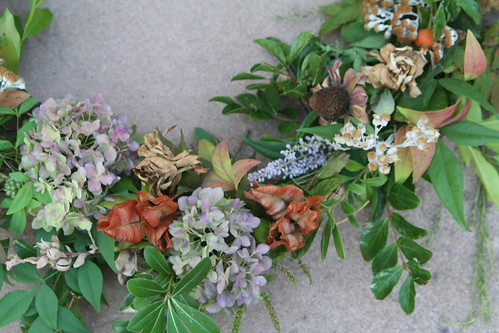
You can make an amazing autumn wreath without taking too much of any one type of plant, too. For example, I clipped only three hydrangea flowers, four old zinnias, and only a couple of totally dried, brown gardenias. If you use just a little bit of lots of different plants, you won’t need to denude any one.

Here’s my finished wreath hanging above our nature table. It will change over the next several weeks as autumn wears on, which seems just right to me.
How do you honor the changing of the seasons in your home?


October 2, 2011 at 8:45 am
This is absolutely stunning
You are truly talented
Bravo!
I would like to try one day