Pumpkin Globe Lantern Tutorial
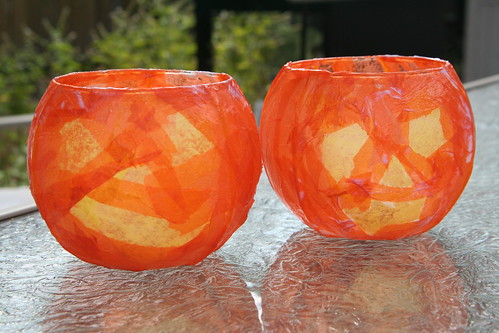
Candlelight is favorite way to illuminate October evenings, and what says October more than jaunty, glowing pumpkin faces? These pumpkin globe lanterns can be made by children of all ages with your supervision. The process is simple and the materials are inexpensive. Why not create a jack-o-lantern that you can enjoy year after year?
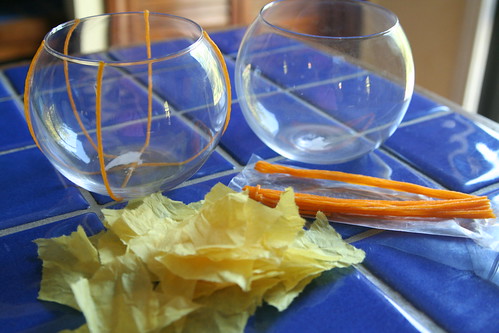
Materials
- tissue paper in yellow and orange
- wax-coated strings in yellow or orange (brand names are Wikki Sticks and Bendaroos)
- globe glass candle holder
- mod podge and a paintbrush or foam applicator
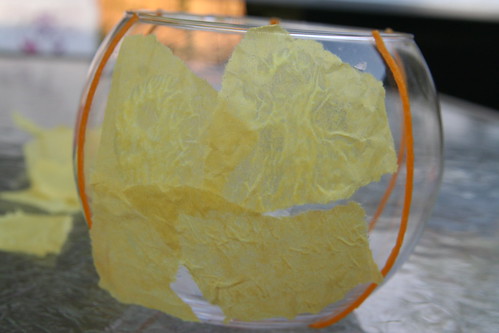
Begin by gathering your materials. The first step in the project is optional. If you want your pumpkin globe lantern to have the iconic vertical rib lines of a real pumpkin, gently squish the end of a wax string to the top edge of the globe. Guide it down the side and squish the other end to the bottom of the globe. Repeat this for as many lines as you like, placing the wax stings equidistant to each other. You might want to omit one line that would naturally appear at the pumpkin’s face. These lines will be visible when the candle is lighted in the finished pumpkin.
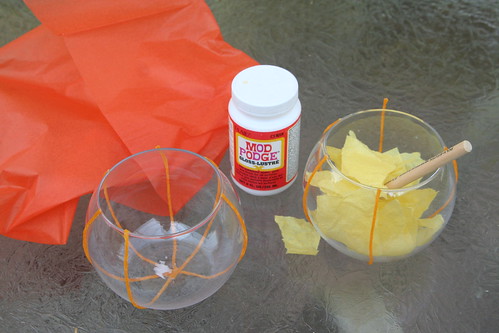
Rip your yellow tissue paper into small pieces. You won’t need much. Now apply a small amount of mod podge to your glass and apply a small piece of yellow paper. This is your first eye. Smooth the paper with more mod podge and the applicator or paintbrush. Add a second eye, a nose, and a long mouth. The shapes of these pieces of tissue don’t matter all that much. Smooth them all down.
At this point, your face might not look much like a face. You’ll use your orange tissue paper to define your pumpkin’s features next. Rip your orange tissue paper into small pieces. (Alternatively, rip some small pieces and then rip some into strips about 6 inches long.)

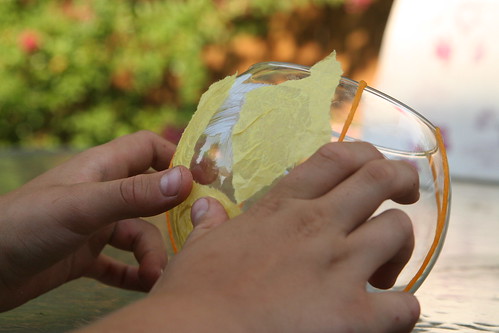
Using your small pieces of orange tissue paper, apply them around your pumpkin’s eyes, nose, and mouth. Now is your opportunity to define your pumpkin globe lantern’s personality. Small children may prefer smiling, happy pumpkins. Older children might enjoy figuring out how to make theirs spooky. Does the pumpkin have squinty, frowning eyes or a snaggletoothed grin?
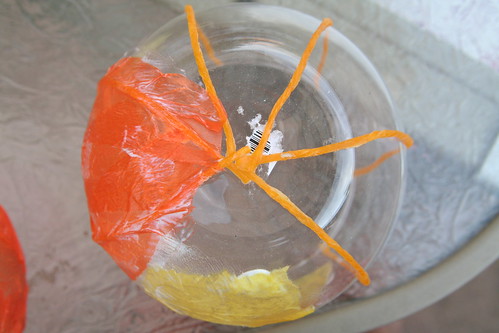
When your pumpkin is mostly découpaged with tissue, turn it over and cover the bottom of the glass globe. You’ll have to let it dry in this position, setting on its top rim.
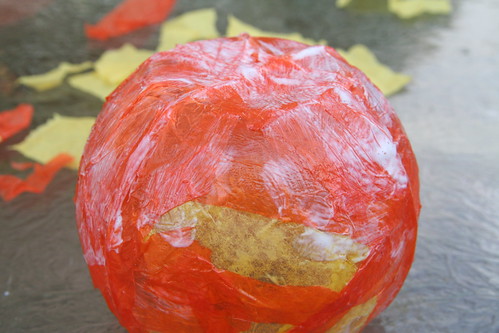
If you wish to use long strips of paper, your in-progress pumpkin lantern will look like this photo above. You’ll add adjoining strips, working your way around until the whole globe is covered.
Now you have to wait patiently while the mod podge dries. Examine your pumpkin for any thin spots or places uncovered by tissue. Add or patch as needed. The more layers of paper you add, the better defined the pumpkin’s features will be.
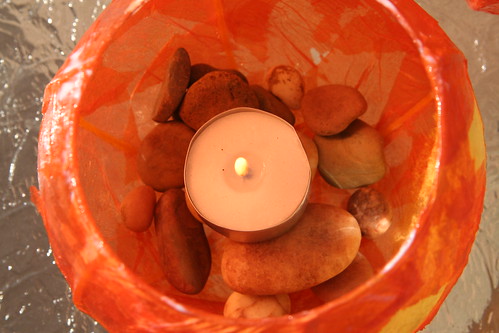
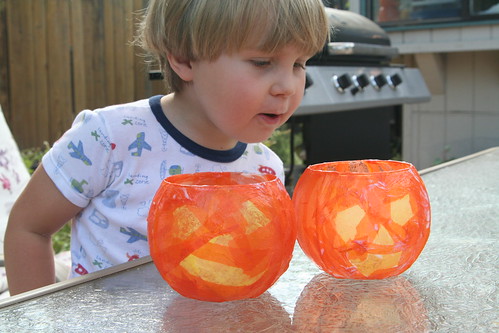
Fill your pumpkin globe lantern with some rocks, gems, or sand, add a tea light or votive, and wait for nightfall to meet your pumpkin friend in all his glowing glory. It will happily share its light during chilly autumn nights.
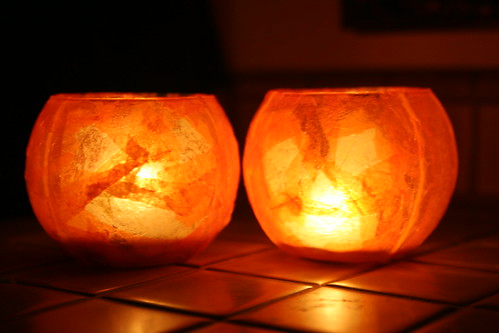
It’s nice to have a friend in the darkness.


October 9, 2012 at 11:29 am
those are awesome! what a great idea. where do you get the globe candle holders??
October 9, 2012 at 12:30 pm
Hi Heathermama, I got them at either Michael’s or Beverly’s Fabrics & Crafts. I see them in lots of craft stores and they aren’t expensive. Thanks for the compliment!