Snowflake Fairies Tutorial
In between chilly outings, when we’re inside warming up, is a wonderful time to appreciate the beauty of winter. Paper snowflakes are festive and look lovely decorating windows and our family cuts beautiful snowflakes every year. Here is a project for making lovely snowflake fairies to flutter and dance in the air. Hang them over a heating vent to see them blow about, just like a real, falling snowflake.
Note: Some Waldorf educators recommend that you not make needle-felted figures and animals in the presence of young children, who may find the action of repeatedly needling the woolen bodies to shape them somewhat disturbing.
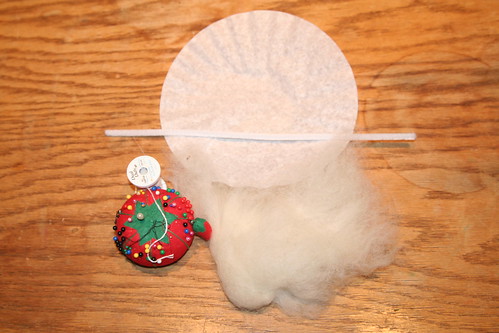
Materials
- coffee filter
- chenille stems
- needle and thread
- scissors
- wool batting
- needle-felting needle and pad
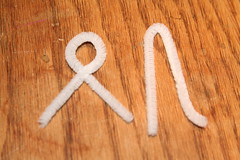
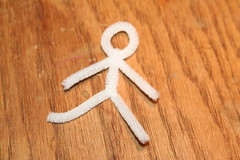
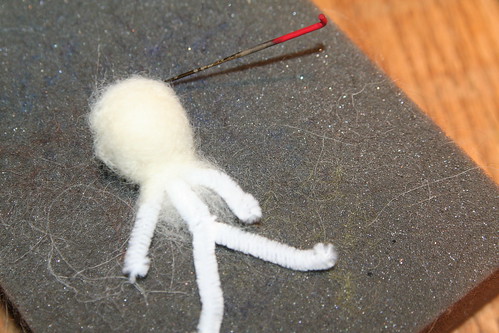
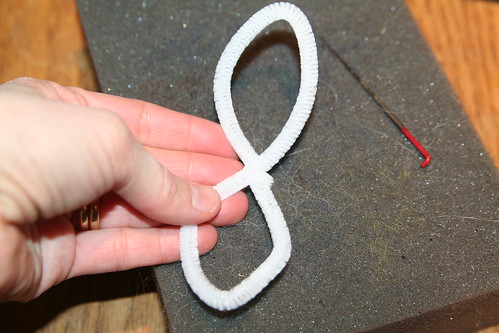
Start by forming the skeleton of your fairy. Cut your chenille stem in half. Twist a loop into the center of one half; this is your fairy’s head with arms attached. Fold the other half over (body and legs). Then put one leg of the folded chenille stem through the loop. The two pieces are now interlocked. About an inch farther down, where the pelvis of the figure would be, twist again to make two legs. You should now have a wire “stick figure” like you see in the right photo above. Fold the smallest possible bit of wire over at the end of each limb, to form tiny hands and feet and keep the cut wire from poking anyone.
Take a small bit of wool roving, roll it into a ball, and insert it into the loop of the figure’s head. Then wrap a bit more roving around the head and begin to needle it in place into an attractive head shape.
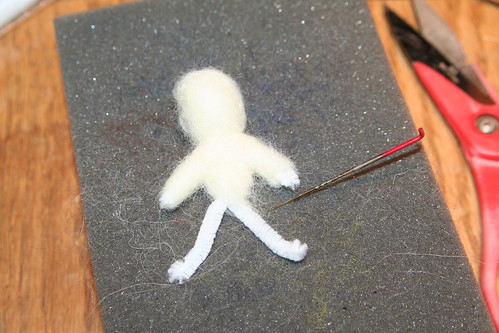
Using very small bits of wool, wrap around the figure’s body and arms. I find making a crisscross of wool that goes from shoulder to waist in both directions to be a good method. Needle this wool until it’s firm and stationary. The fairy’s arms may need more needling than the body to make them graceful and slender.
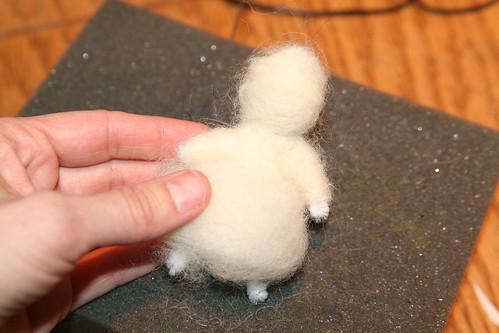
Now add a bigger fluff of wool to create a woolen petticoat. You can either allow the fairy’s feet to show below the fluffy skirt, or make the skirt extend below the feet.
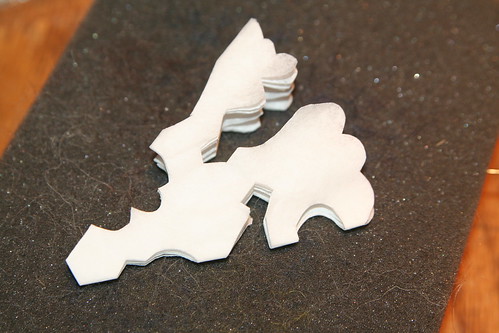
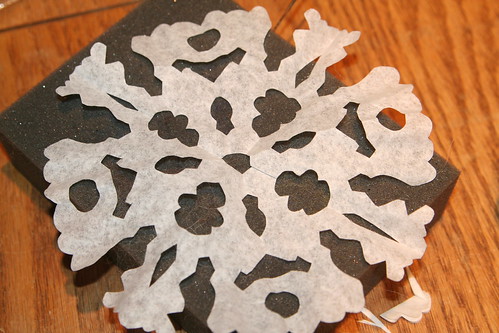
Fold a white, circular coffee filter into quarters or eighths and cut a snowflake. Cut a very small tip off the snowflake and unfold it.
This is the only tricky part: Gently guide your fairy’s head through the center hole in your snowflake. Go slowly to avoid tearing the paper. If the head won’t fit through the hole, refold the snowflake and cut the tip just a tiny bit more to widen the hole and fit the head through.
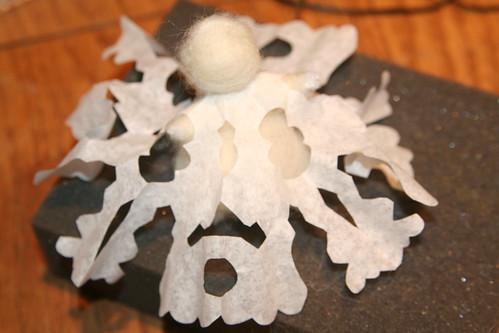
You have a choice now. You can either put the fairy’s arms through holes in your snowflake (if you have such holes) to make a dress (see above), or you can gently move one arm at a time up through the neck hole of the snowflake to make it a skirt instead of a dress. This part is not unlike carefully dressing a small child, except your fairy will wiggle less.
Next, use another chenille stem and form a circle. Twist the two ends together to seal the circle. Then twist the circle into a figure eight. These are your fairy’s wings. Use a bit of wool to tack the wings onto the fairy’s back. Now give your fairy some white hair, and allow it to flow over the center of her back where the wings meet the back.
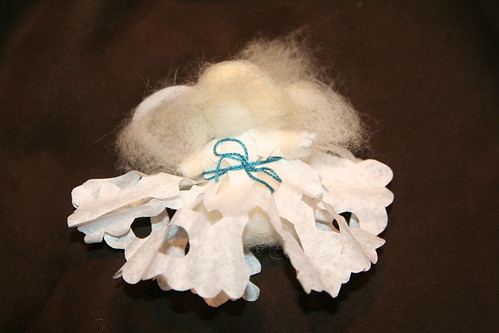
If you made a dress, you might wish to belt it with a ribbon, bit of string, or a braid of wool roving.
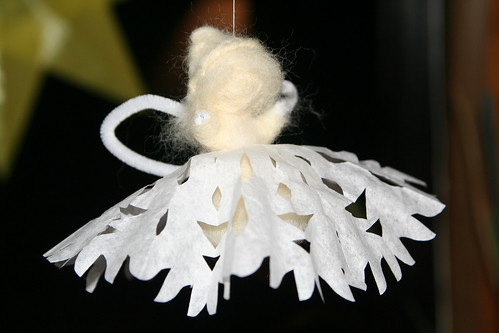
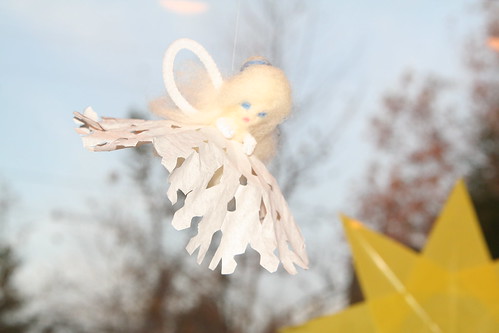
Here is a fairy with a skirt. You can give your fairy a fancy hairdo, if you like, by coiling wool into a bun and needling it onto her head. You can also add a face using tiny bits of color needled in for eyes and a mouth (as seen in the top photo). The fairies are adorable either way.

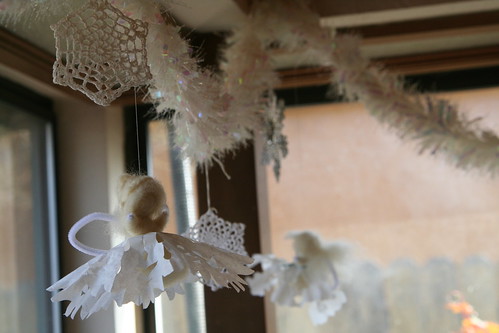
Now, you can make more snowflake fairies and hang them near each other to dance in the air, or display them with other snowflakes.
![]()
Please vote for Love in the Suburbs at the Circle of Moms Top 25 Creative Moms blog list. You can vote once per 24 hours until Jan 30, and you can vote for more than one blog on the list! Thank you!


February 3, 2013 at 8:08 am
This is terrific! I was hoping to make something like these for our nature table.
January 20, 2016 at 2:47 pm
Very Good Sharing. Thanks!