Valentine Window Transparencies Tutorial
Hello! [This post has been edited to remove a broken Pinterest link. 2-13-15]

Anyway, I’m kind of obsessed with window stars lately. I got some new supplies for Christmas (kite paper and a new book and paper kit for making window stars). They are challenging for me and so rewarding when you get it right. I made a ten-pointed star the other day and I had to enlist Ian’s help to get the angles right when assembling the points. Then we had to buy a protractor!
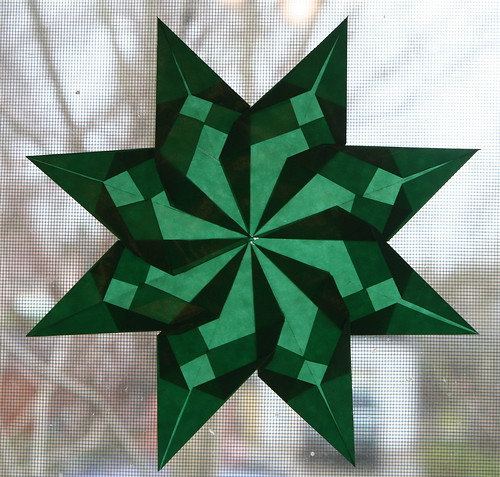
This eight-pointed star I made is new.
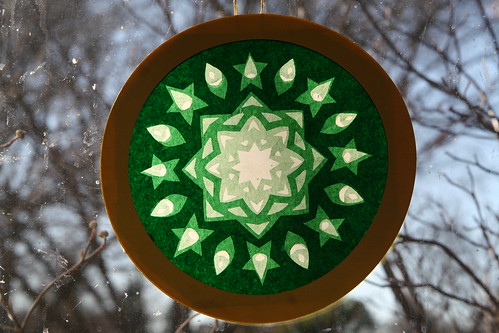
And I accidentally-on-purpose bought this rose window transparency from an 11-year-old kid on Etsy, a shop named Knitting Momma. I couldn’t help myself. It’s so pretty and I like the gnome head shapes within it. See them? (Pay no attention to my dirty windows.)
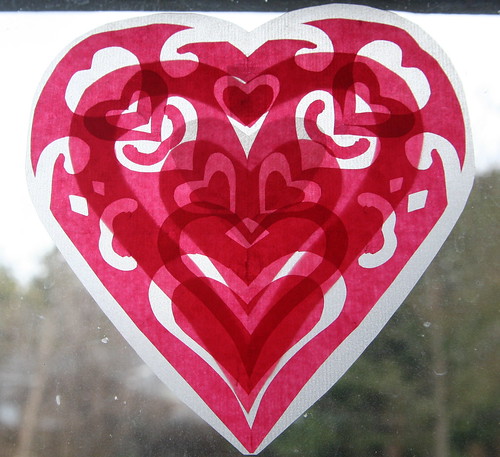
And that got me experimenting with my kite paper. I made this transparent window valentine using three pieces of square kite paper, two red and one white. I like this one a lot. The kite paper is only 6.25 by 6.25 inches, and I wondered if I could do something similar but bigger with tissue paper.
Now, I wouldn’t say my valentine window transparencies are perfect, but we learn in the doing, right? So here is what I did, and what I learned along the way, in case you would like to play along.
Materials
- tissue paper or kite paper in valentine colors (red, pink, dark pink, white, purple)
- scissors
- iron on medium heat and ironing board
- glue stick
- tape
Tutorial
First, lay several pieces of tissue paper of different colors on top of each other. Iron them flat on your ironing board with the heat on medium. Any wrinkles should iron out nicely. Do not spray with water while ironing.

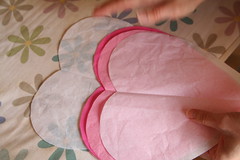
Then, with your papers still stacked, fold it once in half and then in half again. You should now have four stacks of tissue paper. Take one stack, fold it in half, and cut out a big heart shape. Iron out the center crease. Separate the hearts that you’ve just made. They are pretty much the same size, so they can be stacked up again in layers as you make your designs.
Try cutting one heart into smaller hearts by cutting along the heart’s edge. You’ll end up with two usable pieces: the smaller heart and the heart-shaped edge with an open center. Do this a few times and also cut additional hearts out of the scraps from the big hearts.
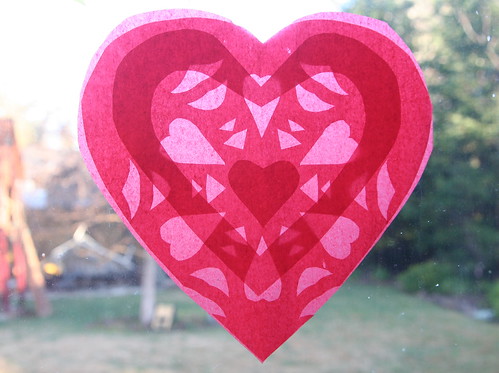
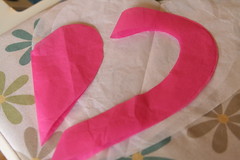
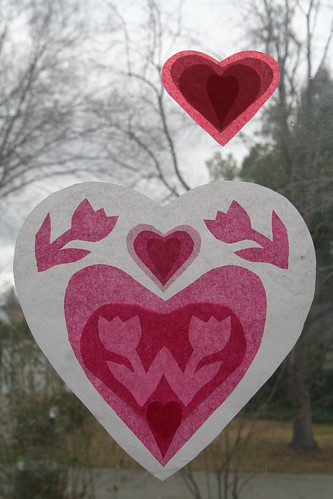
Take one large heart layer and fold it into quarters or eighths, like you would if you were going to cut a paper snowflake. Along the main fold line, cut a small half heart. When you unfold, you’ll have four or eight cut out hearts. Be careful about where you’re cutting, as it’s easy to cut beyond the border of your heart since it’s not a symmetrical shape. This heart transparency shows the four small cutouts. (While it’s folded, you can cut additional shapes such as diamonds or triangles if you wish, like you would for a snowflake.)
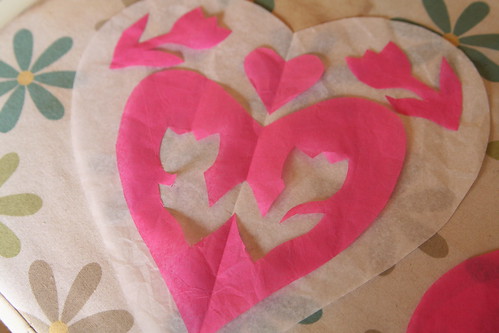
Try folding one layer in half and cutting a simple design. Here is one with tulips.
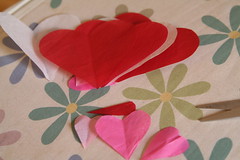
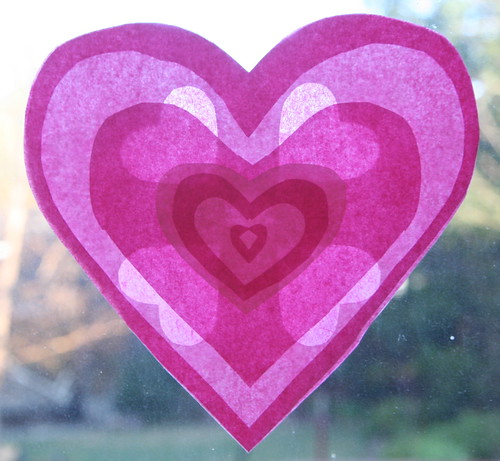
Now play with the layers you have made. Put a whole heart on the bottom and start stacking other layers. Arrange them in a pleasing way, mixing the colors as you like. Hold them up to the window or a lamp to see how the layers affect each other when the light shines through them. The more layers you have, the darker the shapes will seem. You can also put layers on the back of your heart.
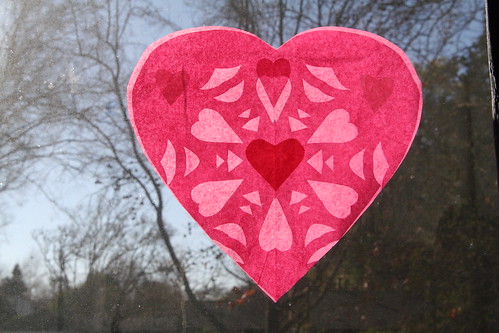
Keep in mind that you want the valentine window transparency to look nice both when the sun shines through it during the daylight, but also when it’s dark outside, when the interior light of your home will shine on the front of the heart.
When you have the papers arranged the way you like them. Use a small amount of glue from your glue stick to stick the layers together—and be very gentle because the tissue paper rips easily. Try to keep the outer edges lined up precisely. Gently add dabs of glue until all the layers seem sandwiched together. Now iron the valentine window transparency flat again. You can use a small dab of glue stick glue to stick the transparency to the window, or use tape.
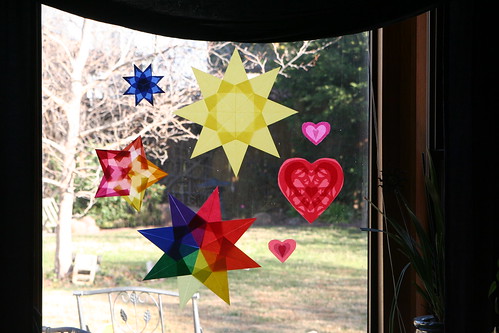
You most likely have small hearts leftover from making the big ones. You can make small transparencies as well. The smaller the valentine transparency, the simpler your design will probably be. Several sizes look great all together, I think.

This Magical Window Stars book is terrific. Many of the designs are very complicated, which is a thrill for me. Maybe I’ll work up to them. The book has many star designs that require rectangular papers. In the meantime, you can find a wonderful free tutorial on folding a simple window star here at GardenMama’s blog.

This Origami Suncatchers kit is the one I got for Christmas. It contains the kite paper, a book of 20 star designs, and a glue stick. I find the instructions and photos in this kit to be easy to follow.
A Toy Garden sells both square and rectangular kite paper. This shop is where I buy lots of gifts for my children. A Toy Garden also sells the Magical Window Stars book and a book about rose windows called Rose Windows and How to Make Them.
And finally, if you want to purchase window stars, I recommend peeking in the Etsy shop of Harvest Moon by Hand. Ann is the best at making window stars. Her work is stunning.
Happy Valentine’s Day to you and your loves!


February 12, 2012 at 12:04 am
I came here via pinterest.What a great idea for using kite paper.
February 14, 2012 at 12:26 pm
Thanks, Sara. Glad you stopped by! Happy Valentine’s Day!
February 15, 2012 at 1:35 pm
Oh Sara,
you are so sweet to mention my daughter’s window sun catcher.
I can’t wait to show her.
Warm wishes,
Tonya
February 18, 2012 at 1:18 pm
Tonya, it was my pleasure. It’s hanging in my kitchen window and I see it every day. I love it. Take care!
February 20, 2014 at 9:56 am
We didn’t get to make these this year as I need to buy some proper paper but I LOVE this! Shared here http://siayla.blogspot.ca/2014/01/got-hearts-try-these-heart-craftsjust.html