Wishing Tree Tutorial
When cultivating optimism, which I posted about the other day, it can be helpful to have a visual reminder of your intentions, hopes, and dreams. Make wishing flags to hang on a tree in your garden and sway in the breezes all summer long.

Materials
* assorted pretty fabric scraps, or watercolor paintings or pretty papers
* a permanent marker
* ribbon or yarn
* pinking shears (if using fabric)
* a hole punch (if using paper), or scissors
* beads (optional)
Tutorial
Take a moment to think of the good things you want to happen in your life. Your wishes may be as specific as you need them to be (new job for daddy, better health for grandma, college acceptance for sister, opportunity to homeschool, good teacher for brother, fun at camp, etc.). If you are doing this project with children, ask them, “What happy things will happen to us?” Chances are good that the children will have many joyful ideas to share. (Marvel for a moment at how easy optimism comes to them.) Write your ideas down in a list.
If you don’t have specific ideas or hopeful expectations, make a general list of positives, such as: joy, learning, rest, health, happiness, hope, peace, harmony, love, patience, safety, etc. When my family and I did this project, we asked our friends and loved ones what they hoped and prayed for—we took their requests and made flags for them, too. It was a lovely way to share our goodwill with others.

Cut your fabric into skinny rectangles (or triangles) with your pinking shears. If you are using paintings or other papers, you can use regular craft scissors. You’ll need one rectangle for each wish, and they can be measured and uniform or free form and varied, it’s up to you. If you want, you can think of them as custom-made prayer flags.


Using your permanent marker, write your wish on your rectangle. Make a hole with scissors (or a hole punch, if you’re using paper) at the top, and loop your ribbon or yarn through the hole and tie a knot. Now it will look a lot like a bookmark.


You may like to add beads to the top of your ribbon. If you do, the beads will add weight to the wish and give it a finished look. Make as many or as few of these wish flags as you like. If you’re doing this as a class or as a family, make sure that everyone contributes some wishes.


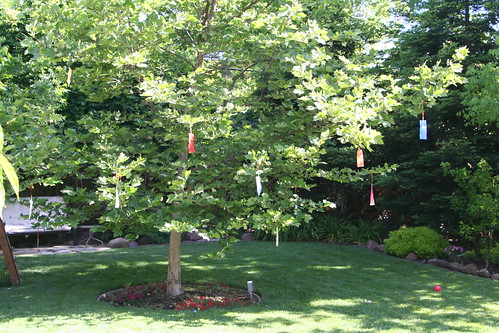
Now find a spot in your garden or playground where you will be frequently and tie your wishes to a tree. They will add color to your garden and flutter in the summer breezes. Perhaps your wishes will be carried by the wind up to heaven, or to the four corners of the world, spreading your love and optimism over the globe to people everywhere. Whenever you see them, you will be reminded of all the good that is in your future.

(This article was originally published in the Little Acorn Learning June Enrichment Guide in 2011. Check out all their many wonderful offerings at Little Acorn Learning.


