Flower Prints for Mother’s Day
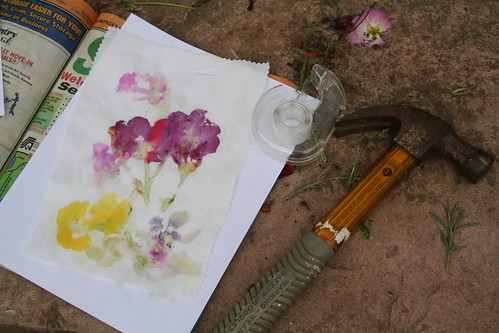
I’d been saving up this hammered botanicals project ever since I saw it on a blog I read, called Dim Sum, Bagels, and Crawfish, last March. (How could I not read it, with a marvelous name like that?) Oh, here it is! I was afraid I might not be able to find it. (The Internet is AWESOME!) Anyway, the Dim Sum author, Lucia, found it in a terrific book called Nature’s Art Box, which is on my wish list.
Anyway, I thought that these smashed flower prints would be a perfect project for my boisterous, bashing boys. I learned a lot during this project, not the lease of which was it’s best to follow directions. Alas, I’m the dive-in-and-figure-it-out sort of person.
We used:
- white cotton fabric
- scissors
- pinking shears
- hammer
- scotch tape
- flower cuttings from our garden
- phone book
- watercolor paper
- watercolor paints and paintbrush
- dollar store certificate frames, 8.5 x 11 size
Lucas enthusiastically helped with the hammering, but I couldn’t get Asher to join in. When dealing with a 3-year-old, timing is everything! And the time I had set aside to do this project was All Wrong. Asher wouldn’t even come outside to see what we were up to.
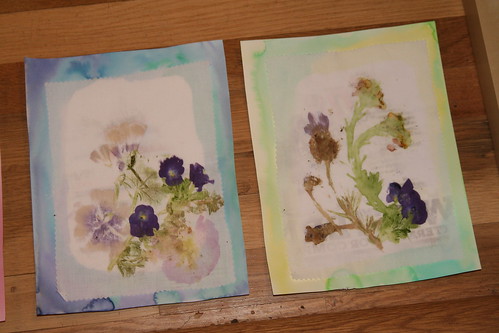
We found that the roses and pansies gave brilliant colors. The mallow flowers and Spanish lavender were subtler. Creating the watercolored mats fell to me. (Are they really mats if the fabric print goes on top of them?) I didn’t want to try to cut the mats precisely; laying the fabric on top of the watercolor paper seemed just fine.
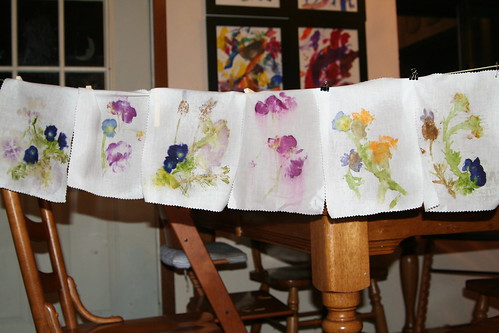
Originally we made six of these. Then I read online that a mixture of alum and water would help keep the colors fresh. Fortunately, our friends had some alum that we could borrow. Unfortunately, three unexpected results happened when I lightly sprayed the fabric prints with the solution.
- The color from the smashed roses bled like crazy, running down the hanging fabric (which you can see in the photo below in the center)
- The color from the dark purple pansies bled outward (I learned not to spray as much solution, and still the capillary action of the water caused the dye to spread)
- Unbeknownst to me, the fabric on two of the prints had actually taken up a tiny amount of newsprint from the phone book pages when we were hammering the cuttings. It was invisible before I sprayed the prints. Afterward, ack! Some of the newsprint words appeared in our lovely botanical prints. (You can see a big black W and other type on the right-hand print in the photo above)
None of those three surprises made me happy. And if I were to do this project again, I’m not sure if I’ll bother with spraying them with alum. Perhaps the colors from the flowers and stems will oxidize or fade over time. I don’t know. Also, I’ll make sure to put white paper between my fabric and anything with newsprint on it.
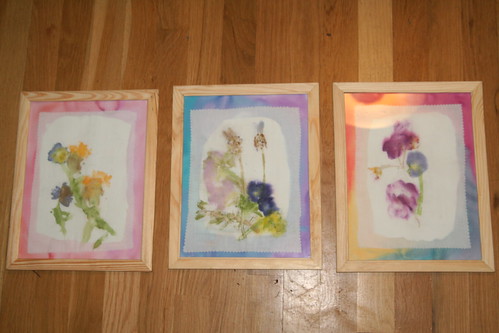
When all was said (cussed) and done, and after two pieces of glass from our frames were broken (more cussing after the children were asleep), we ended up with three pretty prints, ready to give out to grandmothers on Mother’s Day.
The grandmothers seemed pleased. 😉


May 11, 2010 at 9:50 pm
These are gorgeous! Wish we had thought to do them again this year for Mother’s Day. Good to hear the tip on alum, but sorry you had some mixed results. Thanks for sharing!
May 12, 2010 at 1:50 pm
Thanks for visiting, and for the inspiration. Yeah, mixed results, but that’s OK. Art is a process, right? We learned a lot and had some fun. I am very curious to see what happens to the colors over time.