Summer Solstice Celebrating and Feasting

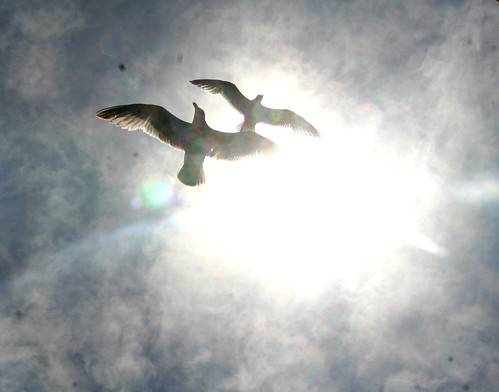
Seagulls

Sunlight is flooding
The widths of space
The son of the birds echoes
Through the realms of the air
The blessing of plants sprouts
From the being of the earth
And human souls lift themselves
In feelings of thankfulness
To the Spirits of the World.

—Rudolf Steiner

IMG_7106

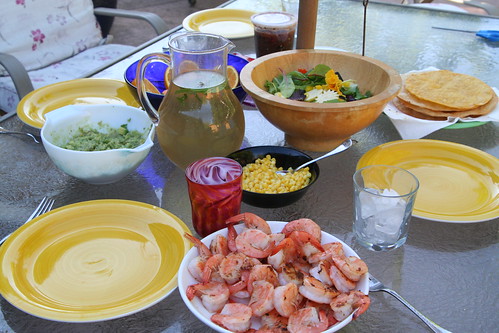
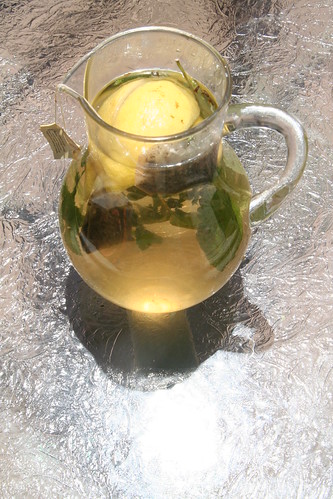
Happy Summer Solstice! Here is a little tea concoction I made and it was so yummy, we’ll definitely do this again:

  • two green tea bags
  • lemon slices, squeezed into the water
  • lemon balm leaves
  • sweetener of your choice

(Steep all day, strain, and then chill before drinking.)

We have had a marvelous day and I hope you have, too.

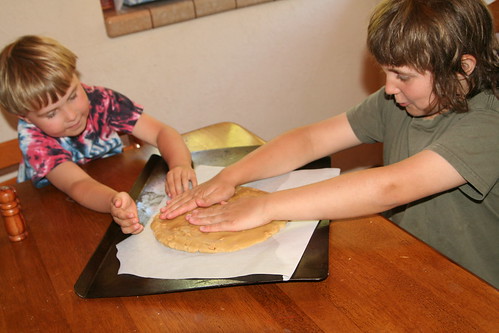
Forming the Giant Cookie

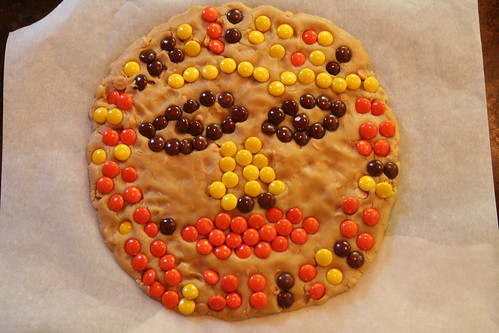
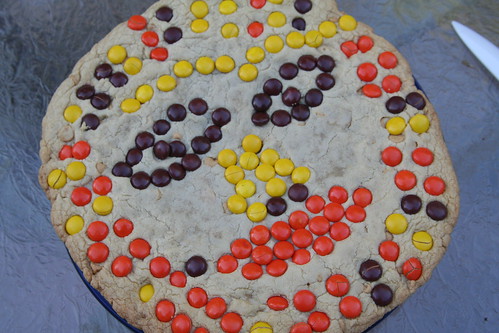
Summer Sun Mosaic Cookie Before Baking

We made a giant summer sun mosaic cookie together. Here it is before baking. And here is the basic giant cookie recipe from Mel’s Kitchen Cafe. This kind of thing goes over really big with my children. Lucas made the face; Asher did the eyebrows and the sun rays around the outside. Since the boys got soooo excited about putting the Reese’s candies on top, I realize now that I didn’t need to put peanut butter chips into the dough.

IMG_7131

IMG_7141

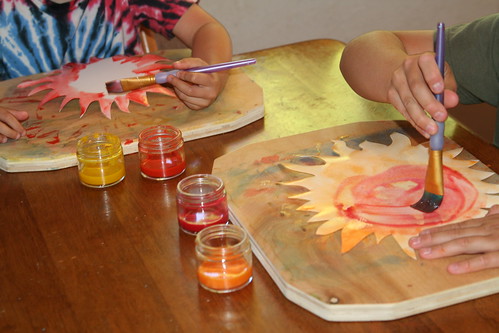
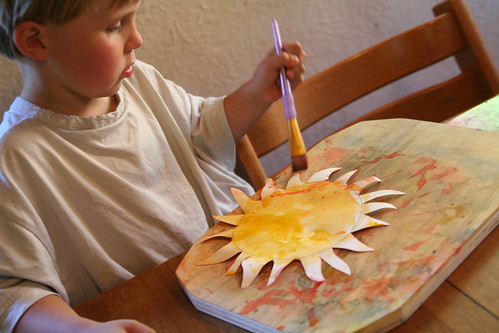
We painted suns, inspired by my co-author and friend Eileen Straiton’s project in our Midsummer Festival E-Book. I think once they’re dry we’ll hang them.

IMG_7149

IMG_7147

IMG_7148

IMG_7157

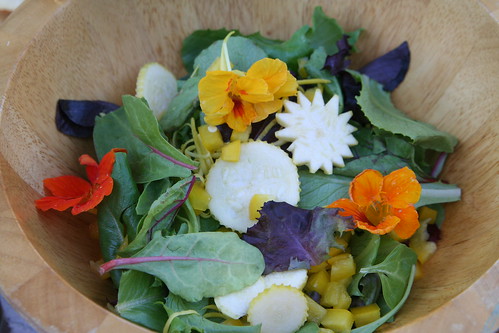
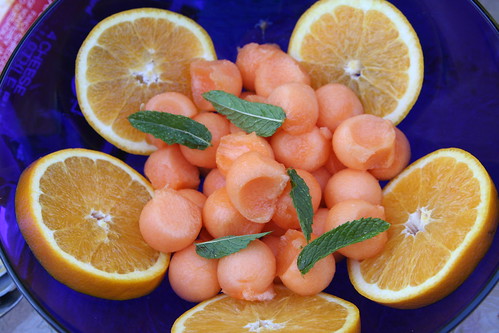
Then we had a beautiful Solstice feast of shrimp tostadas and several fresh salads. I needed lots of circles and colors and fresh veggies in this meal. We even added in some nasturtiums from our garden. We had so much gorgeous food, I wished we had guests to share it with! This is one of my favorite things: Eating amazing California food outside in summertime, when the day has been hot but the evening delta breezes pick up just in time.

IMG_7158

“Give me the splendid silent sun with all his beams full-dazzling.” —Walt Whitman

Solstice in a Sunbeam

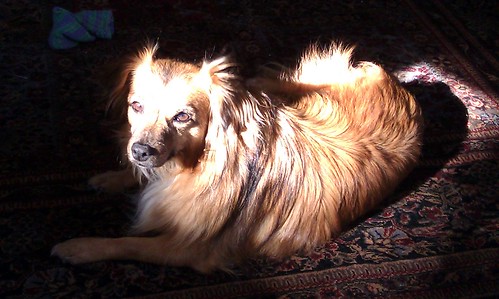
Also, today marks six months since our little dog Solstice came to our family. He followed our boys home on December 21 and hasn’t left our side since then. We love him so much, and we’re all grateful to have him.

Here’s to unexpected blessings that follow you home and take up residence in your heart.

Here’s to abundance of joy, nourishment, learning, and opportunity.

Here’s to family traditions carefully conceived and simply crafted.

Here’s to courage, doing good, and generosity.

Blessed Be.

Midsummer Festival E-Book

Sun_Child-311x426

I am delighted to announce that my dear friend Eileen Straiton (of Little Acorn Learning) and I wrote a Midsummer Festival E-Book! It has been a marvelous journey and I loved every step we took in making it. Please spread the word!

Little Acorn Learning
Monthly and Seasonal Guides
for Childcare, School and Home

*New* Midsummer Festival Book is Available!

This wonderful Midsummer Festival E-Book will bring the magic of summer into your home and help you keep celebrating throughout the season!  It is packed full of Waldorf songs, stories, verses, crafting tutorials and much more to help you celebrate Midsummer and the Summer Solstice with the children in your home, classroom, or childcare environment.

  • Read Stories and Fairy Tales Filled with Sunshine to the Children
  • Enjoy Verses, Songs, Poems and Fingerplays that Celebrate the Coming of Summer
  • Learn about the History, Background and Symbolism of the Summer Solstice
  • Get Ideas for How to Create Your Own Meaning of this Special Festival
  • Enjoy a Solstice Feast
  • Play Solstice Games
  • Make a Midsummer Bonfire
  • Create Simple Beeswax Suns with the Children
  • Make a Solstice Wreath for the Birds
  • Design Midsummer String Art Sunbursts
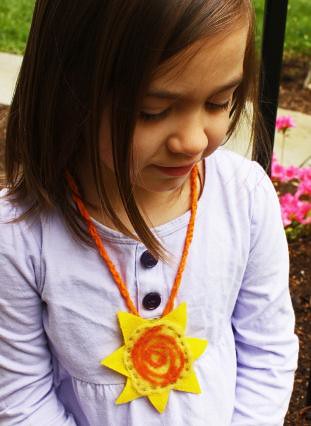
  • Read a Story of The Sun Child and Create a Sun Child Necklace
  • Craft a Shiny Garden Suncatcher
  • Use a Rock Garden Sundial to Tell Time in Your Garden
  • Make a Catch the Sun Throw Toy for Your Child
  • Create a Paper Solstice Sun
  • Read How to Create Daytime and Nightime Midsummer Magic
  • Hang Summer Solstice Flags Indoors or Outdoors this Season
  • Plant a Midsummer Indoor Herb Garden
  • Craft a Sun Mosaic Birdbath
  • Make a Sunshine Fairy out of Wool Roving and Felt
  • Sew and Stuff Herbal Dream Pillows for St. John’s Eve
  • Needle Felt a Summer Sun Wall Hanging
  • Create Sweet Pocket Sun Sprites for the Children
  • Bake Sun Bread with the Children
  • Go on a Sun Hunt
  • Make a Sun Mask
  • Design a Sunshine Banner
  • Crochet Sun Medallion Necklaces

mosaic681a08dd7f492074d30d638319d71c78eb0cd22f

In addition to our Midsummer Festival eBook, Little Acorn Learning has lots of wonderful offerings to fill your summer months with enriching, creative activities for your family, daycare, summer camp, or homeschool group, so please check out their other fine products.

Yarn Necklace for Mother’s Day Tutorial

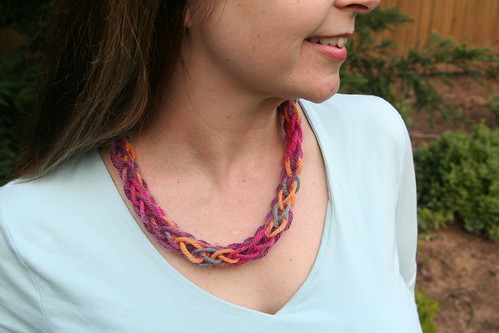
Yarn Necklace

Are you hoping to make a special Mother’s Day gift for mother or grandma, or perhaps an end-of-year gift for a teacher? This yarn necklace is easily made by children who have a little finger knitting experience, in fact, my son made one for me when he was in the first grade and recently taught me how to make it. This kind of cord-making is called “finger knitting” and “finger weaving.” (Besides necklaces, you can make scarfs, braceletes, belts, or headbands in this way.)

Materials

  • wool or cotton yarn in a pretty color

Start by placing the tail of your yarn in the crook between your thumb and forefinger so that the tail hangs down over the back of your hand. Use your thumb to pinch the tail and hold it in place. Take the ball end of your yarn under and over, under and over your four fingers, wrap it once around the pinkie finger.
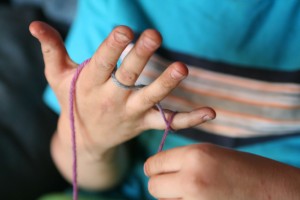
Continue weaving the working yarn under and over, under and over, traveling back toward your index finger.
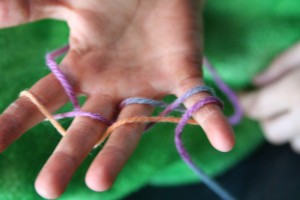
Wrap the yarn around your index finger and go under and over, under and over until you go around your pinkie again, and then weave it back toward your index finger in the same manner. Wrap the yarn one more time around your index finger and let the ball end rest across your palm. You should now have two loops (horizontal bands) of yarn on the front of each finger as you see in the photo below.
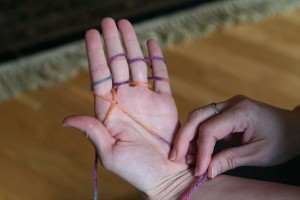
Now, beginning with your pinkie finger, grasp the lower loop with the fingers of your other hand and lift the lower loop over the upper loop …
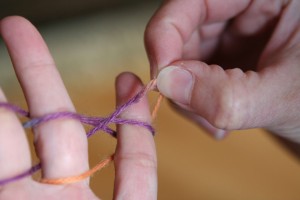
… and completely off the pinkie finger as in the next photo below.
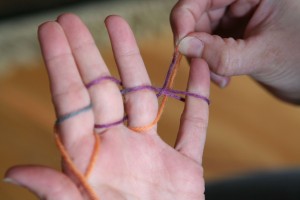
Now release the loop. Your hand should now look like this photo below, with two loops on the first three fingers and only one on the pinkie finger.
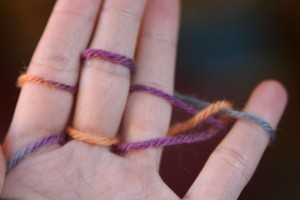
This action of moving the bottom loop over the top loop and off the finger is finger weaving. You will repeat this action with the remaining three fingers (ring finger, then middle finger, then index finger).
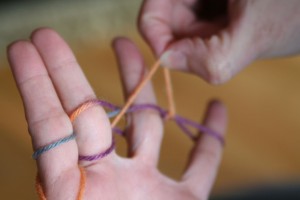
As before, with the ring finger, lift the bottom loop up and over the top loop, and then off the finger altogether. As you complete this procedure with each finger, you’ll see that you now have only one loop left on the finger.
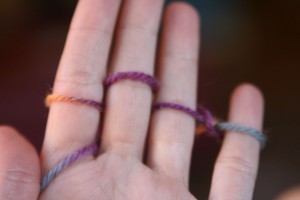
When you reach the index finger, the yarn tail that your thumb has been holding in place acts as your bottom loop. Treat it as any other loop and lift it up and over the top loop and off the index finger.
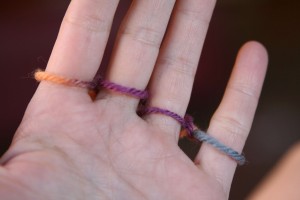
The tail will now trail down between your index finger and your middle finger.
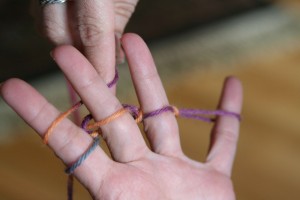
Now grasp your working yarn and wind it under and over your fingers as you did before, under and over, and around your pinkie finger so that your new loops are above the loops already on your fingers. Then continue winding the yarn under and over, under and over until you’re back to your index finger again. You should now have two loops on each finger again.
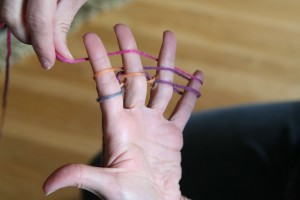
The loops are now high up on your fingers. Push the loops down to the base of your fingers. Then, as you did before and starting with your pinkie finger, pull the bottom loop up and over the top loop and let it go. Repeat for all four fingers exactly as you did before.

Push your stitches down again. Weave your yarn again, under and over, under and over, around, under and over, under and over above the loops already on your fingers, until you have two loops on each finger again.

As you repeat this process of pulling bottom loops over top loops again and again, row after row, you will begin to see the woven cord coming off the back of your middle and ring fingers, as in the photo below.
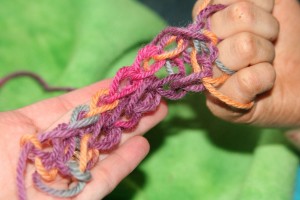
The woven cord looks kind of flat at first, but when you’re done and you tug it gently a few times, it will become a round cord for your necklace.
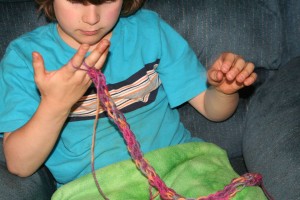
When your cord is long enough, it’s time to cast off. (Experiment with the length by putting it around your own neck while it’s still on your fingers. If you can see the necklace when you look down, chances are good the cord is long enough and stretchy enough to easily fit over a head.)

To cast off, begin with only one row of loops and don’t weave new loops above them.

Instead, lift the loop on the pinkie finger off the finger and place it on your ring finger. Your ring finger now has two loops and your pinkie has none, as in the photo below.
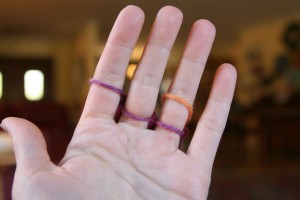
Lift the bottom loop over the top loop and release. Now your ring finger has only one loop. Pick up that loop and move it off your ring finger and place it on your middle finger, which now has two loops. Lift the bottom loop up and over and release. Now move the remaining loop on the middle finger to your index finger. Lift the bottom loop over the top loop and release. Now your index finger has only one loop and your other fingers are bare. You may now remove the final loop from your hand, cut your yarn, pull the working yarn through it, and pull it tight. Now pull the tail on the other end of your cord tight.

Now gently tug on your cord so that it becomes round rather than flat. Tie the two ends together, making a circle necklace.
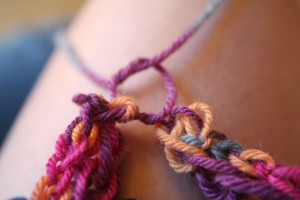
The necklace should be stretchy enough that it can easily go over head of the lucky person you give it to. She will treasure it more than she would any chain of gold.
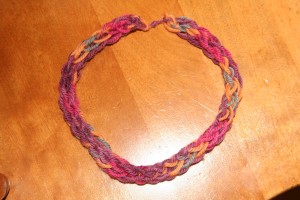
Happy Mother’s Day!


(This tutorial was originally published in the Little Acorn Learning May Enrichment Guide. Check out all their many wonderful offerings at Little Acorn Learning.
Happy Earth Day!

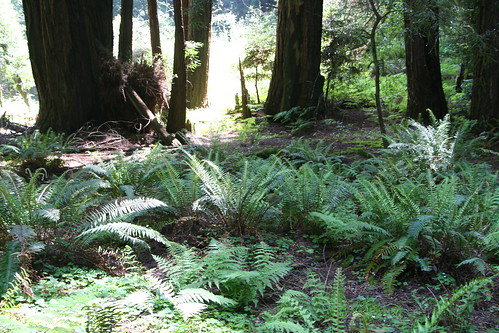
Forest Floor and Ferns

“We must protect the forests for our children, grandchildren and children yet to be born. We must protect the forests for those who can’t speak for themselves such as the birds, animals, fish and trees.”

~ Qwatsinas (Hereditary Chief Edward Moody), Nuxalk Nation


Mother Earth, Mother Earth.

Take our seed and give it birth.

Father Sun, Gleam and glow,

Until the root begins to grow.

Sister Rain, Sister Rain.

Shed thy tear to swell the grain.

Brother Wind, breathe and blow,

Then the blade all green will grow.

Earth and Sun and Wind and Rain,

Turn to gold the living grain.

—Eileen Hutchins

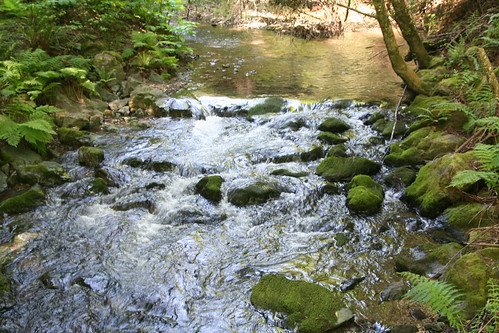
Mossy

Happy Earth Day everyone!

I hope this little list will inspire you to do something good for Mother Earth and all her children. Start small, start anywhere, just start.

1. Release ladybugs in your garden.

2. Start an herb garden and maintain it organically.

3. Go for a bike ride and picnic in a green space.

4. Write a poem. What does the earth mean to you? Show it to teachers, at church, or send it in to the local newspaper.

5. Make a birdbath so our feathered friends have a source of clean water.

6. Participate in a community cleanup; or just walk through your neighborhood with a trash bag and pick up (safe) trash you see along the walk.

7. Make natural soap or shampoo without chemicals. It’s good for your body and good for our waters.

8. Buy something you need at a garage sale or a thrift store, instead of buying a new item at a department store.

9. Symbolically adopt an animal at your local zoo or favorite wildlife conservation organization.

10. Teach your children well. Teach them about stewardship and never be afraid to express your love of nature. Let them see your love of the earth in action.


Blessed be.

Earth Day Moss Garden Terrarium Tutorial

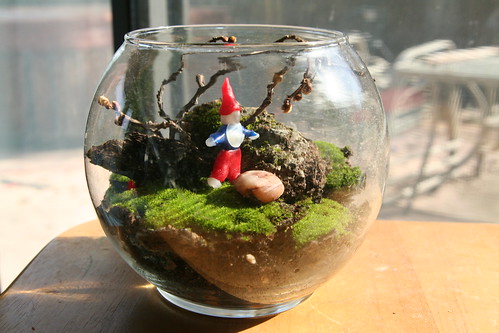
Finished Moss Terrarium

Here is a simple way to celebrate the earth, and bring a little of it inside your home. This moss garden terrarium is easy and inexpensive to make. Children of any age can help with this project and may especially enjoy finding such treasures of the earth. Noticing the small things in nature can be so rewarding, and it feels good to sink our hands in the soil.

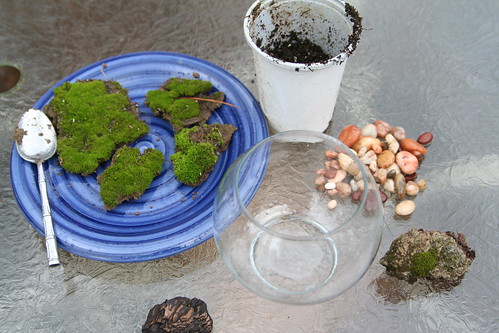
Materials for Moss Terrarium

Materials

  • a wide-mouthed glass container (goldfish bowl, candle holder, or jar; you may find something appropriate a thrift store)
  • gathered moss (gently lift from soil or rock, bringing the soil on which it grows with you)
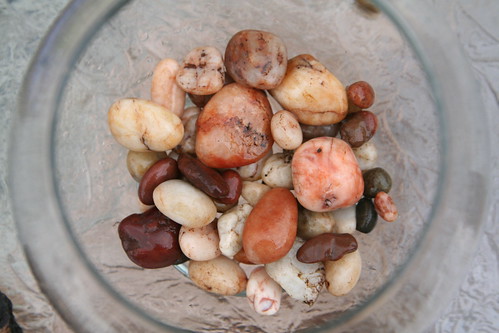
  • about ½ to 1 cup small gravel or pebbles (look for pretty pebbles in your yard)
  • about 1 cup loamy garden soil (or more if your glass container is large)
  • interesting rocks, bark, twigs, or gemstones
  • spray bottle with water

Optional Materials

  • a small plant that requires little water (perhaps a jade plant or other succulent)
  • beeswax for modeling or a small figurine
  • crystals, glass gems, small twigs

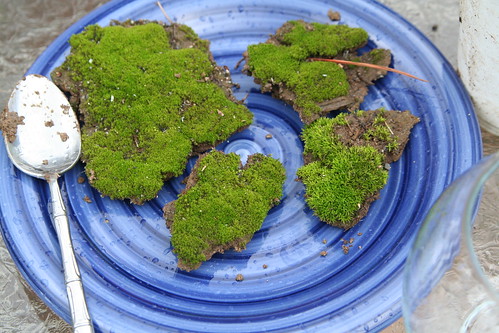
Gathered Moss


Tutorial

Begin by gathering your materials. You may be able to gather most of the materials you’ll need from your yard or nature walk. (Be sure not to remove items from protected nature areas.) Take a soup spoon or small shovel and a gathering basket along on your walk. Look along creeks and in shady, moist areas.

When you find mosses, stop and consider them a moment. Moss is a delightful, soft plant. It gets it’s nutrients from the air, rather than the soil, and requires shade and only a little water. It makes a perfect plant for a terrarium that gets only indirect sunlight in your home.

Feathery soft, your green so bright,

preferring deep shade to the light,

quietly sitting, waiting, spreading,

it’s hard to tell which way you’re heading.
I will touch your velvet softness.

Moss, I love your gentle mossness.


You make a lovely velvet bed

for a Fairy Queen to rest her head,

who sleeps in afternoons for rest

and dreams of forests nightly blessed.

We creatures great and creatures small

find you the tenderest plant of all.


Thank the earth for growing such lovely mosses and gently dig up some patches. Don’t take more than you need to fill your terrarium container, and you’ll likely need to take only an inch of soil or less.

Garden Stones in the Bowl

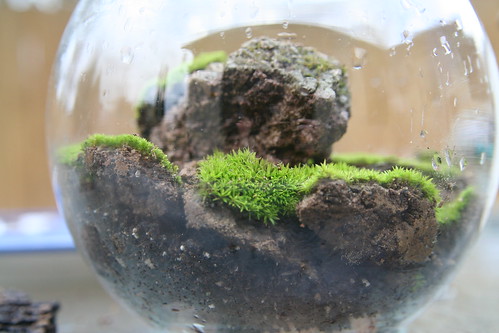
Now place your gravel or pebbles into your glass terrarium. These are at the bottom for drainage of water away from the soil. Add your garden soil to the container. It will probably cover your pebbles completely. You may wish to grade your soil so that some areas are higher than others. This will add interest to your finished terrarium.

Side View

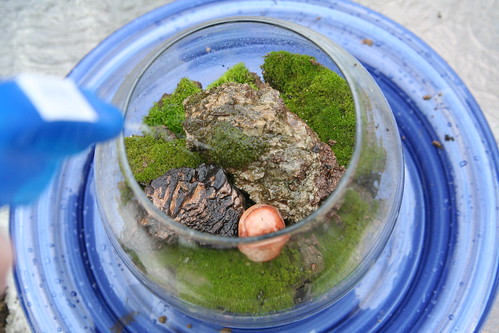
Arrange your mosses (in patches) in your terrarium. Try to keep your clumps of moss mostly intact to make a contiguous, soft carpet. Alternatively, you could place moss in only part of your terrarium, and decorate the other areas with a plant, pretty pebbles, or glass gems.

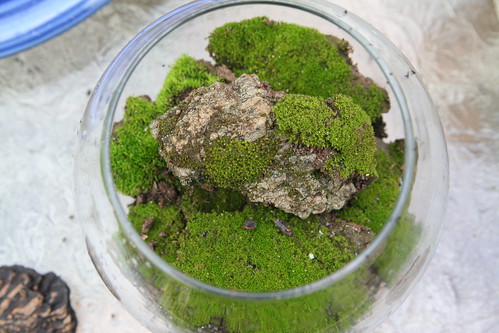
Mosses In

Add your decorative rocks, bark, or crystals. I happened to find a small chuck of old concrete that had more moss growing on it, so I added it to my terrarium. What will you add? Crystals? Twigs? Polished stones? A ceramic figurine of a deer or a rabbit? A butterfly? A gnome or a Fairy Queen in repose? Perhaps you’ll change your terrarium decorations with the holidays.

Spray to Keep Moist

Spray your moss garden with some water. Your mosses may need spraying once or twice a day to stay green and living. Avoid exposing them to direct sunlight.
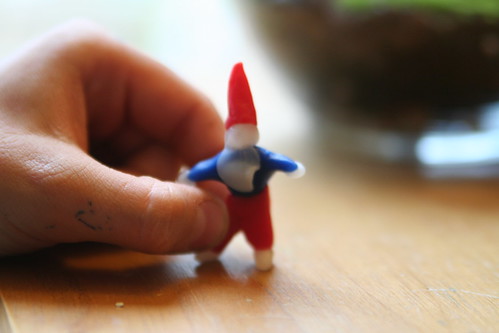
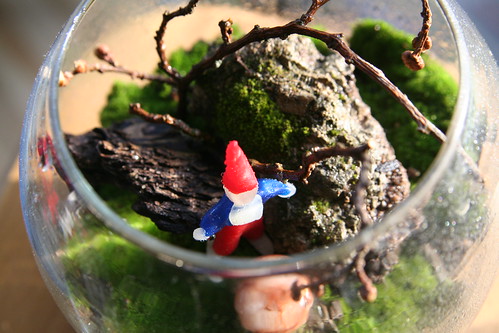
Beeswax Gnome

I turned to our modeling beeswax to fashion a tiny gnome. I think he’ll make an excellent caregiver for my moss garden terrarium. Gnomes are kind custodians of the earth.

Finished Moss Terrarium

Be a good caregiver of your moss garden terrarium, spray it gently every day, and be careful not to saturate it with too much water. (Once again, the direct sunlight you see in this photo is too hot and bright for your moss. Be sure not to keep your terrarium in such a sunny location.)

Now add your terrarium to your nature table, your dinner table for an Earth Day celebration, or anywhere in your home that needs a small reminder of the earth’s beauty.

Easter Gifts: Story Eggs

We have been reading Eggs for the Hunting, by Reg Down, which we got from A Toy Garden. I was inspired by Reg’s drawings in the book and I wondered if I could emulate them on some wooden eggs (also from A Toy Garden) to make my own story eggs. I had seen story eggs made by Mama West Wind who writes at Chocolate Eyes, and they were so beautiful I had to try to make some myself. (You can find a full tutorial by Chris Willow how to do this here at Rhythm of the Home.)

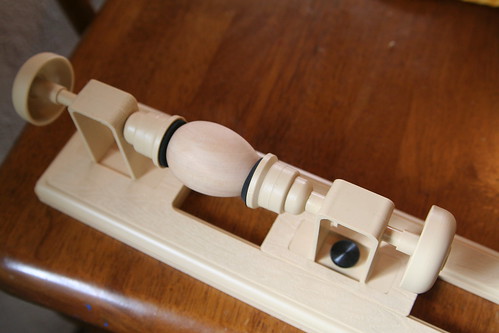
Egg Lathe

This seemed the perfect time to try the wood-burner for the first time. Plus, I had this nifty, super-dandy lathe thingy that Ian bought me for Christmas to try out, so a little project was born.

First Try at Wood-Burning

My first wood-burning attempt. I dig it! I used the pointiest tip and was pleased with the results.

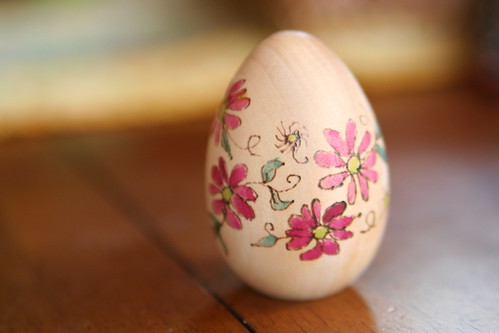
Wood-Burned Egg

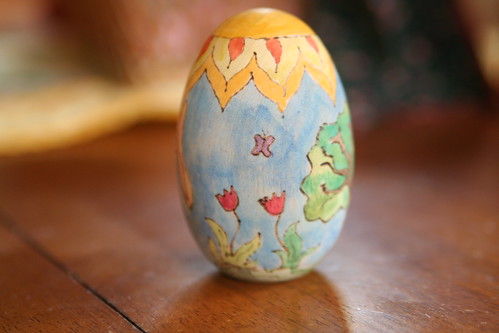
I painted the flowers with some watercolor paints. I liked being able to see the wooden egg, so I left the natural wood.

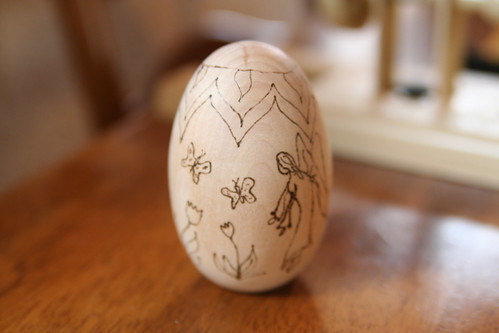
Attempt

Emboldened by my first success, I tried one of Reg’s designs on this large wooden egg.  This was trickier. It felt important not to mess it up. I just worked slowly and took lots of deep breaths while using the wood-burner.
Wood-Burned Egg

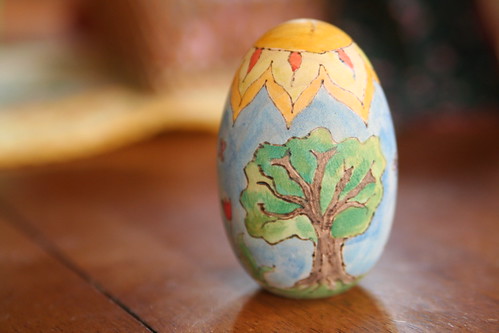
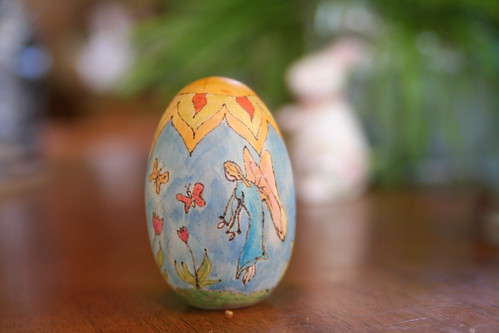
Then I painted it with Stockmar watercolors. The illustration I was emulating is in black and white, so the colors here are my interpretation.

Wood-Burned Egg

I finished it with a nice coat of beeswax furniture polish.

Tiptoes Lightly Egg, Inspired by "Eggs for the Hunting" by Reg Down

My Tiptoes Lightly isn’t perfect, but I think she’s a fine first attempt. I hope to make more of these story eggs before Easter comes. My kids haven’t seen this egg yet and I’d love to have two finished for their Easter baskets.

Painting Wooden Eggs

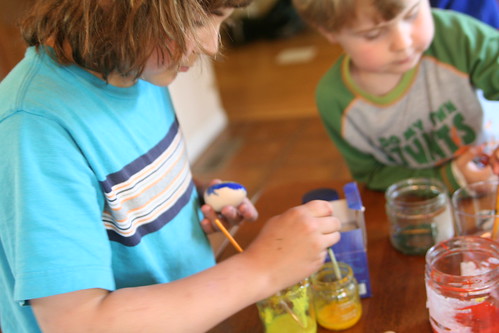
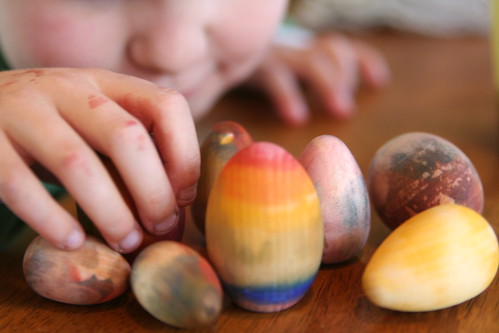
Since we had some smaller wooden eggs, too, I let the boys paint them.

Our Wooden Eggs

What fun things are you doing to enjoy Easter?

Eco-Eggs Egg Coloring

Our Easter Eggs

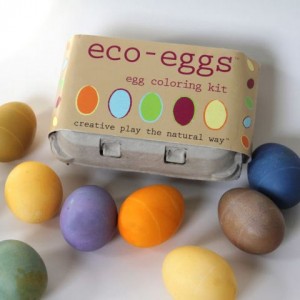
This year I decided to try a product called Eco-Eggs. I bought it from A Toy Garden, which is my favorite place to buy Waldorf and sustainably made, fair trade gifts and art supplies. Eco-Eggs is a egg dye kit made from natural pigments. The dyes are made using natural plant, fruit, and vegetable extracts from annatto seed, curcumin, purple sweet potato and red cabbage.  This kit includes three natural dyes (orange, blue, and purple).

We simply followed the instructions. It was that easy.

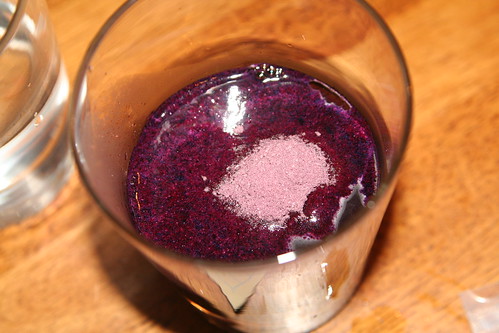
Eco Eggs Dye

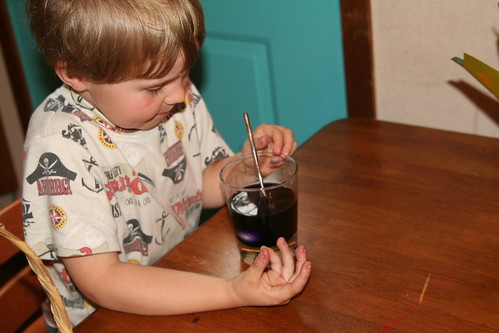
Pour the dye powder into a half cup of water and mix thoroughly until it is all dissolved.

Dyeing

Gently add your eggs so they don’t crack on the bottom of your glass. This time we used all white eggs. But I’ve saved our dye baths and plan to try them on our brown eggs as well.

Eco Eggs Kit

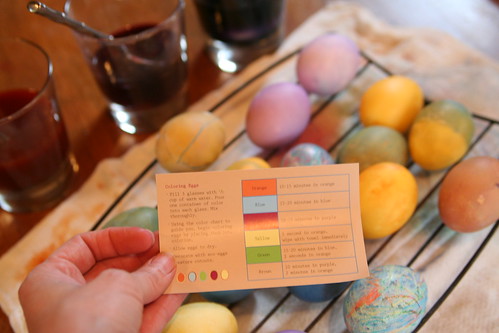
The kit comes with three colors of natural dye and this handy chart tells you how to get other colors, including how long to leave your eggs in the dye to achieve your desired result. Some colors are made by just dipping the egg in for a second and then removing it, as in the case of yellow. Others are achieved by leaving the egg in as long as 15 minutes.

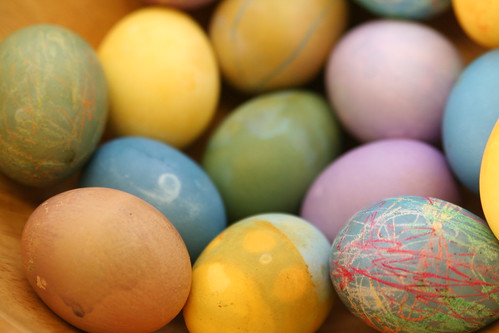
Our Easter Eggs

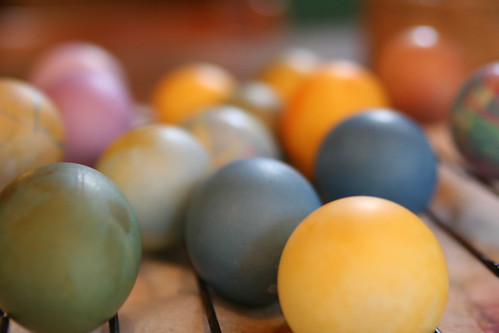
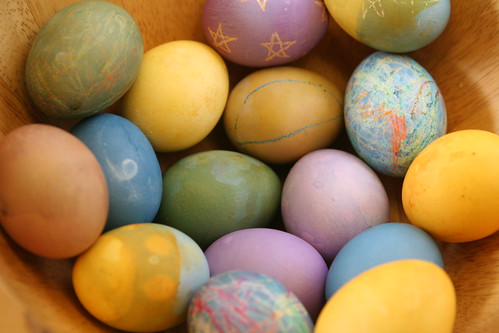
My kids rarely have the patience to leave one egg in a dye bath for 15 minutes, as is recommended on some of the color formulas. But we’re really happy with our colors. Lucas enjoyed dipping eggs into two colors to make three-toned eggs. Asher really liked using his rainbow crayons on the eggs before dyeing them.

Our Easter Eggs

It always seems like 18 eggs is plenty to dye before we get started. But dyeing Easter eggs is so fun that it seems like we run out of eggs way too quickly. If you’re short on time this year, this Eco-Eggs product will work well for you, without using a lot of commercial chemicals in the process.

Aren’t they pretty? We get to hunt for these beauties tomorrow, as we’re celebrating Easter with one side of the family a week early. xo

Creating Your Easter Nature Table Tutorial

On Our Table

Easter is a holiday that fills me with hope and appreciation for the new life being born and blooming all around me. It is the premier Christian holiday, which recalls the suffering and dying of Jesus Christ on the cross, and his resurrection. It is celebrated the world over by Christians everywhere.

Easter is also a springtime celebration in nature religions, and is considered by scholars to be about three thousand years old. Closely associated with the spring equinox, the goddess Ostara (or Eostar or Eostre) was worshipped by Germanic peoples long before the religion of Jesus swept Europe. The symbols in Christian Easter celebrations are very similar to those symbols of the fertile spring goddesses, who can be found in many ancient cultures. For me, this synchronicity of symbolism among multiple faiths resonates. To me, it highlights the similarities among people everywhere and our universal admiration for the earth and its cycles.

Whatever your religious (or nonreligious) take on this springtime festival, you can create a nature table that calls to mind the bounty of the earth and celebrates abundance, new beginnings, and growth.

Spring Nature Table in Daylight

My spring maiden graces this spring nature table. Her companions are rabbits and lambs, both symbols of spring’s bounty in the birth of new animals. Rabbits are prolific breeders, so they have long served as a symbol of fertility and abundance, as well as the bringers of colored eggs at Easter. A beautiful meadow, painted by my son in second grade, serves as a backdrop. A green crystal frog at the far end holds a tea light for a nighttime glow. A needle-felted bird sits on a nest in a branch (not pictured).

Spring Nature Table Left Side in Daylight

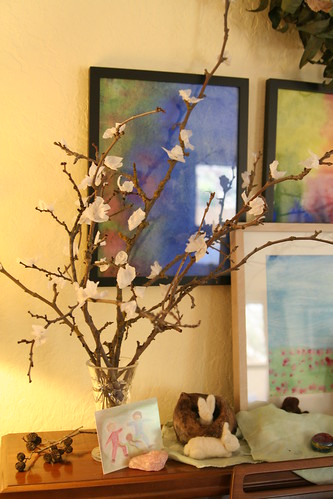
I love blooming branches, but as I don’t wish to cut any off my trees, I crafted these blooms by hot-gluing white tissue paper blossoms onto bare branches we gathered from the ground. The card showing dancing children is a drawing by my god-daughter. It reminds me of how happy we are to be outdoors again in spring.

Easter Nature Table (Mantel) with Felt Egg Ornaments

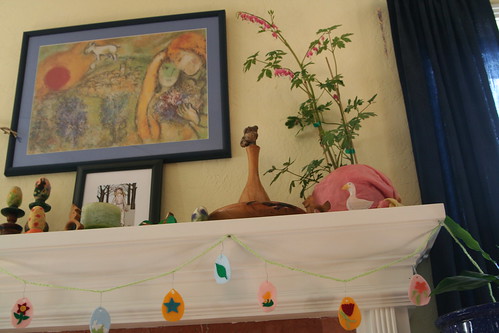
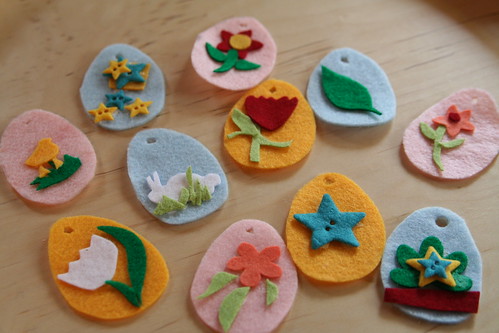
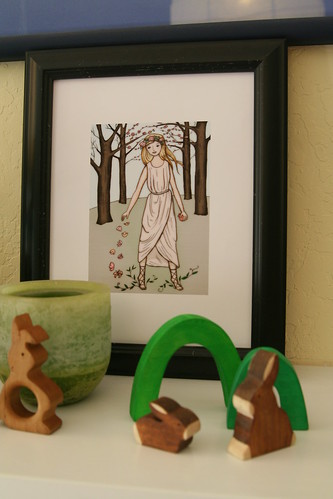
Here is a nature table created on our fireplace mantle. We displayed our many needle-felted eggs on upside-down cups and the tops of candle sticks. I framed a print of Persephone, the Greek goddess of the spring and added it. A plant of bleeding hearts provides a living symbol of life, flowers, and freshness. From a long, finger-knitted yarn rope (made by Lucas) and felt egg decorations we made, we created a simple garland. The felt eggs aren’t fancy: They are two-dimensional and made with “craft” acrylic felt and white glue.

Easter Felt Ornaments

Simple and charming. I use these year after year.

Easter Nature Table (Mantel)

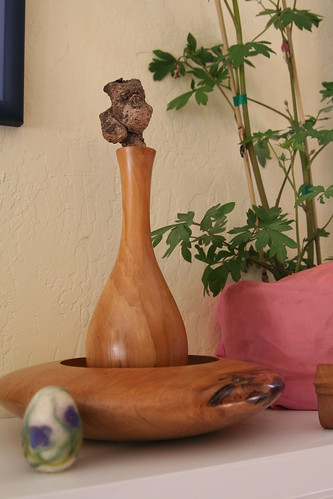
A friend of mine found a gnarled piece of wood one day and picked it up. It has the shape of a pregnant woman, with bulbous belly and breasts. My friend gave it to me when I was pregnant and I have kept it as a special object of love and fertility ever since. Perhaps you have some totem that represents the time when you were carrying your babies inside your body, or the time you were waiting eagerly for their arrival in your family. The spring nature table is a perfect place to put such honored objects.

Easter Nature Table (Mantel) with Persephone

We added some small wooden toys, too: frolicking rabbits and stately geese. These are for curious little hands to touch and enjoy.

For your own nature table, decorate and display Easter eggs of any kind. Blow eggs and hang them from branches to make an Easter tree. Or gather them together in an attractive bowl. Balance colored eggs atop tall candle holders so they may be seen from a distance.

Materials

You most likely won’t have to buy much to create your Easter nature table. Here are some items you probably already have:

  • pretty cloth in a spring color
  • flowers or grasses from your garden
  • fruits or seeds
  • decorated eggs (blown eggs will last longer)
  • candles or figurines
  • watercolor paintings (used as backgrounds or cut into Easter shapes: bunnies, eggs, birds, chicks, flowers)
  • any items that symbolize for you fertility, renewal, awakening, abundance, birth, and beauty
  • religious items that speak to your family’s traditions or faith
  • boxes or bowls

Tutorial

First, clean your nature table. Give the wood a nice polish, if appropriate.  Enlist the aid of your children. Be sure to listen to their suggestions about what to add. Now is a great time to sing springtime songs and recite a poem or two. Lay down your cloth on the table and set up any background cloth, picture, or painting you wish to include. This works well for a table that is backed by a wall, but it’s not necessary. I find it’s nice to have several levels if I have space. This can be achieved by using boxes or upside-down bowls underneath your cloth to make hills. Items place on high spots will draw people’s focus. Now arrange your special items however you like. Candlestick holders without candles are a great way to display beautifully decorated Easter eggs. Leave space for additions such as picked flowers that your little ones might contribute throughout the season.

If you have included fresh flowers or fruits or real eggs on your nature table, be sure to check them often and remove and replace them when they wilt or get too old. Your nature table will inspire you if it looks fresh—which is the whole nature of springtime. When it starts to feel old or boring to you, either rearrange it or choose new symbols to display. Keeping your nature table neat and seasonal is a fun, rhythmic way of helping children celebrate festivals and mark the passage of time.

Easter Bunny Was Here

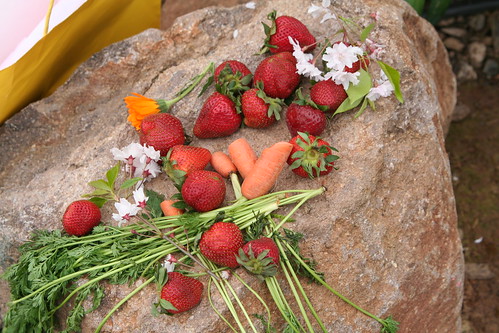
Finally, I wanted to share our family’s Easter tradition. We create an altar outside the night before Easter on a large rock in our backyard. We leave out carrots for the Easter bunny, who personifies for us an Earth spirit, Ostara, or goddess of the spring. In the morning, early on Easter Sunday, we return to our outdoor altar to find the carrots nibbled and fruits and flowers left in their place for us. A basket of small gifts is found there for each of our sons and colored eggs are hidden throughout our yard. As the sun rises over the trees, we greet the new day, hunt for eggs in the dewy grass, and give thanks for the bounty of spring.

* Portions of this article were originally published in the Little Acorn Learning April Enrichment Guide.

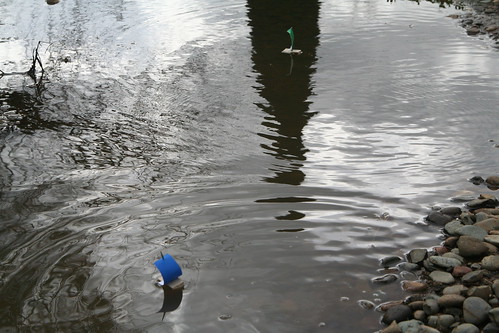
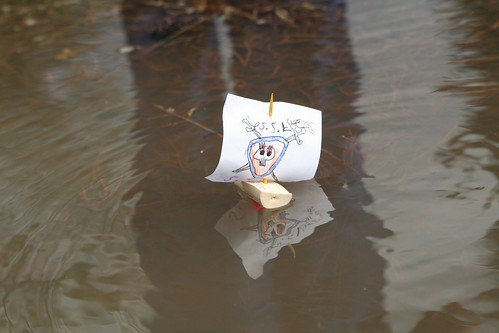
Perfect Play

Rainclouds

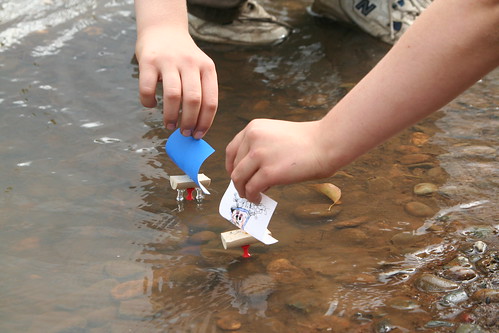
Sailboats

Asher

Sailboats

Lucas's Boat

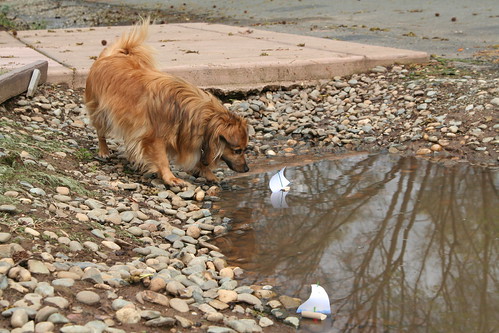
Sailboats and Curious Dog

Sailboats

Raining

No words are needed, I think.

Dyeing Easter Wool Tutorial

Wool

Last year, while we were dyeing Easter eggs, we also dyed some plain white wool batting. I am so pleased with the results. In the photo above are a wool colors from both natural and artificial dyes. I’ve saved this wool all year and now I’m making goodies for my boys’ Easter baskets out of it. I doubt that they’ll appreciate the cyclical nature of this, but I do. And don’t forget, this is science! So by all means, get the kids involved.

Materials

  • natural dye ingredients (such as turmeric, boiled yellow onion skins, boiled red cabbage, boiled beets, etc.)
  • or food dyes from the supermarket
  • or Easter egg kit dyes (capsules or powders)
  • white wool batting or roving (or get fancy and dye silk cloths to make your own play silks?)
  • distilled white vinegar
  • mugs or drinking glassware
  • spoons

Tutorial

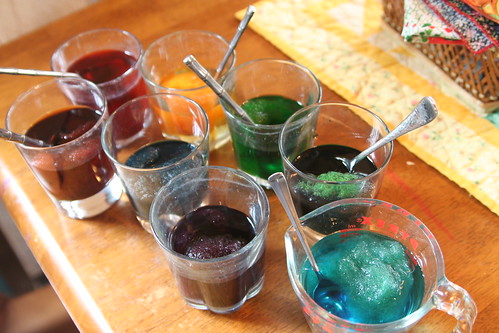
Really, this is totally simple. While you’re dyeing your eggs, add in a good handful or two of wool. We found this was easy to do with the natural dyes as we had a big bowl full of each color, rather than a mere mug full of color.

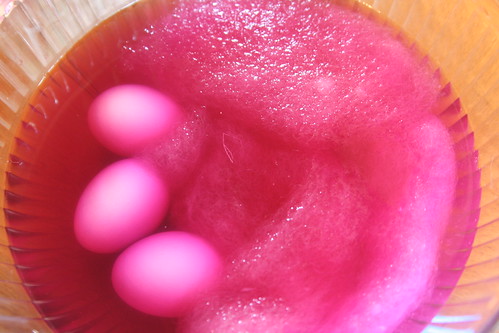
Onion Dye Bath with Eggs and Wool

Onion skins turn wool a pale, golden yellow.

Cabbage Dye Bath with Eggs and Wool

This is the red cabbage dye. It will turn both eggs and wool bluish.

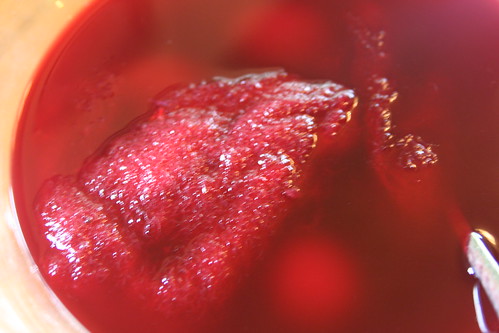
Beet Dye Bath with Eggs and Wool

This is beets. It turns the wool a warm light brown. The eggs and wool at first are a beautiful mauve color, but I think they then oxidize and end up brown.

Dyeing

If you are using kit dye or food coloring to dye eggs, you probably have your dyes in mugs or glasses. (Right? That’s the way we always do it.) So you can just keep the dyes for a day or so after dyeing eggs and dye wool in the mugs. You can do handful after handful if you like. We used about a 1/4 cup of distilled white vinegar in each cup, added the dye, and then added water.

Our yellow dye bath was completely exhausted by the wool. None of the color was left when we pulled the wool out. It makes me wonder if the other colors might have done that if we had left the wool in longer.

I suggest keeping your wool in the dye for about 24 hours. When your wool is the color you like, squeeze out the extra dye into the cup, then rinse it in cool running water until the water runs clear.  Set it on a wire rack or pin it to a clothesline outside to dry.

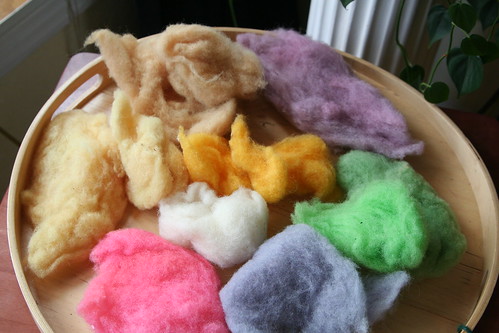
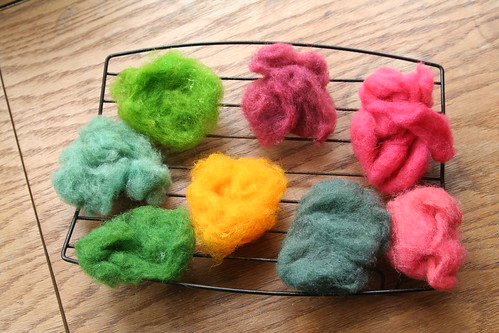
Dyed Wool

Here are the wool colors we got. I’ll name the colors of food dye baths starting with 12 o’clock: purple, dark red, pinkish brown, blue, yellow, dark green, blue green, and yellow green. It seems to me like the blue should be darker and brighter. It may be that my sons sneacked extra green drops into the blue? In any case, I consider this experiment to be a success because it means any frugal crafter or artist can get a wide range of beautiful, bright colors without breaking the bank, using standard McCormick brand food dyes. I love buying new colors of wool to use in projects, but this is a simple way to get many colors cheaply!

Wool batting doesn’t spin into yarn all that well because the fibers tend to be short. It works very well for needle-felting or wet-felting, however. Wool roving, however, is great to spin or felt.

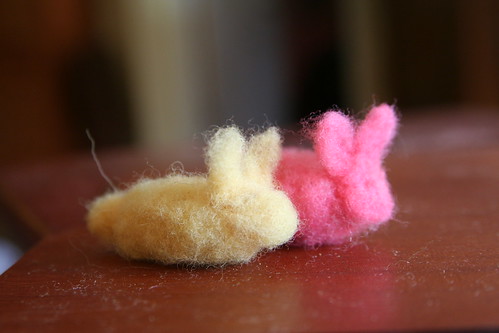
Simple Bunnies

I’m thinking that a rainbow of simple wee bunnies made from wool we dyed ourselves might be just the thing for Easter baskets this year. What would you make with Easter wool?

  • About Sara

    Thanks for visiting! I’m Sara, editor and writer, wife to Ian, and mother of two precious boys. I am living each day to the fullest and with as much grace, creativity, and patience as I can muster. This is where I write about living, loving, and engaging fully in family life and the world around me. I let my hair down here. I learn new skills here. I strive to be a better human being here. And I tell the truth.

    Our children attend Waldorf school and we are enriching our home and family life with plenty of Waldorf-inspired festivals, crafts, and stories.

    © 2003–2018 Please do not use my photographs or text without my permission.

    “Love doesn’t just sit there like a stone; it has to be made, like bread, remade all the time, made new.” —Ursula K. LeGuinn

  • Buy Our Festivals E-Books


  • Archives

  • Tags

  • Categories

  •  

  • Meta