Our Second Week of Advent

IMG_3380

Our second week of Advent was full of plant goodness. We got our Christmas tree from a local lot—our schedules didn’t permit the usual trek up to the foothills to cut a tree at a tree farm. Rather than worry about that, we nabbed a gorgeous tree in about 10 minutes flat and had a whole afternoon to leisurely decorate it, while enjoying Christmas music, hot tea, and candy canes.

upload

It’s truly a beautiful tree, even if this photo isn’t.

upload upload

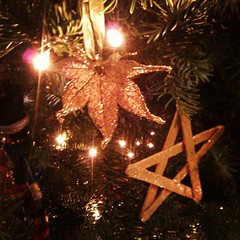
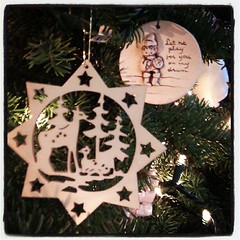
I love unpacking our ornaments. This year, both boys got into the spirit of hanging ornaments and they told some of the origin stories themselves.

The Wreath I Made for Our Door

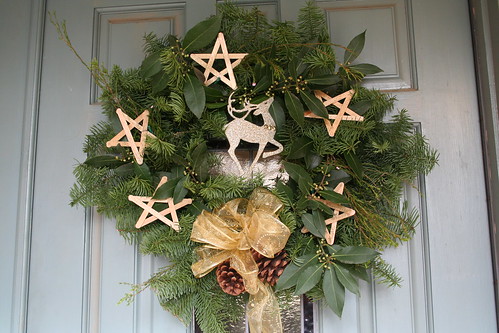
With boughs from the tree lot and bay laurel from my tree, I made a fresh wreath for our door. I bought a wreath last year and had the presence of mind to save the wire frame, so making this was a breeze. It cost me $1.50 for the reindeer and the ribbon. We made the stars last year and I love them.

Mantel with Evergreen Garland

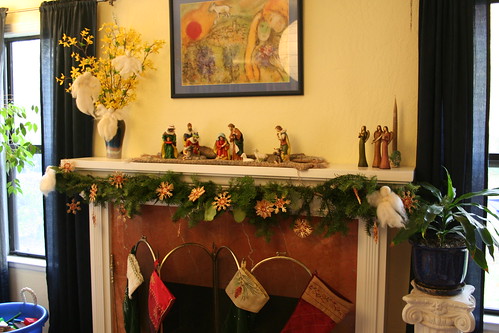
I had enough boughs leftover from the wreath project to make a whole garland for my mantel. It looks very much like last year’s mantel except for the real greenery. I adore the straw stars.

IMG_3667

Ian and the kids put up lights on our house and I added ornaments to some trees by our front door. It’s all rather festive!

IMG_3655

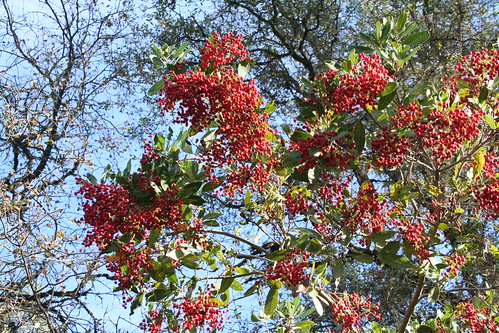
My garden currently features green tomato vines that I am gradually feeding to my chickens, growing cauliflower plants, and sugar snap pea shoots popping up in a pot. The tree out front is still full of golden stars. The heavenly bamboo is sporting gorgeous red bird berries.

I’m happy to have the Steiner practice of celebrating the four kingdoms during Advent to guide the schedule of some of our holiday traditions. It helps to have things spread out over the month instead of all at once, in an overwhelming tide of stuff-to-do. This week was indeed full of plants.

The truth is, I feel kind of stupid even writing about all of this because none of it matters in light of the tragic event in Connecticut. It has shaken me deeply—and I may be dwelling on it too much. What does it matter that my silly traditions go on, or happen on schedule? That we spend time beautifying our home and making it ready for the light and laughter and friendship and love that is our Christmas? It matters not at all compared to life and death and ultimate loss.

Or maybe it does matter.

Getting back to normal, participating in all the everyday acts of love and friendship, and celebrating life are the path to healing, I think. And it feels awkward and weird and yet what else is there to do? We hold our loved ones close, spend quality time, hug our friends, protect our children, and invest in love and beauty, happiness, grace, and gratitude.

I guess. It’s my strategy for now, anyway.

Love these

May we all find moments of happiness and peace in the coming weeks. May we find a way to celebrate and heal.
On Grieving

IMG_3101

I am somehow both pan-religious and nonreligious, both Catholic and pagan. I don’t really know how all of that exists simultaneously in my heart and mind, but somehow it does. For a long time I thought that was an untenable state, and expected that sooner or later I would have to commit to being and believing one thing or another, and not all things and none all at once. But I’ve lived in this state for many years now, and truthfully it shows no sign of coming to some cataclysmic end. Somehow this all-encompassing, tolerant nonbelief system of mine works just fine.

Most of the time.

When terrible things happen, though, there’s no rulebook for me to turn to. All the various religious answers about death and dying, loss, and grief fall flat. The feel-better remarks and there-theres don’t work for me. All I know is that I have to feel my feelings all the way through them, for as long as I need to, until I release them (or until they release me—I’m not sure which it really is). I don’t know if that’s healthy or not healthy. It’s just how I am.

I found this poem by Edna St. Vincent Millay. I understand this.

I am not resigned to the shutting away of loving hearts in the hard ground.
So it is, and so it will be, for so it has been time out of mind:
Into the darkness they go, the wise and the lovely. Crowned
With lilies and laurel they go; but I am not resigned.

Lovers and thinkers, into the earth with you.
Be one with the dull, the indiscriminate dust.
A fragment of what you felt, what you knew,
A formula, a phrase remains, but the best is lost.

The answers quick and keen, the honest look, the laughter, the love,
They are gone. They are gone to feed the roses. Elegant and curled
Is the blossom. Fragrant is the blossom. I know. But I do not approve.
More precious was the light in your eyes than all the roses in the world.

Down, down into the darkness of the grave
Gently they go, the beautiful, the tender, the kind;
Quietly they go, the intelligent, the witty, the brave.
I know. But I do not approve. And I am not resigned.

—Edna St. Vincent Millay

We all have to navigate life’s injustices and sorrows in our own way. There is no script that fits all actors in this play. We have our rites and rituals, our traditions of marking difficult passages. They are useful and good for many. But they are not perfect. And no funeral or day of mourning or flag at half-mast brings an end to the grief. Grieving continues and passes through many stages. We are not resigned.

A long time ago I worked at a funeral home. I spent my workdays with grieving people and people whose job was to help grieving people. A co-worker, Barbara, who had lost her husband many years before, once said to me something I’ll never forget. “After the funeral, all the people go home. The funeral was closure for them. But the grieving goes on for the loved ones, the spouse, the parent. For them, the grief stays.”

Just as our happy moments, our loves, and our triumphs build together and become part of who we are, so do our sorrows knit themselves into our bones.

So how do we cope and what is normal? All of it. Normal is preparing for Christmas with tears falling down one’s cheeks. Normal is gathering with friends and loved ones, smiling and laughing even with a broken heart. Normal is putting one weary foot in front of the other, making breakfast, enforcing room-cleaning, and cuddling precious children to sleep even while you hear the imaginary wolves scratching at the door. All of this depth of feeling and contradiction can exist simultaneously, too. Life is mucky and confusing. It is never as neat as a greeting card.

We say our prayers—or not. We light our candles and weep and gather together. We look to our heroes, spiritual leaders, and poets. We make sandwiches and feed chickens and watch movies for relief. Our hearts break, and we gradually put them back together—with wise compassion and great waves of Love.

We are changed. And that is normal.
Tragedy

I am struggling to find words to express my horror at the tragic shooting at Sandy Hook Elementary School in Newtown, Connecticut. Yesterday was a wash; I mostly sat here and cried, or walked in circles in my home. Couldn’t think. Couldn’t work. I am too permeable.

Last night we went to our school’s Winter Concert, a celebration of light in the darkness. I didn’t want to go. I didn’t want to celebrate anything or anyone. I didn’t think I could handle watching all of our beautiful children performing their songs and dances—the menorah lighting by third grade, the lower school chorus, sixth grade sword dance, seventh and eight grade choir, high school orchestra, a h.s. percussion ensemble. There in the dark of the packed auditorium, listening to these amazing, shining, hopeful children, I let my tears flow.

Truly, normal is what we need. We must continue, yet continuing feels wrong.

We are not discussing this tragedy with our children, and I am grateful these events are far away. I fear Lucas and Asher will find out soon. If and when they do, we will do the best we can to explain the unexplainable. There are many resources online about how to talk with children about tragedy, but the truth is I don’t want to do it at all.
I am reading poetry and trying to take comfort in wise words—God or light or “look for the helpers.” It’s not working. And any words of comfort I can think of are sawdust in my mouth. It’s too soon for comfort.


Santa Lucia Morning

IMG_3637

Santa Lucia Day Breakfast

Good morning! And happy Santa Lucia Day!

Santa Lucia Day Breakfast

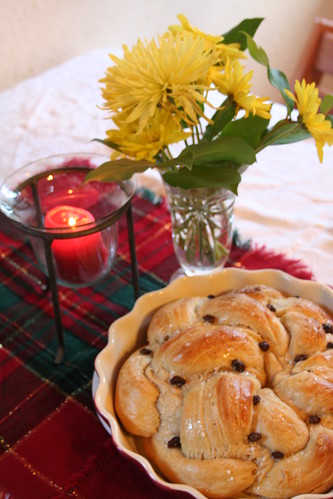
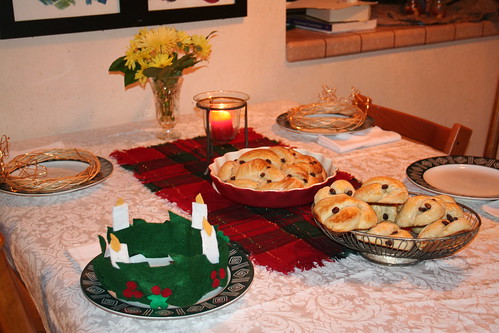
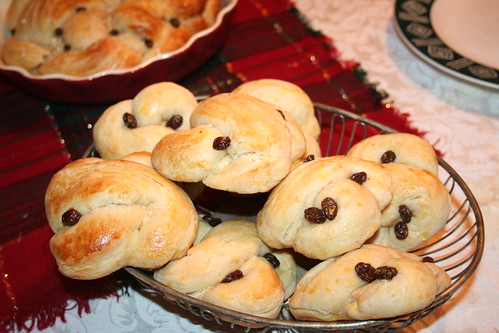
We ate a lovely breakfast of eggs and Lussekatter buns. Daddy told us about winter in Sweden and Santa Lucia Day—about how he used to walk to school in the dark and he wouldn’t see the sun until lunchtime, and then would have to walk home in the dark at 3 p.m.

Lussekatter for Santa Lucia Day

The Lussekatter turned out beautifully this year. My recipe is on my post from last year. These simple celebrations are getting me ready for Solstice and Christmas, I think. There’s something exciting about baking at 10 p.m. And while I am in no way a “morning person,” I love early morning magic!

Star Boy crown

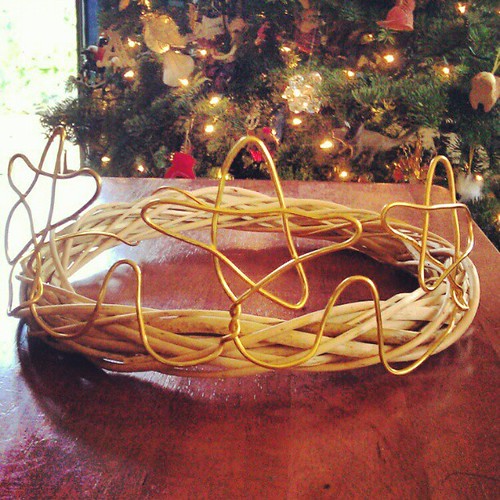
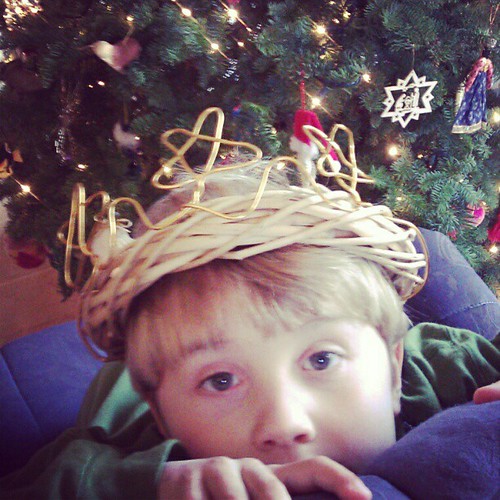
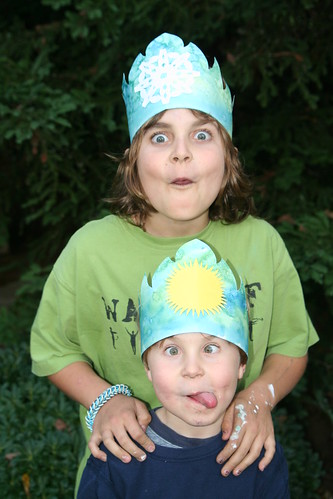
I made two star boy crowns yesterday afternoon for $2 each. They are … improvised. A wreath and a 6 foot length of very soft “florist wire,” both from the Dollar Store. I just bent the wire into three continuous stars and put a little wave in between them, then wrapped the ends around the back of the wreath and tucked them in. This design fit the small wreath perfectly.

I have everything I need to make pointy felt star boy hats like the ones Ian wore when he celebrated Santa Lucia Day at his university in Sweden in 1993, but I didn’t get the time to do it this year.

Star Boy crown for Santa Lucia Day

I think the crowns are cute, but my own stjärngossar (star boys) didn’t much want to wear them. Alas.

IMG_3652

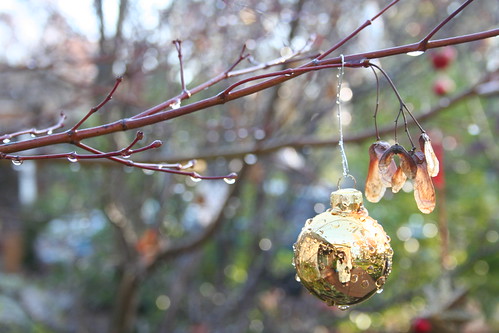
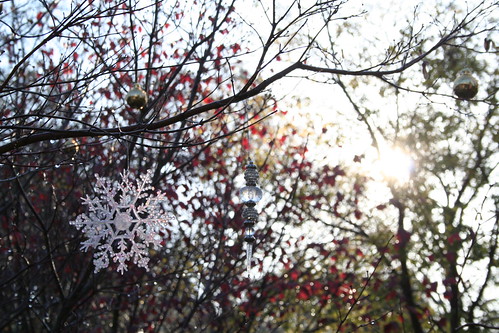
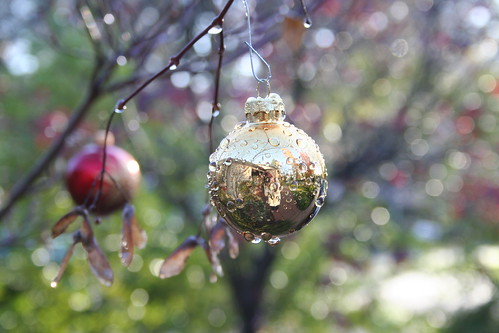
It rained last night, and there are shimmering jewels on the branches, sparkling in the weak winter sun.

IMG_3655

IMG_3645

Have a beautiful day!

Star of David Window Star Tutorial

IMG_3335

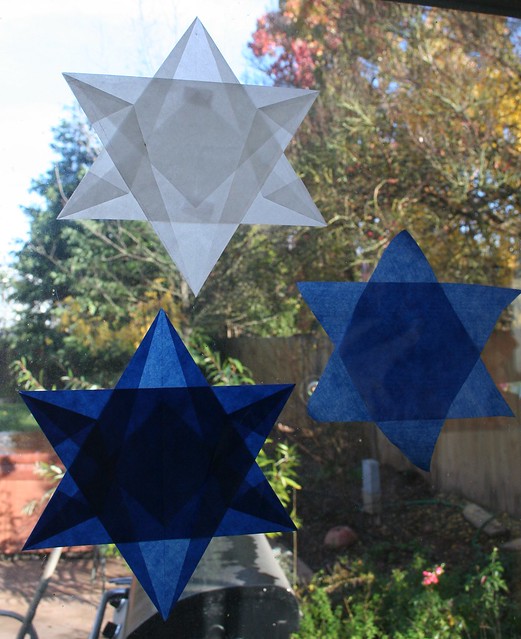
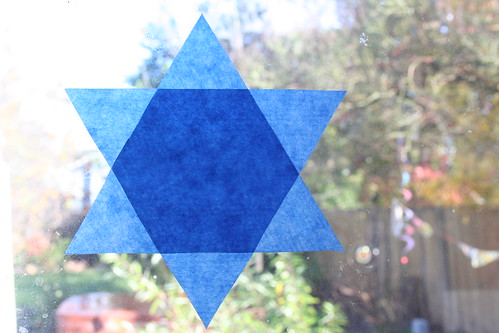
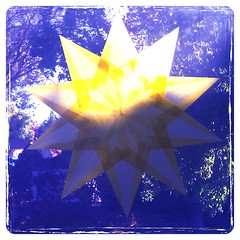
Today is the first day of Hanukkah, and although I am not Jewish, I found myself wondering about Hanukkah crafts and thought I might create something to share. I am very, very fond of (read “obsessed with”) window stars and I wondered if I could come up with a way of making one in the shape of the six-sided Magen David, or Star (or Shield) of David in celebration of Hanukkah.

Well, I have done so. I’ve never seen this window Star of David anywhere in Waldorf circles, so I believe I’ve invented this folding design. Here goes, humbly submitted with love:

Materials

  • 2 sheets of 6 x 6 inch kite paper
  • glue stick
  • ruler
  • tape

Tutorial

IMG_3322

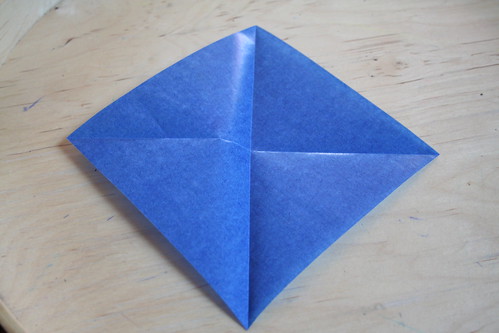
The aim here is to create two equilateral triangles without cutting your kite paper. Start by folding your first sheet diagonally, corner to corner. Open the paper into a square and fold it diagonally the other way, corner to corner. Your paper now has folds that make an X, or a cross when a corner is at the top.

IMG_3323

IMG_3331

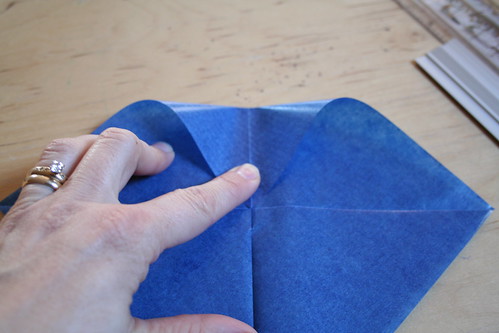
Hold the paper with one corner at the top, in a diamond shape. Fold the top corner down to the middle, where the two diagonal folds you made meet. Crease the paper there, but do not firmly press the fold down all the way. You want a little crease mark halfway in between the top corner and the middle of the square. Unfold the sheet into a diamond shape again.

IMG_3325

Now fold the bottom corner up to the crease you just made. Firmly press the fold; this one is permanent. You now have a fold on the bottom. This bottom fold is one side of your equilateral triangle.

IMG_3326

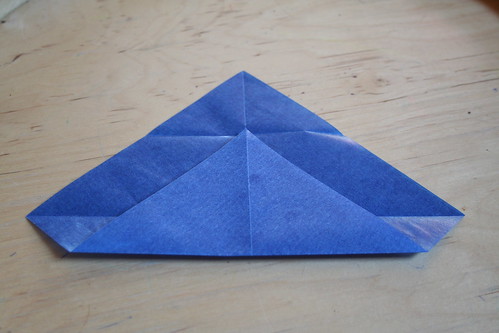
Hold the top point and fold the left side of the kite paper toward the center fold line. The bottom left corner will be where the bottom of the triangle begins. The top of this fold will be very narrow and the bottom will be pretty wide.

IMG_3327

Now do the same thing on the other side.

IMG_3328

IMG_3329 IMG_3330

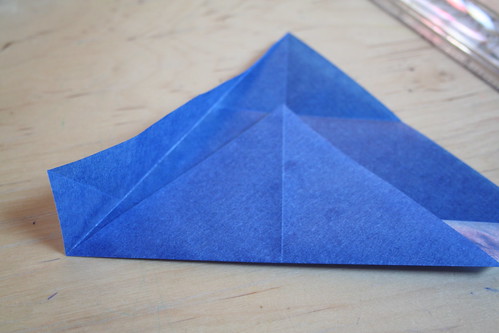
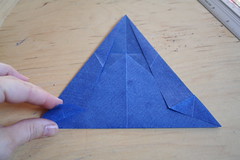
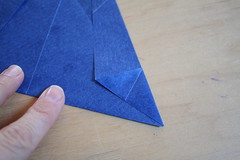
You have two little corners that extend down beyond the bottom edge of your triangle. Fold the left corner up until it meets the left edge of the triangle. Do the same on the right side.

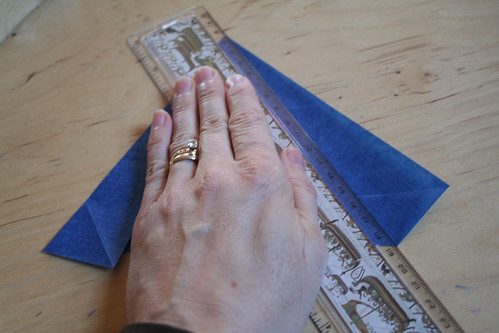
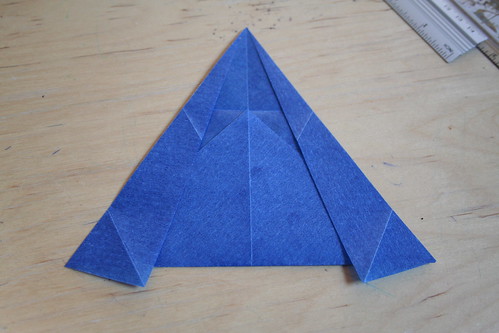
Get out your ruler and let’s see how we did. The bottom of your triangle should be 17 cm long. The left and right sides should be 16.5 cm. That’s not a perfect equilateral triangle but it’s really close. It will do.

Repeat all of the above with your second piece of kite paper.

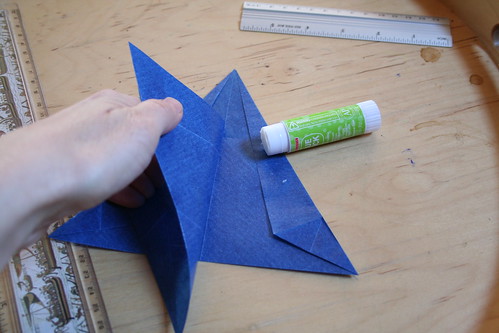
To assemble your Star of David window star, you want one triangle pointing up and one pointing down. They will overlap such that six points of equal size are visible. It doesn’t matter which triangle is on layered on top of the other. Be sure to align the center fold lines of both triangles.

IMG_3337

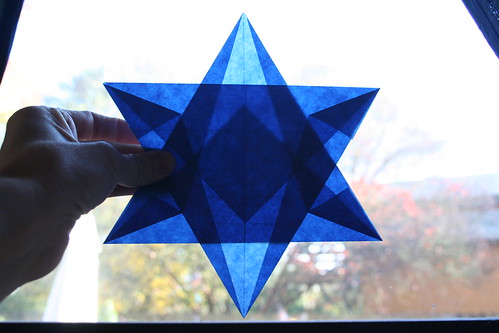
When you layer them together and hold them up to a light source, you should see a hexagram in the center, as well as other details created by your folding pattern. You want the distance from the bottom of each triangle to the tip of the point of the other triangle to be 4.5 cm. If you’ve got that measurement right, then the other four side points of the star should also be 4.5 cm from their tips to the sides of the other triangles.

IMG_3333

Use your glue stick to dab a very small amount of glue to fix the two triangles in place.

IMG_3338

Tape or glue your Star of David to the window. Voilà!              (c) Sara E. Wilson

IMG_3341

If you don’t mind cutting your kite paper, you can make a very simple Star of David that also looks beautiful with the light shining through it. This one is good for kids in older grades to make on their own because they can practice measurements and angles. Use one side of the kite paper to be a side of your equilateral triangle. With a protractor, measure a 60 degree angle, make a pencil mark near the center of the opposite side of the square. Then draw the line. Measure 15 cm. That’s your side length. Make another 60 degree angle and draw another line to intersect the first line you drew. All sides must be the same length: 15 cm. Now that you’ve got your equilateral triangle drawn, cut it out. Repeat these steps to cut a second triangle and then layer one over the other to make the six-pointed Star of David. In this version, the center hexagon is very visible. Simple and lovely. (And the truth is, even if your triangles aren’t perfect equilateral triangles, this star will still look terrific!)

There are other nifty Hanukkah crafts in the Winter Festivals E-Book, created by myself and Eileen Straiton and published by Little Acorn Learning. In it you can find poems, crafts, songs, caregiver meditations for celebrating a number of festivals of light, including Santa Lucia, Hanukkah, Solstice, Yule, and Christmas. We’d be very happy if you checked out our e-book and help us spread the word.

Happy Hanukkah! May we all enjoy the love and light of true friendship during this beautiful season.

Finished, Released, and Relieved

Winter Mosaic 10x3

This is a teaser photo mosaic that shows just a little of what my friend and I have been up to lately. For the last two months, Eileen Straiton (of Little Acorn Learning) and I have been diligently working on our latest e-book. We had so many fantastic ideas and so enjoyed inspiring each other that we kept crafting and writing right up until our self-imposed deadline. Furthermore, we created so much content that we decided to release it as TWO e-books instead of one.

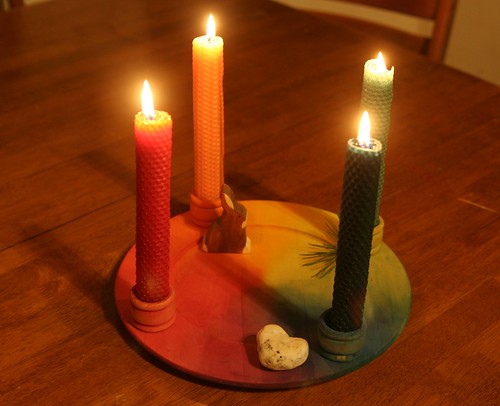
Wooden Advent Wreath

One book is our Advent and Saint Nicholas Festival E-Book, which offers poems, stories, songs, crafts, and myriad special ways that families, schools, or childcare professionals can celebrate the whole month of December with children. The advantage to doing so is that you get a more thoughtful, heartfelt approach to the holidays, with less rushing commercialism and more time in each other’s company while making and giving of yourselves. A measured, calm approach to the winter holidays gives children time to dream, live into the stories of their faith and the season, and count the days of Advent. Children can savor the passing of time with peaceful, delicious anticipation and gentle, useful activity, rather than experience the holiday as a single, frenzied, blowout day that is over all too soon. A peaceful Advent full of simple pleasures and togetherness is what they’ll remember later, not the package-ripping and specific, expensive gifts.

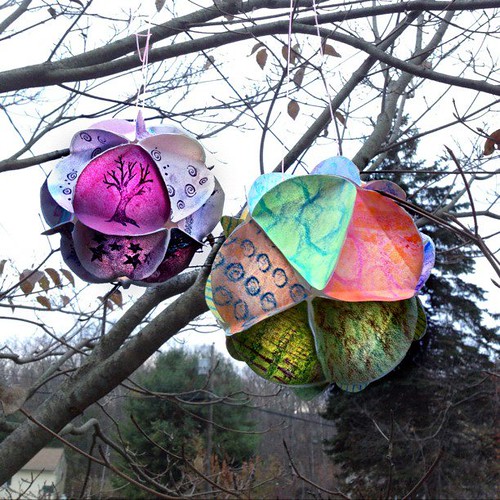
Solstice Spheres

The other e-book we created is the Winter Festivals E-Book, and it’s full of ways to celebrate the festivals of Santa Lucia, Hanukkah, Solstice, Yule, and Christmas. Maybe now it makes sense that we have two offerings instead of one? See, the season of winter festivals is packed with beautiful symbols; messages of peace, hope, rebirth, brotherhood, generosity, and love; and so many inspiring and edifying traditions that it was tough to contemplate leaving out anything. And cold and dark days give us the opportunity to dive into the rich and various traditions that inform the winter festivals. This e-book also offers songs, ancient poems and carols, recipies, rhymes for circle time, caregiver meditations, crafts and natural decorations you can make, and a whole bunch of ideas for enjoying the many festivals of light.

We would be honored and delighted if you’d check out these e-books and spread the word a little. We have poured our hearts and souls into them.

It is our aim to provide nourishing opportunities for families and groups of children at school/daycare environments. Our content is firmly based in Waldorf instructional methods and theories of child development. We value the whole person—head, heart, and hands—both the child and the adult alike. We strive to be original, to use natural, affordable materials, and to create beautiful artwork and handwork without it being so complex that readers are intimidated. We strive to inspire and encourage frequent artistic expression and to share the joy and satisfaction of creating handmade gifts. We are Waldorf moms (and Eileen is a professional childcare provider) and we offer this work with love.

Here are a few “making of” shots from the last two months. I’d like to say thank you to my little helpers and models, Lucas and Asher, for being willing to go along with Mommy’s visions, and to Ian who tolerated my clutter of tools and supplies, my having four different holidays’ décor spread throughout our home at once for photo shoots, and my “Just a minute, I’m writing” excuses. I’m grateful for the opportunity to do this work.

IMG_1931

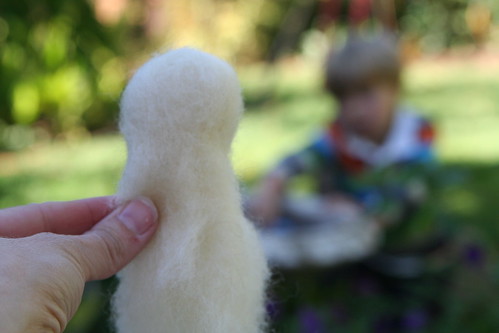
Reborn Solstice Sun Watercolor pants

IMG_2447

IMG_2364

Thanksgiving in Nature

IMG_2531

We had been planning a family vacation in Eureka, but it didn’t work out. As a consolation prize we took the boys and the dog hiking in Auburn on Thanksgiving Day. We hiked about 5 miles and ate chicken sandwiches at a picnic table. It was absolutely perfect and exactly what we needed.

IMG_2539

IMG_2542

IMG_2571

upload

IMG_2588

IMG_2623

IMG_2626

IMG_2635

upload

IMG_2699

IMG_2645

IMG_2657

IMG_2682

IMG_2692

IMG_2708

IMG_2727

IMG_2711

IMG_2701

IMG_2736

Thanksgiving Leaf Mobile

IMG_7639

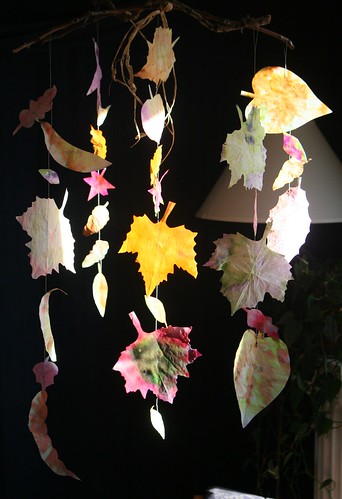
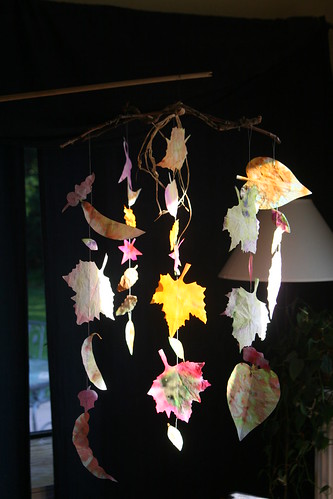
Do you ever wish you had a physical expression of all the many things your family is thankful for? Here is a simple project that can be just that. Hang this Thanksgiving Leaf Mobile over your dining room table or in your family room to decorate for the Thanksgiving holiday and remind your whole family of the bounty of blessings that you all share together.

Materials

  • white circular paper coffee filters
  • washable marker pens and spray bottle with water, or watercolor paints
  • green floral wire
  • two or three strands of raffia
  • two sticks
  • sewing machine or needle and thread
  • scissors
  • leaves to use as patterns (optional)
  • pen (I used a silver pen, but any type will do)

Create Your Gratitude Leaves

IMG_7527

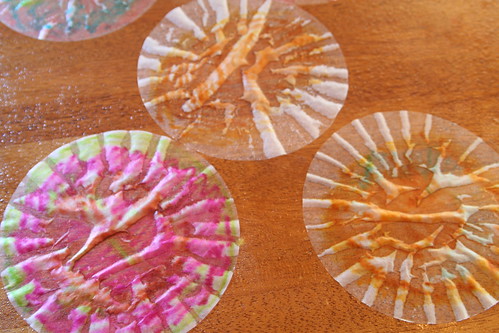
Begin by coloring your paper coffee filters with washable markers. I suggest you use mostly autumn colors. You don’t have to color anything fancy and you don’t have to worry about white spaces in between the strokes of the marker pen.

Now lay your colored coffee filters on a clean dry surface and spray them gently with water from your spray bottle. Because you are using coffee filters, the water will wick throughout the paper, spreading out your ink. The colors of the marker pens will blend together, making a beautiful wash. (Alternatively paint your coffee filters with watercolors.)

IMG_7523

Let the filters dry. Once dry, they won’t adhere to the work surface.

IMG_7531

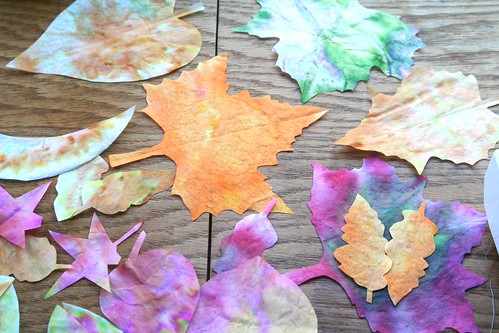
Now, fold each coffee filter circle in half and cut out a leaf shape, using real leaves as patterns, if you wish. You may want your leaves to be all the same type, varying only in size. Or, you might like to have many types of leaves. Cut out a bunch of paper leaves (I made 31).

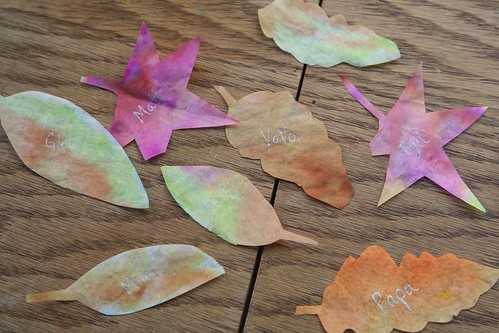
With your family’s help, write what you all feel thankful for on the leaves. Write the name of each family member and pet on leaves. Write down the material things you enjoy, such as a house, a car, and food to eat. Also write abstract concepts such as safety, peace, harmony, education, freedom, friendship, and health. You may be surprised by what your children are grateful for, when they give you their ideas.

IMG_7539

I bet that once you start counting your blessings, you’ll have no trouble creating many gratitude leaves.

Create Your Thanksgiving Leaf Mobile

 IMG_7536

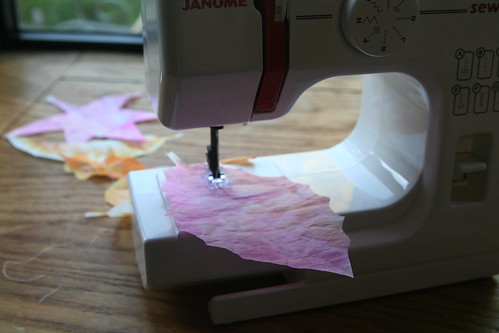
Your leaves are ready now. It’s time to sew them into a long string or banner that will hang vertically from your mobile. The simplest and fastest way to do this is by using a sewing machine set on a long stitch or very wide zigzag stitch. (You don’t want a short stitch because many needle holes very close together may actually cut your leaf into halves as you sew it.)

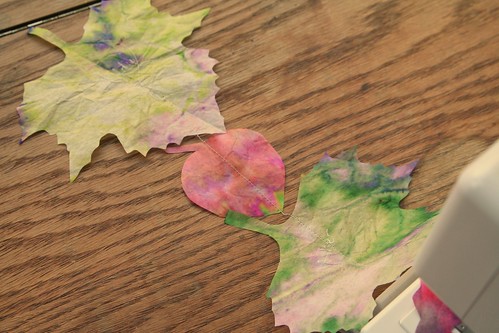
You want a fairly long “tail” of thread on your first leaf, as this thread will tie the whole sewn string of leaves to your mobile. While you’re sewing, allow the machine to continue sewing even off of the leaf. This results in a string of interlocked thread that provides some spacing in between your gratitude leaves and allows for additional motion in your mobile. Consider feeding the leaves into the sewing machine in a variety of orientations. If you do this, you’ll create a windswept look instead of a static look that would result in leaves pointing all the same direction.

IMG_7533

See how the leaves come off the back of the sewing machine, with some space in between them? Sew several strings of leaves. Four or five strands works very nicely. Remember not to trim your threads yet! (You can also create these leaf strands by doing a running stitch by hand with a narrow needle and thread.)

IMG_7540

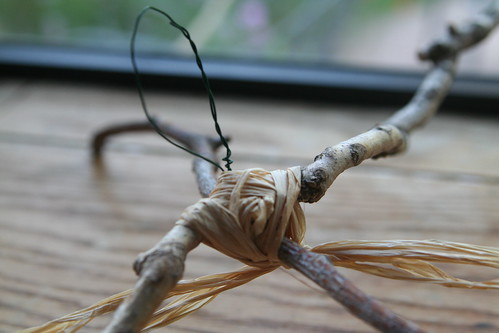
Next, construct your stick hanger. Cross your two sticks in the centers and use the floral wire to bind them together. Wrap the wire around both twigs in all directions until they feel securely bound together. This is also the time to make a wire loop that will serve as a hanger for your mobile.

IMG_7542

You can get fancy here if you want by adding some real or artificial fall leaves and berries to the top by poking them into the wire. Just keep in mind that the most beautiful part of your mobile should be your gratitude leaves. Whether you choose to add decorative items or not, disguise the wire by wrapping some raffia strands around the joint.

IMG_7631

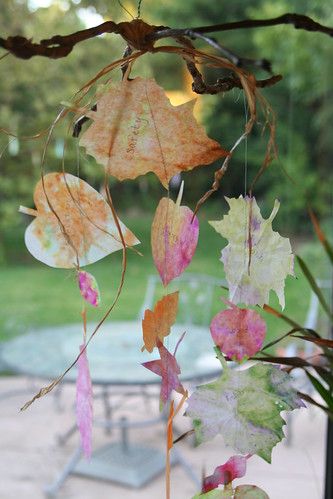
Find a place to hang your crossed sticks at about shoulder level so you can work on the mobile with both hands, or get a helper to hold it for you. Now tie your leaf strands to the ends of each stick by their extra long top threads. If you have enough, also tie a strand to the center of the mobile. Last of all, clip any extra thread from the tops and bottoms of your leaf strands.

IMG_7638

Hang your mobile somewhere prominent in your home, perhaps where some airflow may move it or where autumn sunshine might make it shine. When you look at it, you’ll see how very blessed and grateful you and your loved ones are. Blessed be!

Halloween: The Wood Elf

I realize November 10 is a bit late to write about Halloween, but I’m just getting to it now. We worked way too hard on these costumes to not show them here.

Lucas's Halloween Costume Design: Wood Elf

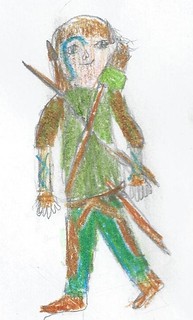
Lucas decided to be a Wood Elf. This year Ian read all three books of The Lord of the Rings to our boys, and the stories have really taken root in Lucas’s and Asher’s minds. Lucas didn’t want to be Legolas or any specific elf, or a fancy High Elf. He drew this picture of himself as a Wood Elf, so this is what we had to work toward.

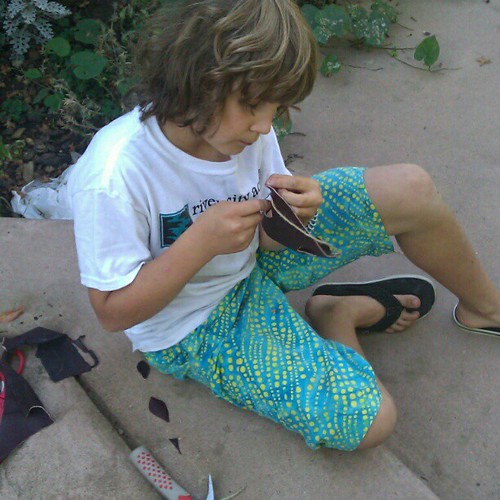
Making leather armor for his wood elf costume.

We brought our cow hide out and allowed Lucas to use some leather to make himself some armor. The hide was purchased back in 1991 when I wanted to make a medicine bundle for Ian—back when there was no Michael’s-type craft store in town. I had to buy a whole hide to get the little bit of leather I needed, and for my college-age self it cost a lot of money. I never dreamed in 1991 that this purchase would help us create a Halloween costume for our 10-year-old son!

IMG_2063

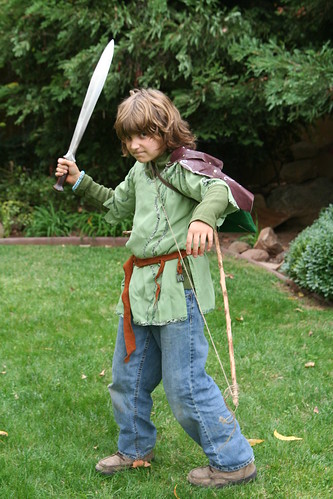
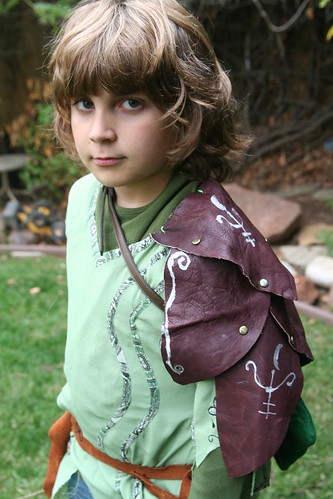
We lucked out at the thrift store this year and found a green tunic-like shirt. It had vine-like details and some beautiful leaf and vine embroidery on it. At first Lucas was nervous about the few flower details on it. He didn’t want to wear flowers. We had to argue for a moment or two, then I pulled out my shears and made some cuts to remove the flowers. I ripped and distressed the tunic just enough to make it look like he had spent several weeks traveling in the woods. That seemed to satisfy him. I also removed a seam to make the arms wider and more comfortable.

IMG_2076

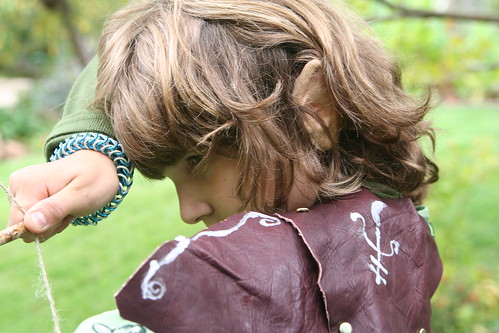
For the shoulder armor, we cut “scales” of leather to look a bit like leaves. We fitted this onto his body, piece by piece, and marked where we needed the scales to connect to each other with a Sharpie. Lucas made all the holes in the leather himself. We used brass-colored paper fasteners to quickly fasten the scales together, and we did the whole piece on the afternoon of the 31st. He decorated the armor with a silver paint pen. “They are runes of protection, Mom.” We sewed the leather to the shirt. The whole thing looks awesome!

IMG_2090

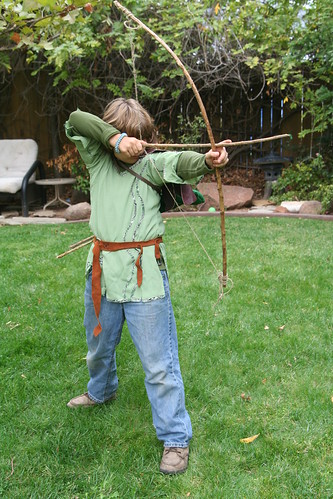
If we had had more time, we would have made a piece of armor to cover his his thigh, too. We pressed into service a leather belt from Ian’s old Renaissance Faire stuff. Lucas sewed a quiver out of green felt using the sewing machine. His first time on the machine! We used a small thrift-store belt to hold the quiver on his back; he used hot glue and stitches to attach the quiver to the belt.He made his own bow from a stick and string, and his quiver held five or six stick arrows.

IMG_2072

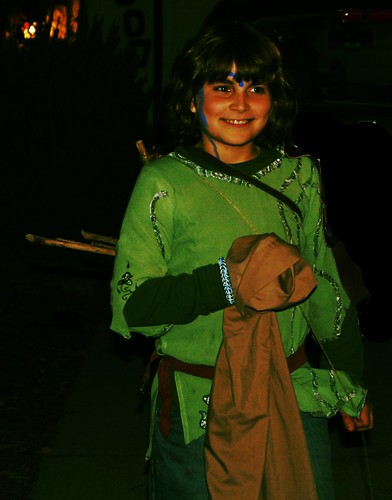
I’m not sure why he wanted to wear jeans, but he did. The last piece was a set of pointy elf ears held on by spirit gum. They had to be subtle ears! He added a blue tattoo to his face.

IMG_2159

And then, with no time to spare, we went to an awesome party with a few other families from school. We ate yummy soup and went trick-or-treating in a big group.

IMG_2154

IMG_2201

The kids got loads of candy and had a blast running door to door at night. They all looked amazing!

I’m so proud of Lucas. He knew what he wanted. He worked hard to create it, doing many of the tasks on his own. He was a terrific Wood Elf!

Asher’s costume is up next.

Growth and Change

IMG_2245

I try not to get too sentimental about my children growing up. They grow. They are made to. They strive and learn and change and discover and grow every day, with or without my consent. And I approve. Most of the time I am too busy being astounded and amazed by their leaps of intelligence, judgement, compassion, and understanding, and feats of strength and skill to be the least bit sad about their not being babies anymore.

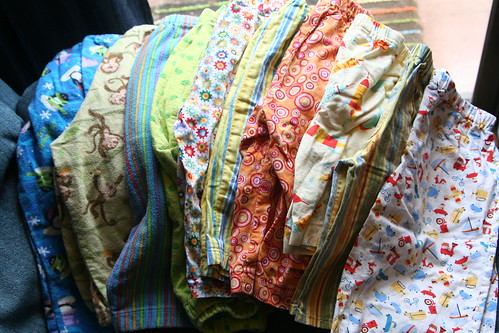
These are pants and shorts and pajamas that my mother and I have for Asher to wear. They were sewn for him and made with love (and in my case, with mistakes and a fair amount of learning frustration). They are all too small for Asher now, and I have sent them on their merry way to another sweet boy (and his baby sister) who may get some further use out of them. They are not the first set of handmades to be passed along, and they certainly won’t be the last. Growth and change are guaranteed.

Nevertheless, I was sentimental enough to take a photo before passing them on. These clothes are loved, soft and colorful, and unique in the world. They are special not only because they once covered my sweet son’s soft skin, but because they were created with loving hands and clever tools and eyes for detail. They are special because they were made first in our hearts before they came to be objects in the world.

May they be useful in the years to come, until they are once again outgrown.


  • About Sara

    Thanks for visiting! I’m Sara, editor and writer, wife to Ian, and mother of two precious boys. I am living each day to the fullest and with as much grace, creativity, and patience as I can muster. This is where I write about living, loving, and engaging fully in family life and the world around me. I let my hair down here. I learn new skills here. I strive to be a better human being here. And I tell the truth.

    Our children attend Waldorf school and we are enriching our home and family life with plenty of Waldorf-inspired festivals, crafts, and stories.

    © 2003–2018 Please do not use my photographs or text without my permission.

    “Love doesn’t just sit there like a stone; it has to be made, like bread, remade all the time, made new.” —Ursula K. LeGuinn

  • Buy Our Festivals E-Books


  • Archives

  • Tags

  • Categories

  •  

  • Meta