Snowflake Fairies Tutorial

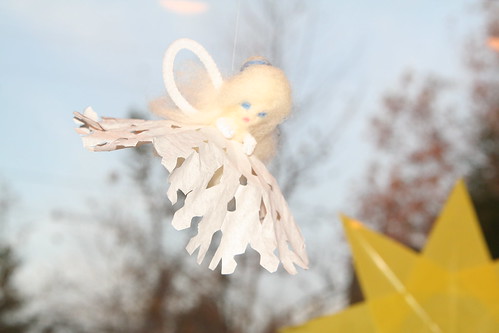
Snowflake Fairy with Face

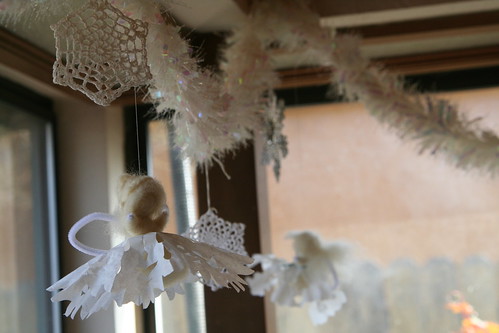
In between chilly outings, when we’re inside warming up, is a wonderful time to appreciate the beauty of winter. Paper snowflakes are festive and look lovely decorating windows and our family cuts beautiful snowflakes every year.  Here is a project for making lovely snowflake fairies to flutter and dance in the air. Hang them over a heating vent to see them blow about, just like a real, falling snowflake.

Note: Some Waldorf educators recommend that you not make needle-felted figures and animals in the presence of young children, who may find the action of repeatedly needling the woolen bodies to shape them somewhat disturbing.

Materials

Materials

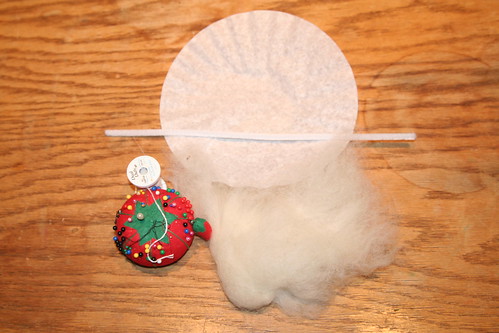
  • coffee filter
  • chenille stems
  • needle and thread
  • scissors
  • wool batting
  • needle-felting needle and pad

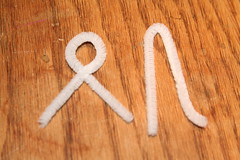
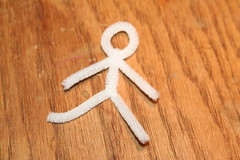
IMG_9664 IMG_9665

Start by forming the skeleton of your fairy. Cut your chenille stem in half. Twist a loop into the center of one half; this is your fairy’s head with arms attached. Fold the other half over (body and legs). Then put one leg of the folded chenille stem through the loop. The two pieces are now interlocked. About an inch farther down, where the pelvis of the figure would be, twist again to make two legs. You should now have a wire “stick figure” like you see in the right photo above. Fold the smallest possible bit of wire over at the end of each limb, to form tiny hands and feet and keep the cut wire from poking anyone.

IMG_9666

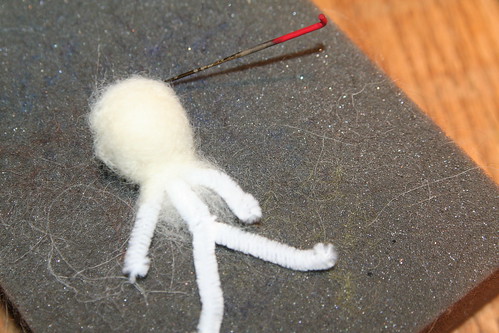
Take a small bit of wool roving, roll it into a ball, and insert it into the loop of the figure’s head. Then wrap a bit more roving around the head and begin to needle it in place into an attractive head shape.

IMG_9668

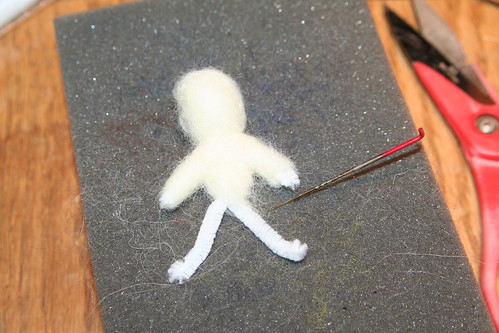
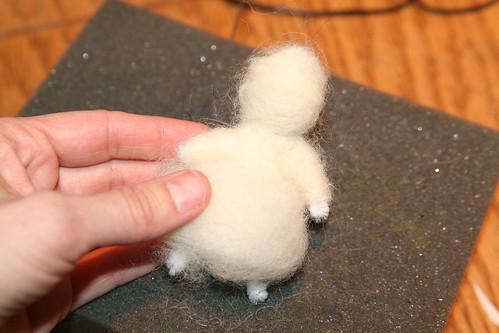
Using very small bits of wool, wrap around the figure’s body and arms. I find making a crisscross of wool that goes from shoulder to waist in both directions to be a good method. Needle this wool until it’s firm and stationary. The fairy’s arms may need more needling than the body to make them graceful and slender.

IMG_9677

Now add a bigger fluff of wool to create a woolen petticoat. You can either allow the fairy’s feet to show below the fluffy skirt, or make the skirt extend below the feet.

Cut

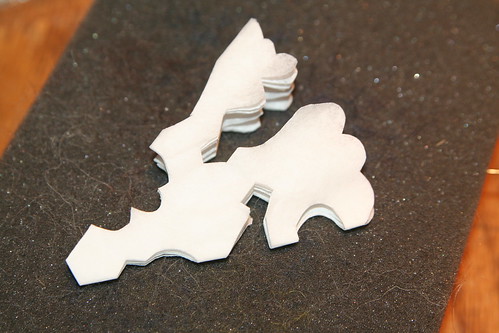
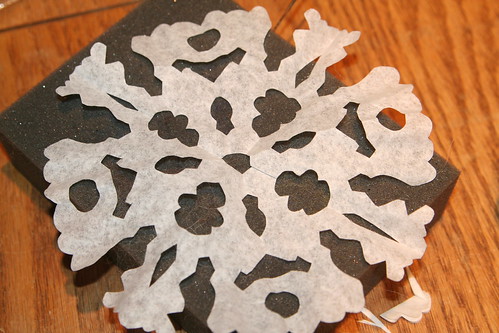
Fold a white, circular coffee filter into quarters or eighths and cut a snowflake. Cut a very small tip off the snowflake and unfold it.

Snowflake

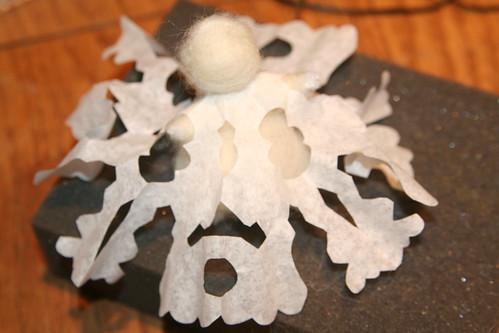
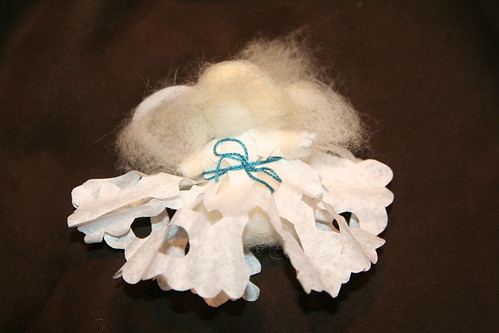
This is the only tricky part: Gently guide your fairy’s head through the center hole in your snowflake. Go slowly to avoid tearing the paper. If the head won’t fit through the hole, refold the snowflake and cut the tip just a tiny bit more to widen the hole and fit the head through.

Snowflake Fairy in Progress

You have a choice now. You can either put the fairy’s arms through holes in your snowflake (if you have such holes) to make a dress (see above), or you can gently move one arm at a time up through the neck hole of the snowflake to make it a skirt instead of a dress. This part is not unlike carefully dressing a small child, except your fairy will wiggle less.

IMG_9680

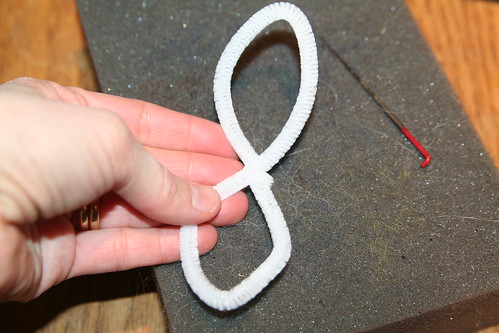
Next, use another chenille stem and form a circle. Twist the two ends together to seal the circle. Then twist the circle into a figure eight. These are your fairy’s wings. Use a bit of wool to tack the wings onto the fairy’s back. Now give your fairy some white hair, and allow it to flow over the center of her back where the wings meet the back.

Snowflake Fairy with Belt

If you made a dress, you might wish to belt it with a ribbon, bit of string, or a braid of wool roving.

Snowflake Fairy with Up-do

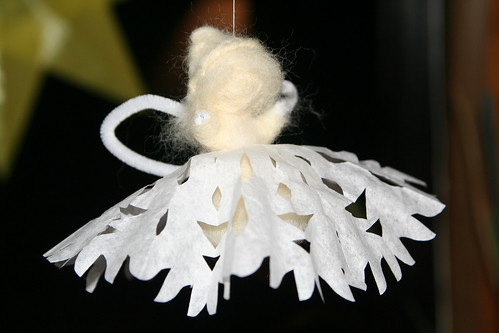
Here is a fairy with a skirt. You can give your fairy a fancy hairdo, if you like, by coiling wool into a bun and needling it onto her head. You can also add a face using tiny bits of color needled in for eyes and a mouth (as seen in the top photo). The fairies are adorable either way.

Snowflake Fairies

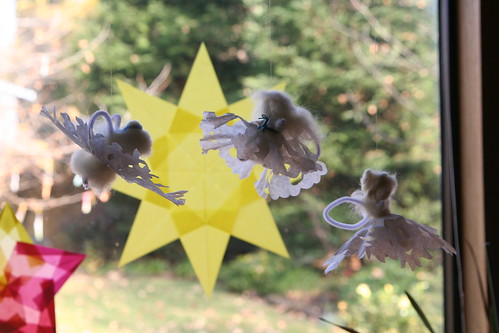
Now, you can make more snowflake fairies and hang them near each other to dance in the air, or display them with other snowflakes.

 Snowy Garland wih Snowflake Fairies

Please vote for Love in the Suburbs at the Circle of Moms Top 25 Creative Moms blog list. You can vote once per 24 hours until Jan 30, and you can vote for more than one blog on the list! Thank you!
Drawing Animals with Children

Bears

Winter days can be long and dreary if you don’t find happy ways to pass the time together indoors. When weather is especially inclement, take the opportunity to sit down with your children and draw. Even if you don’t consider yourself to be artistic, your children will most likely be delighted to have you by their side, making art. The impulse to create is so very strong in children. As parents and caregivers, we can nurture their creative impulse by modeling creative behavior.

Materials

  • paper
  • block crayons and stick crayons
  • inspiration photos from books or Internet
  • a story about animals in wintertime, perhaps

Tutorial

Take a little time to play with the crayons. Experiment how you can make different kinds of strokes and lines. Block crayons are beautifully suited for shading, blending, and giving dimension to your pictures.

Donna Simmons, author of Drawing with your Four to Eleven Year Old, says “By pressing firmly or lightly, you can achieve both depth and movement in clouds or sea, for example. Wavering strokes of red, yellow and orange can bring fire to life. Direction of stroke can also emphasize muscling or roundness in animals, depth in caves, or distance of, say, mountains in the background.” Her book holds specific tips for drawing in Kindergarten through Fifth grade Waldorf curriculum.

Inspiration

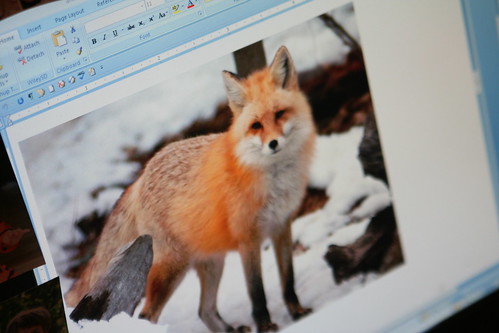
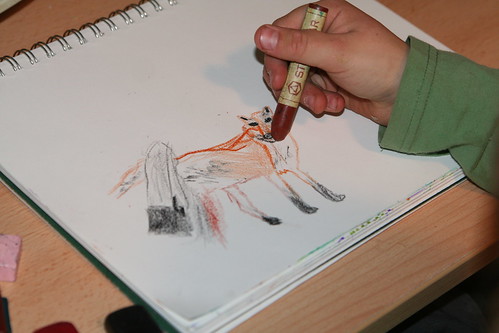
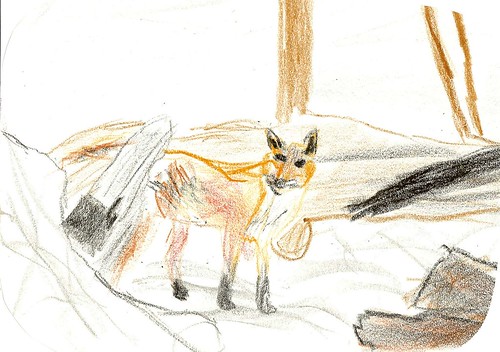
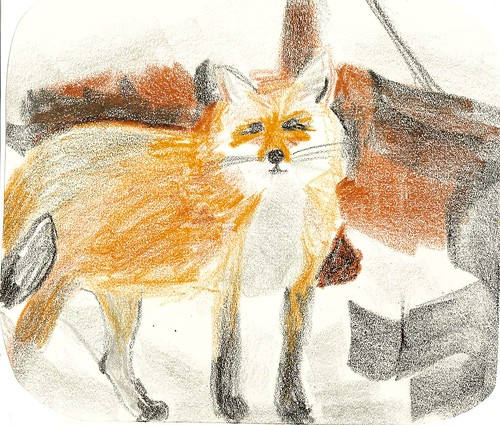
Picture books or books with lots of inspiring photographs are always nice to have around. We found this fox photo online and drew using it as our example.

Lucas Drawing

Lucas's Fox in the Snow (Age 9)

My 9-year-old’s drawing of the fox in the snow

My Fox in the Snow

My drawing of the fox in the snow

Here are some general drawing tips for children:

  • Avoid outlining.
  • Aim to capture the mood or movement of your subject, not the superfine detail.
  • Young children need not worry about eyes, whiskers, nose, etc.
  • Try to find your subject’s major shapes: where are the circles, ovals, triangles, and rectangles? Use these instead of outlining to avoid adding too much detail too soon.
  • Block out where the figures will fit on the page to help make them large and bold. Some children resist using the whole page.
  • Finish your picture with a decorative border.

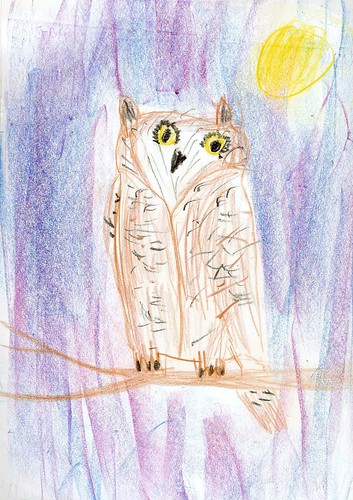
Lucas's Owl at Night (Age 9)

My son’s drawing of an owl at night

You may find that you need to lead by example. After story time, try drawing an animal in your story. Or while your child is having free time, try drawing beside him or her. Encourage your child if he or she chooses to draw with you. “I like to be with you like this.”

Avoid saying things that imply a judgment of the child’s work (“good drawing,” “sloppy drawing,” etc.). Instead try to find something that you can comment on that feels neutral. “I wonder if that fox has cold feet.” or “What a fluffy coat it has!” Nor should you say that your own drawing is “bad” or “didn’t turn out right.”

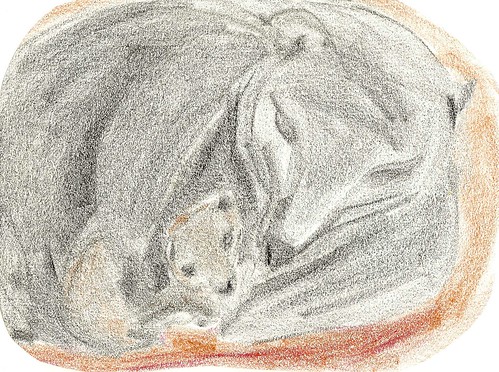
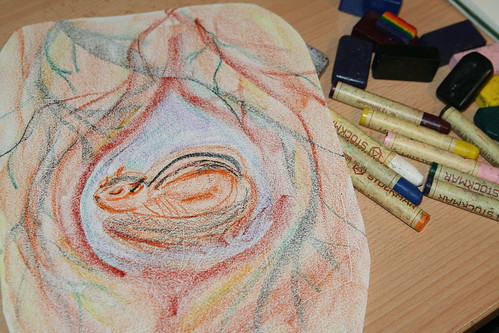
My Chipmunk Drawing

Practice and your own drawings will improve. We are all learning as we go.

Display drawings made by your child. A wooden “card stand” works well for displaying small drawings. A cork board works nicely for larger ones. Refrigerators are a good standby, too, for showcasing family art. And never underestimate the delight a child will feel if you should put his or her artwork in a real frame.

Borax Crystal Snowflakes

upload

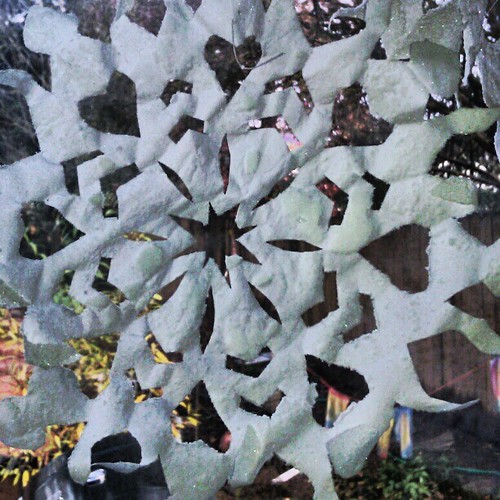
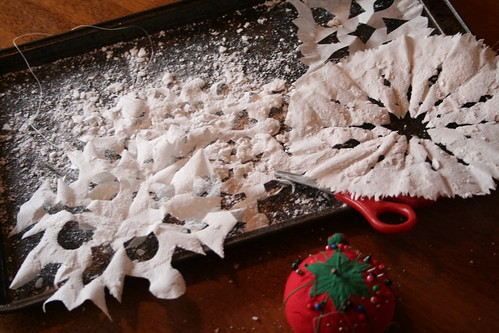
It’s January, so that means snow, right? Well, it does mean snow in lots of places, but not here in Northern California. So, we usually make our own snowflakes to brighten what inevitably becomes a month of fog and rain and mud. These snowflakes are made with Borax laundry booster (sodium borate) to add an ice crystal texture and shine. It takes a few days to make these.

Materials

  • white paper or coffee filters
  • scissors
  • Borax laundry booster
  • plates
  • boiling water
  • needle and thread

Tutorial

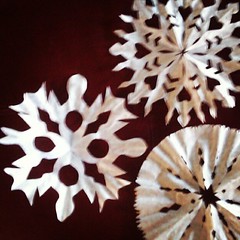
Start by cutting out your snowflakes. I tend to love very lacy snowflakes, but for this project I suggest you leave some nice solid areas. My son Lucas theorized that small cuts were better for these, and he may be right.

January upload

Boil a little water on the stove. Pour it into a glass mixing bowl and then add Borax until it will no longer dissolve into the water. When you see some borax sitting as a sediment in your bowl, you know your solution is right.

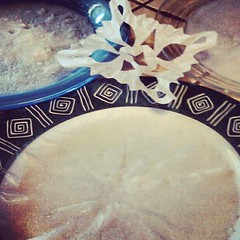
Place each snowflake on a dinner plate. Pour a little of the Borax solution onto the plate—just enough to cover the whole snowflake. Now you wait.

upload

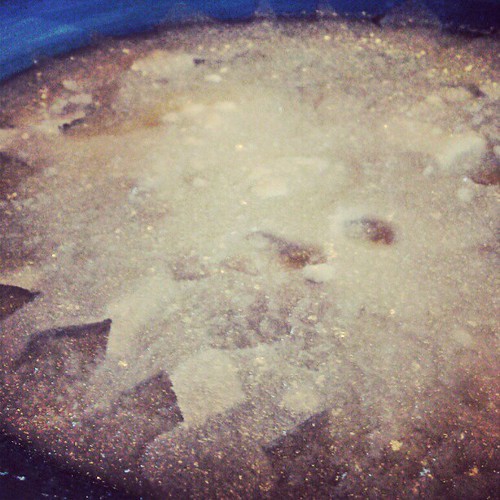
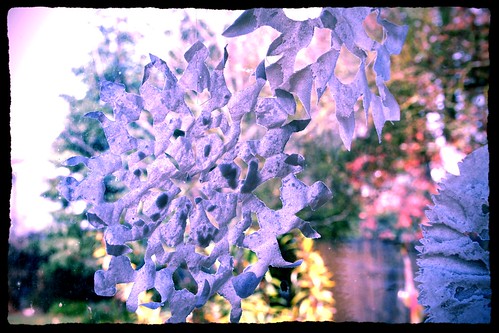
The Borax will start to crystallize on the paper and plate. As it dries, the water will become clearer. You can gently pour off the excess water to speed the drying process. Allow the snowflakes to dry completely, the very carefully pry them up off the plate with a butter knife.

IMG_3852

Some of the Borax may fall off, but most of it will stick to the paper. With your needle and thread, sew a few stitches at the top of your crystal snowflakes and then hang them in the window where they sun can glint off their crystals.

IMG_3857

Enjoy!

Woolen Winter Playscape Tutorial

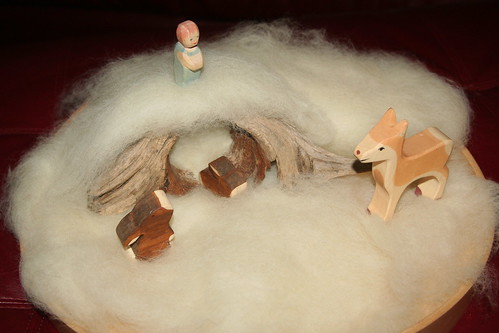
Woolen Winter Playscape, gnomes and deer

Materials

  • white wool batting
  • a board, such as a painting board or serving tray, to serve as a base
  • figurines (gnomes, animals, people of any material you have)
  • driftwood, bark, sticks, pine cones, rocks, etc.
  • small bit of silk

Tutorial

This winter playscape can be assembled inexpensively and remade again and again. It can be either temporary or permanent, as you wish.

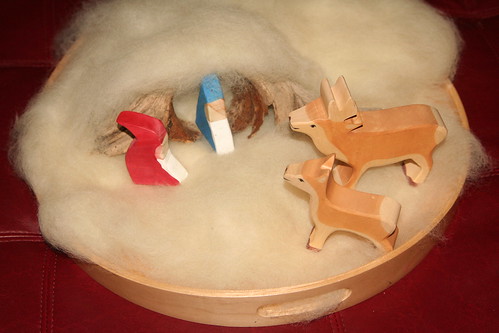
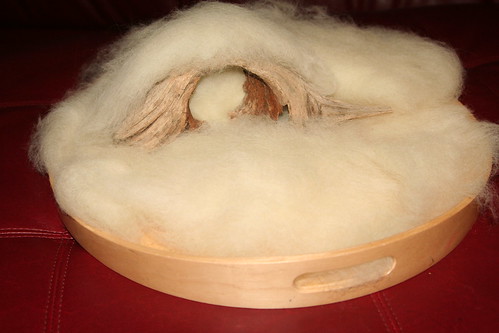
Buy a bag of wool batting. This material is often used as stuffing for toys or pillows, or can be wet-felted or needle felted. It is extremely versatile for all kinds crafting and fiber arts. It often comes in one- or two-pound bags. Tear off a layer of batting to make snow and place it on your playscape base. Add other bits to cover your base. Try to add a hiding place, such as a wooden cave or build a little den make of driftwood or sticks. Layer some more snow over the top of it.

Woolen Winter Playscape

If you have a small bit of silk, you can create a silken creek, perhaps. Now add some figures such as gnomes or animals. Or add some people.

Woolen Winter Playscape

You might also add a special rock or two. If you have a mama and baby animal pair, they might like to cuddle into the den you made. Resist the temptation to fill the scene or complicate it will too many toys.

Woolen Winter Playscape, wolf

Leave this simple scene for your children to find. They will elaborate upon it, change it, and remake it as they play. Their fingers will be warmed and comforted by the feel of the soft wool. They will respond to it and the feel of the wood and rocks in this simple scene.

Woolen Winter Playscape
If you find your child playing with the winter scene, ask him or her to tell you the story of what‟s happening. Or just listen to the play.

(When the play is done, the wool can go back into your craft supplies to be made into something else.)

Here

My view for the last several days

It is nearing the end of winter vacation. I am grateful for the good weather. The boys are playing outside. Asher is “painting” the window with a paintbrush and what I hope is water. Lucas is bouncing on a pogo stick. It’s a ka-chuncka-sqeak sound, over and over. Neighbor kids are in the play house.

Later I peek out and see Lucas cracking ice in the birdbath. A wave of noise floods the backyard when they tumble through the gate, then trickles out again as they move to the street in front of the house.

Some construction or demolition is happening nearby. I can hear the drone of heavy machinery doing work. The soundtrack in the house is the drone of the dryer, which I believe is trying to die.

Now I hear the boys playing stick wars outside, dueling it out with found tree branches, with smaller sticks-as-daggers stabbed through belt loops. They can never have too many stick weapons. I worry about their constant war games. But I have long since learned that I can sooner stop the moon from fattening than I can stop their games. To me they are frighteningly fierce. The boys ignore my pleas to play nicely. I am frequently told to chill out. At the present moment, I am grateful that their bickering and battling is taking place outside our home and not in it. There have been far too many arguments these last few days. Alas, it’s almost dark now and they will come galumphing in the front door soon.

I have all manner of things I want to be doing. My mind is full of chattering thoughts. I sit here, trying to refocus on what I have to do, telling myself to just be. I cannot to all. The. Things. I can only do one thing at a time (plus keep the clothes washer and dryer going).

Back to the editing. I tell myself that I can have a reward when I reach the end of this chapter. I can check Facebook, or write a few words here. I have already rewarded myself several times today with breakfast (after some work), with a shower (after some work). That’s how I roll, how I work alone year after year and stay motivated. Some days—especially dull days—I even break out teeth brushing as a separate reward for slogging through. “Want oral hygiene? Finish this chapter!” Hear the whip crack?

So, in the back of my mind, while I edit fantasy wars for couch-ridden adventurers with thumbs, I am kinda planning out some goals for myself, for this blog, for my work. I had a little time today to lift my head and look up, while the boys were away with grandma. I put a few events on the calendar. It seems that on 1/3 I am able to finally begin my new year.

Well, that’s where I am. Here.


Winter Solstice Love

upload

It was a beautiful glowing dawn on this Winter Solstice day, with a vivid slice of a rainbow in the west—a very nice way to end the solar year. I’m both grateful for all we enjoy—our blessings are truly innumerable—and hopeful that the new year will bring more love, more laughter, more art and play and leisure, and more light.

Dimmest and brightest month am I;
My short days end, my lengthening days begin;
What matters more or less sun in the sky,
When all is sun within?
—Christina Georgina Rossetti

Our sun does shine within, through all our trials both great and small. Each day we wake and pour our love and light into the world. We do our best.

Vivid dawn rainbow, with a second. Phone doesn't do it justice.

I’m not one to dwell on signs, but I’ll happily take this one: a rainbow as a parting gift and a cleansing, cold rain to bring in the new solar year.

Good people all this happy tide,
Consider well and bear in mind,
All that strong love for us can do
When we remember our promise true.

Now love itself stands in this place
With glorious beauty and pleasant grace;
To welcome us with open heart
And raise up welcome in every hearth.

Whatever life on us bestows,
Love’s mantle round our shoulders goes
Remembering this day’s delight,
To bring us help and mercy bright.

When darkest winter draweth near,
The light is kindled without fear;
Love sparks at Midwinter so deep,
This blessed time in our hearts keep.

When coldest winter draweth near,
Turn we to joy and make good cheer;
Remembering our vows so strong,
We raise our voices in this song.

Drive darkest want and need away,
Remember we this happy day.
Call love to witness, everyone,
And dance beneath the winter sun.
—Caitlin Matthews

Dawn

Today is full of preparations. I braved Costco for our holiday food shopping and left only when I couldn’t fit anything else in the cart. We had five guests over after school, a kind of unplanned end-of-term party. My boys are ready for a rest, which is not to say that they aren’t brimming with excitement about the holidays. They are just ready for some snuggling-in time, some extra time with each other and with Mom and Dad.

We are celebrating the Solstice tonight with a big pot of chili and a golden cornbread. We’ll have a fire in our fireplace and give lots of love to our little Solstice dog.

Our foundling dog's one-year anniversary with us. Happy "birthday" Solstice!

One year ago today, this golden fluffy creature bounded into my home with great excitement and settled in. It took me a while to accept that he was staying, but that was true only for me. Everyone else adopted him from the first moment. Now, I can honestly say, he has been a shining light of love and comfort among a whole lot of difficult stuff that happened in 2012. We’ve decided that today is Solstice’s “birthday.” Now we have even more to celebrate on the Winter Solstice!

Blessings of light and love to you on this first day of winter. May your hearts be full to overflowing, so that you may spread warmth, light, and cheer through all the dark days of winter.

Blessed be.


Our Second Week of Advent

IMG_3380

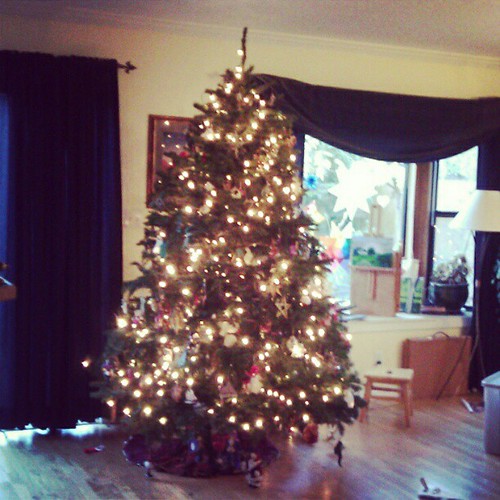
Our second week of Advent was full of plant goodness. We got our Christmas tree from a local lot—our schedules didn’t permit the usual trek up to the foothills to cut a tree at a tree farm. Rather than worry about that, we nabbed a gorgeous tree in about 10 minutes flat and had a whole afternoon to leisurely decorate it, while enjoying Christmas music, hot tea, and candy canes.

upload

It’s truly a beautiful tree, even if this photo isn’t.

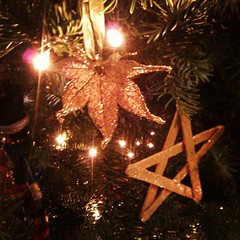
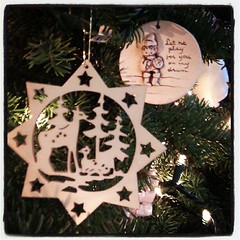
upload upload

I love unpacking our ornaments. This year, both boys got into the spirit of hanging ornaments and they told some of the origin stories themselves.

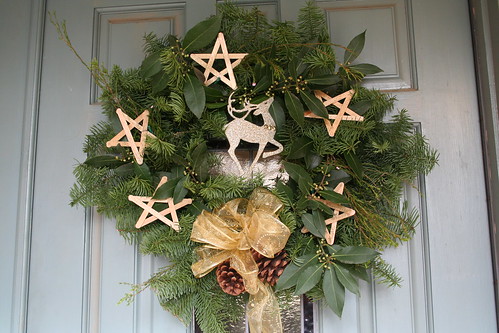
The Wreath I Made for Our Door

With boughs from the tree lot and bay laurel from my tree, I made a fresh wreath for our door. I bought a wreath last year and had the presence of mind to save the wire frame, so making this was a breeze. It cost me $1.50 for the reindeer and the ribbon. We made the stars last year and I love them.

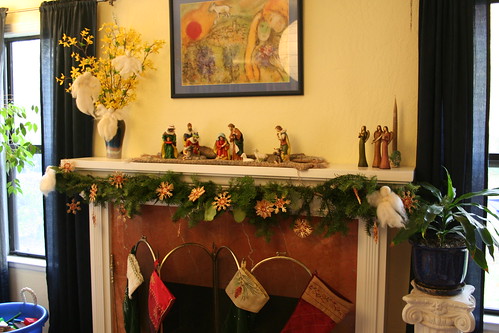
Mantel with Evergreen Garland

I had enough boughs leftover from the wreath project to make a whole garland for my mantel. It looks very much like last year’s mantel except for the real greenery. I adore the straw stars.

IMG_3667

Ian and the kids put up lights on our house and I added ornaments to some trees by our front door. It’s all rather festive!

IMG_3655

My garden currently features green tomato vines that I am gradually feeding to my chickens, growing cauliflower plants, and sugar snap pea shoots popping up in a pot. The tree out front is still full of golden stars. The heavenly bamboo is sporting gorgeous red bird berries.

I’m happy to have the Steiner practice of celebrating the four kingdoms during Advent to guide the schedule of some of our holiday traditions. It helps to have things spread out over the month instead of all at once, in an overwhelming tide of stuff-to-do. This week was indeed full of plants.

The truth is, I feel kind of stupid even writing about all of this because none of it matters in light of the tragic event in Connecticut. It has shaken me deeply—and I may be dwelling on it too much. What does it matter that my silly traditions go on, or happen on schedule? That we spend time beautifying our home and making it ready for the light and laughter and friendship and love that is our Christmas? It matters not at all compared to life and death and ultimate loss.

Or maybe it does matter.

Getting back to normal, participating in all the everyday acts of love and friendship, and celebrating life are the path to healing, I think. And it feels awkward and weird and yet what else is there to do? We hold our loved ones close, spend quality time, hug our friends, protect our children, and invest in love and beauty, happiness, grace, and gratitude.

I guess. It’s my strategy for now, anyway.

Love these

May we all find moments of happiness and peace in the coming weeks. May we find a way to celebrate and heal.

Santa Lucia Morning

IMG_3637

Santa Lucia Day Breakfast

Good morning! And happy Santa Lucia Day!

Santa Lucia Day Breakfast

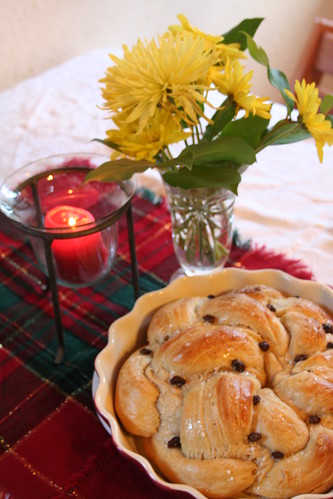
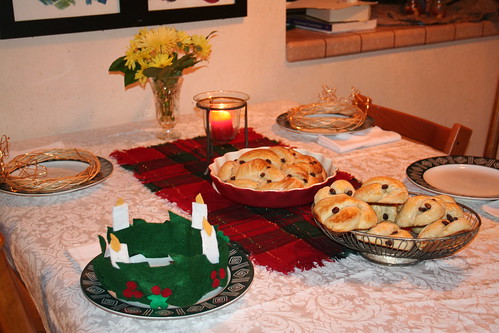
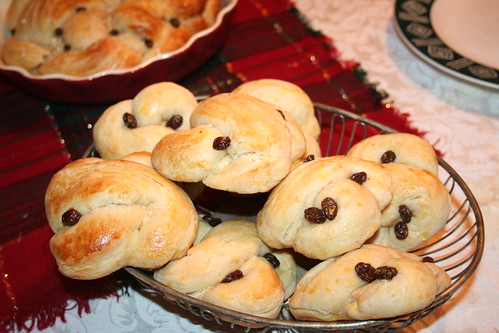
We ate a lovely breakfast of eggs and Lussekatter buns. Daddy told us about winter in Sweden and Santa Lucia Day—about how he used to walk to school in the dark and he wouldn’t see the sun until lunchtime, and then would have to walk home in the dark at 3 p.m.

Lussekatter for Santa Lucia Day

The Lussekatter turned out beautifully this year. My recipe is on my post from last year. These simple celebrations are getting me ready for Solstice and Christmas, I think. There’s something exciting about baking at 10 p.m. And while I am in no way a “morning person,” I love early morning magic!

Star Boy crown

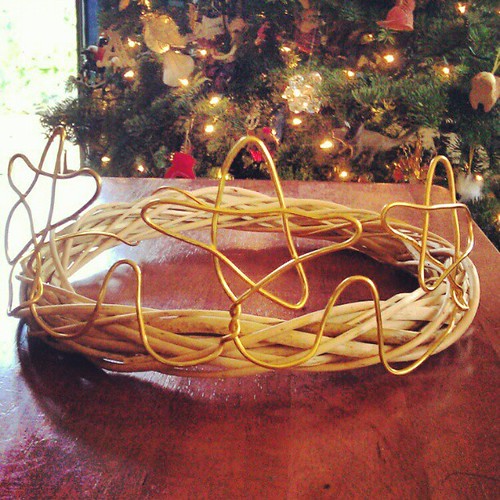
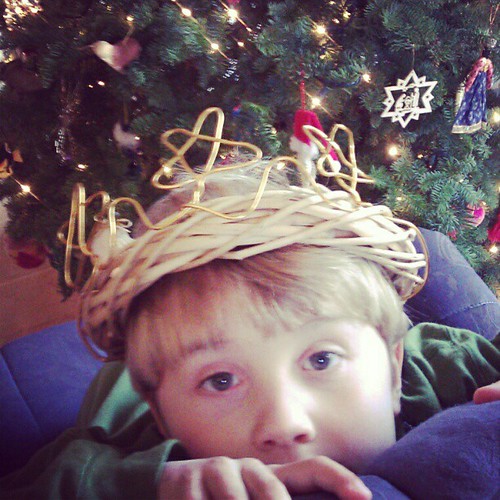
I made two star boy crowns yesterday afternoon for $2 each. They are … improvised. A wreath and a 6 foot length of very soft “florist wire,” both from the Dollar Store. I just bent the wire into three continuous stars and put a little wave in between them, then wrapped the ends around the back of the wreath and tucked them in. This design fit the small wreath perfectly.

I have everything I need to make pointy felt star boy hats like the ones Ian wore when he celebrated Santa Lucia Day at his university in Sweden in 1993, but I didn’t get the time to do it this year.

Star Boy crown for Santa Lucia Day

I think the crowns are cute, but my own stjärngossar (star boys) didn’t much want to wear them. Alas.

IMG_3652

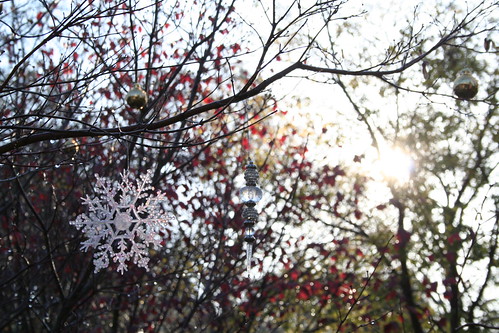
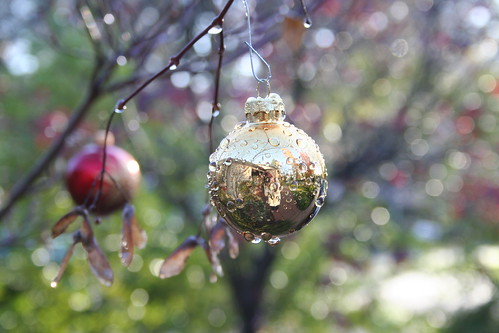
It rained last night, and there are shimmering jewels on the branches, sparkling in the weak winter sun.

IMG_3655

IMG_3645

Have a beautiful day!

Star of David Window Star Tutorial

IMG_3335

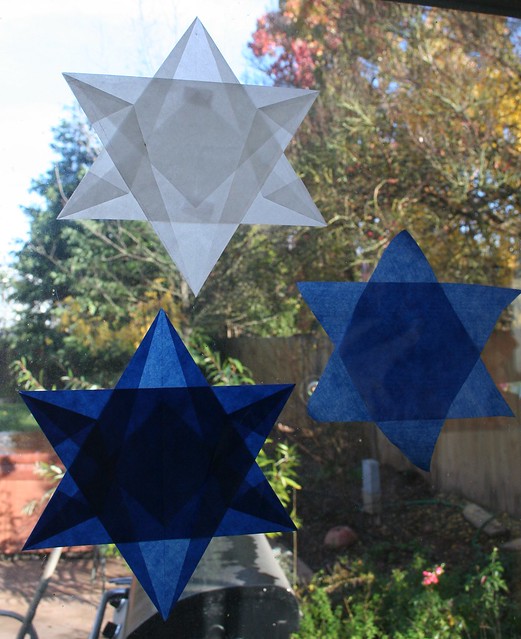
Today is the first day of Hanukkah, and although I am not Jewish, I found myself wondering about Hanukkah crafts and thought I might create something to share. I am very, very fond of (read “obsessed with”) window stars and I wondered if I could come up with a way of making one in the shape of the six-sided Magen David, or Star (or Shield) of David in celebration of Hanukkah.

Well, I have done so. I’ve never seen this window Star of David anywhere in Waldorf circles, so I believe I’ve invented this folding design. Here goes, humbly submitted with love:

Materials

  • 2 sheets of 6 x 6 inch kite paper
  • glue stick
  • ruler
  • tape

Tutorial

IMG_3322

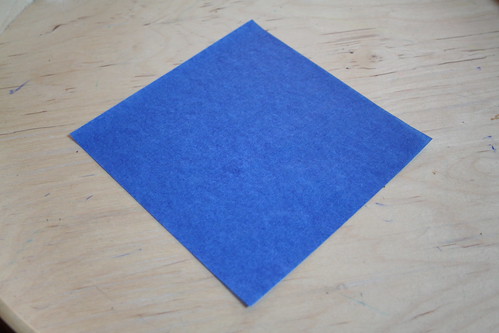
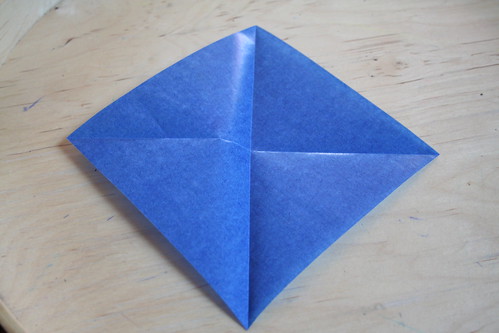
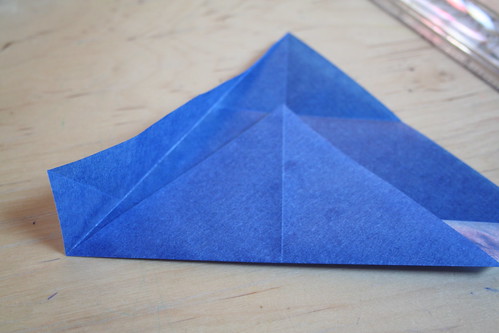
The aim here is to create two equilateral triangles without cutting your kite paper. Start by folding your first sheet diagonally, corner to corner. Open the paper into a square and fold it diagonally the other way, corner to corner. Your paper now has folds that make an X, or a cross when a corner is at the top.

IMG_3323

IMG_3331

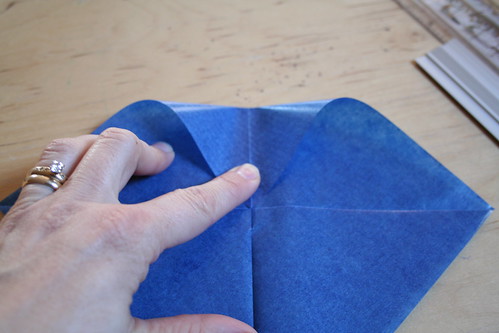
Hold the paper with one corner at the top, in a diamond shape. Fold the top corner down to the middle, where the two diagonal folds you made meet. Crease the paper there, but do not firmly press the fold down all the way. You want a little crease mark halfway in between the top corner and the middle of the square. Unfold the sheet into a diamond shape again.

IMG_3325

Now fold the bottom corner up to the crease you just made. Firmly press the fold; this one is permanent. You now have a fold on the bottom. This bottom fold is one side of your equilateral triangle.

IMG_3326

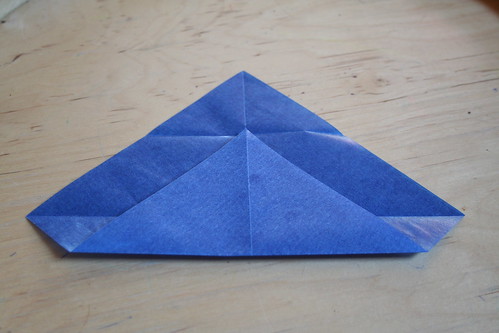
Hold the top point and fold the left side of the kite paper toward the center fold line. The bottom left corner will be where the bottom of the triangle begins. The top of this fold will be very narrow and the bottom will be pretty wide.

IMG_3327

Now do the same thing on the other side.

IMG_3328

IMG_3329 IMG_3330

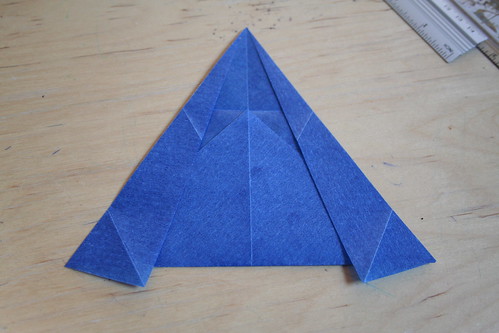
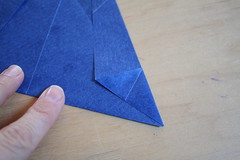
You have two little corners that extend down beyond the bottom edge of your triangle. Fold the left corner up until it meets the left edge of the triangle. Do the same on the right side.

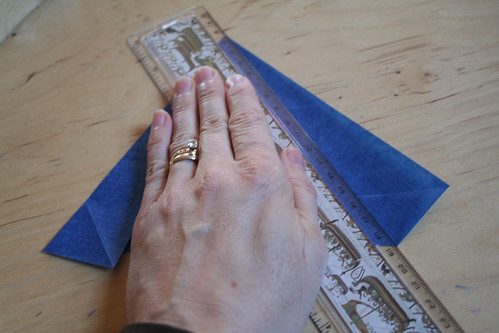
Get out your ruler and let’s see how we did. The bottom of your triangle should be 17 cm long. The left and right sides should be 16.5 cm. That’s not a perfect equilateral triangle but it’s really close. It will do.

Repeat all of the above with your second piece of kite paper.

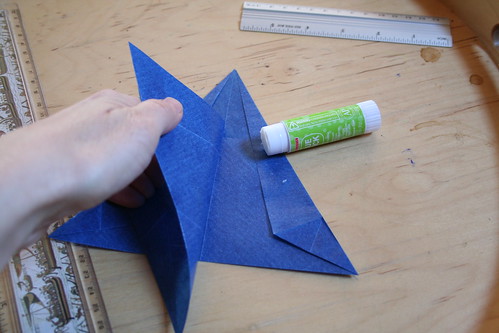
To assemble your Star of David window star, you want one triangle pointing up and one pointing down. They will overlap such that six points of equal size are visible. It doesn’t matter which triangle is on layered on top of the other. Be sure to align the center fold lines of both triangles.

IMG_3337

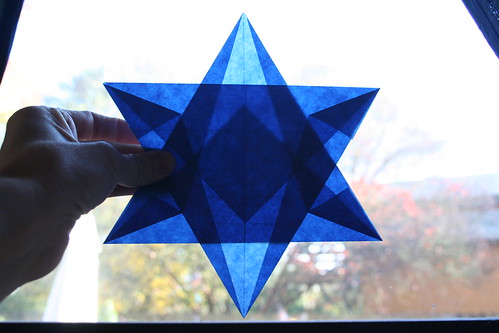
When you layer them together and hold them up to a light source, you should see a hexagram in the center, as well as other details created by your folding pattern. You want the distance from the bottom of each triangle to the tip of the point of the other triangle to be 4.5 cm. If you’ve got that measurement right, then the other four side points of the star should also be 4.5 cm from their tips to the sides of the other triangles.

IMG_3333

Use your glue stick to dab a very small amount of glue to fix the two triangles in place.

IMG_3338

Tape or glue your Star of David to the window. Voilà!              (c) Sara E. Wilson

IMG_3341

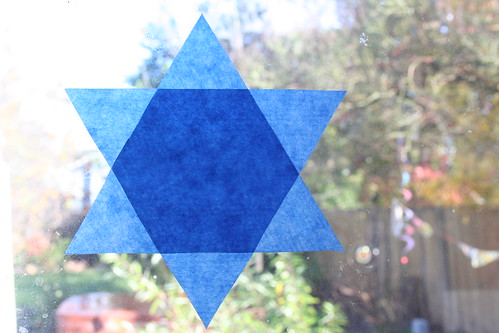
If you don’t mind cutting your kite paper, you can make a very simple Star of David that also looks beautiful with the light shining through it. This one is good for kids in older grades to make on their own because they can practice measurements and angles. Use one side of the kite paper to be a side of your equilateral triangle. With a protractor, measure a 60 degree angle, make a pencil mark near the center of the opposite side of the square. Then draw the line. Measure 15 cm. That’s your side length. Make another 60 degree angle and draw another line to intersect the first line you drew. All sides must be the same length: 15 cm. Now that you’ve got your equilateral triangle drawn, cut it out. Repeat these steps to cut a second triangle and then layer one over the other to make the six-pointed Star of David. In this version, the center hexagon is very visible. Simple and lovely. (And the truth is, even if your triangles aren’t perfect equilateral triangles, this star will still look terrific!)

There are other nifty Hanukkah crafts in the Winter Festivals E-Book, created by myself and Eileen Straiton and published by Little Acorn Learning. In it you can find poems, crafts, songs, caregiver meditations for celebrating a number of festivals of light, including Santa Lucia, Hanukkah, Solstice, Yule, and Christmas. We’d be very happy if you checked out our e-book and help us spread the word.

Happy Hanukkah! May we all enjoy the love and light of true friendship during this beautiful season.

Kind Saint Nicholas

IMG_3321

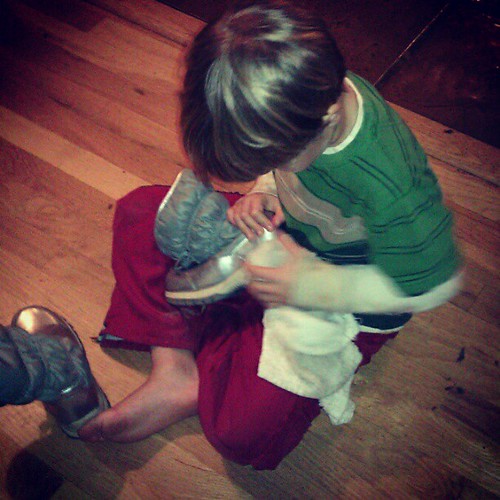
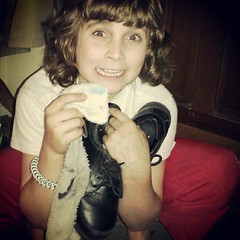
Yesterday was the feast of Saint Nicholas and we marked the holiday in our usual small ways. The boys polished their shoes and put them out near our door. We also left out some hay for the saint’s donkey to eat. (Lucas left a note for Nicholas, asking for oranges, a taser gun, and a katana; the kid can dream big!)

Polishing boots for St. Nicholas Day Eve of St. Nicholas Day

IMG_3320

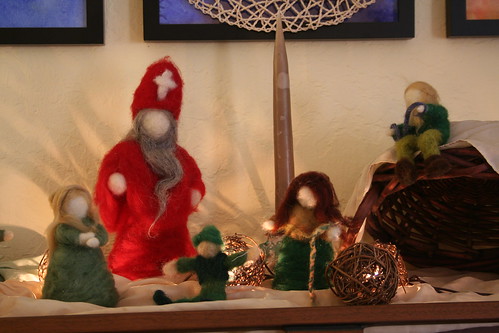
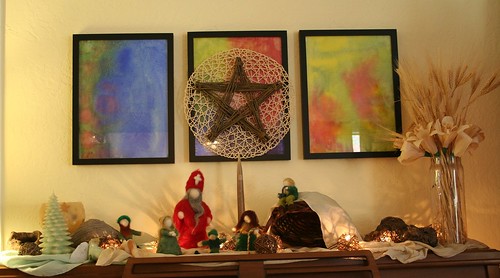
I updated our nature table a bit, with Saint Nicholas surrounded by some little children. Together we read Christine Natale’s Saint Nicholas stories. My favorites are the ones when Nicholas is a boy because he shows generosity in ways that children can—by sharing what he has, by cheering people and giving comfort to those who are sad, and by being kind and generous to those who are different, disadvantaged, or disabled.

In the morning, we all found some treats and treasures in our shoes. Nicholas must have come in the night! Lucas and Asher got oranges, fancy chocolates with honey caramel inside, a bag full of magnetic hematite stones (gold for Lucas and rainbow iridescent for Asher), and they each got a beautiful heart-shaped agate worry stone. (We parents also received worry stones, too, and I think we need them more than the boys do. They are delightful for hands to find in pockets.) Simple. Sweet. My kids think it’s out of this world to be allowed a chocolate first thing in the morning!

Saint Nicholas also visited all the children at school. He and Rupert brought oranges, cookies, and crystals to Asher’s Kindergarten class, and he brought chocolates and pretty stones to Lucas’s fifth-grade class. I wish I had a photo, but I wasn’t there.

My kids chose some toys they no longer want to keep and we are donating them to others. We have a pile of donations outside at our curb, just waiting for the United Cerebral Palsy donation van to come and pick them up. It always feels good to give away things that no longer serve us to those who need them more than we do.

I think Saint Nicholas must be pleased with us. I am.

  • About Sara

    Thanks for visiting! I’m Sara, editor and writer, wife to Ian, and mother of two precious boys. I am living each day to the fullest and with as much grace, creativity, and patience as I can muster. This is where I write about living, loving, and engaging fully in family life and the world around me. I let my hair down here. I learn new skills here. I strive to be a better human being here. And I tell the truth.

    Our children attend Waldorf school and we are enriching our home and family life with plenty of Waldorf-inspired festivals, crafts, and stories.

    © 2003–2018 Please do not use my photographs or text without my permission.

    “Love doesn’t just sit there like a stone; it has to be made, like bread, remade all the time, made new.” —Ursula K. LeGuinn

  • Buy Our Festivals E-Books


  • Archives

  • Tags

  • Categories

  •  

  • Meta