Summer Garden Salad

524548_3617626724075_448463044_n

I whipped up this salad last night and it was so delicious. This is a great way to sneak fresh zucchini into a meal. Everybody has extra zucchini at this time of year! We served it with popcorn and it was a perfect supper for a scorching-hot day.


1 whole cucumber, chopped

1 whole red tomato, chopped

1/2 c yellow or sungold cherry tomatoes, halved

1 small zucchini, shredded

1-2 T fresh parsley

1 avocado, cubed

1/2 to 1 c chopped carrots

1/2 gypsy pepper

1/2 c kalamata olives

2 T shredded horseradish cheese

a few dashes of Tajin fruit seasoning (a mix of chili peppers, salt, and dehydrated lime juice)


Dressing

1/4 c kalamata olive brine from jar

2 T olive oil

2 T rice wine vinegar


Chop veggies and parsley, add shredded zucchini and shredded cheese and then toss. Mix olive brine, oil, and vinegar in a jar, shake and pour over salad. Toss well.


Tutorial: Create a Mermaid Crown and Wrist Ribbons

Mermaid Crown

Who wouldn’t want to be as graceful as a beautiful mermaid or noble merman, living in an underwater wonderland? This play costume—a mermaid crown and wrist ribbons—is something you can create in stages, or do only the part you like best. Mermen might prefer just the crown, without the veil. The wrist ribbons encourage so much imaginative play for boys and girls alike. They can be water flowing while your merfolk swim. They can be magical water powers made visible.

Materials for Mermaid Crown

  • a craft-foam visor
  • jewels, beads, and/or small seashells (Tip: look for packages of jewels and rhinestones for decorating flip flop sandals! Craft stores have inexpensive kits.)
  • low temperature glue gun and glue sticks
  • ½ yard of veil fabric (tulle, netting, etc.)
  • scissors, sewing pins, hand-sewing needle and thread
  • sewing machine
  • notions and ribbons

Materials for Mermaid Wrist Ribbons

  • ¼ yard satin or acetate fabric
  • ½ inch wide elastic
  • notions and ribbons

Materials

Make Your Mermaid Crown

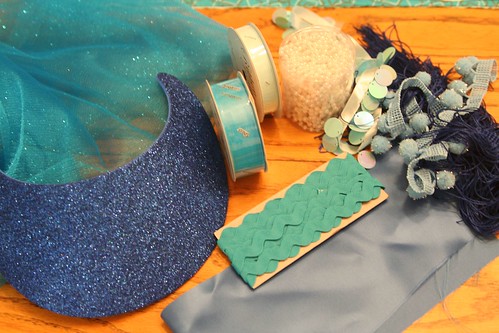
Begin by gathering your materials. You will need a clean, flat surface to work on. First, remove the elastic or plastic coil that is the back of your foam visor. You will put it back on later.

Now decide how you want your headdress to look. Will it have points like a queen’s crown? Will it be scalloped like a seashell? Turn your craft-foam visor over and sketch the shape you want. When you’re happy with what you see, cut your foam with scissors.
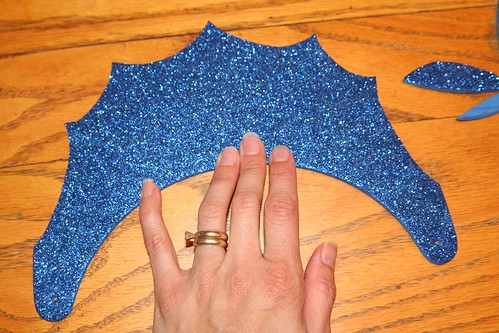
Cut the Visor into a Crown Shape

Now play with your notions and jewels, beads, and/or shells, placing them on the visor here and there, until you have an idea how you want them to be arranged. Take some time with this part because once you glue the items to your visor, it will be hard to remove them if you change your mind about their placement.
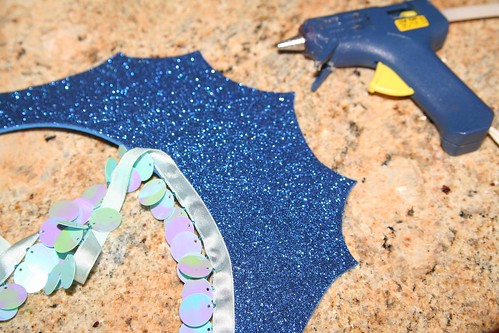
Adding Fringe

With your low-temp glue gun, glue on any trim (such as in this photo) and your decorations.
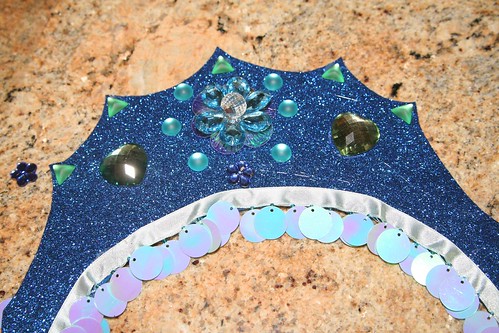
Gluing on Gems
It’s a good idea to measure to find the visor’s center. Try to arrange your biggest, most impressive or most special decorative item in the very center.

Using your glue gun and the smallest drops of glue, begin by gluing the special center item. Other smaller jewels or seashells can then be glued on. If your design is symmetrical, do the same item on both sides before moving on to a different jewel. You’ll have to pull off the strings of glue that may result from gluing on the jewels.

Have you decided to make a veil for your mermaid crown? (If you’re making this for a boy to play a merman, you may wish to skip this part.) Take your veil material (tulle, netting, etc.) and fold it in half so that it has two layers. You might measure your child to decide how long you want the veil to be. I decided I wanted the top layer of the veil to be shorter than the bottom layer. (Depending on the fabric you chose, you may wish to hem the bottom edges of your veil.) Pin the layers in place and then sew a seam about 1 inch from the top fold. This creates a tube through which you can pull the visor’s back elastic or plastic coil.
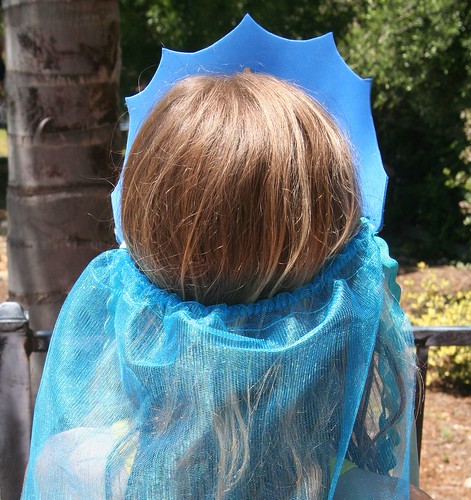
Mermaid Crown Back

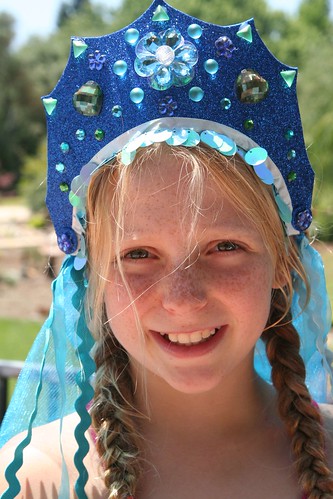
Measure the visor on the head of your child, and shorten the elastic or plastic coil accordingly, so that it fits. (The coil on my visor is visible in the photo above.) You might wish to glue this part onto the visor so that it’s permanently attached. This spot, where the crown attaches to the back can be decorated with another jewel if you wish (see below at the child’s temple).
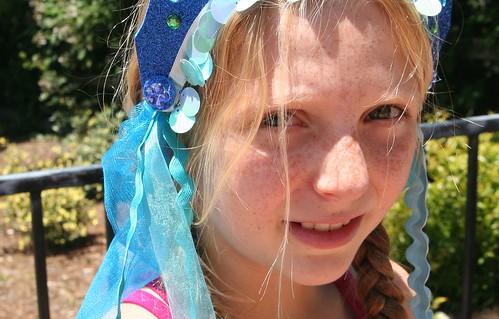
Mermaid Crown Detail

If you have ribbons or notions for decoration or long mermaid locks, fold them in half and with a needle and thread, sew them on to the corner of your veil, where the elastic attaches to the visor, so that they are firmly attached and can trail either in front of the shoulder or behind like hair. Keep in mind the age of the child who will wear this costume. The more decorations you add, the harder it will be for the child to put the crown on herself. (I ended up not using several items that are in the photo at the beginning of the tutorial.)

Congratulations! You’ve made a beautiful headdress for a lucky mermaid, or a handsome crown for a merman.

Sew Your Mermaid Wrist Ribbons

Wrist ribbons are a huge part of dress-up play in our home. You might be surprised at how well your child takes to these simple accessories. There is a bit of sewing involved, but it’s pretty easy.

The first step is to measure your child’s wrist using the elastic. You want the elastic band to be snug enough not to fall off the wrist, but not too snug as to feel tight. You also want to have about a 1 inch overlap, so that you can sew the elastic securely closed.

Now that you know how long it needs to be, cut two pieces of elastic that length. Lay out your covering fabric (satin or acetate). You could be very careful and measure this, but you don’t really need to do so. The object is to cut two strips of fabric so that they are twice as long as your elastic pieces and about 2 ½ inches wide. Turn in ¼ inch on both sides of your fabric strip and the ends and iron it flat. Sew the flat rectangle’s ends together to make a ring. Now fold your wide ring in half to make a long skinny ring with the right side of the fabric out. Make sure the width of your skinny ring will accommodate your elastic, but don’t actually put the elastic into the ring yet.
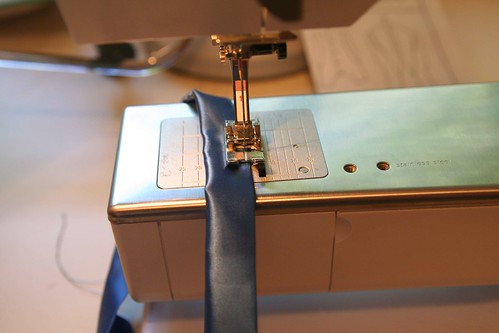
Sewing the Wristband

Top sew along the very edge of the long skinny ring to make a skinny tube. Don’t sew the ring completely closed. Leave an opening of a few inches so that you can insert your elastic.
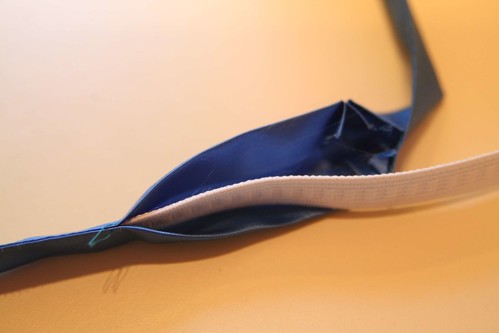
Insert the Elastic

With a safety pin on one end of the elastic, insert your elastic into your skinny tube of fabric. Bunch up the tube and join the ends of your elastic together with the appropriate overlap. Sew the elastic ring securely with a good zigzag stitch. You don’t want the elastic ring to pull apart when the child is putting the band around his or her wrist. At this point you have what looks like a hair scrunchie with a small opening in the side.

Gather up your ribbons that will be trailing and, with a few stitches, tack them all together at one end. I used the same notions as on the mermaid headdress, but you can use any ribbon. Consider painting some white satin ribbon with watercolors to create a watery effect.

Painted Ribbon

Now, insert the tacked end of your trailing ribbons into the hole of your ring and pin them in place.
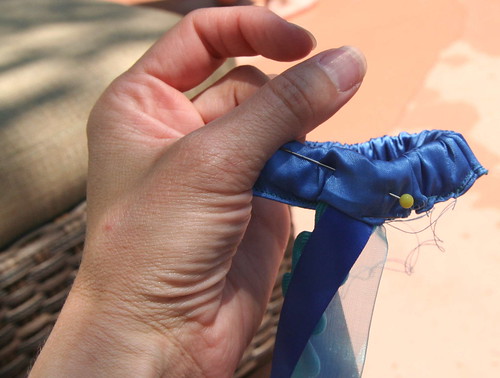
Wrist Ribbon Detail

By hand, with needle and thread, sew the ribbons in place to the elastic and sew the satin ring closed around them. I simply whip-stitched the opening closed and sewed the ribbons in firmly.
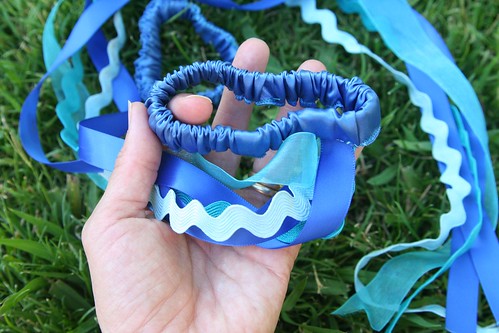
Finished Wrist Ribbons

Repeat all the steps so that you have two wrist ribbons.
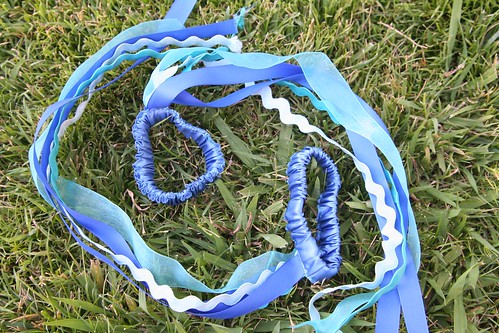
Finished Wrist Ribbons

If the ends of your ribbons want to fray, you can sometimes use a match and carefully melt the fibers at the ribbon ends to seal them. I suggest you first test this out on a ribbon scrap before you try to melt the ends of your finished wrist ribbons. You don’t want to harm your creation.

Now all you need to complete your mermaid or merman costume is a play silk tied around the child’s waist for a tail!
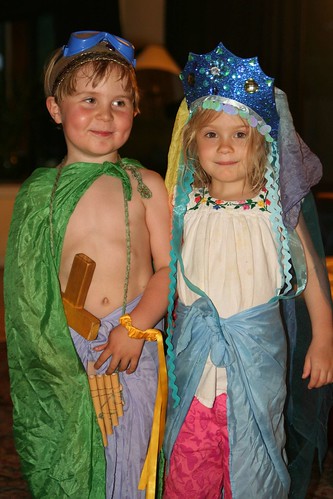
Merboy and Mermaid

You might be surprised at how your child uses these costume pieces. Perhaps the headdress or crown and the wrist ribbons you make will be used all together, or in different ways at different times. In this final photo, you can see that my son and his friend felt like using some of them at that moment, and found plenty of extra accessories (sword, goggles, pan pipes, cape) to transform themselves into a happy merfolk couple!

Happy sewing!

Local Evening Safari

208841_3562774232797_1261923719_n

It’s been a bummer week for me. I’ve worked a lot. I’ve struggled with my current roster of projects and I have lots more work in my future. Last night, my mother-in-law gave us a big break by keeping our kids for dinner, which allowed Ian and me to go on a mini date. We had a lovely sushi dinner. (When I’m feeling beat-up by life, I always want sushi.)

185972_3562763952540_294711063_n 378231_3562780632957_553814106_n 375649_3562784153045_253169516_n 406214_3562766272598_1725675600_n

When we picked up our kids that evening, I just wasn’t ready to go back home. So we drove to Folsom, parked the car and walked over the historic truss bridge and into the old part of town. It was a great opportunity to visit a part of town we don’t often visit and the spontaneity of it felt really good.

487186_3562761752485_1142156933_n

We had great views of the Rainbow Bridge and Lake Natomas. I enjoyed watching the fishing boats move into their nooks for an evening of fishing.

548998_3562788633157_1791747691_n

Along the way we ran into our friends, which was a nice surprise. They were out looking for sticks to make into arrows and wild blackberries—you know, like you do.

578841_3562863875038_1531595046_n 547907_3562827554130_1794200393_n 309438_3562806153595_871188723_n 528950_3562851954740_652411575_n

We walked through the main street and stopped in a New Age shop to admire the crystals and gems (Asher is very font of such things). We saw a huge crystal ball made of quartz with a price tag of $3800! Madame Trelawney must be missing it.

528937_3562909196171_1611436396_n

As dusk fell, we looked into glittering shop windows and then popped into Snook’s ice cream and candy shop for a treat. I really didn’t realize that Folsom has nightlife on the weekends. We saw several open wine bars and pubs. A band was setting up to play in the Folsom Hotel bar. We also discovered a cute and cozy coffee shop. I think this means Ian and need to come back another time when we’re alone.

403811_3562883275523_1740015677_n 304803_3562824034042_826227803_n 306809_3562898315899_427370118_n 600059_3562821633982_1198261163_n

For an unplanned ramble, it was very fun. We walked back to our car in the dark. Asher was pretty tired by the end, but he never complained once; his steps only got slower and slower as we neared the car. It was a perfect summer night.


Mermaid Aquarium Tutorial

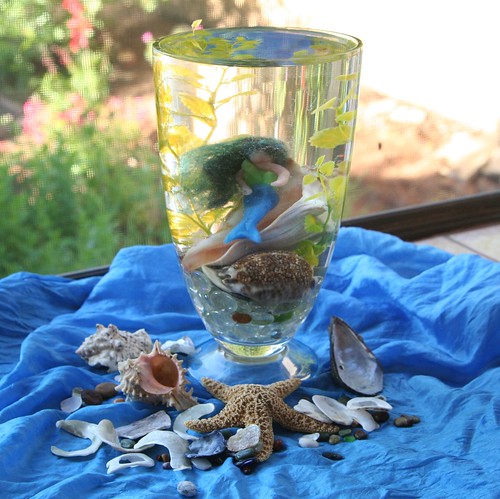
Mermaid Aquarium Finished

Have you ever wished that a mermaid would visit your home and be your best friend? You might get your wish, if you set up the perfect place for her to stay: a mermaid aquarium in your home or school! This is a simple project that older children can create by themselves or with a little help from you, and which may truly enchant younger children. While you’re assembling your mermaid aquarium, dream up some stories that feature your mermaid friend. With your mermaid visitor beside your child’s bed, tell mermaid bedtime stories.

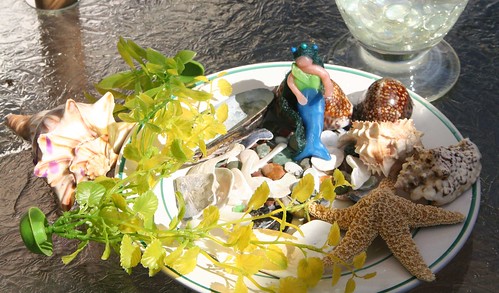
Mermaid Aquarium materials

Materials

  • beeswax (color choice is up to you; I used blue, green and flesh colors for my mermaid)
  • wool roving (any color you like works for mermaid hair)
  • fishing line or thread
  • straight sewing pins
  • a large, clear-glass vase (a gold-fish bowl or small aquarium would also work very well)
  • seashells
  • found beach glass, beach pebbles, or glass gems from the craft store
  • a plastic aquarium plant (if your container is very large, you might want two of these)
  • water

Begin by gathering your materials together. This is a nice project to do outdoors, especially since you may spill some water, so craft outside and enjoy the fresh air. If you don’t have a plastic aquarium plant or would rather use a natural material, you can wet-felt or needle-felt some seaweed out of wool. There are many kinds of seaweed, so any shape of plant will do nicely.

Mermaid out of Beeswax

Model Your Mermaid

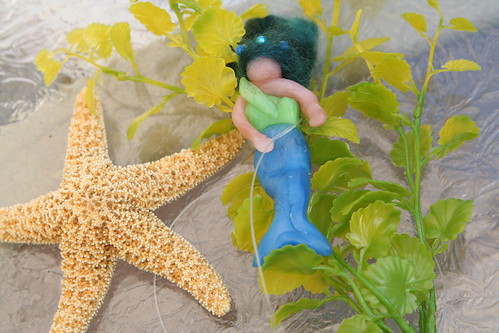
Your first task is to fashion your mermaid out of beeswax. Mermaids (and mermen) come in many different colors. Your child may have an idea of how this mermaid should look. If the beeswax is hard to mold, consider dipping it in warm water for a few minutes, or let the heat from your hands and breath soften it. Younger children find this very helpful when working with beeswax. Start by making the mermaid’s tail first, then create the mermaid’s upper body and arms. Finally, add on her head, making sure to let the wax from the body join the wax of the head. Your mermaid probably looks funny at this point. Mermaids are known for their gorgeous hair, right?

Use a shock of wool roving of any color you like and arrange it on your mermaid’s head to look like her luxurious locks. (You might want to do this next part out of the sight of younger children.) Now carefully take a few sewing straight pins and pin the wool hair to the mermaid’s head by aiming the pin down through her head and into her upper body. If you are careful, you can arrange the pins so that they look like hair decorations or a crown. Since children may be handling the mermaid, make sure the pins don’t stick out from her body to poke someone. Fortunately, if a pin’s tip emerges, you can just back it out and try again. The beeswax easily “heals”  if you rub out the hole. Perhaps the children would like to give the mermaid a name now.

IMG_2373

Assemble the Mermaid Aquarium

Now that your lovely mermaid is done, you can begin to assemble her underwater home. Fill the glass jar about a third of the way full with beach glass, pebbles, or glass gems. Your child may already have such treasures in his or her special collection, and may wish to contribute to the mermaid’s home. Consider adding seashells you have gathered from the shore (after you rinse them well). Real seashells will help your mermaid friend feel at home. Even the youngest children can easily add these special items to your vase.

Beeswax Mermaid

Be Thankful

Talk about where these treasures from the sea came from. Thank Mama Ocean for being the home to such amazing shelled creatures, and for wearing down the pebbles until they are smooth as silk. Sing a mermaid song.

Your aquarium is beginning to look inviting, isn‘t it?

Mermaid Aquarium in progress

The Tricky Part: Beeswax Floats

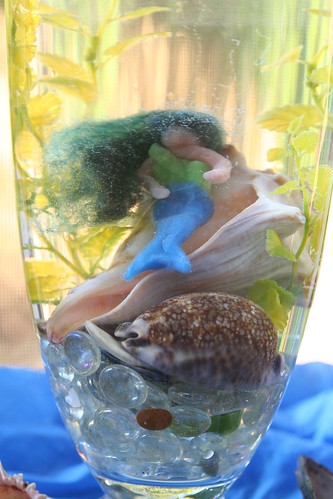
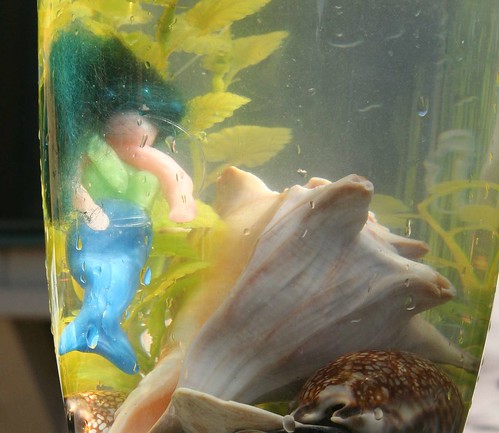
Now comes the only challenging part. Your beeswax mermaid at first wants to float on top of the water, but we know she will be more at home under the water. Take a small length of fishing line or thread and gently tie your mermaid to your plastic aquarium plant, or to a heavy seashell. We tried doing both, and found we were happiest with how she looked when anchored to the heavy shell. If you tie your mermaid to the plant, now is the time to plant the base of the plant into your pebbles or gems so that the plant looks like it’s growing there at the base of the aquarium. If you opt to tie your mermaid to a heavy shell, place your plant first, then add the shell and mermaid to the aquarium last. You probably won’t be able to see the fishing line or thread.

In thes photo above, it looks like our mermaid is swimming. In the next photo, she is resting atop a seashell. Feel free to move the objects around until you achieve a scene that you like.

IMG_2397

Enjoy Your Mermaid Visitor

Now place your mermaid aquarium on your summer nature table or at a child’s bedside. Arrange other beach treasures around her on an ocean-like silk. It will help her feel at home! If you tell a few mermaid stories, your child may become enchanted by the mermaid guest and may whisper secrets to her during the long twilight of summer evenings.
Perhaps the mermaid will tell the children stories of her life in the sea, the beautiful underwater merfolk cities, her fish friends, and water magic. Perhaps, if you‘re very lucky, the children will tell you these stories, too.

Please note: Your child may wish to touch the water and play with the mermaid, so your placement of the mermaid’s aquarium home may depend on whether spills are a problem. Also, if your mermaid visits for a long time, you may need to change the water to keep it looking clear. In doing so, you may need rinse the gems, pebbles, and shells. But then, you and the children get to remake it all over again!


Care

Morning Light at Grandma's House

I spent some time caring for my grandmother today. It’s a long story, but her usual caregivers were temporarily unavailable and my dad asked me to step in and help. At first I was annoyed. I’m very busy with work right now and I’m facing multiple deadlines. I agreed to do it because—obviously—it is the right thing to do; nevertheless I was feeling put out. Even though I am never asked to do this.

Now I am so glad I did.

Beloved Grandma

This is my beautiful grandmother. She is 93 years old. I love her very much.

It is hard to see people you love changing as they age, changing noticeably each time you see them. I don’t like it. I am inexperienced when it comes to being around and caring for elderly people. I was scared to be in charge of her well-being.

It was fine. It was easy, thanks to my dad and others who have this territory all mapped out already. I just had to follow some simple instructions and all the difficult stuff was done when I arrived. I am grateful that grandma took her medications so easily at my request—that was part of what I was worried about.

I wandered a little while I was there, trying hard to notice things about her—about her home, about her likes and loves, her collections, her style.

Treasures

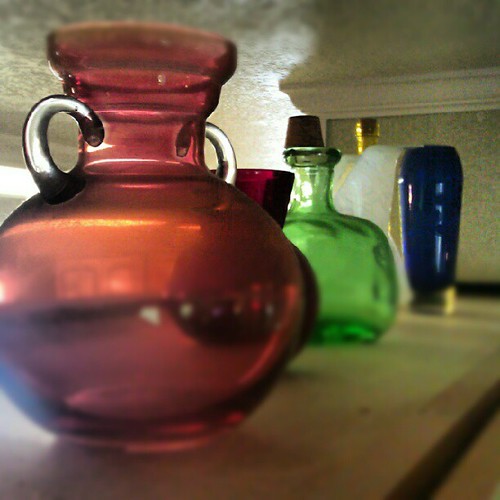
There are careful touches in every nook, beloved items placed with intention.

Colorful Glass

The marks of her hand and her sister’s hand, Nana, with whom my grandmother lived for most of her life, are everywhere.

Just So

Photographs of family members cover walls, bookshelves, and tabletops. Paintings and prints, delicate wallpaper, rich drapes decorate the space. Beautiful light is everywhere. Everything is just so.

But that’s not all I noticed, while I was there. It’s not only my grandmother’s careful hand I see. I see my father’s, my uncle’s, and my aunt’s—they are part of her world every day, ensuring that she is OK, makes it to doctor appointments, and has company. They stay with her when her caregivers are away, do the shopping, and much more.

I see it in a hundred gifts given with love over the years.

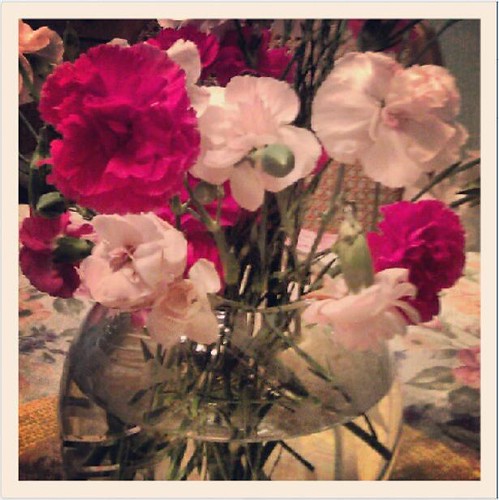
Carnations at Grandma's House

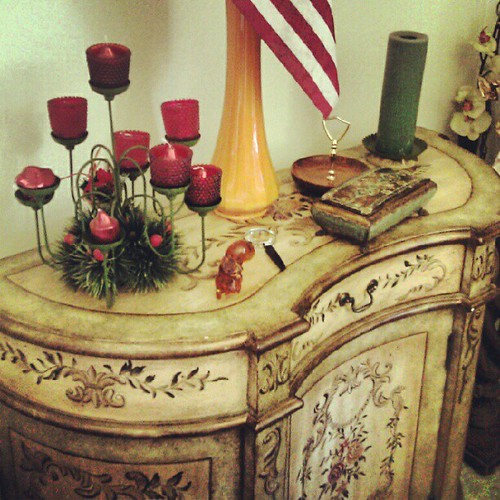
The evidence of caring is all around, especially in the fact that my grandmother is still living in her home, despite her age and infirmities. It’s in the American flag that’s hanging on the house, just as it has done every July of my grandmother’s life. Someone put it there for her. It’s in the tiny china dish, fashioned in the shape of a teapot and painted with flowers, that holds her daily medications for after breakfast. It’s in the coffee, water, and orange juice that are served to her in the morning, and in the fact that they let her put syrup on her frosted danish. It’s in the special, mechanical chair that she sits in to watch her game shows. It’s in the living orchids and other houseplants that someone carefully waters. Fresh carnations sit in a vase on the dining table. Her pale yellow socks matched her pale yellow outfit, even though she cannot dress herself. I see it in her hairdo, which is set faithfully every week, and in her manicured nails.

None of this is easy, this maintenance that is done to keep her well and comfortable. I am full of wonder and gratitude, and not a little sadness.

Life is full of mighty lessons these days. I am trying hard to learn them.

Surprise Evening Picnic


The River is FAST this Summer

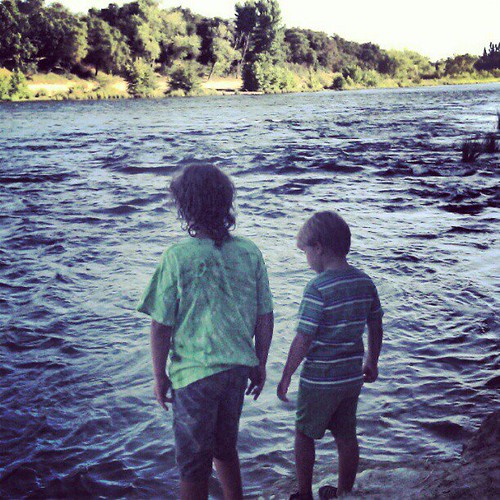
We surprised the boys with a picnic dinner the other night after swimming. We haven’t had a chance to leave town yet, so I’m trying to find little slices of heaven close to home. The river is running very high and very fast this summer. Although there was a small beach, I wasn’t comfortable letting the boys get in the water.

I read about this secluded little park on the American River and decided to check it out. Its entrance is sandwiched between two private residences in a ritzy neighborhood and the park is very small. They have the eleven-space parking lot closed during the summer, which I take to mean that the ritzy neighbors don’t want riffraff using their park.

Boys at River's Edge

Nevertheless, we weren’t the only people there. One family was fishing. Another group brought their dog down for … well, they seemed to want him to get wet. He wasn’t too keen on that plan. One couple swam a while, which looked fairly risky to me.

Our Beautiful River

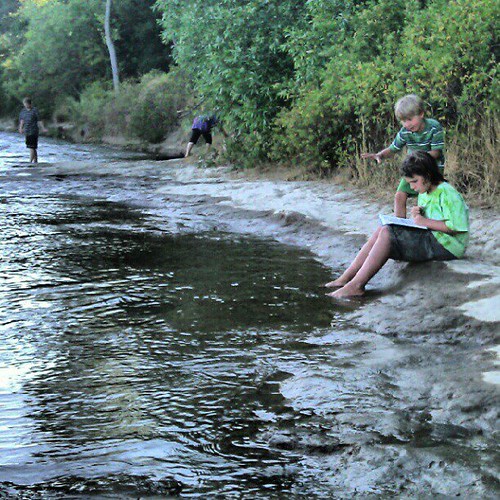
We waited for Daddy to bring Solstice dog and our picnic dinner, as the boys and I came here straight from swimming practice. It was a beautiful place for a picnic.

American River at Sunset

We watched the sun sink lower and light up the far bank.

Canada Goose

We watched the Canada geese and mallard ducks. Solstice dog wanted those ducks sooooo bad.

Canada Geese

I (obviously) played with Instagram on my phone camera.

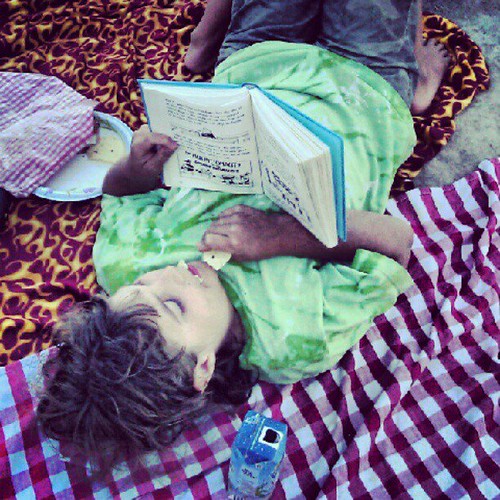
Picnic Reading

Lucas enjoyed some time with his Wimpy Kid book. Asher and Daddy explored a bit, and Asher tried to play with another little boy who was there. We ate ham sandwiches and apples and blueberries and corn chips. Simple. Perfect.

Summer Swimming

Swim Practice

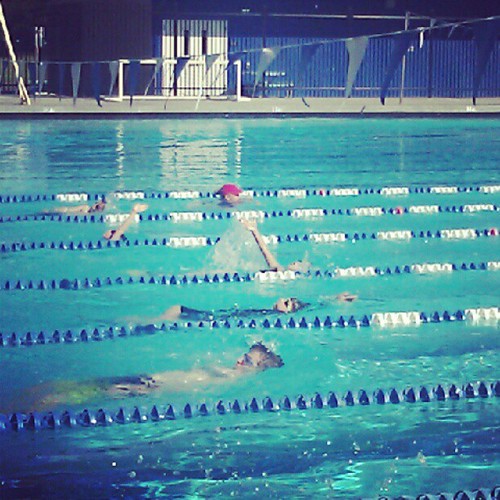
My darling boys are sure getting good workouts in the pool these days. We are nearly done with Lucas’s a six-week swim team commitment. There are four more days of swim, with the last day a meet.

IMG_7196

Lucas was on this American River College Aquatics youth swim team two years ago, and because he was younger then and the length of the commitment a couple of weeks longer, it was kind of a slog. Long before the season was finished, he was ready to be done. I had to coax and cajole to get us through it because I felt it was important not to quit. Last summer, he wasn’t interested in doing swim at all.

But this summer has been altogether different! This summer, Lucas is older, stronger, and more confident. This summer, three of Lucas’s classmates are on the team with him. This summer, he’s better able to take direction and coaching and incorporate new knowledge into his strokes. This summer, the session is a tad shorter. All of these factors have combined to make swim team a lot of fun. He’s getting great exercise four days a week, having fun with friends, and getting to be a stronger swimmer.

IMG_7266

IMG_7272

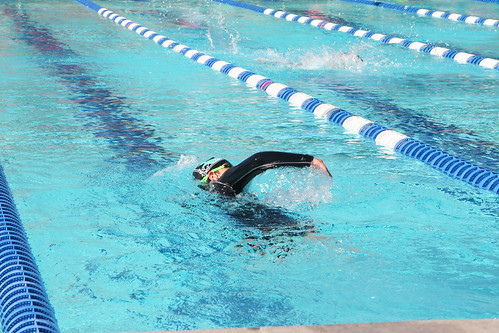
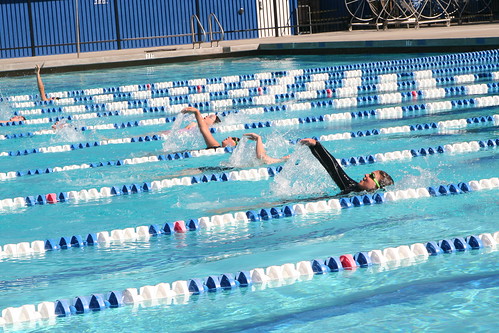
This summer, he’s learning the butterfly stroke. His backstroke is beautiful. On June 21, there was an “inner squad” swim meet and these photos are from the meet. The competition of the thing didn’t interest him much at all. He was just determined to swim hard and have fun. I love the photo above because he is smiling while racing!
IMG_7227

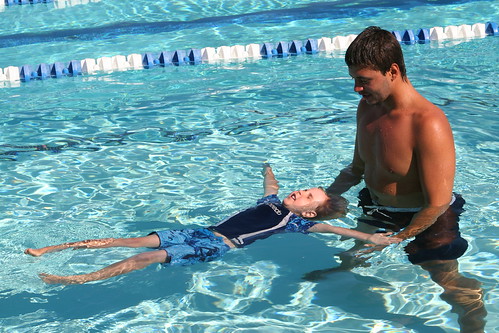
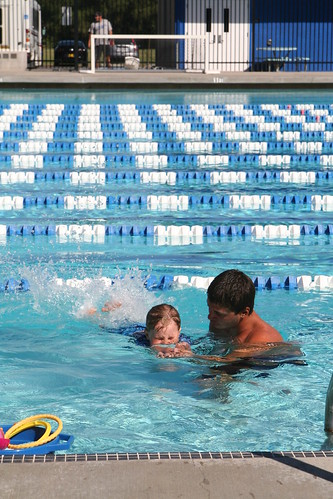
And for three weeks now, Asher has been taking swimming lessons. This young man (I’ll call him S) is Asher’s very patient and gentle teacher. Asher has learned to trust him during these 20 minute lessons, and S has coaxed Asher along from the point when he was afraid to get his face wet, to floating, going underwater, diving for toys, swimming in streamline position, and now doing “freestyle,” which for Asher is a kind of flailing about and moving slightly forward. But it’s a fantastic start. Now Asher goes underwater for fun, even when S isn’t asking him to. Now Asher jumps from the side of the pool into the water, knowing that S will help him up.

IMG_7241

IMG_7235

And now when Asher and I swim together, he’s willing to practice these new skills with me, even though it’s not lesson time and  S isn’t there to encourage him. This last week, Asher was paired in a group lesson with another little boy, but the boy was very frightened and the swim instructors split them up because they weren’t at the same level. So Asher’s been getting private lessons with S and lots of attention. I watch him closely. I see him negotiating, asking S to come a little bit closer so he doesn’t have to swim quite so far by himself. And he’s always got a smile on his face while swimming with S. This week, S had Asher “dive” with assistance. He sort of carried him head first into the water from the edge of the pool.

The last time Asher had swim lessons, two years ago, he hated every single moment of it. He has come so far!

There are four more days of lessons. For my part, I’m ready to be done driving to the college pool and waiting around in the hottest part of the day for my boys to do their swimming, but I’m so grateful this summer’s swim experience has been so successful and fun for both of them. I’m proud of them. There’s so much good stuff here to build on!

Letting Go: A Life Skill

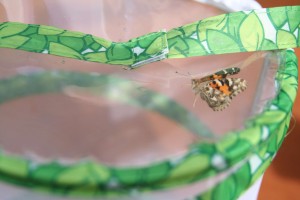
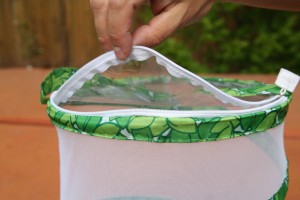
Butterfly Garden Habitat

“We need in love to practice only this: letting each other go. For holding on comes easily–we do not need to learn it.” —Rainer Maria Rilke

Sometimes letting go isn’t easy, especially if what you need to let go of is something you treasure. In many ways, parenting is one long process of letting go; every day we parents and caregivers are challenged to give a little more space, a little more trust, and a little more independence to these growing beings in our care.

Letting go of hurts, mistakes, expectations, and even our loved ones is, at times, part of life, and finding healthy ways to do so without struggle or stubborn holding on is a valuable life skill. Letting go can make way for new ideas, new opportunities, and new knowledge. It‘s also an excellent reminder to live in the present moment, and not in the past.

It‘s a good idea to find opportunities for your children to practice this skill of letting go. Here are two simple ideas that are perfect for children in the summertime.

Rescued Ladybugs

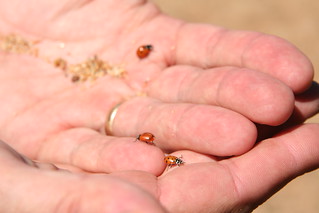
Buy a container of ladybugs at your local nursery. Watch them, hold them, admire them, perhaps compare their colors and count their spots. Wait until evening, when the beetles are less likely to fly away, and then release them in your garden. Gently sprinkle them onto your roses and other plants that attract aphids. The ladybugs will be your garden protectors, and your children will be doing the right thing by letting them go free.

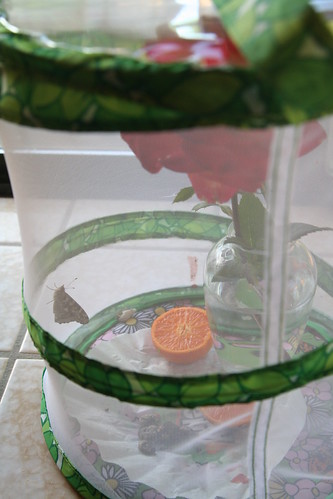
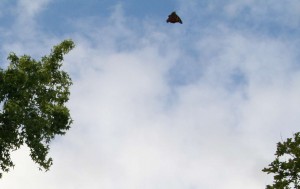
Order a butterfly garden and live painted lady caterpillars from a company such as Insect Lore. When your caterpillars arrive, watch them eat, grow, and transform into chrysalides. Then carefully place them into your mesh butterfly garden. After approximately seven to ten days, your painted lady butterflies will emerge. You can keep them for a while; they will eat sugar water or fruit juice in captivity. After a few days or a week pass, release the butterflies into the wild. Keep your eyes open because they move surprisingly fast! Whenever you see butterflies fluttering among the summer flowers, you’ll fondly remember the ones you set free.

Fly away, butterfly! Fly up so high. Fly away, butterfly, fly up in the sky!

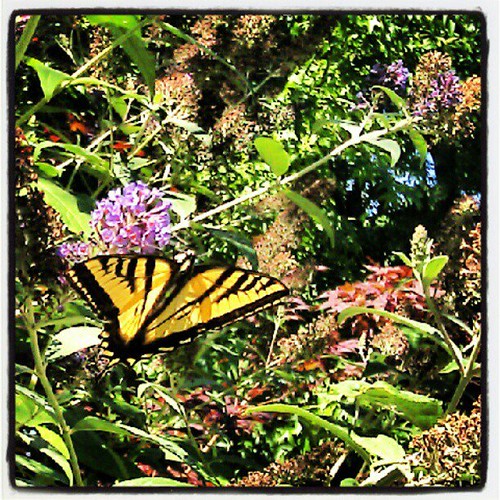
This Moment: Swallowtail

Swallowtail in my Garden

Inspired by SouleMama {this moment} – A Friday ritual. A single photo – no words – capturing a moment from the week. A simple, special, extraordinary moment. A moment I want to pause, savor and remember.

Sweet 4th of July

548236_4216633136721_1475153551_n

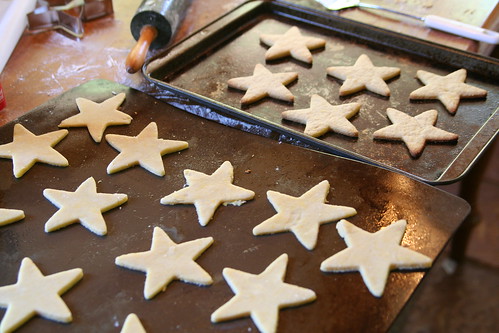
We enjoyed a lovely 4th of July this year, celebrating with many friends in the swimming pool and out. I left my camera at home, but I snapped a couple of shots of our patriotic treats in the making. And the photo above is from Parnassus, who kindly took the “after” cookie shot for me.

IMG_7465

Asher helped me a little with making the sugar cookies. (Why, oh why do I always forget that my sugar cookie recipe calls for the dough to be chilled 2-3 hours before rolling it out?!)

IMG_7470

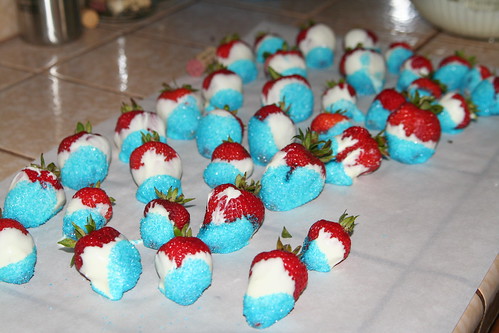
And although I kicked off these pretty strawberry treats, Lucas was kind enough to come along and finish making them for me while I was busy with the cookies. He did a nice job, I think! These are strawberries dipped in white chocolate and blue sugar. Easy as can be, considering you can melt the white chocolate chips in the microwave on medium in just a few minutes. The berries must be dry before you dip them. I saw these on Pinterest and I’ve spent 20 minutes now trying to trace it back to the original creator/photographer and I can’t find her/him to give proper credit.

Anyway …

I hope you had a chance to hold your loved ones close yesterday and remember all the good you have in your life. I did.


  • About Sara

    Thanks for visiting! I’m Sara, editor and writer, wife to Ian, and mother of two precious boys. I am living each day to the fullest and with as much grace, creativity, and patience as I can muster. This is where I write about living, loving, and engaging fully in family life and the world around me. I let my hair down here. I learn new skills here. I strive to be a better human being here. And I tell the truth.
    Our children attend Waldorf school and we are enriching our home and family life with plenty of Waldorf-inspired festivals, crafts, and stories.

    © 2003–2018 Please do not use my photographs or text without my permission.

    “Love doesn’t just sit there like a stone; it has to be made, like bread, remade all the time, made new.” —Ursula K. LeGuinn

  • Buy Our Festivals E-Books


  • Archives

  • Tags

  • Categories

  •  

  • Meta