Humble Cornhusk Flowers

IMG_6489

Cornhusks are a humble but versatile natural material. These protective sheaths from ears of corn, when dried, can be used in many lovely crafts. Here is a way to turn simple, natural cornhusks into flowers fit for decorating your family’s Thanksgiving table, adorning special gifts, or as accents for fall wreaths. If the children in your life need something special to do on Thanksgiving day, this is a fun, inexpensive, and rewarding activity.

Materials

• package of cornhusks from the Mexican food aisle of your grocery store
• 4-inch floral picks with thin wire at one end (floral wire on a spool can be used instead)
• green floral tape
• food dyes (optional)

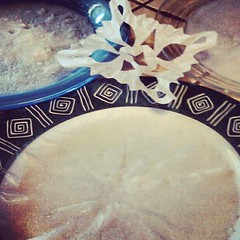
Cornhusks come out of the package as wrapped triangles that are broad at one end and fairly narrow at the other. For these flowers, you’ll be splitting a large triangular cornhusk into strips of about 1 inch wide at the wide end. These strips will naturally taper to a point at the other end. It’s really not important to be precise in splitting the strips. These will end up being your flower’s petals. Make about five or six strips and then set them aside.

IMG_6475

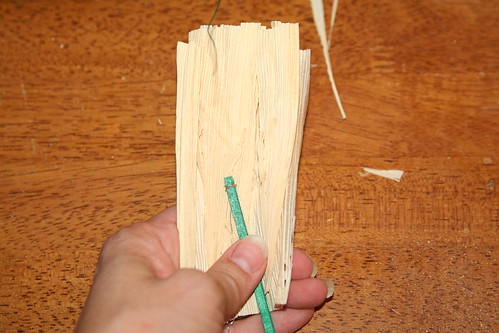
Take a cornhusk triangle and cut the bottom narrow half off so that you have in your hand the widest part. Lay a floral pick in the center with the wire pointing down and laying beside the wooden stem.

IMG_6474

Now roll the cornhusk into a tight tube around this floral pick. The top will look something like the above photo.

IMG_6476

Pull the free end of the wire up, letting it split the cornhusk in one spot, then wrap it tightly around the rolled husk with the pick inside. This is the finished center of your flower.

IMG_6609

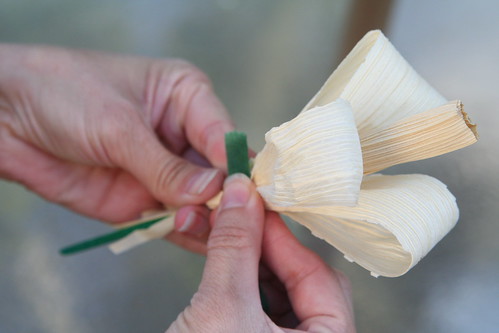
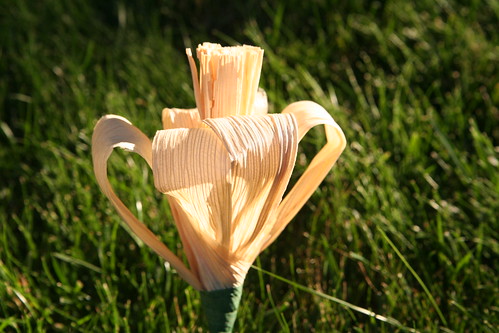
Now it’s time to add your petals. Many petal styles look great. One style is to take a strip of cornhusk (about 1 inch wide at its wide end) and fold it very gently over onto itself, making a loop. Hold both ends and place them next to your flower’s center. With one hand holding the flower’s center and the first petal, repeat the folding over of the next petal with your free hand. Add it to the flower. Repeat this until you have three to six petals ringing your flower’s center. Hold all the petals to the flower center with one hand.

IMG_6615

IMG_6622

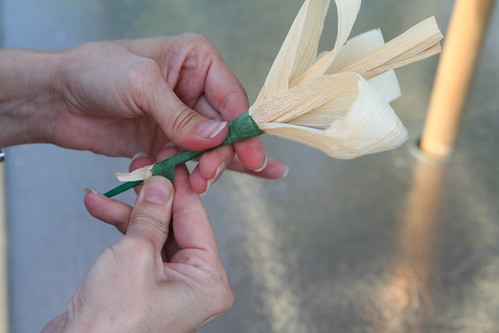
Gently stretch the floral tape slightly, and then place the tape’s end on top of your petals where they join the flower’s center (where the base of the flower is). Begin wrapping the tape around and around your flower’s stem by spinning the flower while keeping the tape gently stretched so it sticks nicely to the previous layer of tape. Work the floral tape all the way down the flower’s base and onto the wooden floral pick stem to its very end. You now have one complete flower, something like this one below.

Cornhusk Flower

Cornhusk flowers can be made with many variations.

IMG_6478

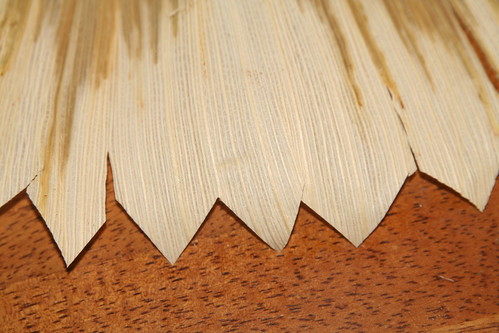
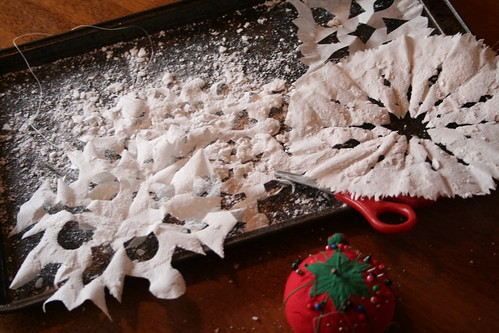
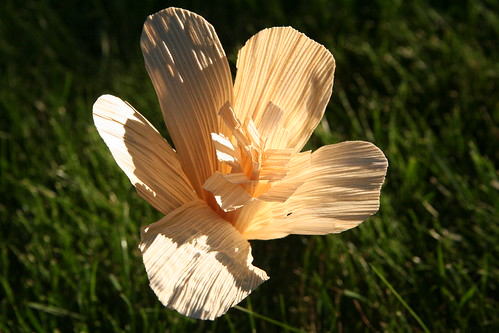
Another way of making flower petals is to unfold a whole cornhusk and cut dags into it every inch or so. Cut the narrow end of the cornhusk off and then wrap these dagged petals around your flower’s center.

IMG_6493

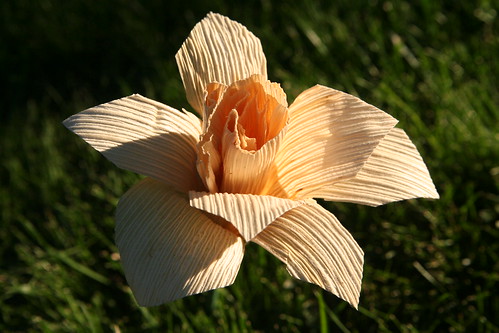
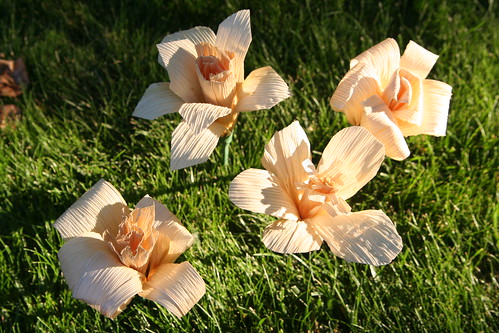
You can then gently pull the petals away from the center and curl them slightly with a finger or a pencil after you have them secured with floral tape. This can result in a lovely lily shape.

IMG_6491

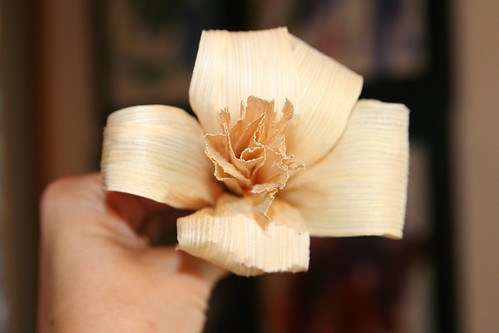
You can also round the ends of your petals like so. In the photo above, you can see that I split the flower’s center into narrow strips and bent them to achieve a different look for the flower’s stamens.

IMG_6490

Some flowers have centers that extend beyond the petals. In some flowers, the opposite is true, and you can trim them to be shorter than the surrounding petals.

IMG_6492

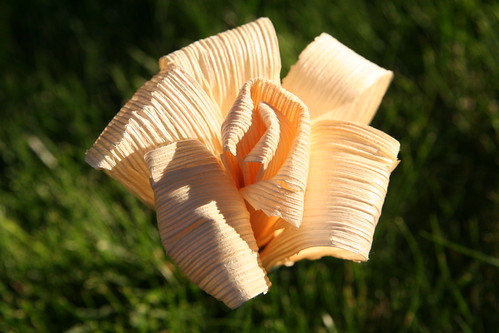
Another possibility is to roll a folded cornhusk to make a center like in the photo above. This one looks more like a rose.

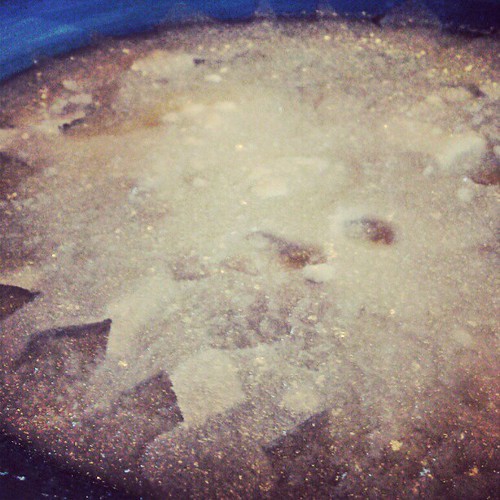
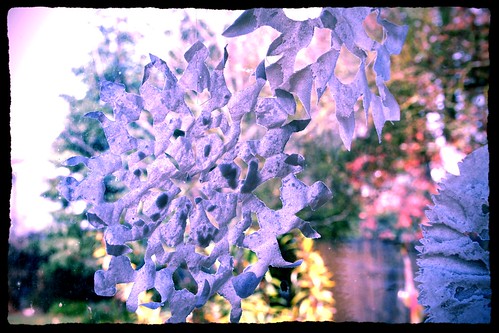
Finally, if you’d rather your cornhusk flowers have colors instead of being natural color, that’s easy to achieve by soaking the cornhusks in a bath of water with food dye. Before you begin making flowers, you’ll have to let your dyed cornhusks dry completely, but that should take only a day or so. Food dyes will achieve pastel colors. If you want vibrant colors, you can dye the cornhusks with fabric dyes. Imagine the possibilities!

Cornhusk Flowers

Cornhusk Flowers

Here’s my humble cornhusk flower bouquet and table decoration. Will these flowers grace your Thanksgiving table?

Snowflake Fairies Tutorial

Snowflake Fairy with Face

In between chilly outings, when we’re inside warming up, is a wonderful time to appreciate the beauty of winter. Paper snowflakes are festive and look lovely decorating windows and our family cuts beautiful snowflakes every year.  Here is a project for making lovely snowflake fairies to flutter and dance in the air. Hang them over a heating vent to see them blow about, just like a real, falling snowflake.

Note: Some Waldorf educators recommend that you not make needle-felted figures and animals in the presence of young children, who may find the action of repeatedly needling the woolen bodies to shape them somewhat disturbing.

Materials

Materials

  • coffee filter
  • chenille stems
  • needle and thread
  • scissors
  • wool batting
  • needle-felting needle and pad

IMG_9664 IMG_9665

Start by forming the skeleton of your fairy. Cut your chenille stem in half. Twist a loop into the center of one half; this is your fairy’s head with arms attached. Fold the other half over (body and legs). Then put one leg of the folded chenille stem through the loop. The two pieces are now interlocked. About an inch farther down, where the pelvis of the figure would be, twist again to make two legs. You should now have a wire “stick figure” like you see in the right photo above. Fold the smallest possible bit of wire over at the end of each limb, to form tiny hands and feet and keep the cut wire from poking anyone.

IMG_9666

Take a small bit of wool roving, roll it into a ball, and insert it into the loop of the figure’s head. Then wrap a bit more roving around the head and begin to needle it in place into an attractive head shape.

IMG_9668

Using very small bits of wool, wrap around the figure’s body and arms. I find making a crisscross of wool that goes from shoulder to waist in both directions to be a good method. Needle this wool until it’s firm and stationary. The fairy’s arms may need more needling than the body to make them graceful and slender.

IMG_9677

Now add a bigger fluff of wool to create a woolen petticoat. You can either allow the fairy’s feet to show below the fluffy skirt, or make the skirt extend below the feet.

Cut

Fold a white, circular coffee filter into quarters or eighths and cut a snowflake. Cut a very small tip off the snowflake and unfold it.

Snowflake

This is the only tricky part: Gently guide your fairy’s head through the center hole in your snowflake. Go slowly to avoid tearing the paper. If the head won’t fit through the hole, refold the snowflake and cut the tip just a tiny bit more to widen the hole and fit the head through.

Snowflake Fairy in Progress

You have a choice now. You can either put the fairy’s arms through holes in your snowflake (if you have such holes) to make a dress (see above), or you can gently move one arm at a time up through the neck hole of the snowflake to make it a skirt instead of a dress. This part is not unlike carefully dressing a small child, except your fairy will wiggle less.

IMG_9680

Next, use another chenille stem and form a circle. Twist the two ends together to seal the circle. Then twist the circle into a figure eight. These are your fairy’s wings. Use a bit of wool to tack the wings onto the fairy’s back. Now give your fairy some white hair, and allow it to flow over the center of her back where the wings meet the back.

Snowflake Fairy with Belt

If you made a dress, you might wish to belt it with a ribbon, bit of string, or a braid of wool roving.

Snowflake Fairy with Up-do

Here is a fairy with a skirt. You can give your fairy a fancy hairdo, if you like, by coiling wool into a bun and needling it onto her head. You can also add a face using tiny bits of color needled in for eyes and a mouth (as seen in the top photo). The fairies are adorable either way.

Snowflake Fairies

Now, you can make more snowflake fairies and hang them near each other to dance in the air, or display them with other snowflakes.

 Snowy Garland wih Snowflake Fairies

Please vote for Love in the Suburbs at the Circle of Moms Top 25 Creative Moms blog list. You can vote once per 24 hours until Jan 30, and you can vote for more than one blog on the list! Thank you!

Borax Crystal Snowflakes

upload

It’s January, so that means snow, right? Well, it does mean snow in lots of places, but not here in Northern California. So, we usually make our own snowflakes to brighten what inevitably becomes a month of fog and rain and mud. These snowflakes are made with Borax laundry booster (sodium borate) to add an ice crystal texture and shine. It takes a few days to make these.

Materials

  • white paper or coffee filters
  • scissors
  • Borax laundry booster
  • plates
  • boiling water
  • needle and thread

Tutorial

Start by cutting out your snowflakes. I tend to love very lacy snowflakes, but for this project I suggest you leave some nice solid areas. My son Lucas theorized that small cuts were better for these, and he may be right.

January upload

Boil a little water on the stove. Pour it into a glass mixing bowl and then add Borax until it will no longer dissolve into the water. When you see some borax sitting as a sediment in your bowl, you know your solution is right.

Place each snowflake on a dinner plate. Pour a little of the Borax solution onto the plate—just enough to cover the whole snowflake. Now you wait.

upload

The Borax will start to crystallize on the paper and plate. As it dries, the water will become clearer. You can gently pour off the excess water to speed the drying process. Allow the snowflakes to dry completely, the very carefully pry them up off the plate with a butter knife.

IMG_3852

Some of the Borax may fall off, but most of it will stick to the paper. With your needle and thread, sew a few stitches at the top of your crystal snowflakes and then hang them in the window where they sun can glint off their crystals.

IMG_3857

Enjoy!

Valentine Window Transparencies Tutorial

Hello! [This post has been edited to remove a broken Pinterest link. 2-13-15]

10-Pointed Window Star

Anyway, I’m kind of obsessed with window stars lately. I got some new supplies for Christmas (kite paper and a new book and paper kit for making window stars). They are challenging for me and so rewarding when you get it right. I made a ten-pointed star the other day and I had to enlist Ian’s help to get the angles right when assembling the points. Then we had to buy a protractor!

Green Window Star

This eight-pointed star I made is new.

Rose Window, Not My Creation

And I accidentally-on-purpose bought this rose window transparency from an 11-year-old kid on Etsy, a shop named Knitting Momma. I couldn’t help myself. It’s so pretty and I like the gnome head shapes within it. See them? (Pay no attention to my dirty windows.)

Heart Window Transparency Cropped

And that got me experimenting with my kite paper. I made this transparent window valentine using three pieces of square kite paper, two red and one white. I like this one a lot. The kite paper is only 6.25 by 6.25 inches, and I wondered if I could do something similar but bigger with tissue paper.

Red and Pink Heart Transparency

Now, I wouldn’t say my valentine window transparencies are perfect, but we learn in the doing, right? So here is what I did, and what I learned along the way, in case you would like to play along.

Materials

  • tissue paper or kite paper in valentine colors (red, pink, dark pink, white, purple)
  • scissors
  • iron on medium heat and ironing board
  • glue stick
  • tape

Tutorial

First, lay several pieces of tissue paper of different colors on top of each other. Iron them flat on your ironing board with the heat on medium. Any wrinkles should iron out nicely. Do not spray with water while ironing.

Cutting Hearts Tissue Paper Hearts
Then, with your papers still stacked, fold it once in half and then in half again. You should now have four stacks of tissue paper. Take one stack, fold it in half, and cut out a big heart shape. Iron out the center crease. Separate the hearts that you’ve just made. They are pretty much the same size, so they can be stacked up again in layers as you make your designs.

Cutting a Smaller Heart from a Bigger Heart  Assorted Sizes

Try cutting one heart into smaller hearts by cutting along the heart’s edge. You’ll end up with two usable pieces: the smaller heart and the heart-shaped edge with an open center. Do this a few times and also cut additional hearts out of the scraps from the big hearts.

Take one large heart layer and fold it into quarters or eighths, like you would if you were going to cut a paper snowflake. Along the main fold line, cut a small half heart. When you unfold, you’ll have four or eight cut out hearts. Be careful about where you’re cutting, as it’s easy to cut beyond the border of your heart since it’s not a symmetrical shape. This heart transparency shows the four small cutouts. (While it’s folded, you can cut additional shapes such as diamonds or triangles if you wish, like you would for a snowflake.)

Pink Heart Transparency

Cut Out Designs

Try folding one layer in half and cutting a simple design. Here is one with tulips.

Now play with the layers you have made. Put a whole heart on the bottom and start stacking other layers. Arrange them in a pleasing way, mixing the colors as you like. Hold them up to the window or a lamp to see how the layers affect each other when the light shines through them. The more layers you have, the darker the shapes will seem. You can also put layers on the back of your heart.

Pink and Red Heart Transparency

Keep in mind that you want the valentine window transparency to look nice both when the sun shines through it during the daylight, but also when it’s dark outside, when the interior light of your home will shine on the front of the heart.

When you have the papers arranged the way you like them. Use a small amount of glue from your glue stick to stick the layers together—and be very gentle because the tissue paper rips easily. Try to keep the outer edges lined up precisely. Gently add dabs of glue until all the layers seem sandwiched together. Now iron the valentine window transparency flat again. You can use a small dab of glue stick glue to stick the transparency to the window, or use tape.

I Made These!

You most likely have small hearts leftover from making the big ones. You can make small transparencies as well. The smaller the valentine transparency, the simpler your design will probably be. Several sizes look great all together, I think.

Valentine Window Transparencies

This Magical Window Stars book is terrific. Many of the designs are very complicated, which is a thrill for me. Maybe I’ll work up to them. The book has many star designs that require rectangular papers. In the meantime, you can find a wonderful free tutorial on folding a simple window star here at GardenMama’s blog.

This Origami Suncatchers kit is the one I got for Christmas. It contains the kite paper, a book of 20 star designs, and a glue stick. I find the instructions and photos in this kit to be easy to follow.

A Toy Garden sells both square and rectangular kite paper. This shop is where I buy lots of gifts for my children. A Toy Garden also sells the Magical Window Stars book and a book about rose windows called Rose Windows and How to Make Them.

And finally, if you want to purchase window stars, I recommend peeking in the Etsy shop of Harvest Moon by Hand. Ann is the best at making window stars. Her work is stunning.

Happy Valentine’s Day to you and your loves!


  • About Sara

    Thanks for visiting! I’m Sara, editor and writer, wife to Ian, and mother of two precious boys. I am living each day to the fullest and with as much grace, creativity, and patience as I can muster. This is where I write about living, loving, and engaging fully in family life and the world around me. I let my hair down here. I learn new skills here. I strive to be a better human being here. And I tell the truth.

    Our children attend Waldorf school and we are enriching our home and family life with plenty of Waldorf-inspired festivals, crafts, and stories.

    © 2003–2018 Please do not use my photographs or text without my permission.

    “Love doesn’t just sit there like a stone; it has to be made, like bread, remade all the time, made new.” —Ursula K. LeGuinn

  • Buy Our Festivals E-Books


  • Archives

  • Tags

  • Categories

  •  

  • Meta