Tutorial: Making Leprechauns

Leprechaun Dolls for Asher and Lucas

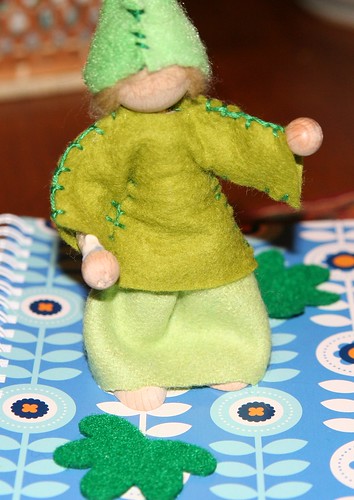
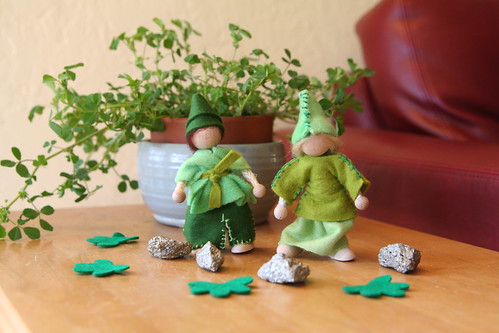
Sew some clothes for bendy dolls to make them look like sweet Leprechaun friends. They make wonderful friends for your kids to play with this time year and older children can make their own with supervision. Or make leprechauns in secret and have them magically appear on the morning of St. Patrick’s Day!

Materials

* wool, wool-blend, or eco felt in various greens
* rope bendy doll body
* embroidery floss
* yarn or wool roving for hair
* white glue

Tutorial

Measure the doll’s body to get a sense of how long the shirt or dress should be. Using these measurements, draw a simple shirt or dress pattern on paper and cut it out. I recommend using generous proportions. Lay the paper pattern on a doubled piece of felt and cut it out. (Make trousers the same way, first drawing a pattern and cutting out the felt.)

Leprechaun Doll and Notebook for Lucas

For a waist band, simply do a running stitch around the top of the skirt or trousers. Pull it tight. For added security, you could glue the skirt or pants onto the doll’s wooden body.

No hemming is necessary with felt, although you can put a pretty blanket stitch along the bottom of a shirt, skirt, or dress to make it even more attractive.

You could even cut out a small shamrock shape for a decoration and sew it to the front of your doll’s shirt, skirt, or dress. Or embellish the front of the outfit with pretty embroidery. (I’m not good at that kind of decorative stitching.)

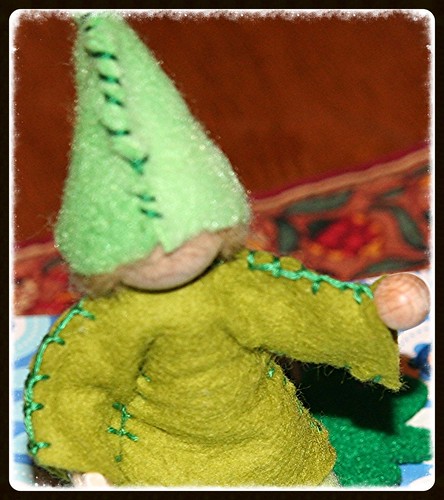
Leprechaun Doll and Notebook for Lucas

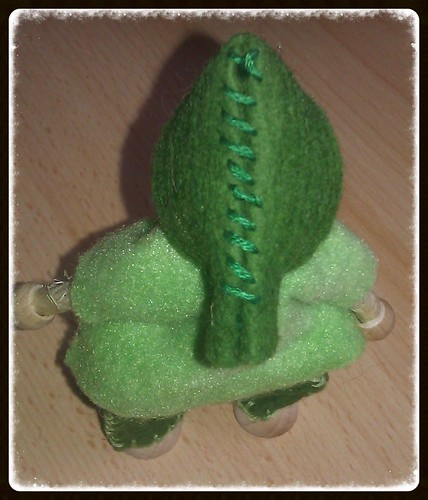
Untitled

Don’t forget to make a jaunty hat! Experiment with your felt and fold it to fashion a hat—any shape you like will do. I made one hat out of a half-circle of felt, stitched up the curved front so the top points backward. Another hat I made by folding a rectangle of felt to make two layers, then folding it around my doll’s head to make a cone, and sewing it along the top and back.

Glue hair, either yarn or wool roving, onto the wooden head and then glue on the hat. Your Leprechauns are now ready for gentle play.

Wool Painting for Imbolc

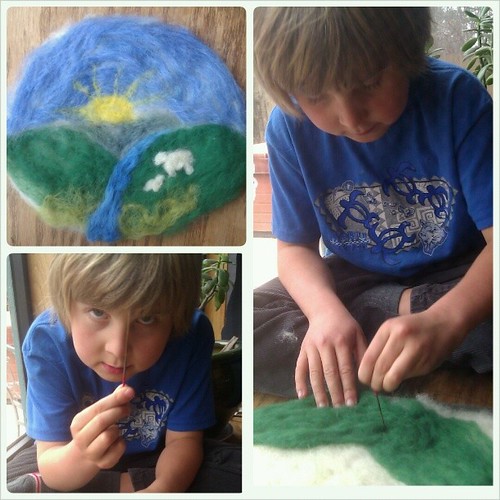
We brought out the wool and made a little "wool painting" together for Imbolc. This was Asher's first time needle felting.

“If Candlemas Day be fair and bright, Winter will take another flight. If Candlemas Day be cloud and rain, Winter is gone and will not come again.”

This has been a weekend jam-packed with holidays and special events: Asher’s seventh birthday, Lunar New Year, Super Bowl today, and Imbolc, or Candlemas, and Groundhog Day. I have a post or two brewing, particularly Asher’s birthday celebration. Unfortunately, we’ve been pretty sick and down for the count for a couple of days.

Asher and I had some time this morning while Lucas and Ian were at basketball practice. We thought Imbolc would be a good time to bring out the wool roving and make something wooly and beautiful. There’s something soothing and lovely about the feel of warm, soft wool in your hands. Asher has never needle-felted before, but he was ready for it. We used a white wool base that I had felted into a rough oval at some time in the past. Asher got to choose the colors for our meadow scene. We worked together and I taught him how sharp and stabby the needle can be, and that we must be very careful. He seemed to enjoy the felting. It was fun making this little wool painting of sheep in a meadow with him.

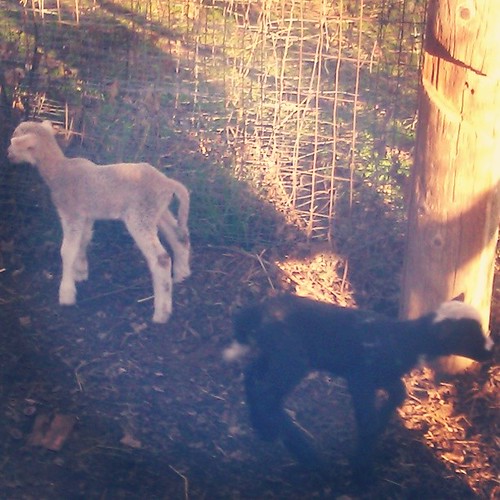
Babies! #sacramentowaldorfschool #waldorf #farm #baby #sheep

Last week, one of the school sheep gave birth to two sweet lambs. We enjoyed a little bit of rain, too. These are some of the many blessings in our winter. What are your wintertime blessings?

Since today is quite fair and not rainy, I’m hoping that we have more weeks of (wet) winter ahead of us. We really need the rain.

If you’d like more info about this festival, I wrote about Imbolc last year here. And here is a little family ritual we did to focus on the hearth and home aspects of this Celtic holiday.

Happy Imbolc, or Candlemas, or feast day of Saint Brigid, Groundhog Day, or Super Bowl day! Whatever you do today, be sure to do it with people you love.

Tutorial: Make an Herbal Dream Pillow for St. John’s Day

herbal pillow

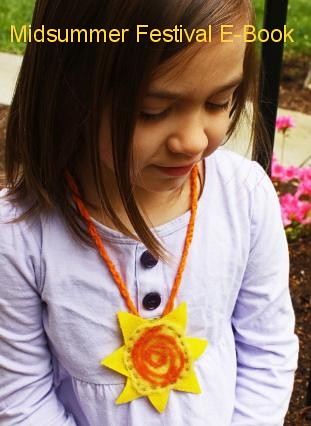
This article is excerpted from our Midsummer Festival E-Book.

Herbs harvested at Midsummer and during the Feast of Saint John (June 24, 2013) are said to be especially magical. Certain herbs, such as mugwort, laurel, sage, or marigold petals, are believed to give prophetic dreams if placed under a pillow at night! Will it work, do you think? Wouldn’t it be fun to find out?

It’s best to use dried herbs for your dream pillow. You’ll need two squares of muslin, two squares of yellow cotton fabric (about 5” by 5”), sewing machine, needle and thread, dried herbs, and a hot iron.

Cut your muslin squares to be about ½ inch smaller than your yellow squares. Sew around the muslin squares, leaving a 2 inch gap. Cut the corners off, but don’t cut into the stitching (this makes the pillow easier to turn inside out). Now turn your pillow inside out and iron it flat. Spoon in your dried herbs. Use a needle and thread to stitch up the hole. Now make the yellow pillow case. Put your “right” or pretty sides together. Sew around the three sides and the corners of the fourth side using a ¼ inch seam. Cut off the inside-out corners as before. Turn the pillow right side out. Use a pencil to make the corners look nice. Iron the yellow pillow case flat. Insert the inner muslin pillow into the yellow case. Turn in ¼ inch seam at the opening and iron it. Now sew up the fourth side, using a top stitch.

Now place your herbal dream pillow under your head before bedtime. Perhaps you’ll dream of the future! Or perhaps you’ll have amazing, fanciful dream that you can write down in a dream journal or draw a picture of in the morning.

Midsummer Festival E-Book

For more fun midsummer crafts, herb lore, Waldorf verses, handwork, and ways to celebrate Midsummer and St. John’s Day, please check out the Midsummer Festival E-Book by yours truly, Sara Wilson of Love in the Suburbs, and the fabulously talented Eileen Straiton of Little Acorn Learning. Click the link or the cover photo above to go directly to the page to find out more.

Midsummer Festival E-Book

Midsummer Festival E-Book

Summertime is here! I often wonder how in the world I’m going to fill 13 consecutive weeks of “summer vacation,” and so I tend to start planning early. I’d like to offer up the Midsummer Festival E-Book as a way of filling summertime with festivities and delightful Waldorf-inspired crafts, songs, poems, and more. My coauthor, Eileen Straiton, and warmly I invite you to check out our e-book, and please tell a friend!

Midsummer Festival E-Book Is Now Available!

This wonderful Midsummer Festival E-Book, our labor of love, will bring the magic of summer into your home and help you keep celebrating throughout the season!  It is packed full of Waldorf songs, stories, verses, crafting tutorials and much more to help you celebrate Midsummer and the Summer Solstice with the children in your home, classroom, or childcare environment.

  • Read Stories and Fairy Tales Filled with Sunshine to the Children
  • Enjoy Verses, Songs, Poems and Fingerplays that Celebrate the Coming of Summer
  • Learn about the History, Background and Symbolism of the Summer Solstice
  • Get Ideas for How to Create Your Own Meaning of this Special Festival
  • Enjoy a Solstice Feast
  • Play Solstice Games
  • Make a Midsummer Bonfire
  • Create Simple Beeswax Suns with the Children
  • Make a Solstice Wreath for the Birds
  • Design Midsummer String Art Sunbursts
  • Read a Story of The Sun Child and Create a Sun Child Necklace
  • Craft a Shiny Garden Suncatcher
  • Use a Rock Garden Sundial to Tell Time in Your Garden
  • Make a Catch the Sun Throw Toy for Your Child
  • Create a Paper Solstice Sun
  • Read How to Create Daytime and Nightime Midsummer Magic
  • Hang Summer Solstice Flags Indoors or Outdoors this Season
  • Plant a Midsummer Indoor Herb Garden
  • Craft a Sun Mosaic Birdbath
  • Make a Sunshine Fairy out of Wool Roving and Felt
  • Sew and Stuff Herbal Dream Pillows for St. John’s Eve
  • Needle Felt a Summer Sun Wall Hanging
  • Create Sweet Pocket Sun Sprites for the Children
  • Bake Sun Bread with the Children
  • Go on a Sun Hunt
  • Make a Sun Mask
  • Design a Sunshine Banner
  • Crochet Sun Medallion Necklaces

mosaic681a08dd7f492074d30d638319d71c78eb0cd22f


Halloween: The Wood Elf

I realize November 10 is a bit late to write about Halloween, but I’m just getting to it now. We worked way too hard on these costumes to not show them here.

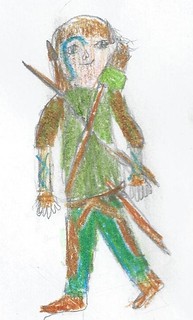
Lucas's Halloween Costume Design: Wood Elf

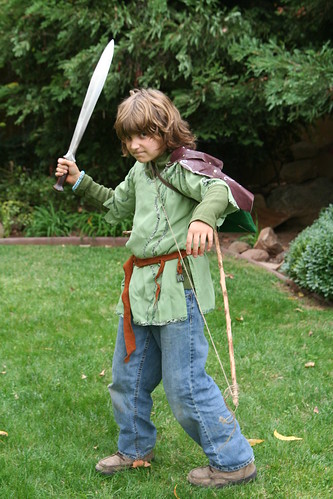
Lucas decided to be a Wood Elf. This year Ian read all three books of The Lord of the Rings to our boys, and the stories have really taken root in Lucas’s and Asher’s minds. Lucas didn’t want to be Legolas or any specific elf, or a fancy High Elf. He drew this picture of himself as a Wood Elf, so this is what we had to work toward.

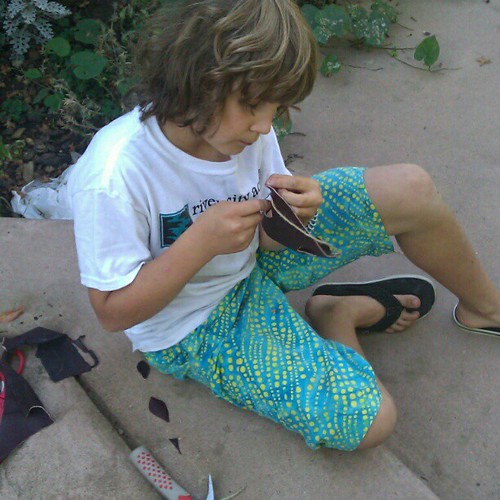
Making leather armor for his wood elf costume.

We brought our cow hide out and allowed Lucas to use some leather to make himself some armor. The hide was purchased back in 1991 when I wanted to make a medicine bundle for Ian—back when there was no Michael’s-type craft store in town. I had to buy a whole hide to get the little bit of leather I needed, and for my college-age self it cost a lot of money. I never dreamed in 1991 that this purchase would help us create a Halloween costume for our 10-year-old son!

IMG_2063

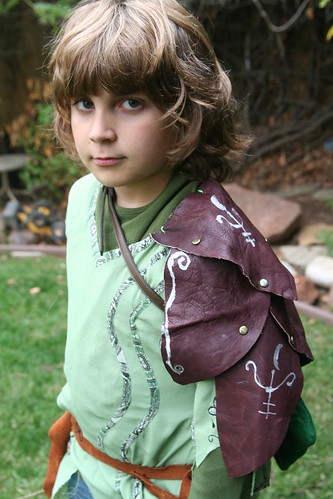
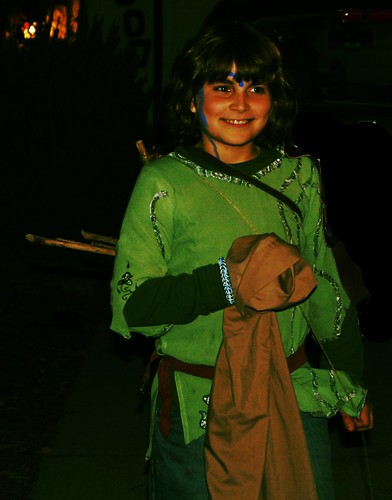
We lucked out at the thrift store this year and found a green tunic-like shirt. It had vine-like details and some beautiful leaf and vine embroidery on it. At first Lucas was nervous about the few flower details on it. He didn’t want to wear flowers. We had to argue for a moment or two, then I pulled out my shears and made some cuts to remove the flowers. I ripped and distressed the tunic just enough to make it look like he had spent several weeks traveling in the woods. That seemed to satisfy him. I also removed a seam to make the arms wider and more comfortable.

IMG_2076

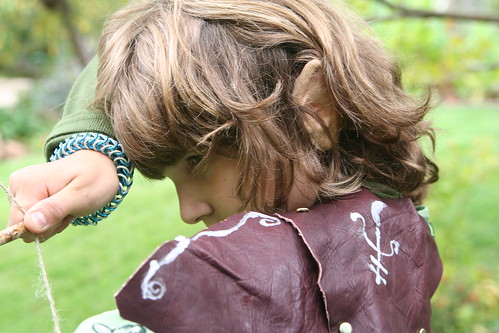
For the shoulder armor, we cut “scales” of leather to look a bit like leaves. We fitted this onto his body, piece by piece, and marked where we needed the scales to connect to each other with a Sharpie. Lucas made all the holes in the leather himself. We used brass-colored paper fasteners to quickly fasten the scales together, and we did the whole piece on the afternoon of the 31st. He decorated the armor with a silver paint pen. “They are runes of protection, Mom.” We sewed the leather to the shirt. The whole thing looks awesome!

IMG_2090

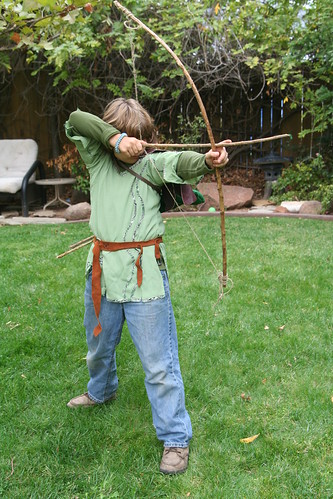
If we had had more time, we would have made a piece of armor to cover his his thigh, too. We pressed into service a leather belt from Ian’s old Renaissance Faire stuff. Lucas sewed a quiver out of green felt using the sewing machine. His first time on the machine! We used a small thrift-store belt to hold the quiver on his back; he used hot glue and stitches to attach the quiver to the belt.He made his own bow from a stick and string, and his quiver held five or six stick arrows.

IMG_2072

I’m not sure why he wanted to wear jeans, but he did. The last piece was a set of pointy elf ears held on by spirit gum. They had to be subtle ears! He added a blue tattoo to his face.

IMG_2159

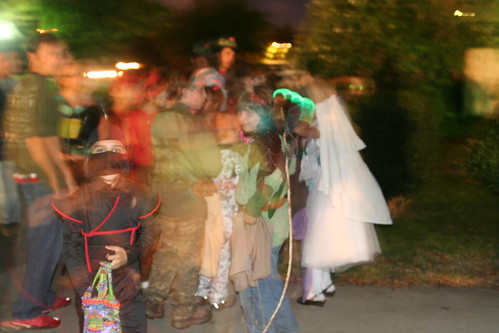
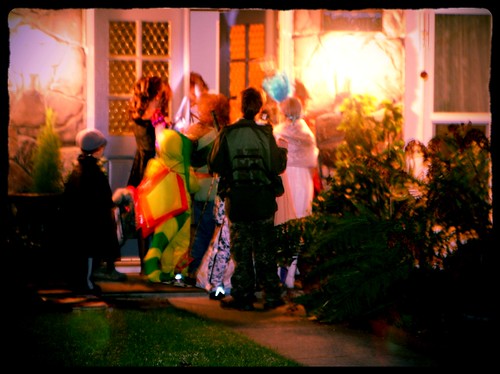
And then, with no time to spare, we went to an awesome party with a few other families from school. We ate yummy soup and went trick-or-treating in a big group.

IMG_2154

IMG_2201

The kids got loads of candy and had a blast running door to door at night. They all looked amazing!

I’m so proud of Lucas. He knew what he wanted. He worked hard to create it, doing many of the tasks on his own. He was a terrific Wood Elf!

Asher’s costume is up next.

Michaelmas in the Waldorf Kindergarten

IMG_1647

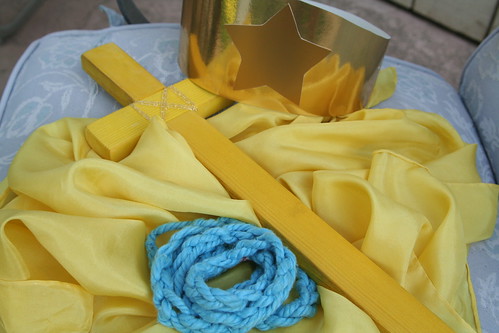
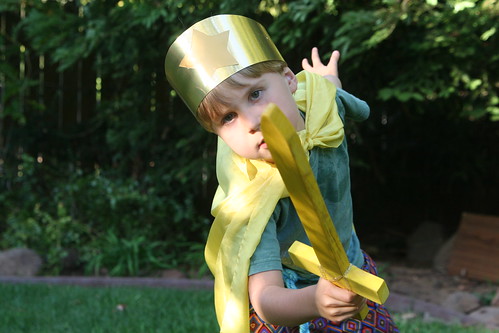
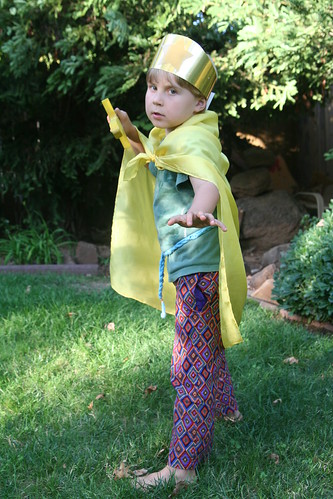
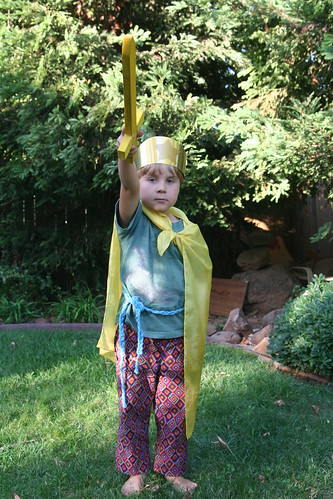
This is what Asher’s Waldorf Kindergarten has been working on for the last couple of weeks to celebrate Michaelmas: a cape of light dyed with marigolds (and a little dye to boost the color), a finger-knitted belt he made, and his sword.

He sanded the wood carefully three times, each time making it as smooth as he could. Then he stained the pieces a golden yellow. Then he assembled it, placing two little bits of silver paint (iron) into the blade where it meets the hilt. Older children in the (mixed-age, two-year) Kindergarten get to make their swords. The younger children have to wait until next year.

Making a sword at school is a big deal and a big responsibility. This is his first sword and he made it himself.

IMG_1656

All the while, the children were learning Michaelmas songs and were told the story of the humble boy, George, who, with Archangel Michael’s help and a sword forged from iron from the stars, defeats a dragon and saves the all the people of the land.

IMG_1660

And this is what he was told when he was given his finished sword to take home:

“Listen, Asher, to the words I say.
Your sword you may take home today.
We know your heart is brave and true.
Courageous, strong in all you do,
Michael will always be with you.
Now you are a knight of Michael.”

I am a knight, kind and good,
Helping others as I should.
I am a knight, gentle and true,
Bringing love to all I do.

I’ll use this sword for the right,
Not for some silly quarrel or fight.
But to drive away evil, I will try,
And protect those who are weaker than I.

IMG_1662

(I had to give Asher a small piece of chocolate to get these photos. It was worth it.)

Dyeing Easter Wool Tutorial

Wool

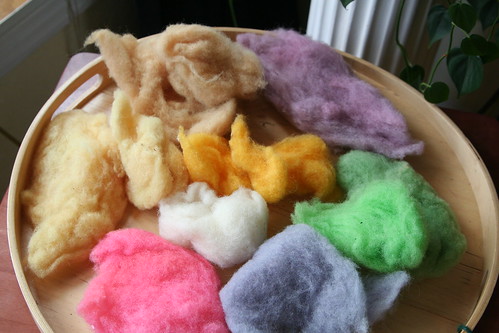
Last year, while we were dyeing Easter eggs, we also dyed some plain white wool batting. I am so pleased with the results. In the photo above are a wool colors from both natural and artificial dyes. I’ve saved this wool all year and now I’m making goodies for my boys’ Easter baskets out of it. I doubt that they’ll appreciate the cyclical nature of this, but I do. And don’t forget, this is science! So by all means, get the kids involved.

Materials

  • natural dye ingredients (such as turmeric, boiled yellow onion skins, boiled red cabbage, boiled beets, etc.)
  • or food dyes from the supermarket
  • or Easter egg kit dyes (capsules or powders)
  • white wool batting or roving (or get fancy and dye silk cloths to make your own play silks?)
  • distilled white vinegar
  • mugs or drinking glassware
  • spoons

Tutorial

Really, this is totally simple. While you’re dyeing your eggs, add in a good handful or two of wool. We found this was easy to do with the natural dyes as we had a big bowl full of each color, rather than a mere mug full of color.

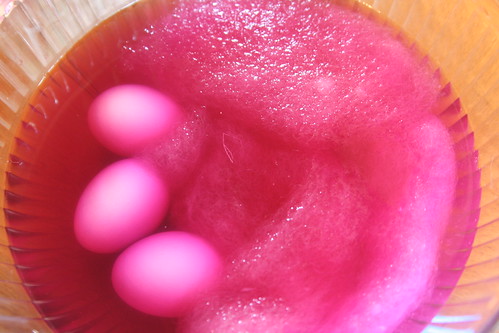
Onion Dye Bath with Eggs and Wool

Onion skins turn wool a pale, golden yellow.

Cabbage Dye Bath with Eggs and Wool

This is the red cabbage dye. It will turn both eggs and wool bluish.

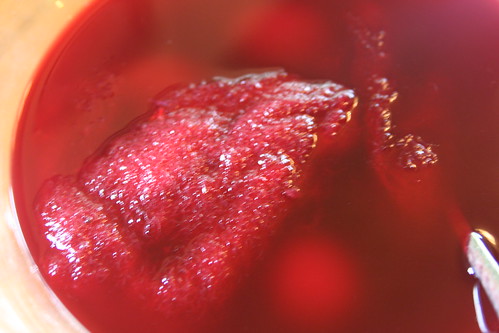
Beet Dye Bath with Eggs and Wool

This is beets. It turns the wool a warm light brown. The eggs and wool at first are a beautiful mauve color, but I think they then oxidize and end up brown.

Dyeing

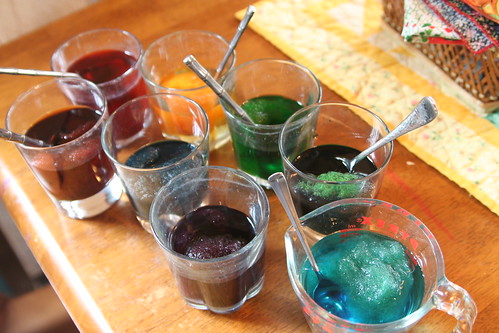
If you are using kit dye or food coloring to dye eggs, you probably have your dyes in mugs or glasses. (Right? That’s the way we always do it.) So you can just keep the dyes for a day or so after dyeing eggs and dye wool in the mugs. You can do handful after handful if you like. We used about a 1/4 cup of distilled white vinegar in each cup, added the dye, and then added water.

Our yellow dye bath was completely exhausted by the wool. None of the color was left when we pulled the wool out. It makes me wonder if the other colors might have done that if we had left the wool in longer.

I suggest keeping your wool in the dye for about 24 hours. When your wool is the color you like, squeeze out the extra dye into the cup, then rinse it in cool running water until the water runs clear.  Set it on a wire rack or pin it to a clothesline outside to dry.

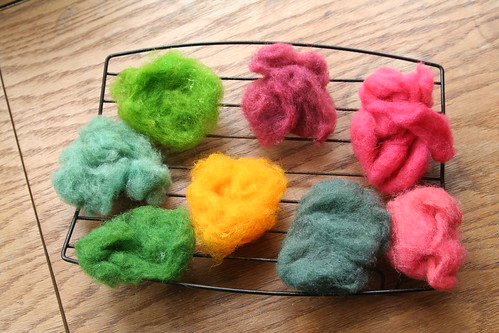
Dyed Wool

Here are the wool colors we got. I’ll name the colors of food dye baths starting with 12 o’clock: purple, dark red, pinkish brown, blue, yellow, dark green, blue green, and yellow green. It seems to me like the blue should be darker and brighter. It may be that my sons sneacked extra green drops into the blue? In any case, I consider this experiment to be a success because it means any frugal crafter or artist can get a wide range of beautiful, bright colors without breaking the bank, using standard McCormick brand food dyes. I love buying new colors of wool to use in projects, but this is a simple way to get many colors cheaply!

Wool batting doesn’t spin into yarn all that well because the fibers tend to be short. It works very well for needle-felting or wet-felting, however. Wool roving, however, is great to spin or felt.

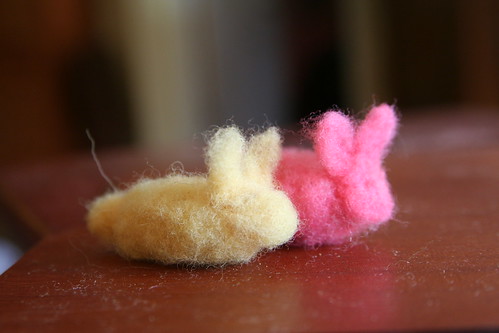
Simple Bunnies

I’m thinking that a rainbow of simple wee bunnies made from wool we dyed ourselves might be just the thing for Easter baskets this year. What would you make with Easter wool?

St. Patrick’s Day Kid Crafting

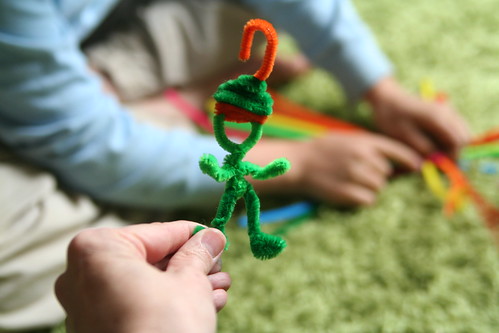
Chenille Stem Leprechaun

Here’s some more simple, impromptu St. Patrick’s Day kid crafting. We made pipe cleaner (they’re called “chenille stems” nowadays) leprechauns, shamrocks, and rainbows yesterday.

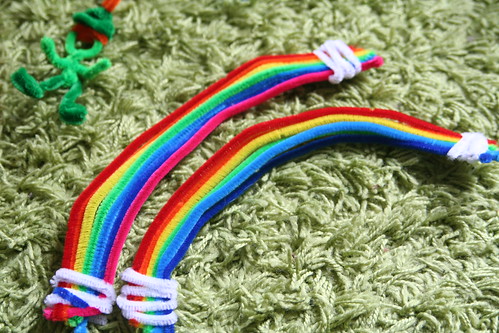
Chenille Stem Rainbows

Tonight we’ll be soaking the rainbows in a Borax solution to grow crystals on them. This is an idea I first saw on Pinterest, then traced it to here. It’s originally from Sweet and Simple Things, and this is where I first saw the shamrock shapes, too. Holiday science!

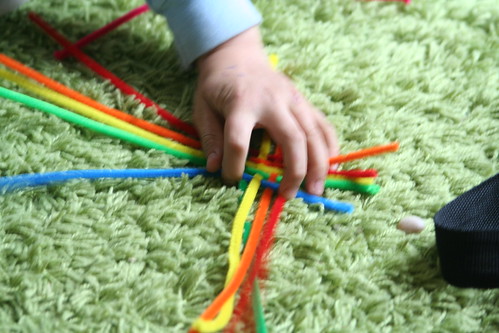
Impromptu Weaving

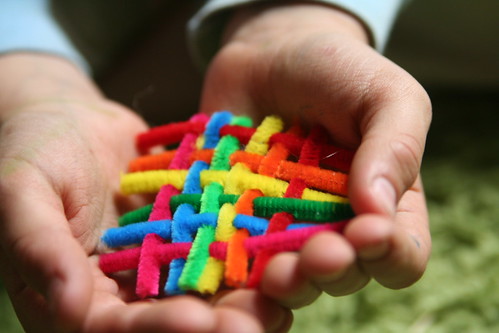
Lucas decided to weave his pipe cleaners to make little woven rainbow diamond shapes.

Solstice and Lucas

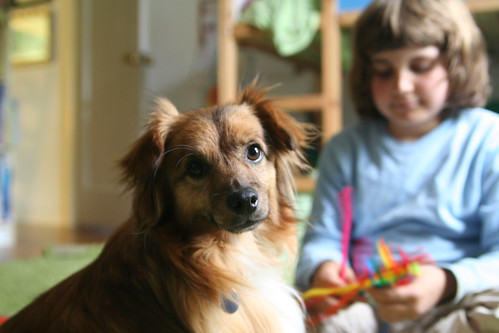
Solstice helped by looking handsome and providing moral support for our creative impulses.

Rainbow Weaving with Chenile Stems

Here’s Lucas’s invention. He bent in all the ends to keep it from unraveling.

St. Patrick's Day Mobile

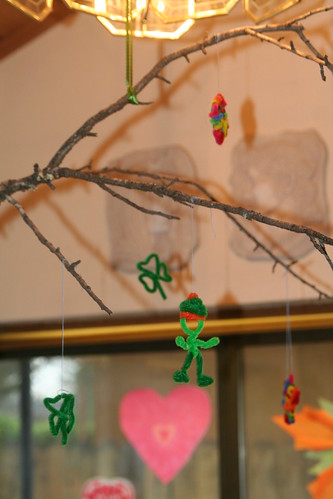
We hung our little creations with sewing thread on a twig with several branches. If our crystalized rainbows are successful, we’ll hang those here, too. I think it will be festive for our little party we’re having tomorrow.

And since it’s still raining around here, here’s a sweet Irish blessing I love.

May the blessing of the rain be on you—
the soft sweet rain.
May it fall upon your spirit
so that all the little flowers may spring up,
and shed their sweetness on the air.
May the blessing of the great rains be on you,
may they beat upon your spirit
and wash it fair and clean,
and leave there many a shining pool
where the blue of heaven shines,
and sometimes a star.


Valentine Window Transparencies Tutorial

Hello! [This post has been edited to remove a broken Pinterest link. 2-13-15]

10-Pointed Window Star

Anyway, I’m kind of obsessed with window stars lately. I got some new supplies for Christmas (kite paper and a new book and paper kit for making window stars). They are challenging for me and so rewarding when you get it right. I made a ten-pointed star the other day and I had to enlist Ian’s help to get the angles right when assembling the points. Then we had to buy a protractor!
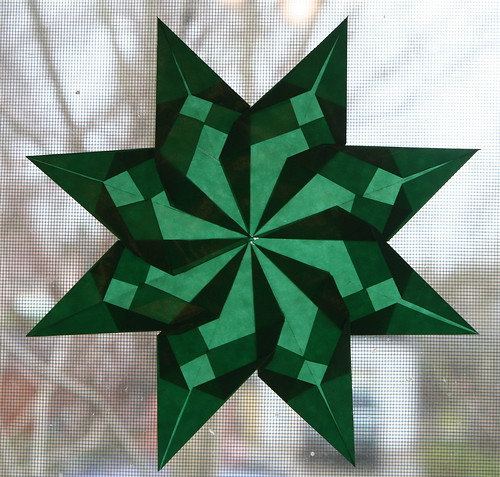
Green Window Star

This eight-pointed star I made is new.
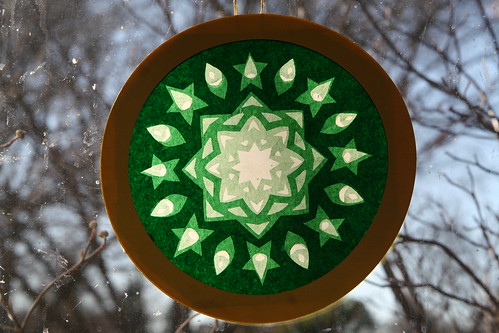
Rose Window, Not My Creation

And I accidentally-on-purpose bought this rose window transparency from an 11-year-old kid on Etsy, a shop named Knitting Momma. I couldn’t help myself. It’s so pretty and I like the gnome head shapes within it. See them? (Pay no attention to my dirty windows.)
Heart Window Transparency Cropped

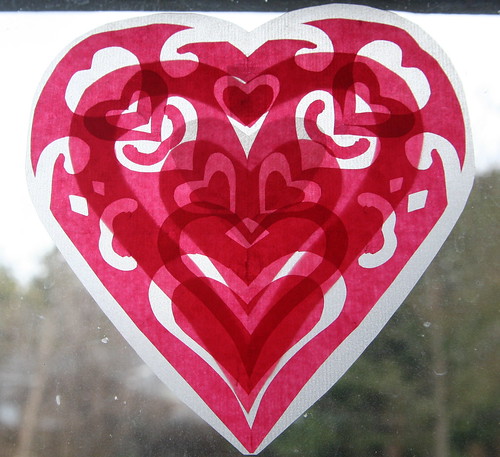
And that got me experimenting with my kite paper. I made this transparent window valentine using three pieces of square kite paper, two red and one white. I like this one a lot. The kite paper is only 6.25 by 6.25 inches, and I wondered if I could do something similar but bigger with tissue paper.
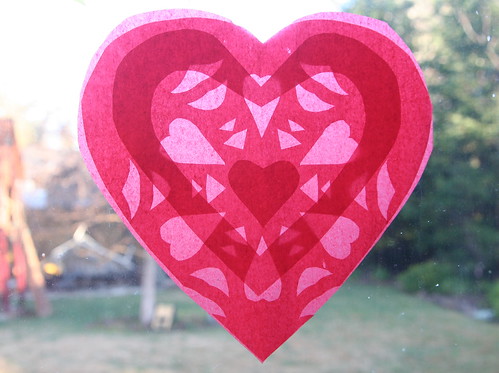
Red and Pink Heart Transparency

Now, I wouldn’t say my valentine window transparencies are perfect, but we learn in the doing, right? So here is what I did, and what I learned along the way, in case you would like to play along.

Materials

  • tissue paper or kite paper in valentine colors (red, pink, dark pink, white, purple)
  • scissors
  • iron on medium heat and ironing board
  • glue stick
  • tape

Tutorial

First, lay several pieces of tissue paper of different colors on top of each other. Iron them flat on your ironing board with the heat on medium. Any wrinkles should iron out nicely. Do not spray with water while ironing.
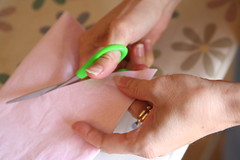
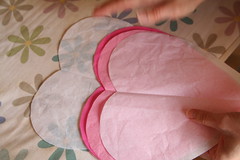
Cutting Hearts Tissue Paper Hearts
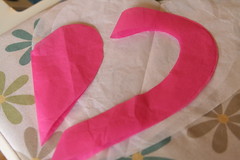
Then, with your papers still stacked, fold it once in half and then in half again. You should now have four stacks of tissue paper. Take one stack, fold it in half, and cut out a big heart shape. Iron out the center crease. Separate the hearts that you’ve just made. They are pretty much the same size, so they can be stacked up again in layers as you make your designs.
Cutting a Smaller Heart from a Bigger Heart  Assorted Sizes

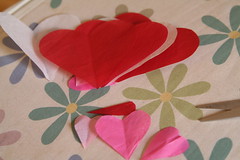
Try cutting one heart into smaller hearts by cutting along the heart’s edge. You’ll end up with two usable pieces: the smaller heart and the heart-shaped edge with an open center. Do this a few times and also cut additional hearts out of the scraps from the big hearts.

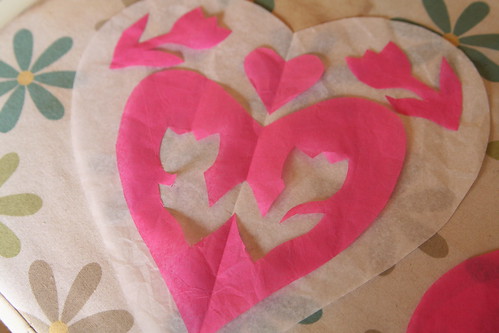
Take one large heart layer and fold it into quarters or eighths, like you would if you were going to cut a paper snowflake. Along the main fold line, cut a small half heart. When you unfold, you’ll have four or eight cut out hearts. Be careful about where you’re cutting, as it’s easy to cut beyond the border of your heart since it’s not a symmetrical shape. This heart transparency shows the four small cutouts. (While it’s folded, you can cut additional shapes such as diamonds or triangles if you wish, like you would for a snowflake.)
Pink Heart Transparency

Cut Out Designs

Try folding one layer in half and cutting a simple design. Here is one with tulips.

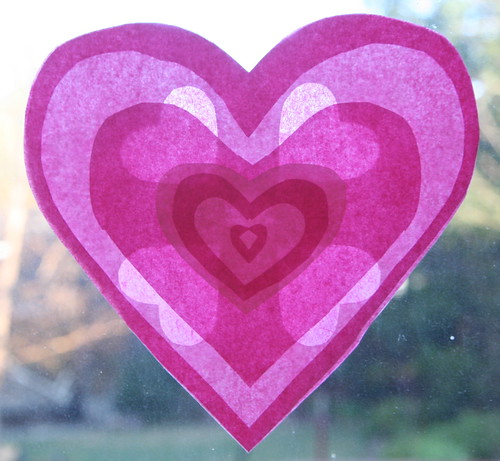
Now play with the layers you have made. Put a whole heart on the bottom and start stacking other layers. Arrange them in a pleasing way, mixing the colors as you like. Hold them up to the window or a lamp to see how the layers affect each other when the light shines through them. The more layers you have, the darker the shapes will seem. You can also put layers on the back of your heart.
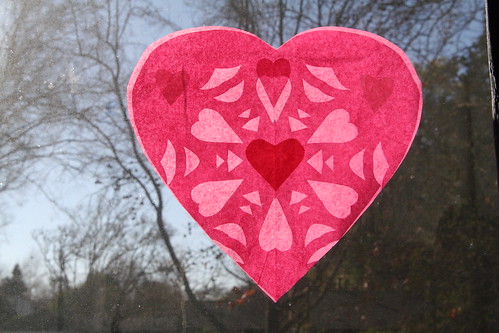
Pink and Red Heart Transparency

Keep in mind that you want the valentine window transparency to look nice both when the sun shines through it during the daylight, but also when it’s dark outside, when the interior light of your home will shine on the front of the heart.

When you have the papers arranged the way you like them. Use a small amount of glue from your glue stick to stick the layers together—and be very gentle because the tissue paper rips easily. Try to keep the outer edges lined up precisely. Gently add dabs of glue until all the layers seem sandwiched together. Now iron the valentine window transparency flat again. You can use a small dab of glue stick glue to stick the transparency to the window, or use tape.
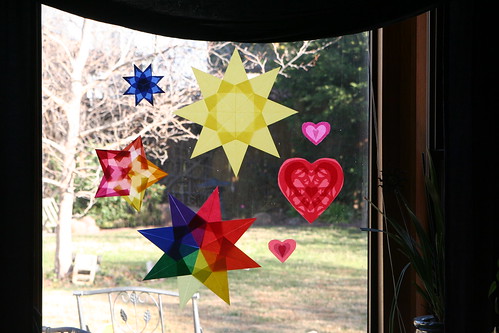
I Made These!

You most likely have small hearts leftover from making the big ones. You can make small transparencies as well. The smaller the valentine transparency, the simpler your design will probably be. Several sizes look great all together, I think.
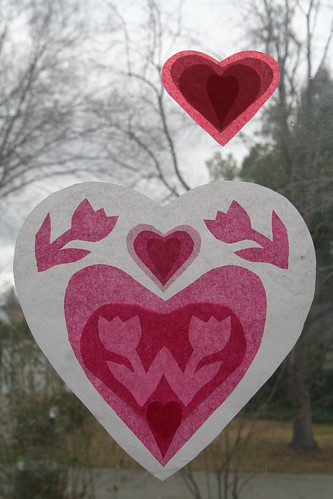
Valentine Window Transparencies

This Magical Window Stars book is terrific. Many of the designs are very complicated, which is a thrill for me. Maybe I’ll work up to them. The book has many star designs that require rectangular papers. In the meantime, you can find a wonderful free tutorial on folding a simple window star here at GardenMama’s blog.

This Origami Suncatchers kit is the one I got for Christmas. It contains the kite paper, a book of 20 star designs, and a glue stick. I find the instructions and photos in this kit to be easy to follow.

A Toy Garden sells both square and rectangular kite paper. This shop is where I buy lots of gifts for my children. A Toy Garden also sells the Magical Window Stars book and a book about rose windows called Rose Windows and How to Make Them.

And finally, if you want to purchase window stars, I recommend peeking in the Etsy shop of Harvest Moon by Hand. Ann is the best at making window stars. Her work is stunning.

Happy Valentine’s Day to you and your loves!
 

Handmade Birthday Gifts for Asher

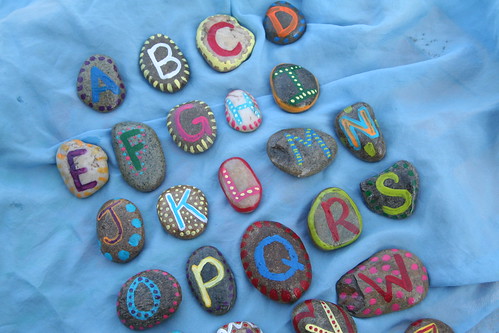
Mama-made Alphabet Stones

Today is my baby boy’s fifth birthday. I am over the moon with excitement for him. I live for this stuff, I think. Anyway, over the last several days, I’ve been scrambling to make some gifts for him.

Mama-made Alphabet Stones

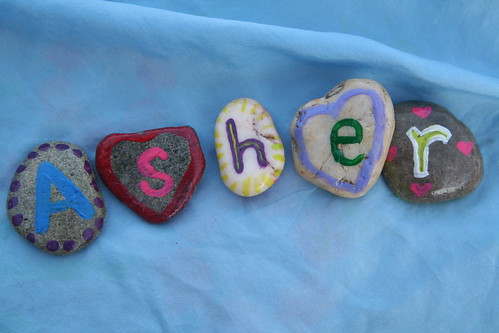
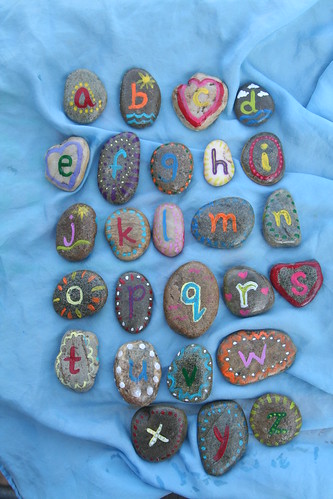
I made these alphabet stones for him using rocks from my yard and my paints. I got this idea from a photo I saw on Pinterest, which I believe is originally from this blog. I am grateful for the fun idea. Asher is five, so I don’t know how or if he will connect with these letters yet, but even if he doesn’t, they are still fun to hold and look at. I think manipulating them to make short words will be fun, and that’s all that matters at this age.

Mama-made Alphabet Stones

Each stone has its lowercase letter on the other side.

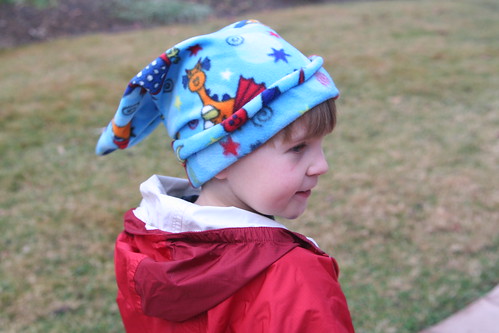
Mama-made Dragon Hat

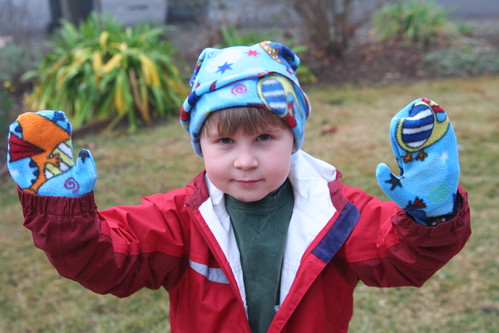
Thanks to a lot of help from my mother and her nifty, first-class serger, I made this fleece dragon hat and a matching pair of mittens. I’ve never done anything like this before and the mittens in particular were challenging for me. But a more accomplished sewist (“sewer” just doesn’t look that great even though it’s correct, does it?) would have an easy time of it, I think. I just traced Asher’s hands and made a paper pattern, adding a good 1/2 inch for the seem. I also made the wrist portion wider to ensure that he could get his hand into the mittens. Fortunately, fleece is slightly stretchy and it’s pretty dreamy to sew because it doesn’t fray, so you don’t have to be as nitpicky as with other fabrics. BUT—like I said, we serged these! And my goodness, what a dream of a machine that is! This was the very first time my mama let me touch her serger. (Machines and I don’t always see eye to eye.)

Mama-made Dragon Hat and Mittens

OK, the back of the mittens look best. Anyway, he went off to school this morning wearing them!

Crayon Holder for Asher's 5th Birthday

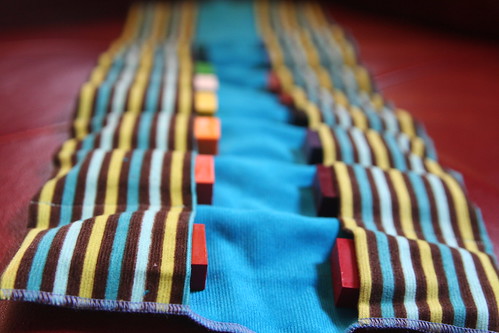
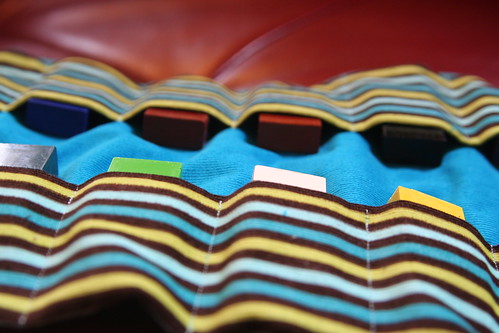
And finally, here is a crayon holder I made for his brand-new birthday block crayons. We have block crayons in this house, but technically they belong to Lucas. I thought Asher might like to have his own and a special place to keep them safe. (I don’t know if he WILL keep them safe, but with the crayon holder’s pockets he COULD.)

Crayon Holder for Asher's 5th Birthday

This item has 22 wee pockets, with six that are empty now so he could add to it later. And to be honest, I still have to sew a ribbon tie on one end of the crayon holder before I can wrap this up. So, I’d better go do that.

Today is for writing, wrapping, baking a cake, and baking a class set of muffins for tomorrow’s Kindergarten celebration. Tonight we’ll have a small family celebration with Asher’s choice of dinners—Daddy’s stir fry with Chinese noodles.

  • About Sara

    Thanks for visiting! I’m Sara, editor and writer, wife to Ian, and mother of two precious boys. I am living each day to the fullest and with as much grace, creativity, and patience as I can muster. This is where I write about living, loving, and engaging fully in family life and the world around me. I let my hair down here. I learn new skills here. I strive to be a better human being here. And I tell the truth.

    Our children attend Waldorf school and we are enriching our home and family life with plenty of Waldorf-inspired festivals, crafts, and stories.

    © 2003–2018 Please do not use my photographs or text without my permission.

    “Love doesn’t just sit there like a stone; it has to be made, like bread, remade all the time, made new.” —Ursula K. LeGuinn

  • Buy Our Festivals E-Books


  • Archives

  • Tags

  • Categories

  •  

  • Meta