Almond Shortbread Calderas Cookies

Almond shortbread calderas cookies. I kind of made them up.

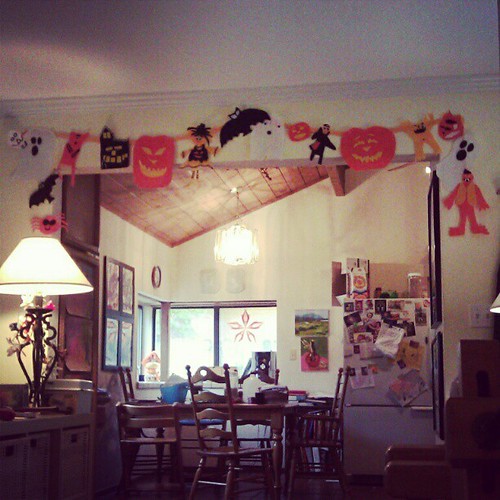
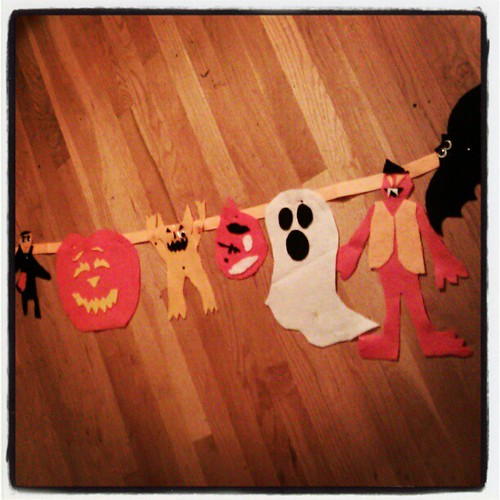
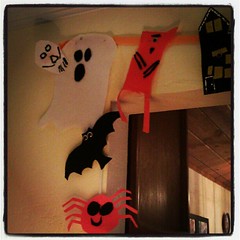
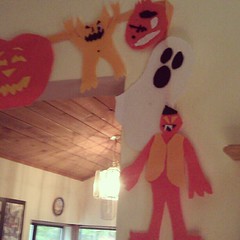
Halloween was a big deal for us this year. Big projects, big fun. Today I’ve been so tired that I just felt like trying to put our home back together again, creating some order out of the costuming chaos, and getting back to normal (chaos). More about Halloween later, but …

I meant to make these groovy witch finger cookies on Halloween, but there wasn’t time to do it. I wondered if I could use a similar recipe to create something fun for Dia de los Muertos. Honestly I didn’t know if these would work.

1 cup butter softened (which to me means microwaved for 35–40 seconds after being in the fridge; is that what it really means?)
3/4 cup confectioner’s sugar
1 teaspoon vanilla extract
1 teaspoon almond extract
2 cups whole wheat flour
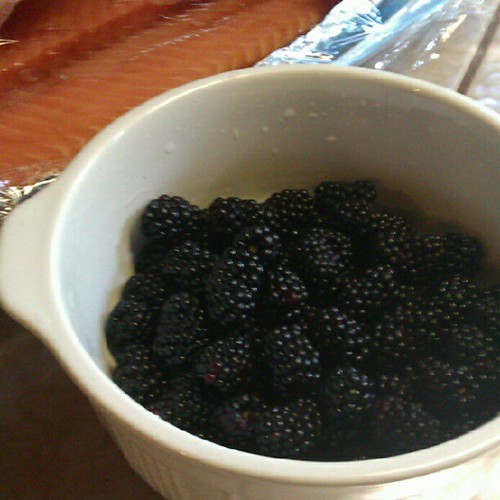
flowery sprinkles or stars (optional)

Butter sugar almond cookies. I have no idea how these will turn out when they are baked.

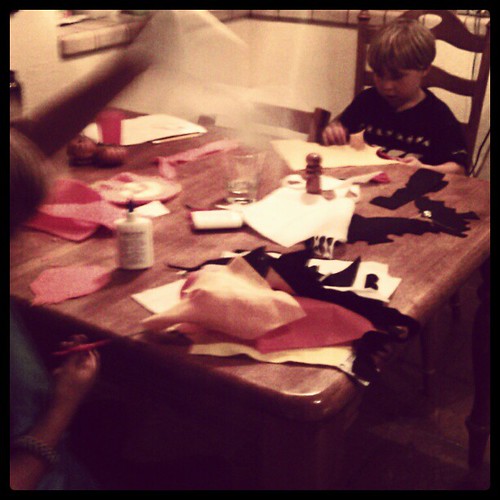
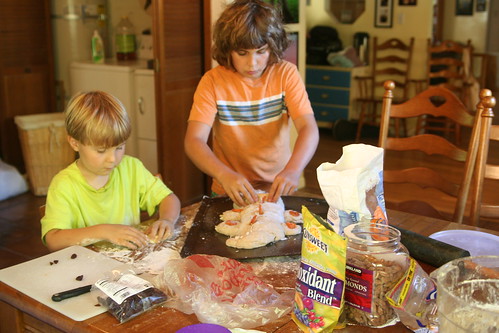
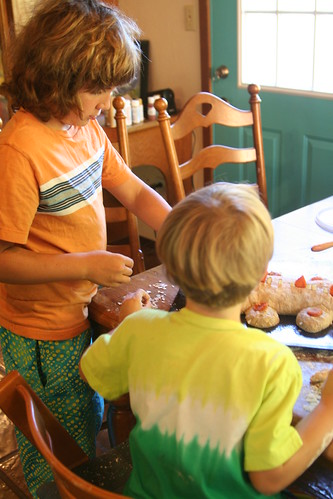
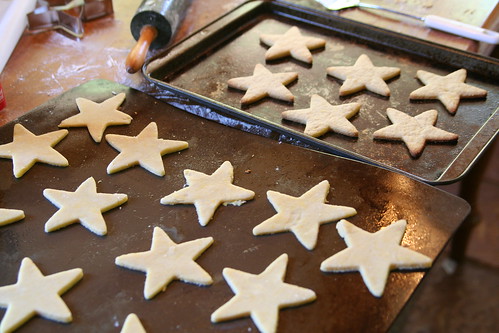
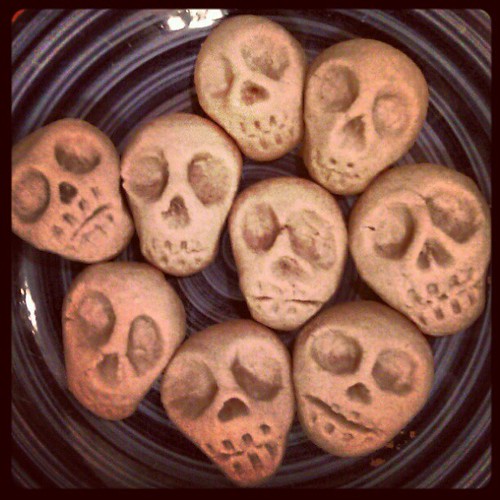
Cream together butter and sugar, add vanilla and almond flavorings, and then add in flour, a half cup at a time. Roll about a tablespoon of dough into a ball. With the end of a big spoon, chopstick, or other poky object, poke two eye holes. With a knife, draw a mouth line. With the tines of a fork, make a quick stroke up from the mouth line to make upper teeth, and another stroke down to make lower teeth. With a narrow skewer or similar object, make a little triangle nose hole. Now with your thumb and forefinger pinch the jaw of your face a little to make it narrower than the cranium. Place the skull on a greased cookie sheet. The most important feature of your caldera is the eye holes, so if they’ve become too squished while making the other features, use the same eye-hole making object to poke the eye holes again to make them nice and round and dominate the skull shape. Do this a bunch of times till you use up all the dough. Asher (5 years old) enjoyed making skulls too, and his are pretty great.

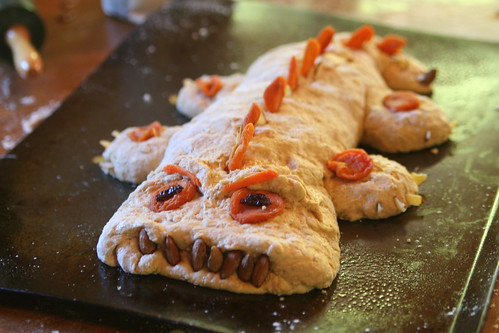
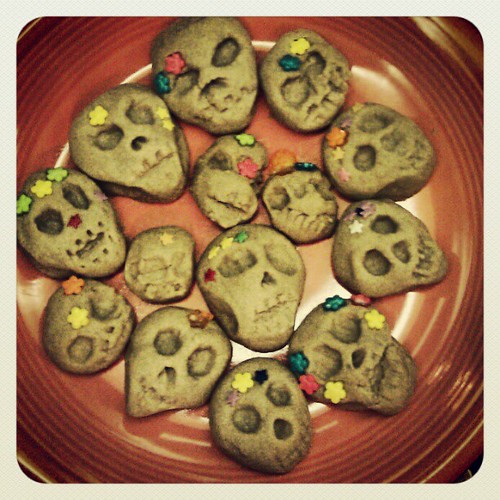
Now, if you want your calderas skulls to be flowery, push some flower sprinkles or stars, or whatever into the skulls. Personally, I think a few flowers go a long way toward creating the Dia de los Muertos look. I didn’t put flowers on all of my cookies and the plain ones look pretty cool too.

upload

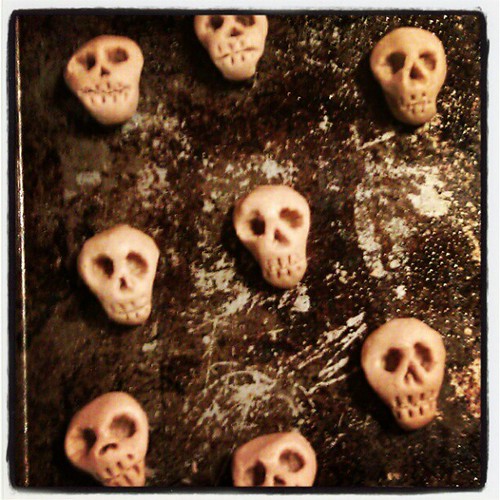
Here they are baked—simultaneously cheerful and spooky—and ready to eat. They got a bit bigger in the baking, but kept their basic shape beautifully. By the way, I used whole wheat flour because that’s what I had. Because of the whole wheat flour, I upped the sugar to 3/4 cup. Your skulls will look whiter if you use all purpose flour, and you might not need as much sugar.

How’s that for a recipe post created late on the night of the holiday for which it is appropriate? OK, night-night. I hope you’ve had a lovely day and that you were were able to take a moment to remember those you love who have passed out of this world. Remember them fondly.

Felt Halloween Banner Tutorial

upload

This is a post about turning something we made a couple of years ago into something new. We made these terrific homemade felt Halloween decorations in 2009. I love them, and every year since then, we’ve hung them up on the walls of our home and in windows for the holiday. This year, we made a few more and turned them into a banner. (I love banners because the decorations don’t have to sit on flat surfaces of our home. We have plenty of things sitting on tabletops and shelves as it is.)

I admit it’s kinda wacky to break out the crafting stuff at 7 p.m. on a school night, but that’s what we did. Daddy was out and I wanted something fun to do with my kids, rather than just wrangle them into bed. So I pulled out the felt and we got to work!

upload upload

Asher (5) designed a monster by drawing it on paper. He had a bit of trouble cutting the felt with our crummy scissors, so I cut out the pieces for him. He had total artistic control. I just executed it for him.

upload

This is what we made in one 40-minute session. Lucas (10) was engrossed (ha!) in making a zombie head. It’s missing an eye and its skull is showing through. “It’s got to hang upside-down, Mom!” OK!

So, anyway, here’s how to do this fun craft, if you’re so inclined.

Materials

  • felt in Halloween colors (orange, gold, yellow, white, black)
  • scissors
  • white glue
  • bias binding tape (1 inch wide, about 3 yards)
  • straight pins and push pins/thumb tack
  • needle and thread (optional)
  • googly eyes and fabric paint (optional)

Tutorial

Your project starts out looking something like this: kitchen table, kids, piles of felt bits. Working with felt for this project is a whole lot like making things out of construction paper, so if you can channel your inner grade school student, you’ll be fine.

upload

Ask yourself and your kids, what means Halloween to you? What kind of creatures would you like to make? Older children might like just a touch of creepiness in their creations. Younger children might prefer to stick with jolly jack-o’-lanterns and friendly ghosts. Here are some ideas to get you thinking: ghosts, jack-‘o-lanterns, witches, spiders, bats, monsters, dracula, skulls, skeletons, coffins, gravestones, haunted mansions, creepy hands, zombies, owls, scary dogs, etc. Just be sure to gear your creations to the ages of the children in your household. (Nobody wants to feel afraid at home.) Remember, googly eyes make anything—ANYTHING—cute. A felt Dracula with a smile—also cute.

Felt has got to be the most forgiving fabric in the world. You can cut it and layer it and you never have to seam anything or make it perfect. It sticks to itself beautifully, so you can place a piece, see how you like it there, and then move it elsewhere if you don’t, until you have a design you’re happy with. Furthermore, the synthetic felt is cheap at $0.20–$0.29 per sheet, which means you don’t have to worry about turning it over to kids with scissors.

So, decide what you’re making. Draw the creature first, or just start cutting. It’s your choice. Cut out the main shape of your creature first. Then cut other, smaller pieces for eyes, mouth, clothing, hair, teeth, etc. out of a contrasting color. Arrange them on top of the main shape until you’re satisfied, then apply some white glue to the topmost piece and lay it onto the felt creature. Add googly eyes or fabric paint for details if you wish. Let it dry. That’s it. Repeat for as many creatures as you’d like to make.

You can now hang your creatures in windows or on walls, or even suspend them from trees if you like. But if you want to make a banner, lay out your bias binding tape on the floor. Place your Halloween creatures along the tape in a pleasing way. Maybe your kids have an opinion about which ghoulish guy goes next to what creepy critter?

You can either sew each creation in place, or if you’re in a hurry like me—or if you might want to use these critters again in a different way another year—just pin them to the bias binding tape using straight pins! If you pin from the back, you won’t see the head of the pin on the front of the banner, and chances are you won’t see the pin shaft at all.

upload

Now find the center of the banner and the center of the wall where you want to hang it. Using a push pin/thumb tack, hang the center of the banner. Stretch out one side at a time, make sure the bias binding tape is flat against the wall without any twists, and then tack the ends. If you only pinned rather than sewed your creatures onto the bias binding tape, you can even adjust their positions at this point.

upload upload

You can also make corners by pinning or sewing critters to each other.

Happy crafting!

[Shared on Natural Suburbia’s Creative Friday, 10/26/2012]


Halloween Fairy Goodies

Needle-Felted Monster Friends

We have a tradition in our home, and I know we’re not the only ones who do this. After Halloween every year, my children set a good portion of the candy they have collected trick-or-treating in our backyard. We shout into the night, “Halloween Fairy! Halloween Fairy! Come and get our candy sweet. Trade us for a little treat!” And then we go to bed.

The next morning we usually find that the candy has been whisked away, and in its place are small goodies or treasures that our children can play with and enjoy much longer than they could enjoy a sweet.

Some years the Halloween Fairy brings books, sometimes toys. Sometimes the toys are handmade—perhaps the Halloween Fairy has a little workshop where she and some Halloween Sprites make treasures for children? You might be wondering, What happens to the candy? Well, the Halloween fairy left us a note once that explained that she gives all the candy to the Sugar Sprite, who needs help to feed her family. She finds it pretty difficult to gather sweet nectar from flowers at this time of year, so she instead feeds candy to her Sugar Babies to keep up their strength in the cold months. In exchange for your child’s generosity, the Halloween Fairy will leave a small gift for your child to play with.

I’ve done a bit of looking, on the Fairy’s behalf, and I’ve discovered all of these wonderful treasures to be purchased at A Toy Garden. I thought I’d share them with you, in case you can help the Halloween Fairy choose a special treasure for your child. *

Mushroom Knitting Spool  /  Peekaboo Pixies – Orange and Black  /  Blank Book – Set of 4 – Red, Yellow, Green, Blue  

 The Harvest Story  /  Autumn Gnome Set  /  Autumn: A Collection of Poems, Songs and Stories for Young Children

Forest Spirit Wand  /  Treasure Pumpkin Wet Felting Kit  /  Felted Pumpkin Pair

Forest Gnome Family Kit  /  Autumn Garden Gnome Pair  /  Forest Friends Herbal Beanbags

Stacking Gnomes  /  Earthtone Silks  /  Forest Animal Box Set

In a Nutshell  /  Felt Mushrooms  /  Carved Wooden Heart Nesting Bowls

There is something for everyone in this collection (open-ended playsilks, dolls, crafting kits, nature table finds, toys), and far more at A Toy Garden’s beautiful website. I know the folks from A Toy Garden personally and I can assure you they take great pride in sourcing toys, craft supplies, clothing, books, seasonal decorations, dolls and much more from the very finest makers and suppliers around. Many of their products are Fair Trade or made in the U.S.

* Now, here’s a little note from me, the Reluctant and Often Confused Webmistress of Love in the Suburbs: I’ve done the best I can with this technology stuff. If you click a photo, you unfortunately won’t go to the website where you can buy the item. (Trust me, I tried!) To be whisked off to the AToyGarden.com website item page, you have to click the text link below the pretty pictures. Thanks!

Pumpkin Globe Lantern Tutorial

IMG_5700

Candlelight is favorite way to illuminate October evenings, and what says October more than jaunty, glowing pumpkin faces? These pumpkin globe lanterns can be made by children of all ages with your supervision. The process is simple and the materials are inexpensive. Why not create a jack-o-lantern that you can enjoy year after year?

IMG_5662

Materials

  • tissue paper in yellow and orange
  • wax-coated strings in yellow or orange (brand names are Wikki Sticks and Bendaroos)
  • globe glass candle holder
  • mod podge and a paintbrush or foam applicator

IMG_5689

Begin by gathering your materials. The first step in the project is optional. If you want your pumpkin globe lantern to have the iconic vertical rib lines of a real pumpkin, gently squish the end of a wax string to the top edge of the globe. Guide it down the side and squish the other end to the bottom of the globe. Repeat this for as many lines as you like, placing the wax stings equidistant to each other. You might want to omit one line that would naturally appear at the pumpkin’s face. These lines will be visible when the candle is lighted in the finished pumpkin.

IMG_5690

Rip your yellow tissue paper into small pieces. You won’t need much. Now apply a small amount of mod podge to your glass and apply a small piece of yellow paper. This is your first eye. Smooth the paper with more mod podge and the applicator or paintbrush. Add a second eye, a nose, and a long mouth. The shapes of these pieces of tissue don’t matter all that much. Smooth them all down.

IMG_5692

At this point, your face might not look much like a face. You’ll use your orange tissue paper to define your pumpkin’s features next. Rip your orange tissue paper into small pieces. (Alternatively, rip some small pieces and then rip some into strips about 6 inches long.)

IMG_5693

Using your small pieces of orange tissue paper, apply them around your pumpkin’s eyes, nose, and mouth. Now is your opportunity to define your pumpkin globe lantern’s personality. Small children may prefer smiling, happy pumpkins. Older children might enjoy figuring out how to make theirs spooky. Does the pumpkin have squinty, frowning eyes or a snaggletoothed grin?

IMG_5695

When your pumpkin is mostly découpaged with tissue, turn it over and cover the bottom of the glass globe. You’ll have to let it dry in this position, setting on its top rim.

IMG_5696

If you wish to use long strips of paper, your in-progress pumpkin lantern will look like this photo above. You’ll add adjoining strips, working your way around until the whole globe is covered.

IMG_5701

Now you have to wait patiently while the mod podge dries. Examine your pumpkin for any thin spots or places uncovered by tissue. Add or patch as needed. The more layers of paper you add, the better defined the pumpkin’s features will be.

IMG_5706

Fill your pumpkin globe lantern with some rocks, gems, or sand, add a tea light or votive, and wait for nightfall to meet your pumpkin friend in all his glowing glory. It will happily share its light during chilly autumn nights.

IMG_5720

It’s nice to have a friend in the darkness.

School Community Michaelmas Festival

dragon

Last Friday was our school Michaelmas festival and we really go all out at Sacramento Waldorf School. While the pageant take the same form each time, every year there is a new dragon to conquer. I think this is an interesting metaphor. Aren’t we always facing some new dragon or other, along with our familiar ones, of course.

The sixth grade class creates and then mans the dragon. This year’s beast was magnificent! Those kids and their teacher should be very proud.

IMG_0498

The fifth graders, Lucas’s class, played the folk music (flutes and xylophones) while the village children (the third graders) did their folk dance.

IMG_0567

Here is a shot of George kneeling and receiving the blessing of the Archangel Michael.

IMG_0577

And then George must face the ferocious dragon, for it is threatening the villagers and the peace of the land.

IMG_0581

This year’s “battle” was particularly dynamic with all that hot dragon breath.

Each class has a verse they say and I wish I knew them all but I certainly do not. This year I learned that the fifth grade verse is the one that suggests the plan for bringing the dragon under control.

“Keep your courage from shrinking!
This beast requires some thinking.
Let’s make a geometric plan;
Surround the creature, if we can.
With courage, strength, and balance,
We’ll make a strong alliance.”

IMG_0586

The the older students surround the dragon and the youngest students (second graders) join them, wearing their knight tunics and with wood swords they have made. It is a powerful alliance, indeed.

IMG_0605

After the dragon is tamed with communal commitment and cleverness, and not might, George manfully leads the dragon away from the town. He has done his job well.

This festival never fails to inspire me because of its message and the great effort the school and each class puts in to make it so wonderful. Each year I get something new out of it. I hope your Michaelmas was full of shining courage and deep meaning.

Our Family Michaelmas Party

Getting Ready for Michaelmas #waldorf #festivals #littleacornlearning #michaelmas #stmichael #autumn #naturetable @littleacornlearning

It’s been a crazy-busy weekend and our Michaelmas celebration at home was both postponed and rolled into a little birthday party for Ian. Change is the name of the game, and we adapted well to suite our circumstances. All day on Saturday, Ian and I were at Tough Mudder in Patterson, California. (He participated; I was support crew and spectator.) The boys were with their besties and the dog was with grandma. We spent Sunday preparing our home for the party …

My Bakers

… and making Dragon Bread. Here are my sweet bakers. This year we used a maple oatmeal bread recipe and I rolled in brown sugar and dried cherries, blueberries, and plums inside the dragon’s body. The boys wanted a sweet dragon. Next year, I might try a savory bread. We use a different recipe each year.

My Bakers

They like adding bits of dried apricots, cherries, and almonds on to the bread to make it fearsome.

Dragon Bread in Progress

Here it is still in progress. Lucas did the eyes and teeth. Of course, it got puffier during the second rise. We wanted a nice big dragon bread to share with our guests.

Getting Ready for Michaelmas #waldorf #watercolors #festivals #michaelmas #stmichael #home #autumn #littleacornlearning  @littleacornlearning

It’s a good thing we already had some decorations out. We cleaned to make everything just so. Poor Ian was a bit sore from the previous day, but we got our home presentable. Lucas did some homework.

Birthday/Michaemas dinner prep.

We served “fillet of dragon” and the dragon bread. I baked a honey and vanilla yogurt birthday cake and made blackberry sauce to top it. One of the legends of St. Michael is that when he cast Lucifer out of heaven, the fallen angel landed in a blackberry bramble patch and spoiled all the berries for the year. So you should only eat blackberries before Michaelmas and not after.

Ready for Our Michaelmas Dinner Party

Here’s our pretty table, with mismatched plates and napkins, and our homemade Michael’s sword napkin rings. Grandma Syd and Papa brought a gorgeous green salad to share. Grandpa Glen and Mimi brought a wonderful potato salad with tarragon and hard-boiled eggs. It was yummy. The fillet of dragon came out perfectly. (Thanks, Ian!)

Family Gathering for Michaelmas and Birthday

Then we visited and shared stories about recent and not-so-recent trips to France and Amsterdam. We discussed the Tough Mudder event, the Michaelmas festival in Waldorf schools, the Bayeux Tapestry, and the Battle of Hastings, and art and other interesting things.

Family Gathering for Michaelmas and Birthday

It was a warm, lovely gathering and we are grateful that we were able to share our Michaelmas celebration with extended family this year. I hope Ian didn’t mind too much sharing his family birthday celebration with Michaelmas. Sometimes the only thing that makes sense is to combine occasions, ya know?

Blessings of the Michaelmas season,

Blessings of adaptability and courage in the face of change and the coming darkness,

Blessings of abundance and a grateful harvest,

Blessings of strength and inner resolve to you and yours.

Autumn Equinox and Michaelmas Festival E-Book

E-Book Cover

I’ve been a bit quiet in this space lately. We’ve been adjusting to a new school year and working through some projects. I am delighted to announce that my dear friend Eileen Straiton (of Little Acorn Learning) and I have finished another big e-book. This one is our Autumn Equinox & Michaelmas Festival E-Book and I’d be honored if you’d check it out and spread the word a little. It was a pleasure to work with Eileen on this and I’m really proud of it. We have such a great rapport and similar values, and I think this comfort and compatibility reflects in our e-book. So here’s to healthy, joyful, creative collaboration!

Here is a little teaser: a mosaic of just some of the images from the projects and activities we offer in our e-book.

Taste of the Contents of Our Autumn Equinox & Michaelmas Festival E-Book

133 PAGES of verses, fingerplays, poems, song, crafts, meditations, book recommendations, circle times, recipes, and much more to guide you in celebrating the Autumn Equinox and Michaelmas
in your home or school!

  • Needle Felt a Beautiful Apple Mother Doll
  • Go on an Apple Picking Field Trip and Learn
    About Different Varieties of Apples
  • Design a Breathtaking Early Autumn Nature Table
  • Read Books with the Children Celebrating
    Autumn and Michaelmas
  • Make Your Own Apple Stamps
  • Enjoy Homemade Applesauce Together
  • Crochet an Apple for Your Nature Table or Play Kitchen
  • Create a Beautiful Autumn Candle Holder Centerpiece
  • Make an Archangel Michael Mobile
  • Harvest Natural Dye Materials from Outdoors and
    Make Capes of Light Playsilks
  • Hold a Michaelmas Family Feast
  • Create Dragons out of Nature Items
  • Bake Dragon Bread with the Children
  • Make a Dragon Tree Block Checker Set
  • Sculpt Dragons out of Modeling Material
  • Cut Out Paper Flying Dragons to Display on Your Wall
  • Make a Michaelmas Felt Play Set
  • Paint an Autumn Leaf Stencil Painting with Watercolors
  • Crochet Beautiful Autumn Leaves for Your Nature Table
  • Paint Your Own Interpretation of Michael and the Dragon
  • Look Inward and Face Your Own Dragons with our Caregiver Meditation
  • Share Verses and Songs About Autumn and Michaelmas
  • Meditate on Quotes from Steiner and Other Inspirational Individuals
  • Enjoy Pinecone Weaving
  • Share Circle Time Together
  • Make Michael Sword Napkin Holders
  • Sculpt Michaelmas Worry Beads
  • Craft an Autumn Equinox Wreath
  • And more!

So, if you’re wondering how to make this time of year feel magical, this e-book may be just what you need. Thanks for peeking!

Only $24.99

Authors:
~ Eileen Straiton,
Little Acorn Learning

~ Sara Wilson, Love in the Suburbs

With Guest Contribution from Jennifer Tan, Syrendell

Review: Naturally Fun Parties for Kids

Review: Naturally Fun Parties for Kids

I was tickled to be asked to review Anni Daulter and Heather Fontenot’s new book, Naturally Fun Parties for Kids. Alas, I should have done so in a more timely fashion, as the book released earlier this year. But hopefully late is better than never. I’ve paged through this book dozens of times and I think it’s marvelous. Every time I pick it up I light upon a brilliant idea that hadn’t ever occurred to me before.

Daulter’s and Fontenot’s book is all about throwing parties with kid-friendly themes. As a huge fan of parties in general and, really, ANY excuse to dress up, I can totally relate. We all need celebrations and we all need to exercise our creativity muscles. This book is just the ticket to show what’s possible, with a little ingenuity, patience, and planning. A party for children doesn’t have to glorify a licensed media character! The book is organized into seasons and the authors provides three awesome party ideas per season. My favorites are the Summer Solstice Beach party, the Winter Solstice Party, the Forest Fairy Dress-up Party (Oh, to have girls!), and the Knights and Dragon Quest party.

The book offers “tips and tricks for making the parties green, natural, simple, and organic in style and content.” I like the emphasis on taking inspiration from nature and keeping it simple. The authors suggest thrifting, upcycling, borrowing, and making items from scratch to make the parties doable and special.

Review: Naturally Fun Parties for Kids

The book’s photography, by Tnah and Mario Di Donato, is simply gorgeous. Do NOT take my silly snapshots as an indication of the book’s beauty. I just wanted to give a little teaser. Their photos are vivid and inspiring.

Review: Naturally Fun Parties for Kids

What is kind of fun is how much the authors’ esthetic matches my own. Several of the projects in this book are ones we have done in the past, or ones that I’ve always wanted to do with my kids. I’m particularly intrigued by the beeswax ornaments (Winter Solstice Party), the upcycled sweater aprons (Community Cooking Party), and the grapefruit sugar scrub (Natural Spa Party). But there is much more.

Review: Naturally Fun Parties for Kids

Each party comes with a project and materials list, and a timeline for getting things put together in advance of the big party day. That’s just the sort of thing people like me need! I’m often full of ideas at the too-late last minute and don’t have time to execute them. These handy lists fix that deficiency.

Review: Naturally Fun Parties for Kids

Activities are provided for each party, too: games and crafts, and even a play! And the party themes are well chosen to appeal to kids, such as pajama parties, berry picking, art, egg-dying in spring.

Review: Naturally Fun Parties for Kids

The authors also provide plenty of delicious-looking recipes and, frankly, you don’t need to throw the party to make them. Herbal tea spice cake and mushroom and onion mini crustless quiches both sound like they’ll be visiting my kitchen soon. Furthermore, the recipes are geared toward kid palates. Nothing too fussy and plenty of fun: Italian ices; black bean, corn, and cheese quesadillas; grilled flatbread pizzas; Dutch oven apple-berry cobbler, etc. Now, where the heck does one find a donut pan for baking donuts? (The Internet, I suppose.)

Those who like to do paper crafts will love all the invitation making in this book. That’s mostly not my thing, to be honest. So I’d probably skip some of that stuff. Anyone with a flare for scrapbooking and stamps and stuff will dig it.

So, if you’re looking for inspiration for celebrating with children, check out Naturally Fun Parties for Kids by Anni Daulter with Heather Fontenot.  I wonder if I could con my boys into a Forest Fairy Party? Well, maybe not that one, but definitely the Pancake P.J. Party. They’ll go for that!

Sweet 4th of July

548236_4216633136721_1475153551_n

We enjoyed a lovely 4th of July this year, celebrating with many friends in the swimming pool and out. I left my camera at home, but I snapped a couple of shots of our patriotic treats in the making. And the photo above is from Parnassus, who kindly took the “after” cookie shot for me.

IMG_7465

Asher helped me a little with making the sugar cookies. (Why, oh why do I always forget that my sugar cookie recipe calls for the dough to be chilled 2-3 hours before rolling it out?!)

IMG_7470

And although I kicked off these pretty strawberry treats, Lucas was kind enough to come along and finish making them for me while I was busy with the cookies. He did a nice job, I think! These are strawberries dipped in white chocolate and blue sugar. Easy as can be, considering you can melt the white chocolate chips in the microwave on medium in just a few minutes. The berries must be dry before you dip them. I saw these on Pinterest and I’ve spent 20 minutes now trying to trace it back to the original creator/photographer and I can’t find her/him to give proper credit.

Anyway …

I hope you had a chance to hold your loved ones close yesterday and remember all the good you have in your life. I did.


Midsummer

IMAG0236

Happy Midsummer! It’s been a perfectly lovely weekend for our family. It looked like this:

Asher's June 22 Writing

(Asher’s writing, 5 and a 1/2)

IMAG0240

598738_3435623614111_264728551_n

303516_3434018493984_380201588_n

Morning Glories for Joyce

Asher Caught a Pullet

Remodeled Chicken Run

We had friends over for two spectacular meals—friends whom I adore and crave constantly.

Lucas went to a fantastic birthday party. He gave his friend a copy of Fellowship of the Ring, a thoughtful gift, as Lucas and Asher are thoroughly enjoying the Tolkien trilogy. Ian is reading The Two Towers to them now.

Ian got a spiffy new phone f0r work. The Star Walk app is awesome!

Friends from school rode their bikes over to play here with us on Saturday. They get along so beautifully with my kids.

I painted a tiny bit.

We did some shopping for home improvement stuff.

Ian shortened the chicken run a tad, as the first step to solving one part of our drainage problems. He built a new wall with tree stakes we already had laying about!

We worked on our drip system, fixing problems and adding drippers. The weather was so cool, we had to take advantage of the opportunity to work in the yard.

Lucas played in a piano recital, which was altogether wonderful. So many talented kids!

We grown-ups have been watching the Lord of the Rings films. All the boys’ talk of orcs and elves and dwarves made me want to see them again.

Our Midsummer days have been happy and full of food, friendship, love, useful work, and celebration! I hope yours have been, too!

  • About Sara

    Thanks for visiting! I’m Sara, editor and writer, wife to Ian, and mother of two precious boys. I am living each day to the fullest and with as much grace, creativity, and patience as I can muster. This is where I write about living, loving, and engaging fully in family life and the world around me. I let my hair down here. I learn new skills here. I strive to be a better human being here. And I tell the truth.

    Our children attend Waldorf school and we are enriching our home and family life with plenty of Waldorf-inspired festivals, crafts, and stories.

    © 2003–2018 Please do not use my photographs or text without my permission.

    “Love doesn’t just sit there like a stone; it has to be made, like bread, remade all the time, made new.” —Ursula K. LeGuinn

  • Buy Our Festivals E-Books


  • Archives

  • Tags

  • Categories

  •  

  • Meta