Love Is …


  • RAIN. My garden looks so grateful, and bulbs are starting to pop up from the soil.
  • Sleeping in until 8:30 a.m.; waking to hot, fresh coffee.
  • Grandpa’s 68th birthday, and gathering around a table with my new beautiful nieces.
  • Work that comes when you need it, even if it comes all at once in a big rush.
  • Dog-sitting a sweet little girl for a sweet friend.
  • A creative friend who spends his precious free time hanging out and playing Magic with my kids, conjuring a magical duel between wizards.
  • A husband who does laundry and cleans the kitchen while I work on the weekend, even though he’s sick.
  • A young friend who gives my older son a taste of big kid adventure—exciting paintball wars in the rain and mud.
  • Basketball games, even when we get skunked by a team two years older and two heads taller than our boys.
  • Little boy who says, “Mama, put your arms around me; it makes me feel safe,” and then tells me precisely how much to keep the bedroom door open and “check on me in four minutes,” every single night.
  • Big boy who lately seems more interested in hugs than usual, and who is learning how to write essays.
  • A grandfather who braved an outing alone with the boys for the first time.
  • Trudging through the muddymuck of the chicken coop to feed the hens; finding that their laying has increases ever so slightly.
  • Realizing that I live with Tigger—irrepressible, indefatigable, bubbly, bouncy funfunfun 7-year-old!

Happy New Year & Welcome 2014!

Happy New Year! Blessings on you and your loved ones in 2014!

Happy New Year!

For our family this past year has been good overall. We’ve all grown so much, learning joyfully and meeting our challenges with determination and sometimes with grace. We have pursued goals, developed skills, made friends, and found and made new opportunities. We have carved a place for ourselves. We have faced our fears. We have dug deep to find additional strength and resolve. We have unearthed some old psychic muck and purged some baggage that no longer serves us. We have planted seeds of joy and nourished gardens of all kinds. We have bumbled and bumped along, at times, and our experiences have polished us a little bit more. I am repeatedly humbled by our amazing good fortune, most especially in our friends and loved ones. I am constantly amazed by and inspired by the courageous people around us, who serve as our support network and as excellent examples of compassion, understanding, goodness, bravery, and arete. Our boys continue to be our raison d’etre and an endless fountain of love in our lives.

I wish for our family, and for you and yours, fourteen essential blessings in 2014:

1. love
2. good luck/opportunity
3. prosperity
4. good health and stronger bodies
5. creativity
6. learning
7. friendship
8. laughter and whimsy
9. peace in our homes
10. forgiveness of self and others
11. patience
12. perseverance
13. dreaming
14. trust

Blessed Be.

Fifth-Grade Pentathlon

IMG_6560

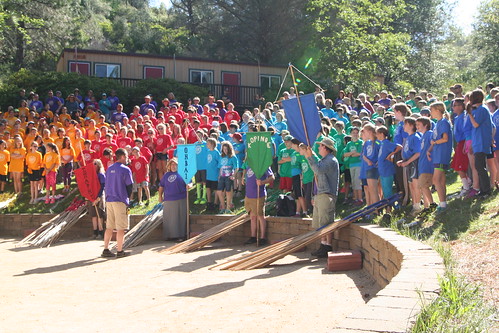
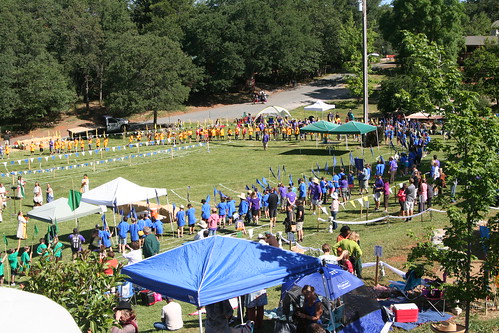
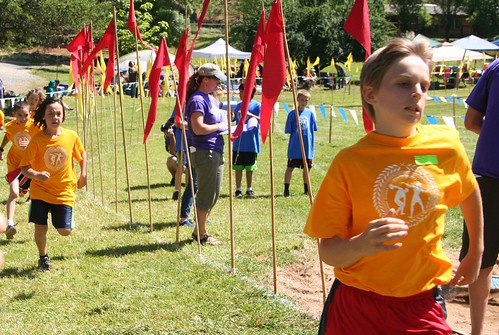
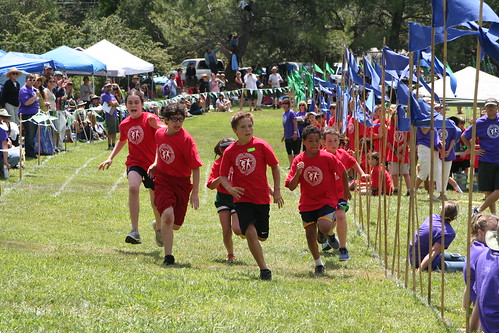
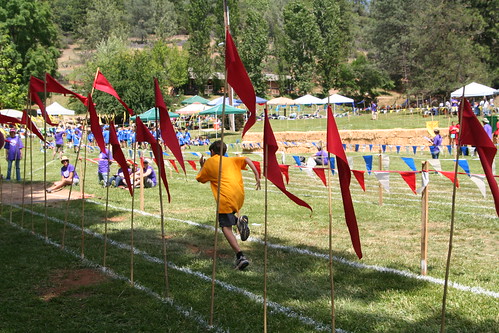
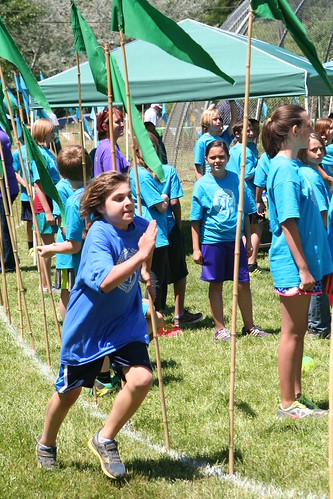
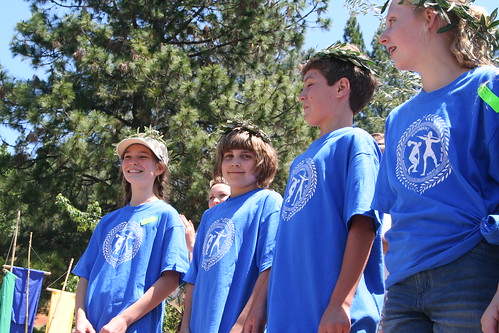
What a day! Last Friday we attended with Pentathlon for all area Waldorf schools’ fifth graders. It was held a Live Oak Waldorf School in Meadow Vista and it was nothing short of spectacular in every way. Honestly, I couldn’t be more impressed with the way this event came together. Approximately 300 fifth graders from 12 classes joined together in a spirit of peace to compete in five athletic events. This is the culmination of their studies of the Ancient Greeks and Greek mythology. They have studied and trained hard for these celebratory games.

IMG_5884

Before the games began, there was a very stirring opening ceremony. Prior to arrival, the children were divided into five Greek city states, depending on temperament, and each had its own color. So our class of 26 competitors went into five different cities. Each city had a set of parent and teacher judges, who were specially trained before the Pentathlon to judge the five athletic events.

IMG_5880

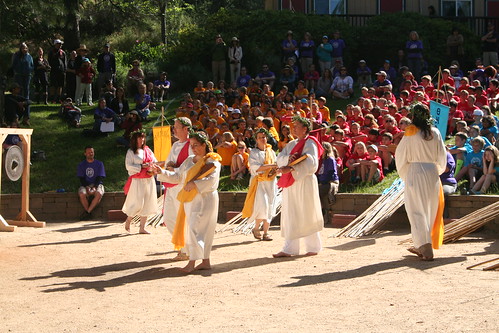
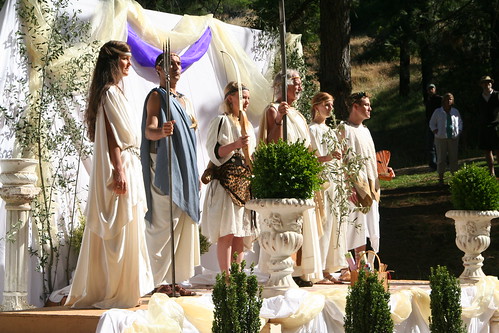
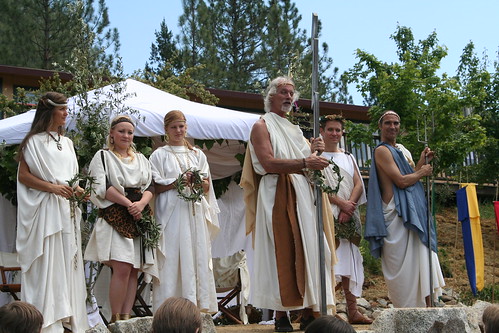
They rang a gong to quiet the crowd. We were welcomed to this special day of fellowship and competition. Musicians played lyres and sang. The Olympian gods were invited to witness. The children chanted and sang in both Greek and English, in honor of the gods.

IMG_5878

The gods were invoked to bless the event and to inspire the athletes to do their very best, to let their highest selves come forward in their conduct for the day. Aphrodite, Poseidon, Artemis, Zeus, Athena, and Apollo each gave speeches, calling on the athletes to hold in their hearts peace, beauty, courage, compassion, fairness, friendship, and good sportsmanship. I just let the tears roll down my face. It was perfect. (Thomas, Janelle, Suzi, Steve, Anne, Sandy—I wish you could have seen this!)

As part of their main lesson studies in class, each class wrote odes to the gods, and then chose one student to read his or her ode aloud to all assembled on this special day. The poems were marvelous and full of epithets for the gods and imagery evocative of the Homeric hymns. The whole ceremony set a beautiful tone for the day and by the time it was done, there was no doubt in my mind that these kids were transported in spirit, and were the embodiment of the Greek ideal of ἀρετή—excellence—for the duration of the Pentathlon.

IMG_5915

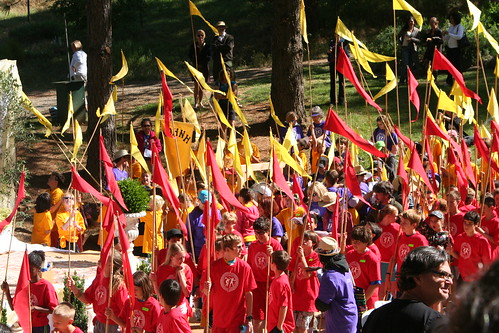
Then the athletes processed, carrying flags of the color of their city state, around the entire field.

IMG_5938

IMG_5950

IMG_5965

In the center of the field, the gods assembled around a giant torch. A child ran a small torch around the length of the field, entered the center, and then Zeus lit the big torch to officially begin the games. Such pageantry! Such effort! They really spared no expense to make this day a marvel.

IMG_6478

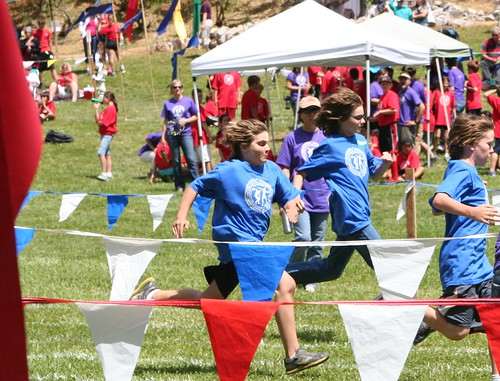
Naturally, Ian and I followed our own sweet fifth grader around and snapped shots of him competing. (He’s in dark blue with a ponytail.) I also tried really hard to get pictures of all the fifth graders from Sacramento Waldorf School. I don’t know how to say it really—they were truly inspiring. They gave it their all.

IMG_6576

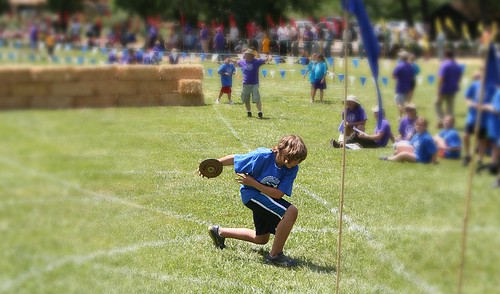
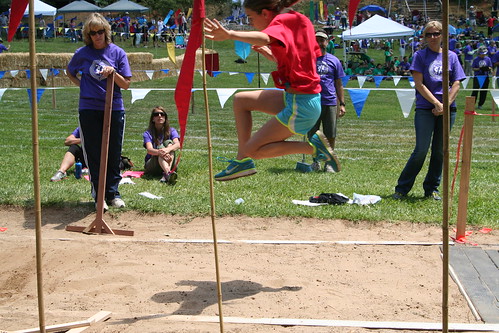
I know for a fact that our fifth graders have been training all year for these events. They had great form and confidence, having practiced discus and javelin, long jump, and both dashes and long runs.

IMG_6131

IMG_6455

IMG_6571

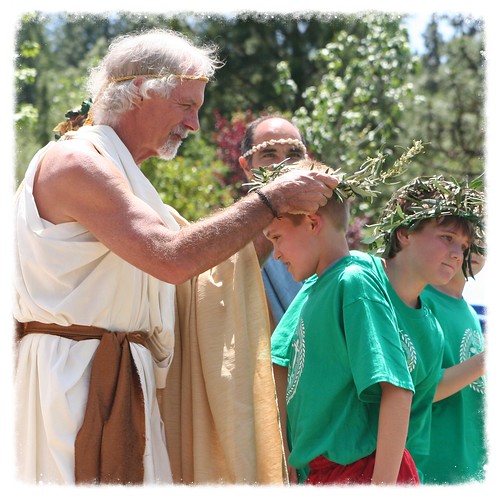
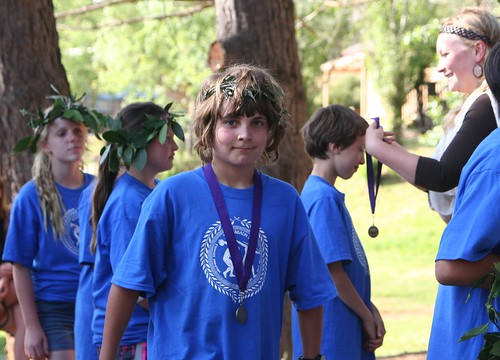
After each event was done, the whole city state trooped up to Mount Olympus to receive the awards of the gods. Laurel wreaths were given for first, second, and third place. And two wreaths were awarded to athletes who exhibited excellence in Beauty, Grace, and Style.

IMG_6498

IMG_6408

IMG_6365

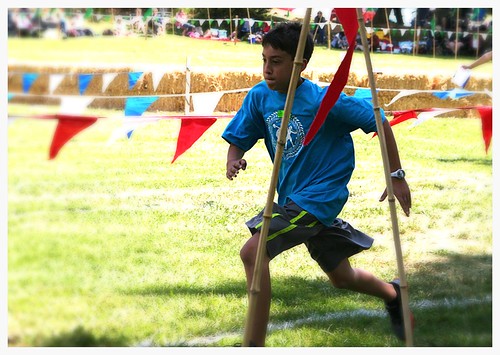
These children just flew!

IMG_6314

IMG_6356

Lucas won a laurel wreath for Beauty, Grace, and Style in the long run, which was a race around the entire field. I am so proud of him!

IMG_6654

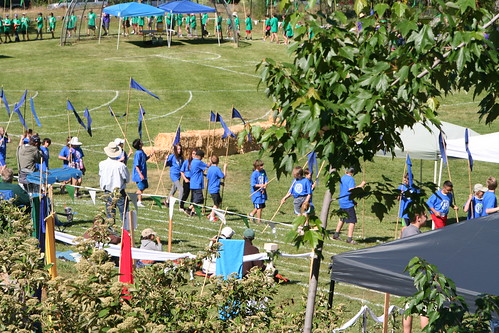
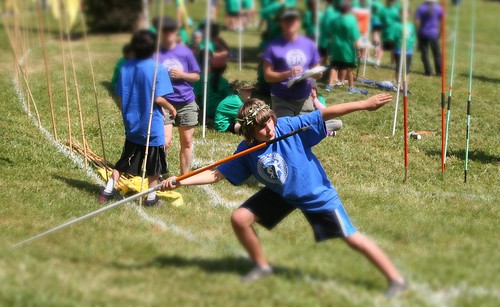
Javelin was the final event and all four corners of the field were used at the same time. Hay bales were put up to separate the areas. Here is Lucas getting ready to throw the javelin. Both of his throws were good and stuck, making them count. For a little while he was in first place, but then other children got greater distance with their throws. I think Lucas would really like to continue with this sport.

IMG_6691

Every athlete received a medal for participating. Some kids won several wreaths; many won none. But I think everyone had an amazing day.

There was a closing ceremony, of course. The gods were thanked for attending. Each of them spoke about the noble qualities they saw in the children: perseverance, bravery, honor, kindness, fellowship. They chose a winning ode, and one more laurel wreath was awarded to the poet.

The day was challenging, long, and tiring for the athletes. They were physically competing from about 10 to 4, which is a long time for 11- and 12-year-olds to stay focused and follow the rules. They comported themselves with such maturity and determination, even when struggling or disappointed, and also with camaraderie and good spirit. Oh, the GLORY!


Waldorf Homeschool Expo Giveaway


Expo Logo 250x175

I think it’s time for a giveaway, don’t you? Would you like to get some support in your Waldorf-inspired home or homeschool? Check out the Global Waldorf Expo website to learn how you can register to participate in this free online conference.

I’ve had the pleasure of listening to many Waldorf teachers and craftspeople in previous Expos, and I highly recommend it! This year’s lineup includes Rainbow Rosenbloom, Kristie Burns, Jennifer Tan, Janet Alison, Marsha Johnson, Reg Down, Sally Fallon Morell, and Eileen Straiton—just to name some of the presenters.

Here’s a bit from Donna Ashton, the Expo’s creator:

Join 14 of the Top Teachers & Experts in Waldorf Homeschooling for this No Cost Virtual Online Event presented by The Waldorf Connection.

Presenting: the 4th Global Waldorf  Homeschool Expo, an online conference to be held May 17th through May 19.

We are bringing the information to YOU and giving you a “backstage” pass to the world of WaldorfWe have chosen speakers who are thought leaders on the front lines of this movement that will teach you their techniques and inspire you.  These visionaries are here to help expand your thinking, deepen your perspective, with more ease and fun!

For FREE access to practical tips and inspiration, register today.

All who are registered receive a free mp3 recording of “Bringing Music to Your Day” by Waldorf teacher Anne Cleveland.

Here’s the link for more information and to register:
http://globalwaldorfexpo.com/2013/

I’m delighted to host generous giveaway from Donna. The giveaway will be the Expo Option 1 package, which includes audio mp3 downloads and Call Highlights on PDF. To enter to win, please “Like” the Love in the Suburbs Facebook page and then leave a comment on this blog post! Spread the word! I’ll be choosing a winner on Monday, May 20, 2013.
a Rafflecopter giveaway

Easter Surprise: Påsk Ris

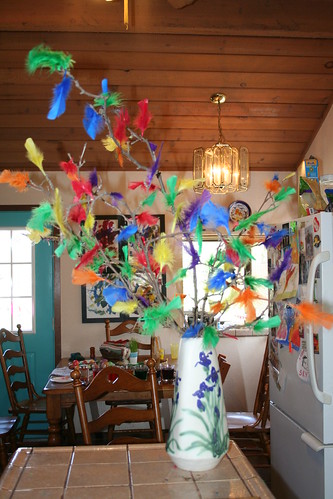
IMG_4981

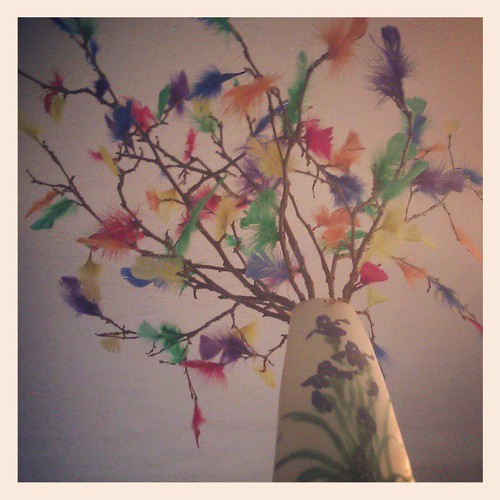
A mazillion years ago, when Ian lived in Sweden and I was visiting at Easter time, we saw everywhere in Upsala bare branches decorated with colorful feathers. We wondered, is this sympathetic magic? If the Swedish people decorate bare branches with feathers, are they invoking the coming of springtime? Of course, at Easter time, the ice and snow still holds sway, and warm days are still several months away. (As I type this it’s currently 27 degrees F there.)

“The Easter tree, or “påsk ris”, can be seen all over the country this time of year. Outside shop entrances, in peoples’ living rooms, outdoors in the neighbours’ gardens.”

I’ve had these bare branches in a vase in my home for a couple of months now. They held hearts on Valentine’s Day and they’ve lingered through the month of March. I’m pretty sure they’ve poked everyone in the eye at least once. I’m also sure that my Ian has wished I would take them away.

But, NO! I had a secret plan, you see. I wanted us to make him a påsk ris as a surprise. Because once, a mazillion years ago after we came home from Europe, I made one of these to decorate our very first apartment together at Easter time, and it was sweet and lovely and back then life was uncomplicated …

So anyway, Lucas, Asher and I made a påsk ris to surprise Daddy.

Materials

  • colorful craft feathers
  • branches
  • glue gun

Tutorial

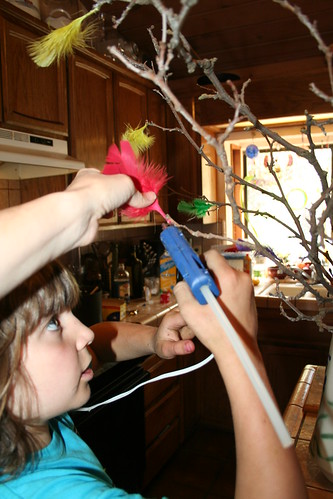
IMG_4967

Get out your low temperature glue gun and your patience and start gluing feathers on. That’s it. It takes a good long while and maybe an extra pair of hands to hold the feather in the warm glue until it sets.

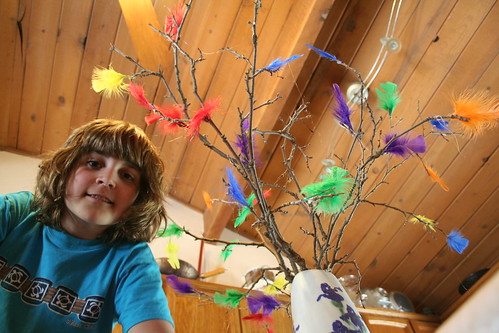
IMG_4972

But you can get funny photos while you’re doing it.

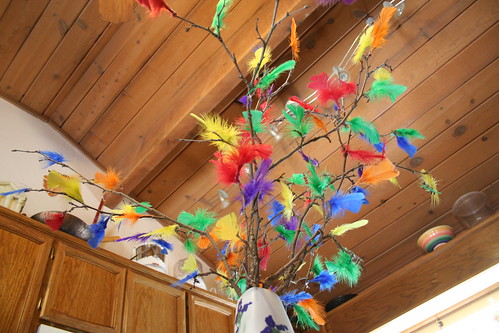
IMG_4978

And then you can surprise people you live with and people who visit, and they’ll say, “What the heck is that?”

upload

And then you can explain that the symbolism of the Easter tree is not about bringing on the spring, or sweeping out winter, or even about Easter witches—which is a Swedish thing! Really.

“But, apparently the Easter tree has a completely different origin and symbolism. It comes from the 1600’s. Swedish people in the 1600’s used to take twigs and sticks and beat each other with them on Good Friday to commemorate the suffering of Jesus. In the 1800’s and 1900’s, they started to be decorated and became a symbolic decoration for Easter.” —from Watching the Swedes

Snowflake Fairies Tutorial

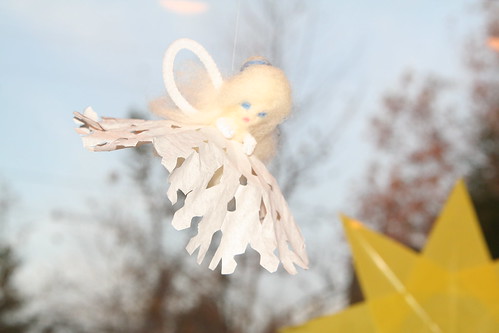
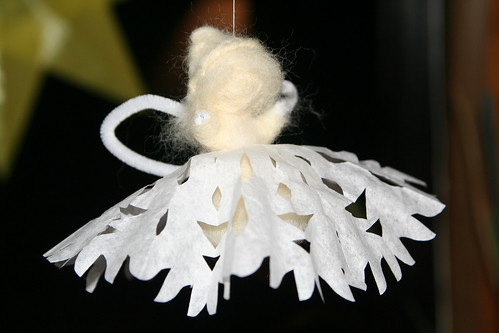
Snowflake Fairy with Face

In between chilly outings, when we’re inside warming up, is a wonderful time to appreciate the beauty of winter. Paper snowflakes are festive and look lovely decorating windows and our family cuts beautiful snowflakes every year.  Here is a project for making lovely snowflake fairies to flutter and dance in the air. Hang them over a heating vent to see them blow about, just like a real, falling snowflake.

Note: Some Waldorf educators recommend that you not make needle-felted figures and animals in the presence of young children, who may find the action of repeatedly needling the woolen bodies to shape them somewhat disturbing.

Materials

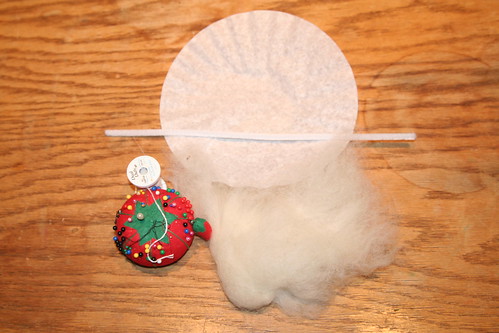
Materials

  • coffee filter
  • chenille stems
  • needle and thread
  • scissors
  • wool batting
  • needle-felting needle and pad

IMG_9664 IMG_9665

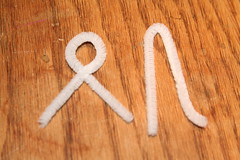
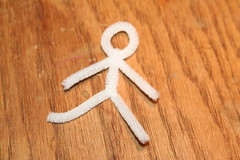
Start by forming the skeleton of your fairy. Cut your chenille stem in half. Twist a loop into the center of one half; this is your fairy’s head with arms attached. Fold the other half over (body and legs). Then put one leg of the folded chenille stem through the loop. The two pieces are now interlocked. About an inch farther down, where the pelvis of the figure would be, twist again to make two legs. You should now have a wire “stick figure” like you see in the right photo above. Fold the smallest possible bit of wire over at the end of each limb, to form tiny hands and feet and keep the cut wire from poking anyone.

IMG_9666

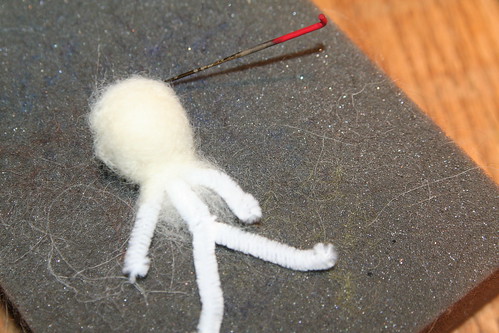
Take a small bit of wool roving, roll it into a ball, and insert it into the loop of the figure’s head. Then wrap a bit more roving around the head and begin to needle it in place into an attractive head shape.

IMG_9668

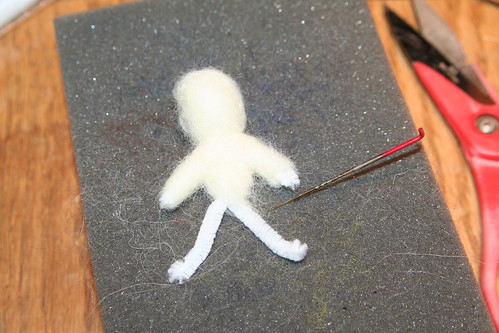
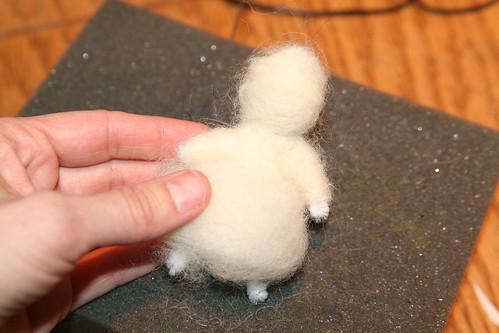
Using very small bits of wool, wrap around the figure’s body and arms. I find making a crisscross of wool that goes from shoulder to waist in both directions to be a good method. Needle this wool until it’s firm and stationary. The fairy’s arms may need more needling than the body to make them graceful and slender.

IMG_9677

Now add a bigger fluff of wool to create a woolen petticoat. You can either allow the fairy’s feet to show below the fluffy skirt, or make the skirt extend below the feet.

Cut

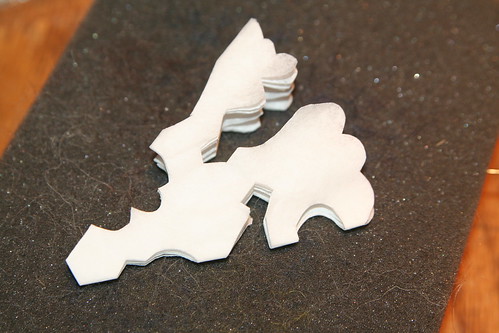
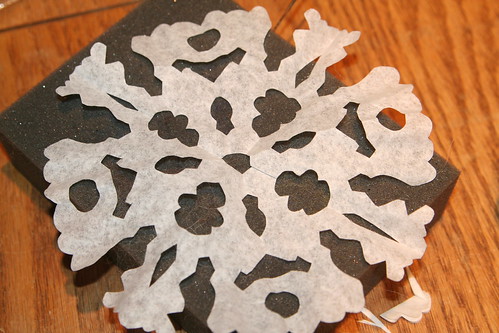
Fold a white, circular coffee filter into quarters or eighths and cut a snowflake. Cut a very small tip off the snowflake and unfold it.

Snowflake

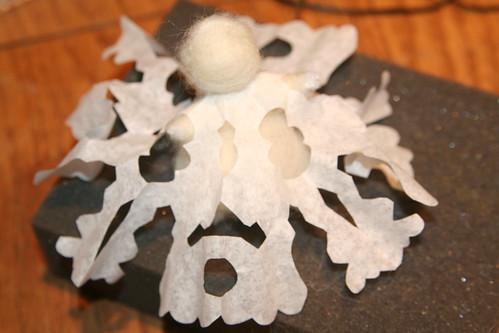
This is the only tricky part: Gently guide your fairy’s head through the center hole in your snowflake. Go slowly to avoid tearing the paper. If the head won’t fit through the hole, refold the snowflake and cut the tip just a tiny bit more to widen the hole and fit the head through.

Snowflake Fairy in Progress

You have a choice now. You can either put the fairy’s arms through holes in your snowflake (if you have such holes) to make a dress (see above), or you can gently move one arm at a time up through the neck hole of the snowflake to make it a skirt instead of a dress. This part is not unlike carefully dressing a small child, except your fairy will wiggle less.

IMG_9680

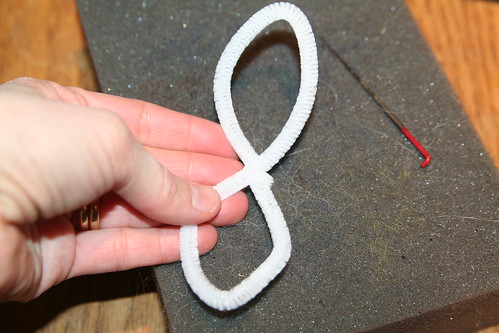
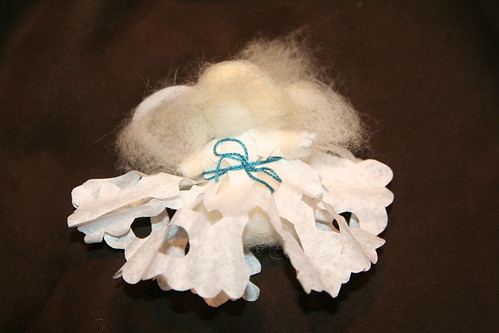
Next, use another chenille stem and form a circle. Twist the two ends together to seal the circle. Then twist the circle into a figure eight. These are your fairy’s wings. Use a bit of wool to tack the wings onto the fairy’s back. Now give your fairy some white hair, and allow it to flow over the center of her back where the wings meet the back.

Snowflake Fairy with Belt

If you made a dress, you might wish to belt it with a ribbon, bit of string, or a braid of wool roving.

Snowflake Fairy with Up-do

Here is a fairy with a skirt. You can give your fairy a fancy hairdo, if you like, by coiling wool into a bun and needling it onto her head. You can also add a face using tiny bits of color needled in for eyes and a mouth (as seen in the top photo). The fairies are adorable either way.

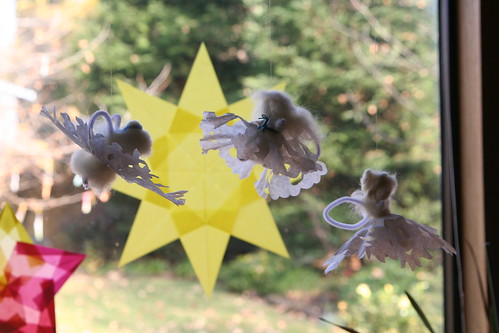
Snowflake Fairies

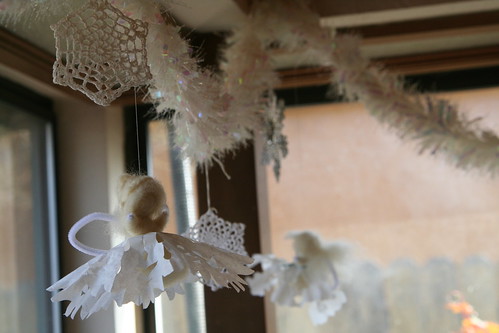
Now, you can make more snowflake fairies and hang them near each other to dance in the air, or display them with other snowflakes.

 Snowy Garland wih Snowflake Fairies

Please vote for Love in the Suburbs at the Circle of Moms Top 25 Creative Moms blog list. You can vote once per 24 hours until Jan 30, and you can vote for more than one blog on the list! Thank you!

Almond Shortbread Calderas Cookies

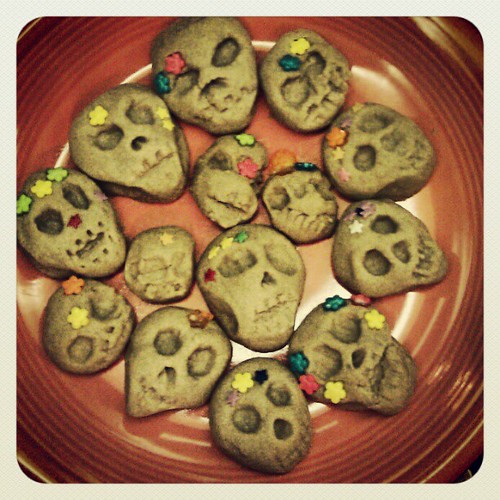
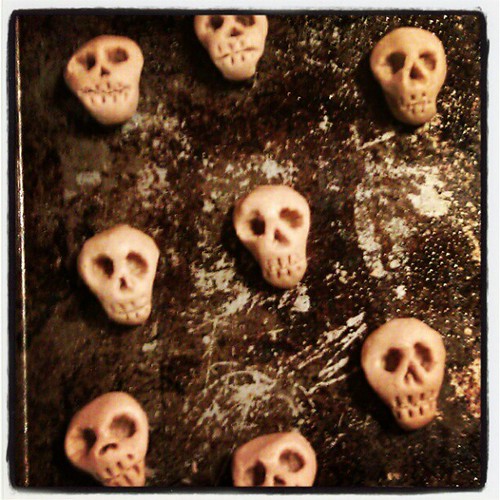
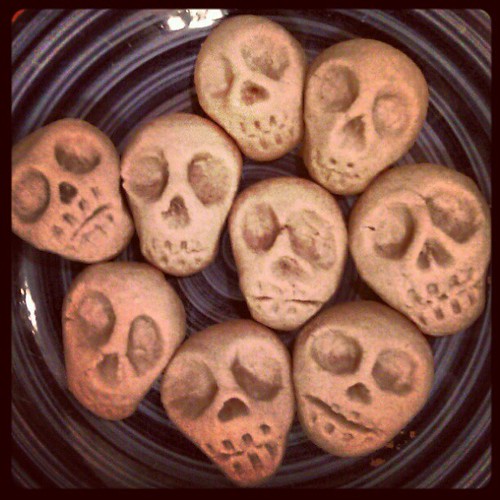
Almond shortbread calderas cookies. I kind of made them up.

Halloween was a big deal for us this year. Big projects, big fun. Today I’ve been so tired that I just felt like trying to put our home back together again, creating some order out of the costuming chaos, and getting back to normal (chaos). More about Halloween later, but …

I meant to make these groovy witch finger cookies on Halloween, but there wasn’t time to do it. I wondered if I could use a similar recipe to create something fun for Dia de los Muertos. Honestly I didn’t know if these would work.

1 cup butter softened (which to me means microwaved for 35–40 seconds after being in the fridge; is that what it really means?)
3/4 cup confectioner’s sugar
1 teaspoon vanilla extract
1 teaspoon almond extract
2 cups whole wheat flour
flowery sprinkles or stars (optional)

Butter sugar almond cookies. I have no idea how these will turn out when they are baked.

Cream together butter and sugar, add vanilla and almond flavorings, and then add in flour, a half cup at a time. Roll about a tablespoon of dough into a ball. With the end of a big spoon, chopstick, or other poky object, poke two eye holes. With a knife, draw a mouth line. With the tines of a fork, make a quick stroke up from the mouth line to make upper teeth, and another stroke down to make lower teeth. With a narrow skewer or similar object, make a little triangle nose hole. Now with your thumb and forefinger pinch the jaw of your face a little to make it narrower than the cranium. Place the skull on a greased cookie sheet. The most important feature of your caldera is the eye holes, so if they’ve become too squished while making the other features, use the same eye-hole making object to poke the eye holes again to make them nice and round and dominate the skull shape. Do this a bunch of times till you use up all the dough. Asher (5 years old) enjoyed making skulls too, and his are pretty great.

Now, if you want your calderas skulls to be flowery, push some flower sprinkles or stars, or whatever into the skulls. Personally, I think a few flowers go a long way toward creating the Dia de los Muertos look. I didn’t put flowers on all of my cookies and the plain ones look pretty cool too.

upload

Here they are baked—simultaneously cheerful and spooky—and ready to eat. They got a bit bigger in the baking, but kept their basic shape beautifully. By the way, I used whole wheat flour because that’s what I had. Because of the whole wheat flour, I upped the sugar to 3/4 cup. Your skulls will look whiter if you use all purpose flour, and you might not need as much sugar.

How’s that for a recipe post created late on the night of the holiday for which it is appropriate? OK, night-night. I hope you’ve had a lovely day and that you were were able to take a moment to remember those you love who have passed out of this world. Remember them fondly.

Review: Naturally Fun Parties for Kids

Review: Naturally Fun Parties for Kids

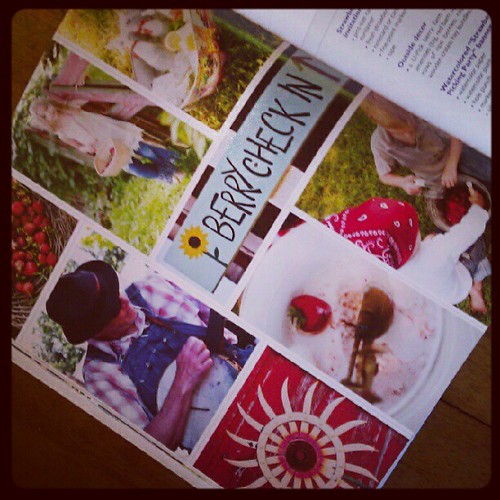
I was tickled to be asked to review Anni Daulter and Heather Fontenot’s new book, Naturally Fun Parties for Kids. Alas, I should have done so in a more timely fashion, as the book released earlier this year. But hopefully late is better than never. I’ve paged through this book dozens of times and I think it’s marvelous. Every time I pick it up I light upon a brilliant idea that hadn’t ever occurred to me before.

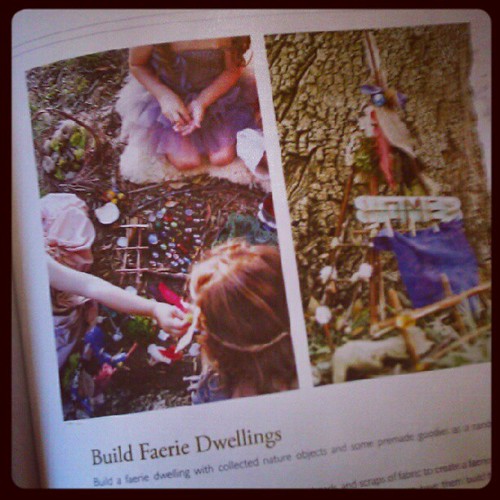
Daulter’s and Fontenot’s book is all about throwing parties with kid-friendly themes. As a huge fan of parties in general and, really, ANY excuse to dress up, I can totally relate. We all need celebrations and we all need to exercise our creativity muscles. This book is just the ticket to show what’s possible, with a little ingenuity, patience, and planning. A party for children doesn’t have to glorify a licensed media character! The book is organized into seasons and the authors provides three awesome party ideas per season. My favorites are the Summer Solstice Beach party, the Winter Solstice Party, the Forest Fairy Dress-up Party (Oh, to have girls!), and the Knights and Dragon Quest party.

The book offers “tips and tricks for making the parties green, natural, simple, and organic in style and content.” I like the emphasis on taking inspiration from nature and keeping it simple. The authors suggest thrifting, upcycling, borrowing, and making items from scratch to make the parties doable and special.

Review: Naturally Fun Parties for Kids

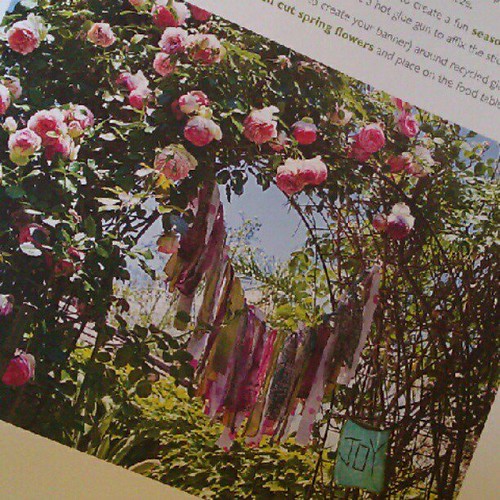
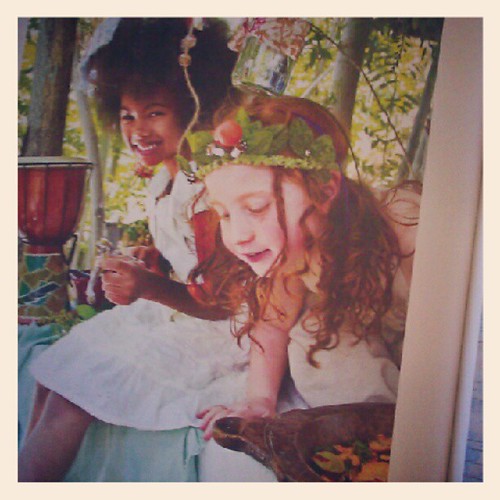
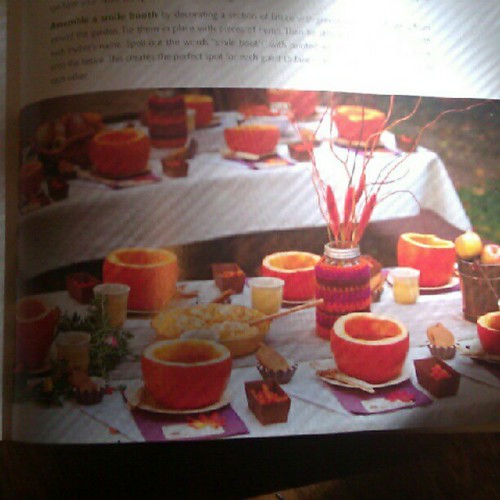
The book’s photography, by Tnah and Mario Di Donato, is simply gorgeous. Do NOT take my silly snapshots as an indication of the book’s beauty. I just wanted to give a little teaser. Their photos are vivid and inspiring.

Review: Naturally Fun Parties for Kids

What is kind of fun is how much the authors’ esthetic matches my own. Several of the projects in this book are ones we have done in the past, or ones that I’ve always wanted to do with my kids. I’m particularly intrigued by the beeswax ornaments (Winter Solstice Party), the upcycled sweater aprons (Community Cooking Party), and the grapefruit sugar scrub (Natural Spa Party). But there is much more.

Review: Naturally Fun Parties for Kids

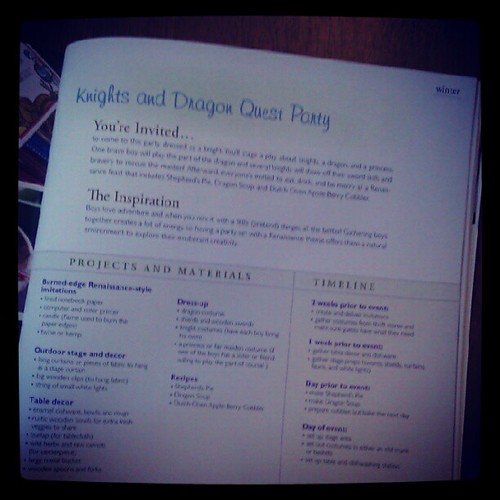
Each party comes with a project and materials list, and a timeline for getting things put together in advance of the big party day. That’s just the sort of thing people like me need! I’m often full of ideas at the too-late last minute and don’t have time to execute them. These handy lists fix that deficiency.

Review: Naturally Fun Parties for Kids

Activities are provided for each party, too: games and crafts, and even a play! And the party themes are well chosen to appeal to kids, such as pajama parties, berry picking, art, egg-dying in spring.

Review: Naturally Fun Parties for Kids

The authors also provide plenty of delicious-looking recipes and, frankly, you don’t need to throw the party to make them. Herbal tea spice cake and mushroom and onion mini crustless quiches both sound like they’ll be visiting my kitchen soon. Furthermore, the recipes are geared toward kid palates. Nothing too fussy and plenty of fun: Italian ices; black bean, corn, and cheese quesadillas; grilled flatbread pizzas; Dutch oven apple-berry cobbler, etc. Now, where the heck does one find a donut pan for baking donuts? (The Internet, I suppose.)

Those who like to do paper crafts will love all the invitation making in this book. That’s mostly not my thing, to be honest. So I’d probably skip some of that stuff. Anyone with a flare for scrapbooking and stamps and stuff will dig it.

So, if you’re looking for inspiration for celebrating with children, check out Naturally Fun Parties for Kids by Anni Daulter with Heather Fontenot.  I wonder if I could con my boys into a Forest Fairy Party? Well, maybe not that one, but definitely the Pancake P.J. Party. They’ll go for that!

Tutorial: Create a Mermaid Crown and Wrist Ribbons

Mermaid Crown

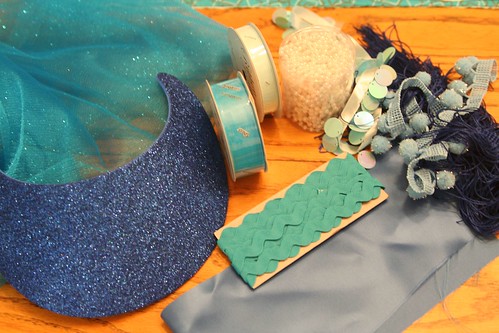
Who wouldn’t want to be as graceful as a beautiful mermaid or noble merman, living in an underwater wonderland? This play costume—a mermaid crown and wrist ribbons—is something you can create in stages, or do only the part you like best. Mermen might prefer just the crown, without the veil. The wrist ribbons encourage so much imaginative play for boys and girls alike. They can be water flowing while your merfolk swim. They can be magical water powers made visible.

Materials for Mermaid Crown

  • a craft-foam visor
  • jewels, beads, and/or small seashells (Tip: look for packages of jewels and rhinestones for decorating flip flop sandals! Craft stores have inexpensive kits.)
  • low temperature glue gun and glue sticks
  • ½ yard of veil fabric (tulle, netting, etc.)
  • scissors, sewing pins, hand-sewing needle and thread
  • sewing machine
  • notions and ribbons

Materials for Mermaid Wrist Ribbons

  • ¼ yard satin or acetate fabric
  • ½ inch wide elastic
  • notions and ribbons

Materials

Make Your Mermaid Crown

Begin by gathering your materials. You will need a clean, flat surface to work on. First, remove the elastic or plastic coil that is the back of your foam visor. You will put it back on later.

Now decide how you want your headdress to look. Will it have points like a queen’s crown? Will it be scalloped like a seashell? Turn your craft-foam visor over and sketch the shape you want. When you’re happy with what you see, cut your foam with scissors.
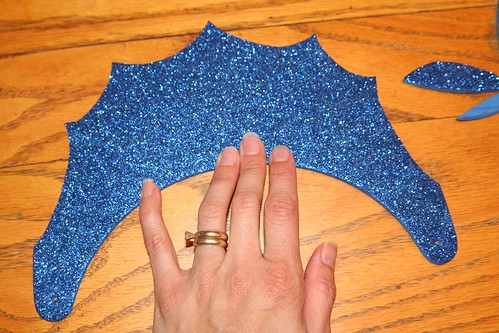
Cut the Visor into a Crown Shape

Now play with your notions and jewels, beads, and/or shells, placing them on the visor here and there, until you have an idea how you want them to be arranged. Take some time with this part because once you glue the items to your visor, it will be hard to remove them if you change your mind about their placement.
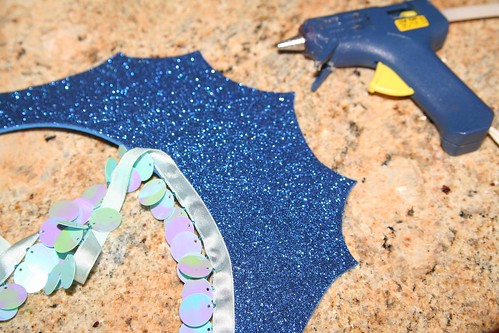
Adding Fringe

With your low-temp glue gun, glue on any trim (such as in this photo) and your decorations.
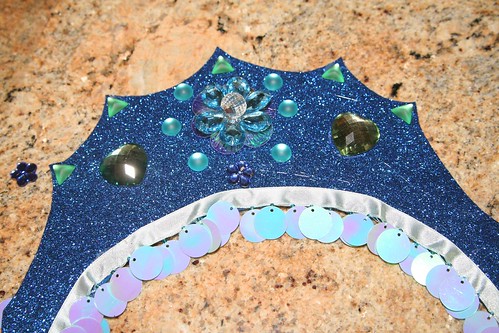
Gluing on Gems
It’s a good idea to measure to find the visor’s center. Try to arrange your biggest, most impressive or most special decorative item in the very center.

Using your glue gun and the smallest drops of glue, begin by gluing the special center item. Other smaller jewels or seashells can then be glued on. If your design is symmetrical, do the same item on both sides before moving on to a different jewel. You’ll have to pull off the strings of glue that may result from gluing on the jewels.

Have you decided to make a veil for your mermaid crown? (If you’re making this for a boy to play a merman, you may wish to skip this part.) Take your veil material (tulle, netting, etc.) and fold it in half so that it has two layers. You might measure your child to decide how long you want the veil to be. I decided I wanted the top layer of the veil to be shorter than the bottom layer. (Depending on the fabric you chose, you may wish to hem the bottom edges of your veil.) Pin the layers in place and then sew a seam about 1 inch from the top fold. This creates a tube through which you can pull the visor’s back elastic or plastic coil.
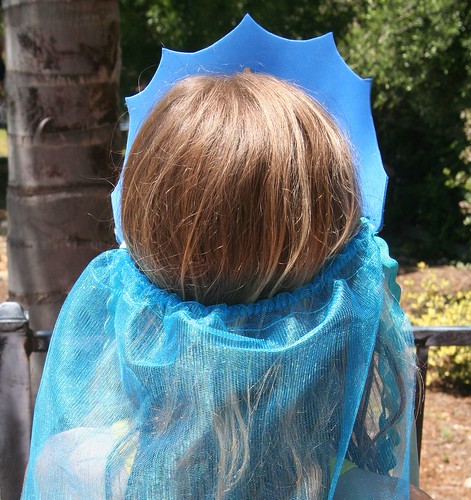
Mermaid Crown Back

Measure the visor on the head of your child, and shorten the elastic or plastic coil accordingly, so that it fits. (The coil on my visor is visible in the photo above.) You might wish to glue this part onto the visor so that it’s permanently attached. This spot, where the crown attaches to the back can be decorated with another jewel if you wish (see below at the child’s temple).
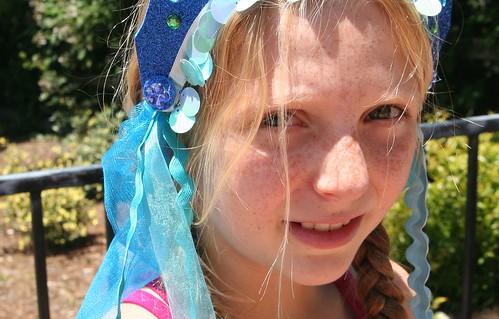
Mermaid Crown Detail

If you have ribbons or notions for decoration or long mermaid locks, fold them in half and with a needle and thread, sew them on to the corner of your veil, where the elastic attaches to the visor, so that they are firmly attached and can trail either in front of the shoulder or behind like hair. Keep in mind the age of the child who will wear this costume. The more decorations you add, the harder it will be for the child to put the crown on herself. (I ended up not using several items that are in the photo at the beginning of the tutorial.)

Congratulations! You’ve made a beautiful headdress for a lucky mermaid, or a handsome crown for a merman.

Sew Your Mermaid Wrist Ribbons

Wrist ribbons are a huge part of dress-up play in our home. You might be surprised at how well your child takes to these simple accessories. There is a bit of sewing involved, but it’s pretty easy.

The first step is to measure your child’s wrist using the elastic. You want the elastic band to be snug enough not to fall off the wrist, but not too snug as to feel tight. You also want to have about a 1 inch overlap, so that you can sew the elastic securely closed.

Now that you know how long it needs to be, cut two pieces of elastic that length. Lay out your covering fabric (satin or acetate). You could be very careful and measure this, but you don’t really need to do so. The object is to cut two strips of fabric so that they are twice as long as your elastic pieces and about 2 ½ inches wide. Turn in ¼ inch on both sides of your fabric strip and the ends and iron it flat. Sew the flat rectangle’s ends together to make a ring. Now fold your wide ring in half to make a long skinny ring with the right side of the fabric out. Make sure the width of your skinny ring will accommodate your elastic, but don’t actually put the elastic into the ring yet.
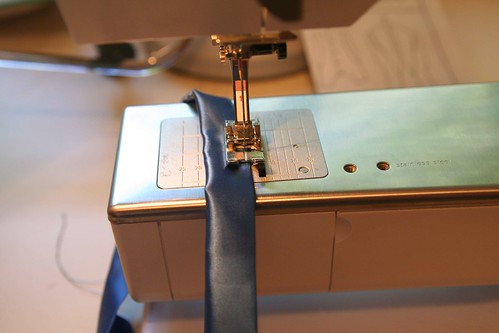
Sewing the Wristband

Top sew along the very edge of the long skinny ring to make a skinny tube. Don’t sew the ring completely closed. Leave an opening of a few inches so that you can insert your elastic.
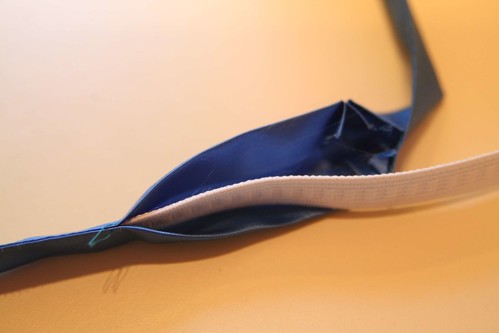
Insert the Elastic

With a safety pin on one end of the elastic, insert your elastic into your skinny tube of fabric. Bunch up the tube and join the ends of your elastic together with the appropriate overlap. Sew the elastic ring securely with a good zigzag stitch. You don’t want the elastic ring to pull apart when the child is putting the band around his or her wrist. At this point you have what looks like a hair scrunchie with a small opening in the side.

Gather up your ribbons that will be trailing and, with a few stitches, tack them all together at one end. I used the same notions as on the mermaid headdress, but you can use any ribbon. Consider painting some white satin ribbon with watercolors to create a watery effect.

Painted Ribbon

Now, insert the tacked end of your trailing ribbons into the hole of your ring and pin them in place.
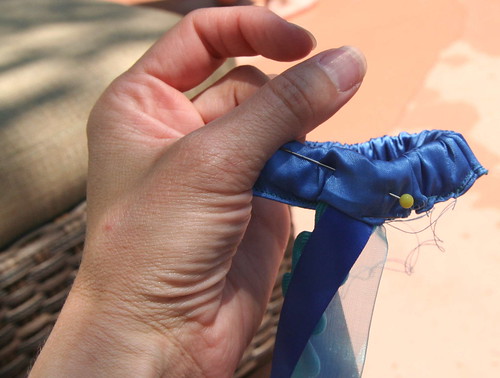
Wrist Ribbon Detail

By hand, with needle and thread, sew the ribbons in place to the elastic and sew the satin ring closed around them. I simply whip-stitched the opening closed and sewed the ribbons in firmly.
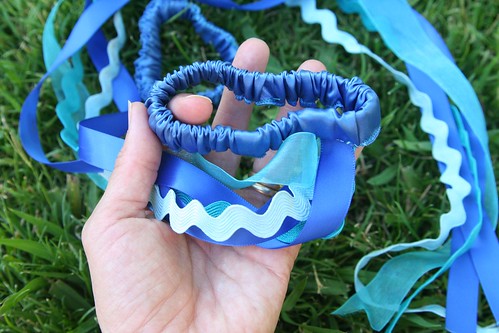
Finished Wrist Ribbons

Repeat all the steps so that you have two wrist ribbons.
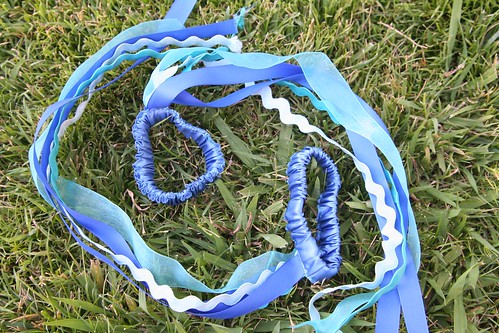
Finished Wrist Ribbons

If the ends of your ribbons want to fray, you can sometimes use a match and carefully melt the fibers at the ribbon ends to seal them. I suggest you first test this out on a ribbon scrap before you try to melt the ends of your finished wrist ribbons. You don’t want to harm your creation.

Now all you need to complete your mermaid or merman costume is a play silk tied around the child’s waist for a tail!
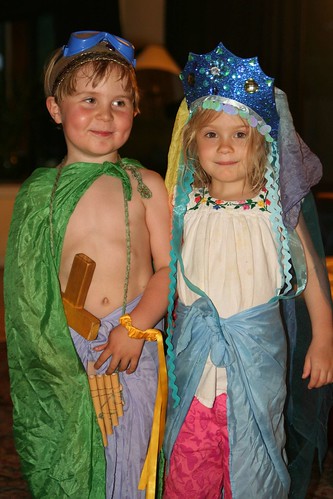
Merboy and Mermaid

You might be surprised at how your child uses these costume pieces. Perhaps the headdress or crown and the wrist ribbons you make will be used all together, or in different ways at different times. In this final photo, you can see that my son and his friend felt like using some of them at that moment, and found plenty of extra accessories (sword, goggles, pan pipes, cape) to transform themselves into a happy merfolk couple!

Happy sewing!
Surprise Evening Picnic


The River is FAST this Summer

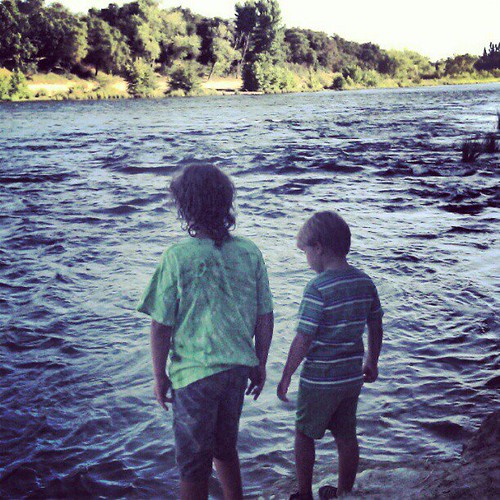
We surprised the boys with a picnic dinner the other night after swimming. We haven’t had a chance to leave town yet, so I’m trying to find little slices of heaven close to home. The river is running very high and very fast this summer. Although there was a small beach, I wasn’t comfortable letting the boys get in the water.

I read about this secluded little park on the American River and decided to check it out. Its entrance is sandwiched between two private residences in a ritzy neighborhood and the park is very small. They have the eleven-space parking lot closed during the summer, which I take to mean that the ritzy neighbors don’t want riffraff using their park.

Boys at River's Edge

Nevertheless, we weren’t the only people there. One family was fishing. Another group brought their dog down for … well, they seemed to want him to get wet. He wasn’t too keen on that plan. One couple swam a while, which looked fairly risky to me.

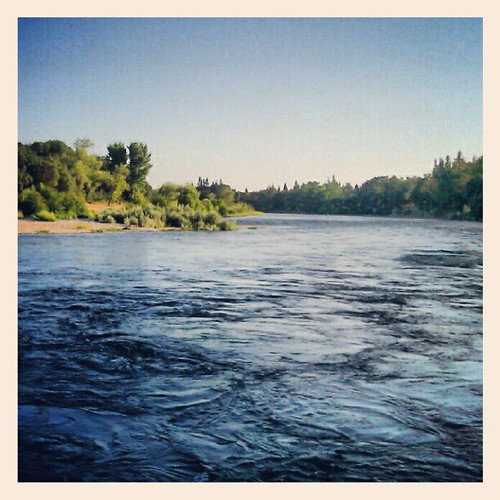
Our Beautiful River

We waited for Daddy to bring Solstice dog and our picnic dinner, as the boys and I came here straight from swimming practice. It was a beautiful place for a picnic.

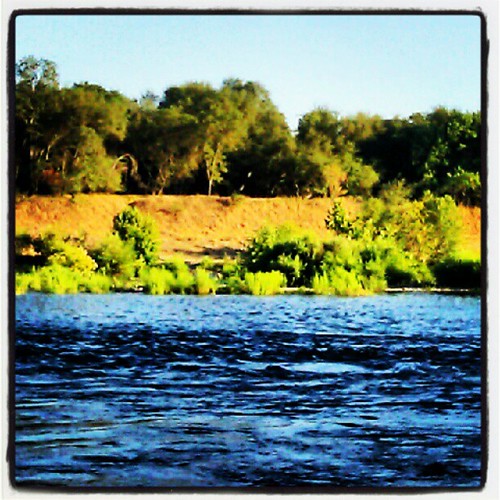
American River at Sunset

We watched the sun sink lower and light up the far bank.

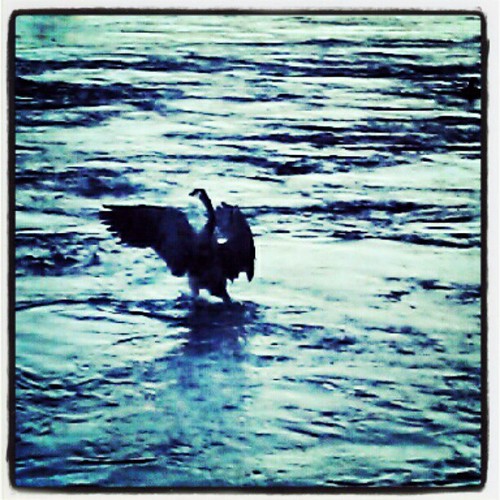
Canada Goose

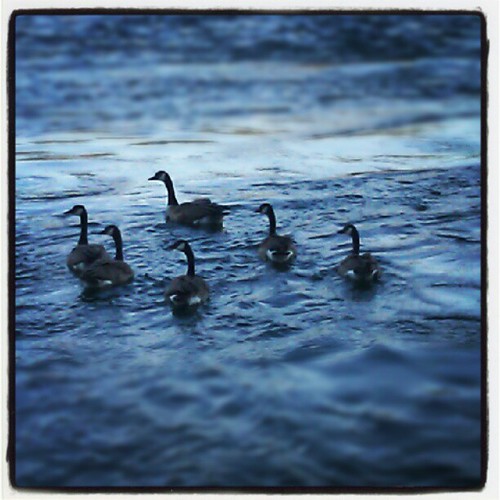
We watched the Canada geese and mallard ducks. Solstice dog wanted those ducks sooooo bad.

Canada Geese

I (obviously) played with Instagram on my phone camera.

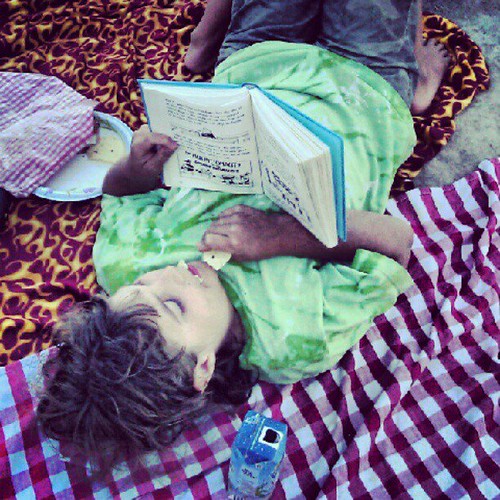
Picnic Reading

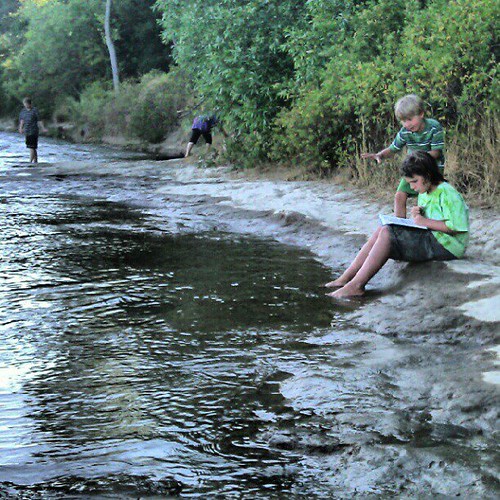
Lucas enjoyed some time with his Wimpy Kid book. Asher and Daddy explored a bit, and Asher tried to play with another little boy who was there. We ate ham sandwiches and apples and blueberries and corn chips. Simple. Perfect.

  • About Sara

    Thanks for visiting! I’m Sara, editor and writer, wife to Ian, and mother of two precious boys. I am living each day to the fullest and with as much grace, creativity, and patience as I can muster. This is where I write about living, loving, and engaging fully in family life and the world around me. I let my hair down here. I learn new skills here. I strive to be a better human being here. And I tell the truth.
    Our children attend Waldorf school and we are enriching our home and family life with plenty of Waldorf-inspired festivals, crafts, and stories.

    © 2003–2018 Please do not use my photographs or text without my permission.

    “Love doesn’t just sit there like a stone; it has to be made, like bread, remade all the time, made new.” —Ursula K. LeGuinn

  • Buy Our Festivals E-Books


  • Archives

  • Tags

  • Categories

  •  

  • Meta