Signs of Spring

upload

I’ve been watching carefully for signs of the coming spring. Perhaps you have been too?

Signs

I collected these for you, in case your eyes are aching for some color and you’re tired of being cold.

Signs: Chinese Fringe Flower

Or even if you just enjoy the promise of it, knowing that it’s coming.

Magnolia

Signs: Plum buds

Signs: Almond in bloom

The trees are waking up, putting on their pale dresses and stretching in the sunshine.

upload

Our eyes can get caught in the showers of petals, or in the shimmering, sunstreaked clouds.

Park time

But looking down is rewarding too. The earth is dark and moist. Grasses are singing. It’s a good time for tromping, in shirtsleeves if you can get away with it.

Signs: Hyacinth

Sometimes you have to look closely. There among the decayed leaf litter …

Signs: Jonquils

are some lovely signs. Fortunately, they’re designed to catch the eye.

Do you feel the earth waking? Are you seeing signs of spring?

This Moment: Signs

Signs

Spring is coming! I see signs of it everywhere. Bud are swelling on trees, the earliest magnolia in my neighborhood is starting to flower, my bulbs are coming up, there’s baby peeps for sale at the feed store, jonquils are blooming, and my Leghorn hen (who is positively elderly) has started laying again.

When

In February there are days,
Blue, and nearly warm,
When horses switch their tails and ducks
Go quacking through the farm.
When everything turns round to feel
The sun upon its back—
When winter lifts a little bit
And spring peeks through the crack.
—Dorothy Aldis

Fourth Grade Trip to Malakoff Diggins

L at farm sepia

In May, before the end of the school year, Lucas and Ian got to go on the fourth-grade class trip to Malakoff Diggins, a California State Historic Park that was once a hydraulic mining operation in the Sierra Nevada mountains. Twenty-eight students, one class teacher, one Spanish teacher, and about ten parent volunteers/chaperones went for two and a half days. They dressed in Gold Rush period clothing, cooked their meals over an open fire, hiked, made rope, made candles, built their own benches for sitting around the campfire, learned about gold mining, danced, listened to a storyteller entertainer, and forged their own iron hooks. They had a marvelous time and came back filthy and tired, but very satisfied.

IMG_6003

Boys at farm

IMG_5887

IMG_5641

IMG_5859

IMG_5983

The class made wonderful wood, tin, and plexiglass lanterns in school, so they would have a way to see at night. I’m told that the food was wonderful the whole time.

IMG_5716

IMG_6170

IMG_6175

M gunslinger sepia

IMG_5961

These are the cabins Ian stayed in when he was a boy, going camping with his mother and sister. Malakoff Diggins is very special to him and he jumped at the chance to chaperone. I’m so glad he got to do it, both for his sake and for Lucas’s sake. For Lucas, it was fun having his dad there to share in the adventure.

IMG_6198

There was an old, old piano in the saloon. Lucas and some other students got to play it. They also played cards and ordered root beer from Ian, the barkeep. To get their second root beer, they had to tell Ian a joke, a fact, or a riddle.

IMG_6187

IMG_6171

I and S gunslingers sepia

Girls making rope

IMG_6129

IMG_5959

IMG_6126

IMG_6059

The blacksmith was amazing, according to Ian. He was a volunteer who, in his time of working with children at Malakoff Diggins, had helped over 10,000 kids make iron hooks like this one. He had his system down pat, with every child getting the opportunity to both work the bellows and hammer the iron hooks into shape. Isn’t Lucas’s hook terrific?

L trapper sepia

R and E sepia

The parents in attendance brought a wagon load of essential skills along to help: camping, cooking, nursing, building, child herding, and much more.

IMG_6249

IMG_6271

Everyone even tried square dancing and country dancing.

IMG_5942

IMG_5996

A few brave kids brought their guitars and played music around the campfire. I’m so impressed by this! These kids are so comfortable with each other, as they’ve been together since first grade (and some since preschool).

Lucas tired

This is how Lucas looked when he returned home after two and a half days—filthy and soooo tired.

These photos are just some of my favorite shots. I took a bunch of “before” shots on the morning they all left town, when the kids were clean, fresh-faced, and eager. Ian took all the wonderful photographs of the kids at Malakoff Diggins, for which I am so grateful. I had a TON of fun editing the photos when they returned, adding filters and making them look old-timey—something altogether new to me. Anyway, aren’t they the most beautiful children in the Wild West?

I am so grateful that my son got to experience this! Although every child in California studies California history in fourth grade, few get to immerse themselves in a Gold Rush era town for a few days, living and working like people used to do. These children, because of their Waldorf background, took to this stuff so easily. Make our own rope? Of course! My heartfelt thanks goes to the teachers and brave parents to took them. And thank you to Malakoff Diggins for having such a terrific program.

Plein Air Painting and Iris Farm

My Landscape Choice: Plein Air Painting Workshop at Iris Farm

Back in April I got to spend a half a day doing something amazing. I attended a plein air painting workshop taught by Randy Blasquez at the Horton Farm Iris Garden in Loomis, California. The view above was my chosen landscape and I attempted to crop it down to a 12 x 8 canvas and just show the middle part. The day was warm and gorgeous, and I prudently parked my easel, Anaïs, in the shade. Something about that chartreuse tree, the lavender in the back, the dark right side, and the red-orange irises in the foreground was very attractive to me.

My Friend Jonathan Iris

Maybe it’s because these were named “My Friend Jonathan.” Jonathan is my brother’s name.

Plein Air Painting Workshop at Iris Farm

We spent about an hour or so watching our teacher Randy do a demonstration after we arrived that morning. Then we all fanned out and found our spots. I found myself struggling with wanting to paint, but also wanting to walk around and admire the irises and take photographs. I buckled down and painted for about two hours. Then I allowed myself to wander just a bit before rushing back to work on an editing project at home.

My painting from that day isn’t good, isn’t finished, and I don’t care much for it—except that I learned a lot in painting it. I learned that simpler is better, when it comes to landscapes—at least for a beginner like me. I learned that the point of painting outside is to capture colors and shapes. That the light will change while you’re painting, and your painting won’t look much like the landscape does at the time you stop. Also, I learned that my eyes worked really hard at adjusting between seeing the landscape in sunlight and seeing the painting in the shade. By the end of the day I was a trifle sunburned and my eyes were sore.

Iris Farm

No matter, though. It was a glorious day. And maybe someday I’ll work on that painting some more. Bring in more light, darken the bare ground with a warmer brown, etc. Maybe.

Mariposa Skies in Foreground

Light-and-dark blue “Mariposa Skies” was so lovely.

IMG_4126

IMG_4121

The farm is gorgeous in every way. Rows upon rows upon rows. I bought three irises in gallon pots that day to add to my garden: “Widdershins,” “Smoke Rings,” and “Obi-Wan Kenobi”—how could I resist? All of these are rather unusual colors for irises, which suits my garden just fine. I didn’t really have to be too choosy anyway; so many were gorgeous.

IMG_4076

I liked this place so much I took my mom there the following weekend. No painting that time, although they were having an event for painters that weekend.

IMG_4096

Mom and I just enjoyed wandering and admiring and iris shopping.

IMG_4083

IMG_4112

IMG_4093

IMG_4179

Surprisingly, Mom was attracted to all the purple irises that day, instead of the yellow ones. Yellow is her favorite color.

IMG_4157

Oh, and there were super-cute goats. And a lizard. And a bunch of rusty old farm equipment! And a rundown barn. Truly a delightful place.

IMG_4171

IMG_4139

The Theft of Thor’s Hammer: Fourth Grade Play

Thor

Last month, my son’s fourth grade class put on their spring play, The Theft of Thor’s Hammer. It was a funny story and the children performed beautifully in two performances. I only have photos from the performance in which Lucas played Thor. Doesn’t he look mighty? I was so proud to see him try for a big part—the part he really wanted—and get it. He’s never put himself out there like that before. And boy did he! I think this part required quite a lot of courage. You’ll see why in a minute.

Freya

Here’s Freya, the goddess associated with love, beauty, fertility, gold (and sorcery, war, and death—don’t mess with Freya).

Frey, with Sif in the Background

And here’s glorious Frey, with Thor’s wife Sif, an earth goddess whose hair is “like golden sheaves of wheat,” in the background.

Angry Thor

See Thor’s grumbly, angry face? That’s ACTING. I love it. I also love the wool roving used for his hair and beard.

Loki

This darling child played Loki with such athleticism and feeling. Truly it was a joy to watch Loki’s antics.

Loki

Loki borrows Freya’s falcon feather cloak.

Loki and Thrym

In the play, the giant Thrym steals Thor’s hammer, Mjolnir. The Asir gods are imperiled if Thor doesn’t get it back. Thrym says he’ll return the hammer to Thor if Freya will consent to become his wife.

Freya Is Angry: The Gods Suggest She Marry Thrym the Giant

Several of the of Norse gods say this isn’t a bad plan. Freya, on the other hand, is highly insulted. She will not consent! (Go Freya!)

Thrym

Thrym insists and waits eagerly for his bride.

Loki Confronts Thor

Loki suggests that Thor disguise himself as Freya to go get the hammer. This is not Thor’s favorite idea, but after his fury subsides, he reluctantly agrees.

Thor Dressed as Freya

Thor and Loki are dressed as Freya and her maid. The veil hides Thor’s manly visage.

Giants

Giants' Song

At Thrym’s home, the giants bumble about and sing a song. Thor-as-Freya is invited to a wedding feast, where he puts away a lot of food before unveiling his true god-self and bonking Thrym with the hammer. Mustn’t fight giants on an empty stomach, after all.

Mjolnir, Thor's Hammer, Is Back

With Mjolnir back in Thor’s possession, the world of the Asir gods is saved. Odin and the others are grateful.

Yarn Necklace for Mother’s Day Tutorial

Yarn Necklace

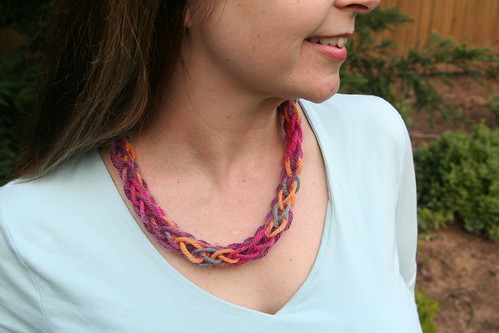
Are you hoping to make a special Mother’s Day gift for mother or grandma, or perhaps an end-of-year gift for a teacher? This yarn necklace is easily made by children who have a little finger knitting experience, in fact, my son made one for me when he was in the first grade and recently taught me how to make it. This kind of cord-making is called “finger knitting” and “finger weaving.” (Besides necklaces, you can make scarfs, braceletes, belts, or headbands in this way.)

Materials

  • wool or cotton yarn in a pretty color

Start by placing the tail of your yarn in the crook between your thumb and forefinger so that the tail hangs down over the back of your hand. Use your thumb to pinch the tail and hold it in place. Take the ball end of your yarn under and over, under and over your four fingers, wrap it once around the pinkie finger.

Continue weaving the working yarn under and over, under and over, traveling back toward your index finger.

Wrap the yarn around your index finger and go under and over, under and over until you go around your pinkie again, and then weave it back toward your index finger in the same manner. Wrap the yarn one more time around your index finger and let the ball end rest across your palm. You should now have two loops (horizontal bands) of yarn on the front of each finger as you see in the photo below.

Now, beginning with your pinkie finger, grasp the lower loop with the fingers of your other hand and lift the lower loop over the upper loop …

… and completely off the pinkie finger as in the next photo below.

Now release the loop. Your hand should now look like this photo below, with two loops on the first three fingers and only one on the pinkie finger.

This action of moving the bottom loop over the top loop and off the finger is finger weaving. You will repeat this action with the remaining three fingers (ring finger, then middle finger, then index finger).

As before, with the ring finger, lift the bottom loop up and over the top loop, and then off the finger altogether. As you complete this procedure with each finger, you’ll see that you now have only one loop left on the finger.

When you reach the index finger, the yarn tail that your thumb has been holding in place acts as your bottom loop. Treat it as any other loop and lift it up and over the top loop and off the index finger.

The tail will now trail down between your index finger and your middle finger.

Now grasp your working yarn and wind it under and over your fingers as you did before, under and over, and around your pinkie finger so that your new loops are above the loops already on your fingers. Then continue winding the yarn under and over, under and over until you’re back to your index finger again. You should now have two loops on each finger again.

The loops are now high up on your fingers. Push the loops down to the base of your fingers. Then, as you did before and starting with your pinkie finger, pull the bottom loop up and over the top loop and let it go. Repeat for all four fingers exactly as you did before.

Push your stitches down again. Weave your yarn again, under and over, under and over, around, under and over, under and over above the loops already on your fingers, until you have two loops on each finger again.

As you repeat this process of pulling bottom loops over top loops again and again, row after row, you will begin to see the woven cord coming off the back of your middle and ring fingers, as in the photo below.

The woven cord looks kind of flat at first, but when you’re done and you tug it gently a few times, it will become a round cord for your necklace.

When your cord is long enough, it’s time to cast off. (Experiment with the length by putting it around your own neck while it’s still on your fingers. If you can see the necklace when you look down, chances are good the cord is long enough and stretchy enough to easily fit over a head.)

To cast off, begin with only one row of loops and don’t weave new loops above them.

Instead, lift the loop on the pinkie finger off the finger and place it on your ring finger. Your ring finger now has two loops and your pinkie has none, as in the photo below.

Lift the bottom loop over the top loop and release. Now your ring finger has only one loop. Pick up that loop and move it off your ring finger and place it on your middle finger, which now has two loops. Lift the bottom loop up and over and release. Now move the remaining loop on the middle finger to your index finger. Lift the bottom loop over the top loop and release. Now your index finger has only one loop and your other fingers are bare. You may now remove the final loop from your hand, cut your yarn, pull the working yarn through it, and pull it tight. Now pull the tail on the other end of your cord tight.

Now gently tug on your cord so that it becomes round rather than flat. Tie the two ends together, making a circle necklace.

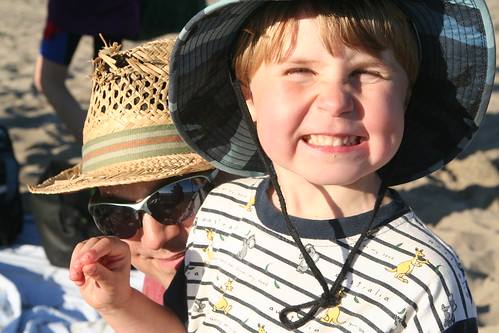
The necklace should be stretchy enough that it can easily go over head of the lucky person you give it to. She will treasure it more than she would any chain of gold.

Happy Mother’s Day!


(This tutorial was originally published in the Little Acorn Learning May Enrichment Guide. Check out all their many wonderful offerings at Little Acorn Learning.

Garden Love

Foxgloves

I am thoroughly enjoying my garden this year. Everywhere I turn I see successes in the form of bright flowers. Not everything I’ve planted has done well, but so much has and I am finding that going even a few days without some time working in the garden is too long. (It helps when the weather is so completely perfect like it is now.)

Of course, there are spots of ugliness that I have plans to change, but I’ll give a little tour of the good stuff. My foxgloves (above) are off the hook this year. In fact, since this photo was taken, more tall spires have bloomed out and they’re bending down to the ground. I’ve got to stake them up with something.

Sun Rose (Helianthemum nummularium 'Ben Nevis')

These sunny fellows are called Sun Roses (Helianthemum nummularium, according to the Interwebz). It’s a low-growing ground cover with orange flowers that drift up above.

Salmon-Colored Azalea

April is the month for Azaleas and mine are doing great. I’ve actually been feeding them this year. I’ve turned over a new leaf and vowed to support the plants I already have with loving attention and fertilizer.

Black-eyed Susan (Rudbekia) Vine

This vine is new this spring. It’s a form of rudbekia called Black-eyed Susan vine. I’ve had it for about three weeks and it’s still blooming like this. My hope is that it will grow up onto my fence near my patio. My concern is that my soil isn’t all that great in that spot. It was such an arresting flower that I decided to take the chance. I think I paid $12 for this. It stands about 4 feet tall.

Nemisia

My nemesia from last year is blooming beautifully.

IMG_4008

I think this rose is called “Peace” but I’m not sure. I think it’s heavenly.

Clematis

My clematis vine survived the winter and bloomed like crazy all through April. Then it had a few quiet days before a new batch of flowers opened up. These are about six inches across. I bought a pretty trellis for them to climb and need to paint it and get it into its permanent spot soon for the vine to grow on.

Like a Candy Cane

Peppermint candy rose—it was called something like that, but I forget. This rose was new last year and it seems very happy.

Mandavilla Vine

I bought a Mandevilla vine at Costco. My mother says she has killed several of these over the years. I figured I’d give it a try. It’s flowers look like ballerinas.

"Hot Cocoa" Rose

And this baby is Ian’s favorite rose “Hot Cocoa.” We like it so much we have two of them.

Let’s see … the delphinium is looking good and getting ready to bloom. I have seven new irises that I recently bought at the nearby Horton Iris Farm. One called “Obi-Wan Kenobi” is blooming and another called “Tomorrow’s Child” will bloom soon. Today I planted a scarlet dianthus and three purple verbena ground cover plants. The rock roses I put in last year are blooming and I’m looking forward to them getting bigger; they should get at least three feet tall. My evening primrose has spread and is now sporting baby-pink poppy-like flowers. I’m hoping it will spread out more in the front yard too. All the purple iris rhizomes I bought from the Waldorf school farm are doing fine but aren’t yet ready to bloom. I think I’ll have to wait until next spring for them to be well enough established to flower.

Oh—and the mint is trying to take over the world.

My next project, apart from putting in tomatoes and peppers and pumpkins from seed, is to get some rooting hormone and try my hand at propagating from cuttings.

May Day 2012

Woven Ribbons

Good Morning, Mistress and Master,

I wish you a happy day;

Please to smell my garland

‘Cause it’s the First of May.


A branch of May I have brought you,

And at your door I stand;

It is but a sprout, but it’s well budded out,

The work of Nature’s hand.

—from A Child’s Seasonal Treasury

Maypole Ribbons

Happy May Day! Today is one of my favorite days of the year because May Day celebrations are so beautiful and full of flowers and because it is my older son’s birthday. This year feels extra special because Lucas is turning 10. A decade of our lives has been spent loving and raising this beautiful boy.

Beltane Birthday Boy: 10

He is magnificent and I love him so!

Welcome Spring!

BEACH

I’m catching up from last weekend. Last Saturday we celebrated Delphinia, a tradition that we have held for about 20 years. Friends come from far and wide to play on the beach at Point Reyes National Seashore and to declare that springtime has come! The time for breathing out, adventuring, travel, enterprise, and busyness has returned and we can throw off our quiet introspection of the winter months. This year, the weather was absolutely perfect! We sometimes have a chilly beach experience, but not this year.

Champagne! Why, Thank You!

Champagne? Why, yes, thank you!

Daddy and Asher

We picnicked. The daring children splashed in the cold waves.

Dragon Kite

We played and flew kites. Sweet X has a nifty dragon kite. We had a community fire; we shared our intention and our gratitude. Two mamas are expecting. We’ll soon have two new baby friends in the world! How amazing is that?

Beach Doggy

So many of us have dogs now and we brought them along. Five dogs makes things extra exciting. This was Solstice’s first trip to the beach—as far as we know. He’s new to our family.

Manly Men

The guys found a giant log up the beach. They decided it was in the wrong place.

Erecting the Log

And in the wrong orientation.

She Made It!

Then they hatched an even greater plan. (Everyone in this photo is at least 6 feet tall.)

J on Top

And brave J climbed to the tipy-top, amply proving her courage, . I watched the whole thing and I still don’t know how she did it.

Limantour

Point Reyes is so lovely. This is one of my favorite places on earth. Perhaps it’s because we have been coming here to celebrate and adventure my entire adult life. It’s pretty far from home—more than three hours in the car—but it’s definitely worth the trip. As is our family tradition, we picked up garbage on the beach before we left and hiked it out. Earth Day was the next day, after all, so we worked extra hard.

Lucas Leaving Pt. Reyes

We didn’t leave the beach until 7:30 in the evening!

Soggy Lucas (Leaving Pt. Reyes)

We were tired and soggy, but very happy. And our adventure didn’t end there! Our friends, T and E invited us to camp with them in their trailer at Samuel P. Taylor campground in the redwoods of Marin county. Staying overnight there with them meant that the fun didn’t have to end, we didn’t have to drive 3 hours home at night, and we got to play and hike a bit in the forest in the morning. It was sooooo great waking up on Earth Day to all that green!

Camping

It was beautiful. Suki dog patiently tolerated all of our noise and business. We had a yummy breakfast together.

E and T (I took this one!)

I got to play with E’s iPhone and took this funky Hipstamatic shot of her and T.

Clowning with My Sons

And we got silly. Nothing pleases little boys more than allowing them time to be goofballs.

Our Family! (E's Shot)

Thanks for the family photo, E! (And for all the photos!)

Naturally, I’d like to show you all the wildflowers and beautiful emerald trees but this post is getting waaaaaaaaaay too long …

Asher in the Wildflowers

Sunlit Leaves

Oops. They sneaked in here anyway. Ahem! So, I’ll skip our stop at the Mission San Rafael on the way home. Perhaps I’ll write about that another time.

For now, I need to clean my house and get ready to have family over for a birthday party this evening. Lucas turns 10 on Tuesday!

Earth Day Moss Garden Terrarium Tutorial

Finished Moss Terrarium

Here is a simple way to celebrate the earth, and bring a little of it inside your home. This moss garden terrarium is easy and inexpensive to make. Children of any age can help with this project and may especially enjoy finding such treasures of the earth. Noticing the small things in nature can be so rewarding, and it feels good to sink our hands in the soil.

Materials for Moss Terrarium

Materials

  • a wide-mouthed glass container (goldfish bowl, candle holder, or jar; you may find something appropriate a thrift store)
  • gathered moss (gently lift from soil or rock, bringing the soil on which it grows with you)
  • about ½ to 1 cup small gravel or pebbles (look for pretty pebbles in your yard)
  • about 1 cup loamy garden soil (or more if your glass container is large)
  • interesting rocks, bark, twigs, or gemstones
  • spray bottle with water

Optional Materials

  • a small plant that requires little water (perhaps a jade plant or other succulent)
  • beeswax for modeling or a small figurine
  • crystals, glass gems, small twigs

Gathered Moss


Tutorial

Begin by gathering your materials. You may be able to gather most of the materials you’ll need from your yard or nature walk. (Be sure not to remove items from protected nature areas.) Take a soup spoon or small shovel and a gathering basket along on your walk. Look along creeks and in shady, moist areas.

When you find mosses, stop and consider them a moment. Moss is a delightful, soft plant. It gets it’s nutrients from the air, rather than the soil, and requires shade and only a little water. It makes a perfect plant for a terrarium that gets only indirect sunlight in your home.

Feathery soft, your green so bright,

preferring deep shade to the light,

quietly sitting, waiting, spreading,

it’s hard to tell which way you’re heading.

I will touch your velvet softness.

Moss, I love your gentle mossness.


You make a lovely velvet bed

for a Fairy Queen to rest her head,

who sleeps in afternoons for rest

and dreams of forests nightly blessed.

We creatures great and creatures small

find you the tenderest plant of all.


Thank the earth for growing such lovely mosses and gently dig up some patches. Don’t take more than you need to fill your terrarium container, and you’ll likely need to take only an inch of soil or less.

Garden Stones in the Bowl

Now place your gravel or pebbles into your glass terrarium. These are at the bottom for drainage of water away from the soil. Add your garden soil to the container. It will probably cover your pebbles completely. You may wish to grade your soil so that some areas are higher than others. This will add interest to your finished terrarium.

Side View

Arrange your mosses (in patches) in your terrarium. Try to keep your clumps of moss mostly intact to make a contiguous, soft carpet. Alternatively, you could place moss in only part of your terrarium, and decorate the other areas with a plant, pretty pebbles, or glass gems.

Mosses In

Add your decorative rocks, bark, or crystals. I happened to find a small chuck of old concrete that had more moss growing on it, so I added it to my terrarium. What will you add? Crystals? Twigs? Polished stones? A ceramic figurine of a deer or a rabbit? A butterfly? A gnome or a Fairy Queen in repose? Perhaps you’ll change your terrarium decorations with the holidays.

Spray to Keep Moist

Spray your moss garden with some water. Your mosses may need spraying once or twice a day to stay green and living. Avoid exposing them to direct sunlight.

Beeswax Gnome

I turned to our modeling beeswax to fashion a tiny gnome. I think he’ll make an excellent caregiver for my moss garden terrarium. Gnomes are kind custodians of the earth.

Finished Moss Terrarium

Be a good caregiver of your moss garden terrarium, spray it gently every day, and be careful not to saturate it with too much water. (Once again, the direct sunlight you see in this photo is too hot and bright for your moss. Be sure not to keep your terrarium in such a sunny location.)

Now add your terrarium to your nature table, your dinner table for an Earth Day celebration, or anywhere in your home that needs a small reminder of the earth’s beauty.

  • About Sara

    Thanks for visiting! I’m Sara, editor and writer, wife to Ian, and mother of two precious boys. I am living each day to the fullest and with as much grace, creativity, and patience as I can muster. This is where I write about living, loving, and engaging fully in family life and the world around me. I let my hair down here. I learn new skills here. I strive to be a better human being here. And I tell the truth.

    Our children attend Waldorf school and we are enriching our home and family life with plenty of Waldorf-inspired festivals, crafts, and stories.

    © 2003–2018 Please do not use my photographs or text without my permission.

    “Love doesn’t just sit there like a stone; it has to be made, like bread, remade all the time, made new.” —Ursula K. LeGuinn

  • Buy Our Festivals E-Books


  • Archives

  • Tags

  • Categories

  •  

  • Meta