Shamrock Window Transparency Tutorial

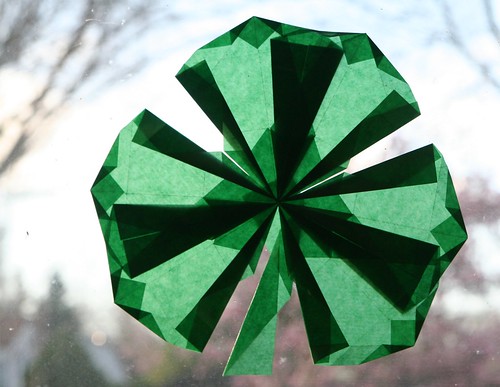
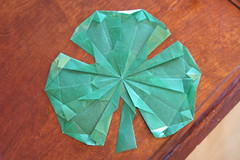
Finished Window Shamrock

Are you excited about Saint Patrick’s Day? I am because we can do anything we want to celebrate. I’m a big fan of “minor” holidays for this reason. We can be creative and silly and spontaneous, and even do something different every year, if we want.

I thought I would share this with you. I made up this shamrock window transparency, building on what I’ve learned from Magical Window Stars by Frédérique Guéret. Although there is a beautiful clover leaf design in the book, this is not it. This design that I’ve created uses the square kite paper that is most commonly available. The basic point I teach below is Guéret’s invention, but the configuration and the assembly of the shamrock was my idea. I hope you like it. In any case, I fully recommend this book if you love window stars like I do.

Materials

  • 7 sheets of square kite paper in dark green
  • scissors
  • glue stick
  • tape
  • ruler or straight edge for making crisp folds

Tutorial
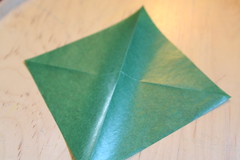
IMG_2205
Fold your square into diagonals.

IMG_2207
Now fold opposing corners to the center line (photo above). The top is now a horizontal fold that is parallel to your horizontal crease.
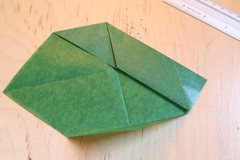
IMG_2208
Unfold the bottom corner; the crease you made will be used later. From the top, folded edge, fold the right side down to meet the center horizontal line (photo above).
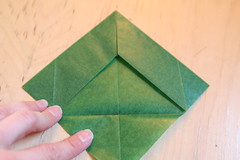
IMG_2211
Do the same to the other side. Now you have a point at the top again (photo above).
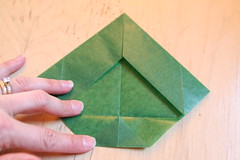
IMG_2212
Fold the bottom corner up to the horizontal crease line (photo above).
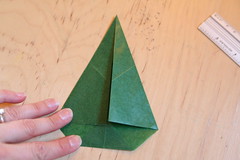
IMG_2214
Now fold both sides in to the center vertical crease. This step looks like an airplane or maybe a sailboat. Do your best to keep the top point crisp.
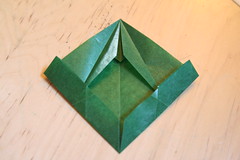
IMG_2215
Open those sides out again.

IMG_2216
Now fold the bottom sides up so that the flat bottom edge aligns with the center vertical crease (photo above). Unfold those bottom sides again.
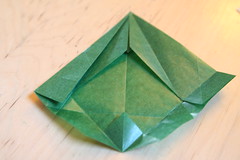
IMG_2218
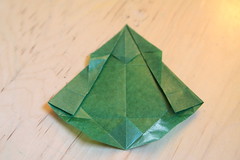
Now fold the left top side in again, allowing the corner to touch the horizontal crease you made in the previous step. Your top point is becoming more acute.
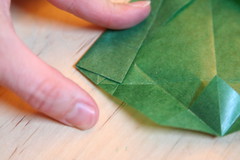
IMG_2219
Above is a detail of this step. See where the left edge folds in and meets the crease? The corner touches the horizontal crease.
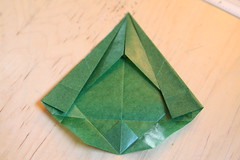
IMG_2220
Now do the same with the right side.

IMG_2221
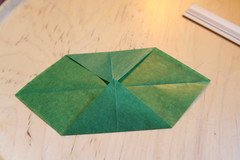
Open out the innermost flaps of the top point, allowing their “wings” to extend beyond the edges of the sides.
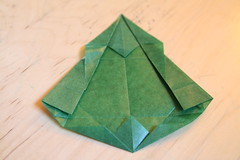
IMG_2223
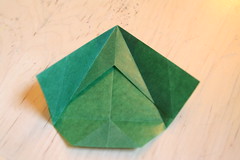
From the bottom center, you have two diagonal creases. Fold the very bottom edge on both sides up, aligning the bottom edge with the diagonal creases.
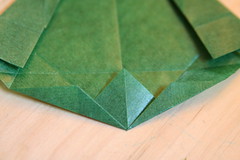
IMG_2224
This photo above is a detail of that final fold. Congratulations! You’ve make one point. Now— sorry about this part—you repeat that process five more times, so that you have six of these points. Two points will make one lobe of your shamrock.
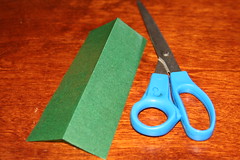
IMG_2153
Once you have six of those points, you can make the stem. Take another square of kite paper and fold and cut it in half. Now fold and cut piece in half again and cut along the fold. You should now have a skinny, rectangular strip that is one-quarter the width of the original square.

IMG_2154
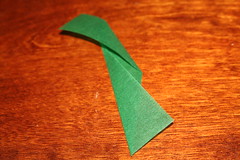
This long strip is the stem of your shamrock. Fold the bottom of the strip like the photo above.
IMG_2155
And fold the top of the strip in the opposite direction, like so. This makes it kind of curve. You now have all the pieces you need and you can assemble the shamrock window transparency.
IMG_2156
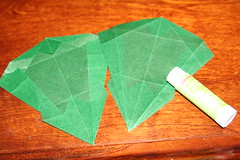
For each lobe of the three-lobed shamrock, you’ll need two points. The sharpest point—what I was calling the top in the photos above— goes in the center. The front side of each piece is the side with the points. If you run your fingers across the front, they will catch on the little triangles created in the folding process. The back side is smooth; your fingers won’t catch on any part. Turn one of the two points over so that the back side is up, as in the picture above. Run your glue stick along the right edge (where the glue end of the glue stick is in the photo above).
IMG_2159
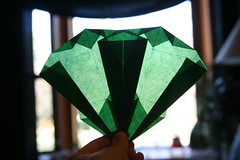
Align the points at the bottom as close together as you can, hold your two points up to the light, and align the darkest edges side by side, as you see in this photo above. They make a very dark upside-down triangle in the middle. The broad (formerly bottom) end of your two points will be overlapping. You now have one lobe of your shamrock done. Do the same thing two more times to make two more lobes of your shamrock.
IMG_2161
If it helps, hold up each lobe to the light before gluing them together. You should see a medium green triangle in the center when all three points are aligned. Now put all the center points together on top of your stem. Glue them to the stem with your glue stick so that the points of the center are just barely touching and the three lobes are almost touching halfway up, just beyond the edge of that inner triangle. The stem should extend down in the gap between the left and right lobes of the shamrock.
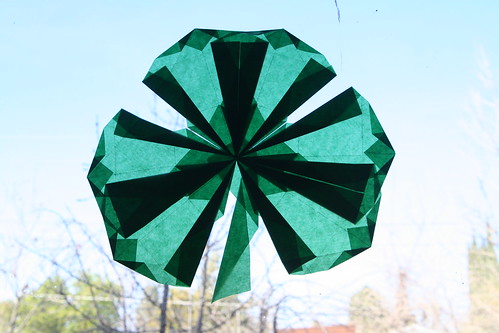
Finished Shamrock Window Transparency
Now you can hang your shamrock in the window. Make three or four loops of tape and put at least one on the back of each lobe to stick it to your window. Perhaps your window shamrock with bring you good luck!

The Dear Little Shamrock

There’s a dear little plant that grows in Ireland.
‘Twas Saint Patrick himself sure that set it.
And the sun on his labor with pleasure did smile.
And a tear from his eyes oft-times wet it.
It grows thro’ the bog, thro’ the brake, and the mireland,
And it’s called the dear little Shamrock of Ireland.

That dear little plant still grows in our land,
Fresh and fair as the daughters of Erin,
Whose smiles can bewitch, and whose eyes can command,
In each climate they ever appear in:
For they shine thro’ the bog, thro’ the brake, and the mireland,
Just like their own dear little Shamrock of Ireland.

That dear little plant that springs from our soil,
When its three little leaves are extended,
Denotes from the stalk we together should toil,
And ourselves by ourselves be befriended.
And still thro’ the bog, thro’ the brake, and the mireland,
From one root should branch, like the Shamrock of Ireland.

—Andrew Cherry

Valentine Window Transparencies Tutorial

Hello! [This post has been edited to remove a broken Pinterest link. 2-13-15]

10-Pointed Window Star

Anyway, I’m kind of obsessed with window stars lately. I got some new supplies for Christmas (kite paper and a new book and paper kit for making window stars). They are challenging for me and so rewarding when you get it right. I made a ten-pointed star the other day and I had to enlist Ian’s help to get the angles right when assembling the points. Then we had to buy a protractor!

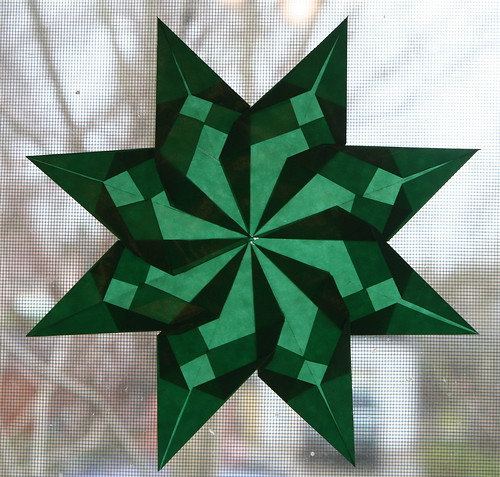
Green Window Star

This eight-pointed star I made is new.

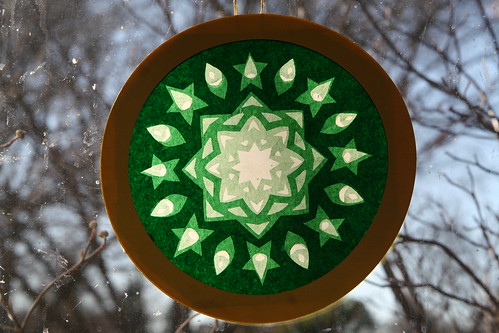
Rose Window, Not My Creation

And I accidentally-on-purpose bought this rose window transparency from an 11-year-old kid on Etsy, a shop named Knitting Momma. I couldn’t help myself. It’s so pretty and I like the gnome head shapes within it. See them? (Pay no attention to my dirty windows.)

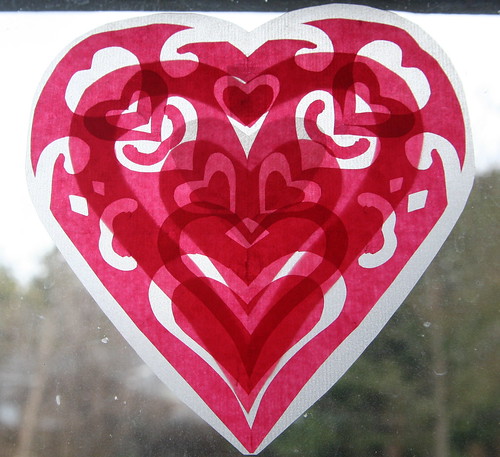
Heart Window Transparency Cropped

And that got me experimenting with my kite paper. I made this transparent window valentine using three pieces of square kite paper, two red and one white. I like this one a lot. The kite paper is only 6.25 by 6.25 inches, and I wondered if I could do something similar but bigger with tissue paper.

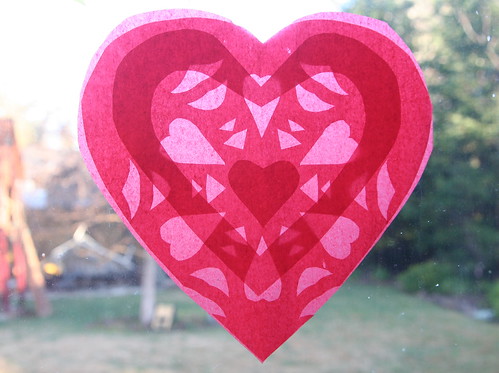
Red and Pink Heart Transparency

Now, I wouldn’t say my valentine window transparencies are perfect, but we learn in the doing, right? So here is what I did, and what I learned along the way, in case you would like to play along.

Materials

  • tissue paper or kite paper in valentine colors (red, pink, dark pink, white, purple)
  • scissors
  • iron on medium heat and ironing board
  • glue stick
  • tape

Tutorial

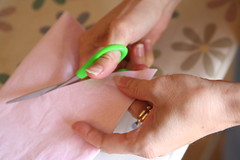
First, lay several pieces of tissue paper of different colors on top of each other. Iron them flat on your ironing board with the heat on medium. Any wrinkles should iron out nicely. Do not spray with water while ironing.

Cutting Hearts Tissue Paper Hearts
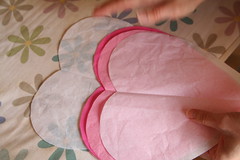
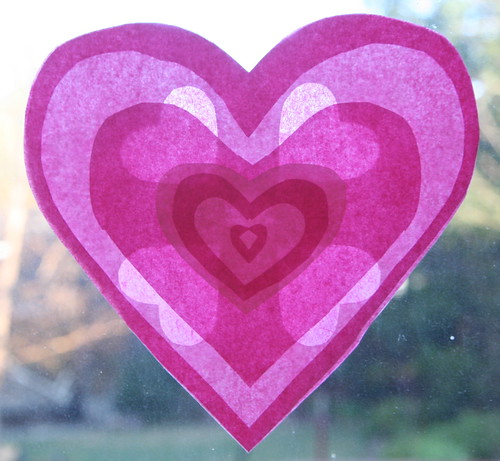
Then, with your papers still stacked, fold it once in half and then in half again. You should now have four stacks of tissue paper. Take one stack, fold it in half, and cut out a big heart shape. Iron out the center crease. Separate the hearts that you’ve just made. They are pretty much the same size, so they can be stacked up again in layers as you make your designs.

Cutting a Smaller Heart from a Bigger Heart  Assorted Sizes

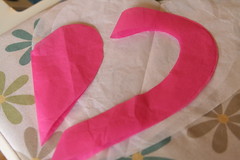
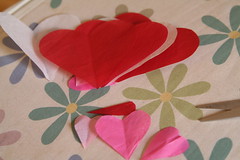
Try cutting one heart into smaller hearts by cutting along the heart’s edge. You’ll end up with two usable pieces: the smaller heart and the heart-shaped edge with an open center. Do this a few times and also cut additional hearts out of the scraps from the big hearts.

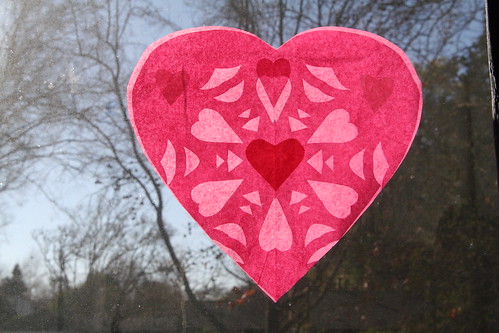
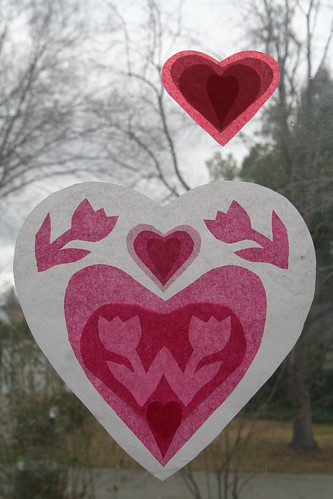
Take one large heart layer and fold it into quarters or eighths, like you would if you were going to cut a paper snowflake. Along the main fold line, cut a small half heart. When you unfold, you’ll have four or eight cut out hearts. Be careful about where you’re cutting, as it’s easy to cut beyond the border of your heart since it’s not a symmetrical shape. This heart transparency shows the four small cutouts. (While it’s folded, you can cut additional shapes such as diamonds or triangles if you wish, like you would for a snowflake.)

Pink Heart Transparency

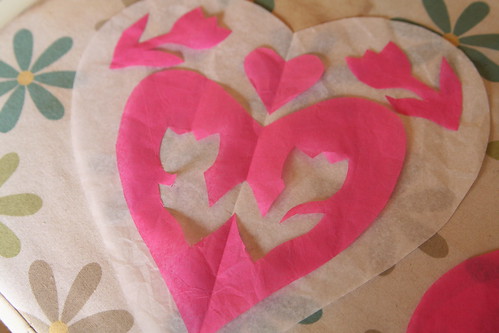
Cut Out Designs

Try folding one layer in half and cutting a simple design. Here is one with tulips.

Now play with the layers you have made. Put a whole heart on the bottom and start stacking other layers. Arrange them in a pleasing way, mixing the colors as you like. Hold them up to the window or a lamp to see how the layers affect each other when the light shines through them. The more layers you have, the darker the shapes will seem. You can also put layers on the back of your heart.

Pink and Red Heart Transparency

Keep in mind that you want the valentine window transparency to look nice both when the sun shines through it during the daylight, but also when it’s dark outside, when the interior light of your home will shine on the front of the heart.

When you have the papers arranged the way you like them. Use a small amount of glue from your glue stick to stick the layers together—and be very gentle because the tissue paper rips easily. Try to keep the outer edges lined up precisely. Gently add dabs of glue until all the layers seem sandwiched together. Now iron the valentine window transparency flat again. You can use a small dab of glue stick glue to stick the transparency to the window, or use tape.

I Made These!

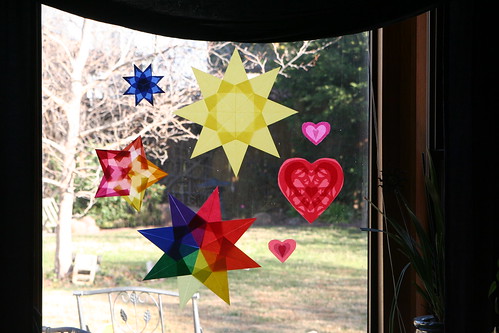
You most likely have small hearts leftover from making the big ones. You can make small transparencies as well. The smaller the valentine transparency, the simpler your design will probably be. Several sizes look great all together, I think.

Valentine Window Transparencies

This Magical Window Stars book is terrific. Many of the designs are very complicated, which is a thrill for me. Maybe I’ll work up to them. The book has many star designs that require rectangular papers. In the meantime, you can find a wonderful free tutorial on folding a simple window star here at GardenMama’s blog.

This Origami Suncatchers kit is the one I got for Christmas. It contains the kite paper, a book of 20 star designs, and a glue stick. I find the instructions and photos in this kit to be easy to follow.

A Toy Garden sells both square and rectangular kite paper. This shop is where I buy lots of gifts for my children. A Toy Garden also sells the Magical Window Stars book and a book about rose windows called Rose Windows and How to Make Them.

And finally, if you want to purchase window stars, I recommend peeking in the Etsy shop of Harvest Moon by Hand. Ann is the best at making window stars. Her work is stunning.

Happy Valentine’s Day to you and your loves!


  • About Sara

    Thanks for visiting! I’m Sara, editor and writer, wife to Ian, and mother of two precious boys. I am living each day to the fullest and with as much grace, creativity, and patience as I can muster. This is where I write about living, loving, and engaging fully in family life and the world around me. I let my hair down here. I learn new skills here. I strive to be a better human being here. And I tell the truth.

    Our children attend Waldorf school and we are enriching our home and family life with plenty of Waldorf-inspired festivals, crafts, and stories.

    © 2003–2018 Please do not use my photographs or text without my permission.

    “Love doesn’t just sit there like a stone; it has to be made, like bread, remade all the time, made new.” —Ursula K. LeGuinn

  • Buy Our Festivals E-Books


  • Archives

  • Tags

  • Categories

  •  

  • Meta