Wool Painting for Imbolc

We brought out the wool and made a little "wool painting" together for Imbolc. This was Asher's first time needle felting.

“If Candlemas Day be fair and bright, Winter will take another flight. If Candlemas Day be cloud and rain, Winter is gone and will not come again.”

This has been a weekend jam-packed with holidays and special events: Asher’s seventh birthday, Lunar New Year, Super Bowl today, and Imbolc, or Candlemas, and Groundhog Day. I have a post or two brewing, particularly Asher’s birthday celebration. Unfortunately, we’ve been pretty sick and down for the count for a couple of days.

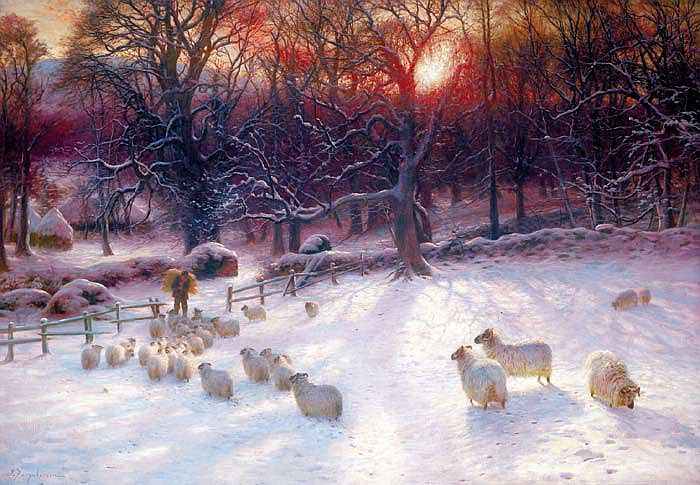
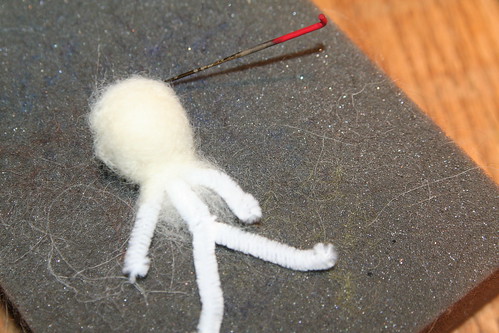
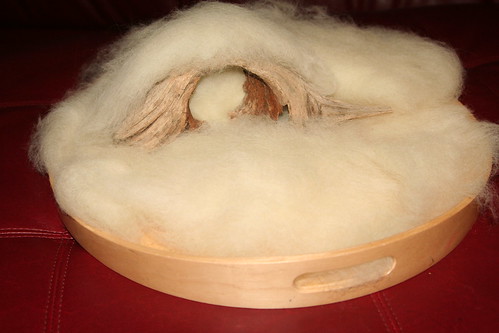
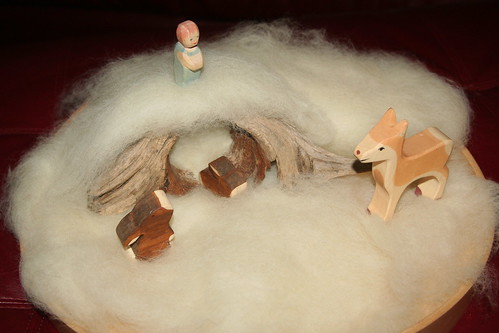
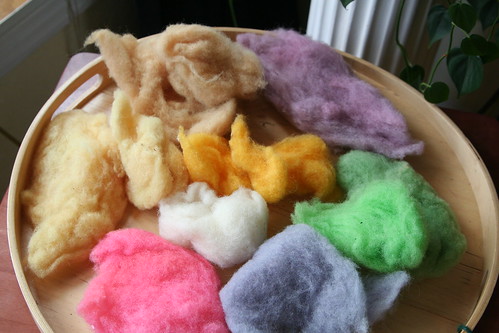
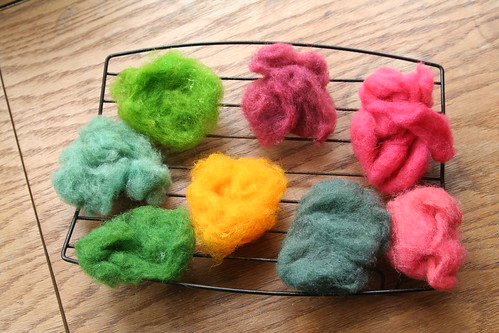
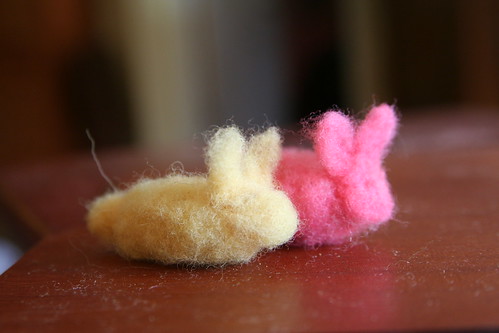
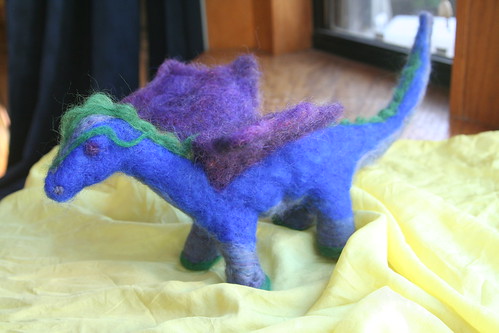
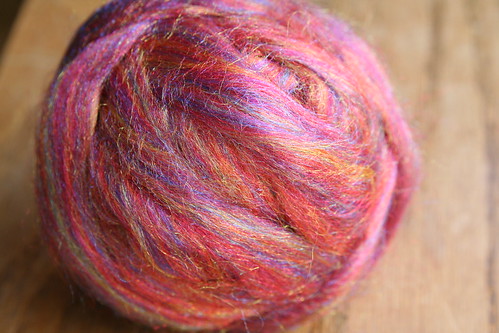
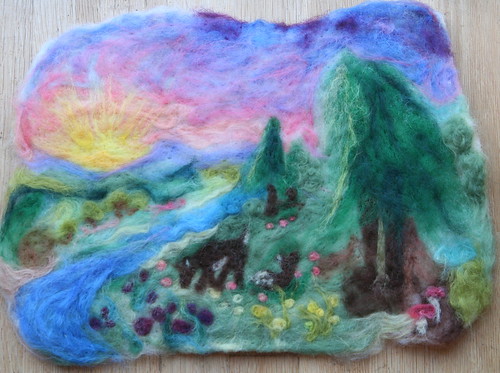
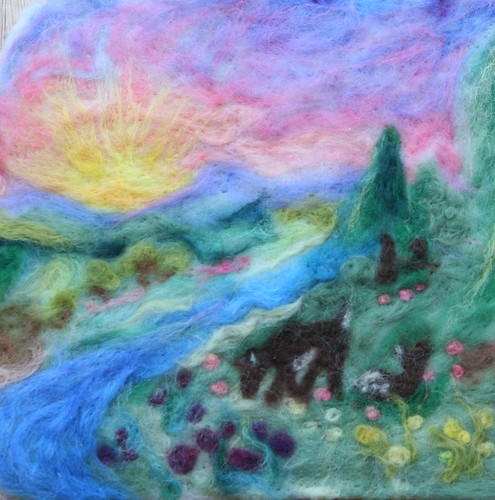
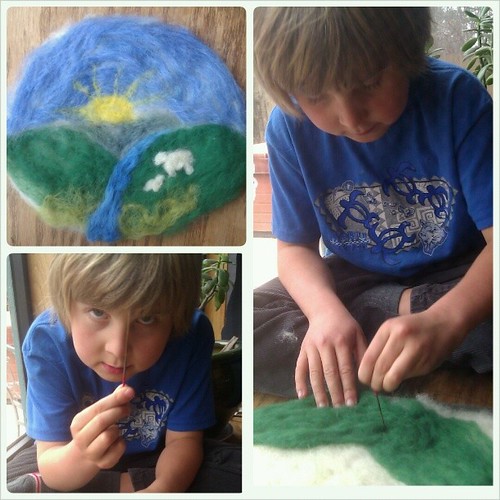
Asher and I had some time this morning while Lucas and Ian were at basketball practice. We thought Imbolc would be a good time to bring out the wool roving and make something wooly and beautiful. There’s something soothing and lovely about the feel of warm, soft wool in your hands. Asher has never needle-felted before, but he was ready for it. We used a white wool base that I had felted into a rough oval at some time in the past. Asher got to choose the colors for our meadow scene. We worked together and I taught him how sharp and stabby the needle can be, and that we must be very careful. He seemed to enjoy the felting. It was fun making this little wool painting of sheep in a meadow with him.

Babies! #sacramentowaldorfschool #waldorf #farm #baby #sheep

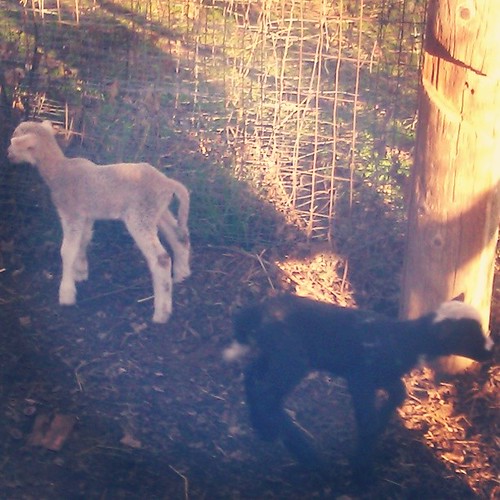
Last week, one of the school sheep gave birth to two sweet lambs. We enjoyed a little bit of rain, too. These are some of the many blessings in our winter. What are your wintertime blessings?

Since today is quite fair and not rainy, I’m hoping that we have more weeks of (wet) winter ahead of us. We really need the rain.

If you’d like more info about this festival, I wrote about Imbolc last year here. And here is a little family ritual we did to focus on the hearth and home aspects of this Celtic holiday.

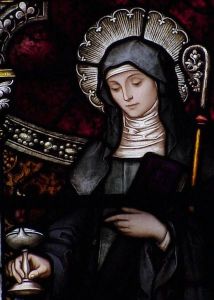
Happy Imbolc, or Candlemas, or feast day of Saint Brigid, Groundhog Day, or Super Bowl day! Whatever you do today, be sure to do it with people you love.

Happy Imbolc!

Imbolc_2007_Fire_Hare

(photo from Imbolc celebration 2007 by Mark Kelly; used with permission)

Today is the Celtic fire festival of Imbolc, which is so deliciously wrapped up also in the Catholic festival of Candlemas, the Irish Saint Brigit, and the goddess Brigid, who is the Celtic Triple Goddess. I find all these synchronicities and conflations of culture, myth, ritual, and worship to be fascinating.

Imbolc welcomes the warming sun, ushering it back into the world so that spring may come. It’s said that if Imbolc (and Groundhog Day, which is tomorrow, February 2) is sunny and bright, winter will hold on a good long while. If the day is sunny, then the Gaelic divine hag, the Cailleach, can gather plenty of firewood for an extended winter. If the day is stormy, then she’ll sleep in and the winter will end sooner because she will run out of firewood.

The goddess Brigid is associated with fire, with early spring, and is the patroness of poetry, smithing, medicine, arts and crafts, cattle and other livestock. Her symbols include arrows, bells, thresholds, and doorways. Several animal correspondences are also tied to Brigid, particularly ewes, dairy cows, bees, owls, and serpents. (Thank you, Wikipedia, that will do.)

Today I learned that Saint Brigid was a patroness of students, and also founded a school of art, including metal work and illumination. She is known as Saint Brigit of Kildare, or Brigit of Ireland (variants include Brigid, Bridget, Bridgit, Bríd and Bride), and was nicknamed Mary of the Gael.

She’s awesome, right?

Stbrigid

(photo from St. Joseph Catholic Church in Macon, Georgia)

Two years ago we were able to have a lovely family Imbolc celebration, which I blogged about here. This year we have been very busy with preparing for Asher’s sixth birthday, and his birthday party is happening tomorrow on February 2. I honestly don’t think I have much in me for Imbolc this year, except to quietly observe it and take comfort in knowing that winter is now halfway over. We are closer to spring now, and that’s a joy and comfort.

My hope for tonight is simple because I need a rest. Glass of wine. Fire in our fireplace. A little crafting to finish up for tomorrow’s party. Maybe over the weekend we’ll roll some new beeswax candles to light our home and warm our hearts. We’ll take it slow, and if candle-making happens, great. If not, that’s OK too. For me, this is a festival of home and hearth, and snuggling in with our beloveds.

In honor of Brigid’s association with poetry, I offer a poem I wrote for children last year. OK, don’t laugh.

joseph Farquharson
(“Beneath The Snow Encumbered Branches” by Joseph Farquharson, 1903)

Wool Dreaming

Shepherd, shepherd,
Tend your sheep
In the snowy yard.
Rams and ewes, heavy with lambs,
Endure the winter’s cold.

Shepherd, shepherd,
Take good care
Of charges in your fold.
Their wool will be a comfort
To newborn, young, and old.

Shepherd, shepherd,
Feed them well
That their fleece grows soft and fine.
I would like wool warmth to wear
All through the wintertime.

—by moi, Sara E. Wilson

Snowflake Fairies Tutorial

Snowflake Fairy with Face

In between chilly outings, when we’re inside warming up, is a wonderful time to appreciate the beauty of winter. Paper snowflakes are festive and look lovely decorating windows and our family cuts beautiful snowflakes every year.  Here is a project for making lovely snowflake fairies to flutter and dance in the air. Hang them over a heating vent to see them blow about, just like a real, falling snowflake.

Note: Some Waldorf educators recommend that you not make needle-felted figures and animals in the presence of young children, who may find the action of repeatedly needling the woolen bodies to shape them somewhat disturbing.

Materials

Materials

  • coffee filter
  • chenille stems
  • needle and thread
  • scissors
  • wool batting
  • needle-felting needle and pad

IMG_9664 IMG_9665

Start by forming the skeleton of your fairy. Cut your chenille stem in half. Twist a loop into the center of one half; this is your fairy’s head with arms attached. Fold the other half over (body and legs). Then put one leg of the folded chenille stem through the loop. The two pieces are now interlocked. About an inch farther down, where the pelvis of the figure would be, twist again to make two legs. You should now have a wire “stick figure” like you see in the right photo above. Fold the smallest possible bit of wire over at the end of each limb, to form tiny hands and feet and keep the cut wire from poking anyone.

IMG_9666

Take a small bit of wool roving, roll it into a ball, and insert it into the loop of the figure’s head. Then wrap a bit more roving around the head and begin to needle it in place into an attractive head shape.

IMG_9668

Using very small bits of wool, wrap around the figure’s body and arms. I find making a crisscross of wool that goes from shoulder to waist in both directions to be a good method. Needle this wool until it’s firm and stationary. The fairy’s arms may need more needling than the body to make them graceful and slender.

IMG_9677

Now add a bigger fluff of wool to create a woolen petticoat. You can either allow the fairy’s feet to show below the fluffy skirt, or make the skirt extend below the feet.

Cut

Fold a white, circular coffee filter into quarters or eighths and cut a snowflake. Cut a very small tip off the snowflake and unfold it.

Snowflake

This is the only tricky part: Gently guide your fairy’s head through the center hole in your snowflake. Go slowly to avoid tearing the paper. If the head won’t fit through the hole, refold the snowflake and cut the tip just a tiny bit more to widen the hole and fit the head through.

Snowflake Fairy in Progress

You have a choice now. You can either put the fairy’s arms through holes in your snowflake (if you have such holes) to make a dress (see above), or you can gently move one arm at a time up through the neck hole of the snowflake to make it a skirt instead of a dress. This part is not unlike carefully dressing a small child, except your fairy will wiggle less.

IMG_9680

Next, use another chenille stem and form a circle. Twist the two ends together to seal the circle. Then twist the circle into a figure eight. These are your fairy’s wings. Use a bit of wool to tack the wings onto the fairy’s back. Now give your fairy some white hair, and allow it to flow over the center of her back where the wings meet the back.

Snowflake Fairy with Belt

If you made a dress, you might wish to belt it with a ribbon, bit of string, or a braid of wool roving.

Snowflake Fairy with Up-do

Here is a fairy with a skirt. You can give your fairy a fancy hairdo, if you like, by coiling wool into a bun and needling it onto her head. You can also add a face using tiny bits of color needled in for eyes and a mouth (as seen in the top photo). The fairies are adorable either way.

Snowflake Fairies

Now, you can make more snowflake fairies and hang them near each other to dance in the air, or display them with other snowflakes.

 Snowy Garland wih Snowflake Fairies

Please vote for Love in the Suburbs at the Circle of Moms Top 25 Creative Moms blog list. You can vote once per 24 hours until Jan 30, and you can vote for more than one blog on the list! Thank you!

Woolen Winter Playscape Tutorial

Woolen Winter Playscape, gnomes and deer

Materials

  • white wool batting
  • a board, such as a painting board or serving tray, to serve as a base
  • figurines (gnomes, animals, people of any material you have)
  • driftwood, bark, sticks, pine cones, rocks, etc.
  • small bit of silk

Tutorial

This winter playscape can be assembled inexpensively and remade again and again. It can be either temporary or permanent, as you wish.

Buy a bag of wool batting. This material is often used as stuffing for toys or pillows, or can be wet-felted or needle felted. It is extremely versatile for all kinds crafting and fiber arts. It often comes in one- or two-pound bags. Tear off a layer of batting to make snow and place it on your playscape base. Add other bits to cover your base. Try to add a hiding place, such as a wooden cave or build a little den make of driftwood or sticks. Layer some more snow over the top of it.

Woolen Winter Playscape

If you have a small bit of silk, you can create a silken creek, perhaps. Now add some figures such as gnomes or animals. Or add some people.

Woolen Winter Playscape

You might also add a special rock or two. If you have a mama and baby animal pair, they might like to cuddle into the den you made. Resist the temptation to fill the scene or complicate it will too many toys.

Woolen Winter Playscape, wolf

Leave this simple scene for your children to find. They will elaborate upon it, change it, and remake it as they play. Their fingers will be warmed and comforted by the feel of the soft wool. They will respond to it and the feel of the wood and rocks in this simple scene.

Woolen Winter Playscape
If you find your child playing with the winter scene, ask him or her to tell you the story of what‟s happening. Or just listen to the play.

(When the play is done, the wool can go back into your craft supplies to be made into something else.)

Dyeing Easter Wool Tutorial

Wool

Last year, while we were dyeing Easter eggs, we also dyed some plain white wool batting. I am so pleased with the results. In the photo above are a wool colors from both natural and artificial dyes. I’ve saved this wool all year and now I’m making goodies for my boys’ Easter baskets out of it. I doubt that they’ll appreciate the cyclical nature of this, but I do. And don’t forget, this is science! So by all means, get the kids involved.

Materials

  • natural dye ingredients (such as turmeric, boiled yellow onion skins, boiled red cabbage, boiled beets, etc.)
  • or food dyes from the supermarket
  • or Easter egg kit dyes (capsules or powders)
  • white wool batting or roving (or get fancy and dye silk cloths to make your own play silks?)
  • distilled white vinegar
  • mugs or drinking glassware
  • spoons

Tutorial

Really, this is totally simple. While you’re dyeing your eggs, add in a good handful or two of wool. We found this was easy to do with the natural dyes as we had a big bowl full of each color, rather than a mere mug full of color.

Onion Dye Bath with Eggs and Wool

Onion skins turn wool a pale, golden yellow.

Cabbage Dye Bath with Eggs and Wool

This is the red cabbage dye. It will turn both eggs and wool bluish.

Beet Dye Bath with Eggs and Wool

This is beets. It turns the wool a warm light brown. The eggs and wool at first are a beautiful mauve color, but I think they then oxidize and end up brown.

Dyeing

If you are using kit dye or food coloring to dye eggs, you probably have your dyes in mugs or glasses. (Right? That’s the way we always do it.) So you can just keep the dyes for a day or so after dyeing eggs and dye wool in the mugs. You can do handful after handful if you like. We used about a 1/4 cup of distilled white vinegar in each cup, added the dye, and then added water.

Our yellow dye bath was completely exhausted by the wool. None of the color was left when we pulled the wool out. It makes me wonder if the other colors might have done that if we had left the wool in longer.

I suggest keeping your wool in the dye for about 24 hours. When your wool is the color you like, squeeze out the extra dye into the cup, then rinse it in cool running water until the water runs clear.  Set it on a wire rack or pin it to a clothesline outside to dry.

Dyed Wool

Here are the wool colors we got. I’ll name the colors of food dye baths starting with 12 o’clock: purple, dark red, pinkish brown, blue, yellow, dark green, blue green, and yellow green. It seems to me like the blue should be darker and brighter. It may be that my sons sneacked extra green drops into the blue? In any case, I consider this experiment to be a success because it means any frugal crafter or artist can get a wide range of beautiful, bright colors without breaking the bank, using standard McCormick brand food dyes. I love buying new colors of wool to use in projects, but this is a simple way to get many colors cheaply!

Wool batting doesn’t spin into yarn all that well because the fibers tend to be short. It works very well for needle-felting or wet-felting, however. Wool roving, however, is great to spin or felt.

Simple Bunnies

I’m thinking that a rainbow of simple wee bunnies made from wool we dyed ourselves might be just the thing for Easter baskets this year. What would you make with Easter wool?

Needle-Felted Harvest Mother

This is my best work to date. I made this needle-felted Harvest Mother as a donation for our school’s Country Store fundraiser, part of Sacramento Waldorf School’s Harvest Faire, which is being held this Saturday, October 23. Now that’s she’s done, I’m kind of sorry to have to give her up. She took about four hours to make, spread over several evenings. She is about 9 inches tall and the widest part of her skirt is about 7 inches across.

Needle-Felted Harvest Mother

I tried to gently stripe the colors to suggest agricultural rows. I tried to suggest that from her body flows all good things: crops of pumpkins, cabbages, and greens. I tried to use colors that bring to mind dried-up summer grains and tired fields ready for resting. I tried to suggest that she is the goddess of foods gathered in and the growing foods that will nourish us in time, in a never-ending cycle. I hope you can see the wind in her hair.

I admit, that’s a lot to suggest with a bunch of fluff!

Needle-Felted Harvest Mother Close-Up, Cornucopia in Arms

It’s amazing what a little needle can do! She is holding a cornucopia in her arms, can you tell?

Needle-Felted Harvest Mother Skirt Detail Needle-Felted Harvest Mother Skirt Detail

These are two details of her earthy skirt, with various crops growing on it. I love the pumpkin vines the most. I would have loved to make grapes and wheat, but I couldn’t seem to make the wool cooperate in that way for superfine details.

I’m ridiculously proud of this doll! I don’t really want to give her up, but she is going for a good cause. I just hope they sell her for a decent amount and that the person who buys her loves her as much as I do.

Michaelmas Craft: Making Dragons!

Think wisely,
Speak well,
Stand upright
And St. Michael
Will lead you
from darkness
to Light.

Lucas's Sculpture of St. Michael Battling the Dragon within a Ring of Fire

Yesterday afternoon, after school, the boys and I pulled down some Crayola modeling “clay” (in exciting day-glo colors) that we had on hand and sculpted dragons in honor of Michaelmas. We spent a happy 30 to 40 minutes sculpting, with each of us working on our own dragon.

Lucas’s sculpture was ambitious! He sculpted the Archangel Michael battling the dragon within a ring of fire! He is justifiably pleased with the result. He certainly remembered the story well.

Making Dragons for Michaelmas

Making Dragons for Michaelmas

Asher got to use a plastic knife! Big fun.

My Dragon and Asher's Dragon

Here is my dragon posing next to Asher’s dragon, which morphed a lot during our crafting, just as you would expect for a 3-year-old. His dragon also got lots of lovely dragon play.

Needle-Felted Dragon for Michaelmas

Here is a needle-felted dragon I made last Sunday. I had some time in the company of some of my favorite people in the world and my hands happily worked on this while we were visiting. I think he needs some fiery breath!

Some of my research into Michaelmas has brought me to these lovely resources, which I gladly share. I am actually still debating about whether to cook a Michaelmas meal today or save it for Friday, when our school will celebrate this festival.

Waldorf Library

The Parenting Passageway

Rockin Granola

Rudolf Steiner Archive

Mama Roots Branching Out

New Fibers for Handwork

Ian and spent just about an hour in Placerville last weekend, on our way to South Lake Tahoe for a short getaway. Mom had said, “Why don’t you get out of town for a while?” Why not, indeed!

Since we didn’t have the boys in tow, I dragged Ian to Lofty Lou’s, where I pawed at the yarn and came home with these gems. He’s such a good sport!

Gorgeous Fiber from Lofty Lou's in Placerville

This is a four-ounce ball of Firestar, a sparkly nylon fiber that can be carded with wool or silk or other fibers and either spun or needle-felted. Pretty!

Hand-dyed Wool Roving for Felting

And this is a lovely hank of hand-painted wool in an array of autumn browns, golds, and russet reds that I’m hoping will inspire some lovely autumnal artwork. Or I could spin it into luscious yarn, which I haven’t done since last February and I really should practice so I don’t forget how.

Or maybe both. That’s what I love about roving; it can become so many things! And I’ve just spent a bit of time on abstractfiber.com and I must say, YUM!

Needle-Felted Mushroom Family

These red and white cap mushrooms look so cute and magical, they’ve captured the imaginations of thousands of authors and illustrators, crafters, and Waldorf families, not to mention the wacky game designers at Nintendo.

They are, in actuality, Amanita muscaria, commonly known as fly agaric or fly Amanita, and are poisonous and psychoactive. So if you see them growing, don’t eat them. Please avoid them. Take a picture, but leave them be. They belong to the fairies,  gnomes, and other magical creatures of the forest, and not at all to human beings.

Needle-Felted Mushroom Family

Mushroom Mother and Baby Mushroom Child Mushroom Child and Father

Needle-Felted Mushroom Family Top Down

This little family of Mushroom People, the Amanitas,  just wouldn’t stop clamoring in my head until they were made. They are needle-felted out of 100 percent wool roving and without any internal wire structure, so they are very soft and lovable. I expect they will come and visit our nature table in the autumn.

Needle-Felted Wool Painting: “Summer Bliss”

"Summer Bliss" Needle-Felted Wool Painting

My second wool painting

"Summer Bliss" Wool Painting Detail

Detail

  • About Sara

    Thanks for visiting! I’m Sara, editor and writer, wife to Ian, and mother of two precious boys. I am living each day to the fullest and with as much grace, creativity, and patience as I can muster. This is where I write about living, loving, and engaging fully in family life and the world around me. I let my hair down here. I learn new skills here. I strive to be a better human being here. And I tell the truth.

    Our children attend Waldorf school and we are enriching our home and family life with plenty of Waldorf-inspired festivals, crafts, and stories.

    © 2003–2018 Please do not use my photographs or text without my permission.

    “Love doesn’t just sit there like a stone; it has to be made, like bread, remade all the time, made new.” —Ursula K. LeGuinn

  • Buy Our Festivals E-Books


  • Archives

  • Tags

  • Categories

  •  

  • Meta