Easy Valentine’s Day Decorations

Valentine's Day decorations

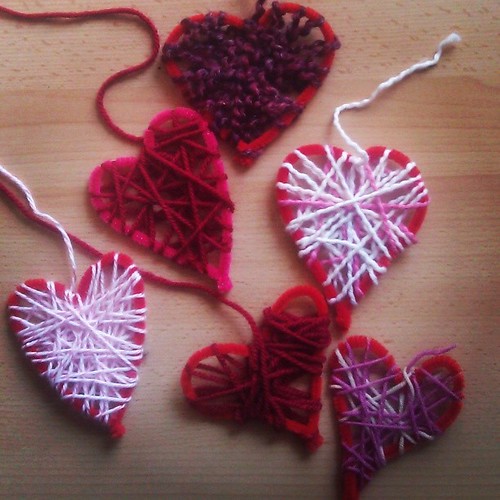
Here’s a quick, easy decoration you can make with the kids for Valentine’s Day. I thank Family Chic for the inspiration. We used chenille stems instead of wire and I like the way the hearts have red outlines. Also, the yarn sticks pretty nicely to to the fuzzy coating; we didn’t have to wrap the yarn all the way around the wire each time. We used up some scrap yarn that Grandma gave us. It’s always lovely to use what you have on hand already, don’t you think?

Bend chenille stems (aka pipe cleaners) into heart shapes. Tie one end of pink, red, white, or variegated yarn to anyplace on the heart shape. Now wrap the yarn around the heart every which way, or any way that pleases you, taking care not to pull it too tight and distort the heart shape. You can cover the heart in as much or as little yarn webbing as you like. When you’re ready, tie it to the middle top of your heart and leave an end long enough to serve as a hanger.

upload

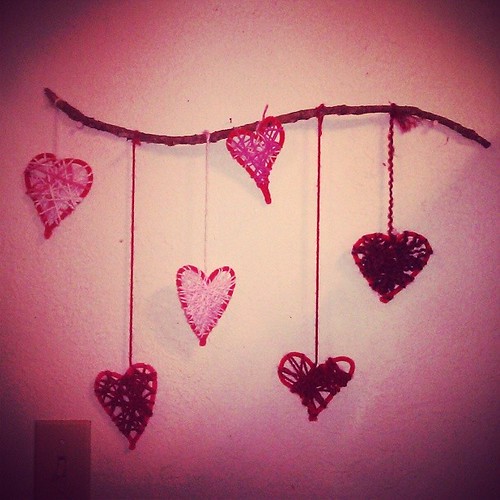
I decided to hang our hearts on a stick I found on the ground outside.

These hearts look great hanging on the wall or in groups. And if you use other colors of chenille stems and yarn, they would make pretty decorations for other special occasions, too! Imagine them in rainbow colors for a birthday party, or as a wall hanging in a child’s bedroom!

Yarn Necklace for Mother’s Day Tutorial

Yarn Necklace

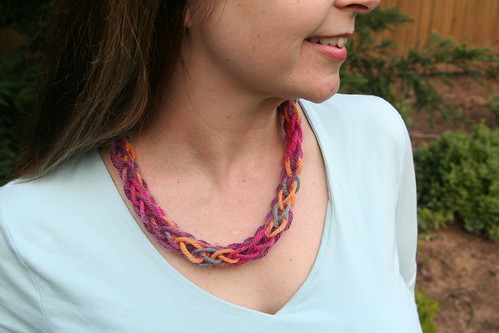
Are you hoping to make a special Mother’s Day gift for mother or grandma, or perhaps an end-of-year gift for a teacher? This yarn necklace is easily made by children who have a little finger knitting experience, in fact, my son made one for me when he was in the first grade and recently taught me how to make it. This kind of cord-making is called “finger knitting” and “finger weaving.” (Besides necklaces, you can make scarfs, braceletes, belts, or headbands in this way.)

Materials

  • wool or cotton yarn in a pretty color

Start by placing the tail of your yarn in the crook between your thumb and forefinger so that the tail hangs down over the back of your hand. Use your thumb to pinch the tail and hold it in place. Take the ball end of your yarn under and over, under and over your four fingers, wrap it once around the pinkie finger.
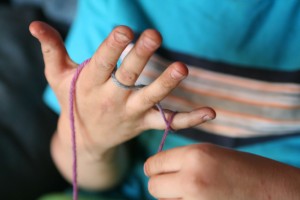
Continue weaving the working yarn under and over, under and over, traveling back toward your index finger.
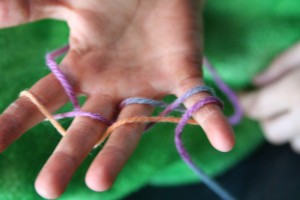
Wrap the yarn around your index finger and go under and over, under and over until you go around your pinkie again, and then weave it back toward your index finger in the same manner. Wrap the yarn one more time around your index finger and let the ball end rest across your palm. You should now have two loops (horizontal bands) of yarn on the front of each finger as you see in the photo below.
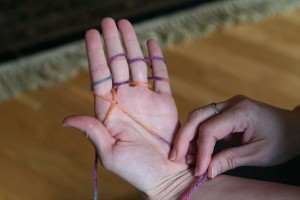
Now, beginning with your pinkie finger, grasp the lower loop with the fingers of your other hand and lift the lower loop over the upper loop …
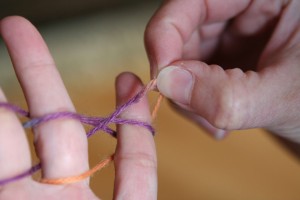
… and completely off the pinkie finger as in the next photo below.
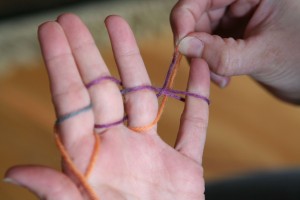
Now release the loop. Your hand should now look like this photo below, with two loops on the first three fingers and only one on the pinkie finger.
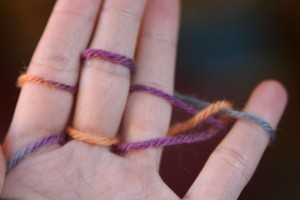
This action of moving the bottom loop over the top loop and off the finger is finger weaving. You will repeat this action with the remaining three fingers (ring finger, then middle finger, then index finger).
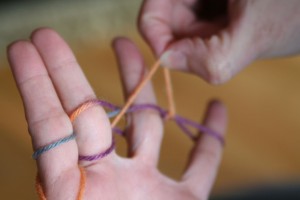
As before, with the ring finger, lift the bottom loop up and over the top loop, and then off the finger altogether. As you complete this procedure with each finger, you’ll see that you now have only one loop left on the finger.
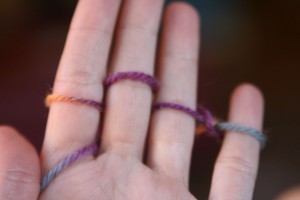
When you reach the index finger, the yarn tail that your thumb has been holding in place acts as your bottom loop. Treat it as any other loop and lift it up and over the top loop and off the index finger.
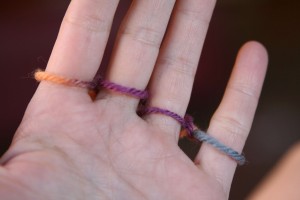
The tail will now trail down between your index finger and your middle finger.
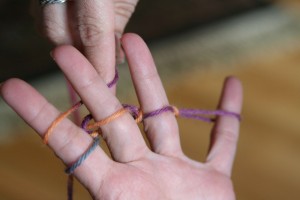
Now grasp your working yarn and wind it under and over your fingers as you did before, under and over, and around your pinkie finger so that your new loops are above the loops already on your fingers. Then continue winding the yarn under and over, under and over until you’re back to your index finger again. You should now have two loops on each finger again.
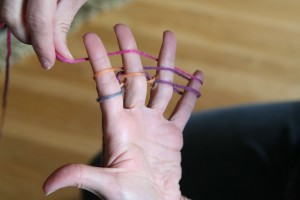
The loops are now high up on your fingers. Push the loops down to the base of your fingers. Then, as you did before and starting with your pinkie finger, pull the bottom loop up and over the top loop and let it go. Repeat for all four fingers exactly as you did before.

Push your stitches down again. Weave your yarn again, under and over, under and over, around, under and over, under and over above the loops already on your fingers, until you have two loops on each finger again.

As you repeat this process of pulling bottom loops over top loops again and again, row after row, you will begin to see the woven cord coming off the back of your middle and ring fingers, as in the photo below.
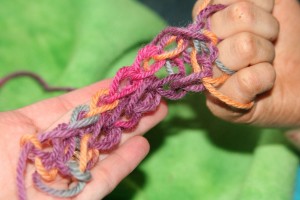
The woven cord looks kind of flat at first, but when you’re done and you tug it gently a few times, it will become a round cord for your necklace.
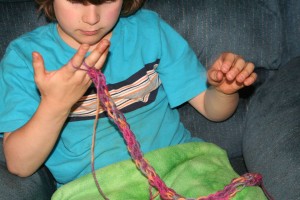
When your cord is long enough, it’s time to cast off. (Experiment with the length by putting it around your own neck while it’s still on your fingers. If you can see the necklace when you look down, chances are good the cord is long enough and stretchy enough to easily fit over a head.)

To cast off, begin with only one row of loops and don’t weave new loops above them.

Instead, lift the loop on the pinkie finger off the finger and place it on your ring finger. Your ring finger now has two loops and your pinkie has none, as in the photo below.
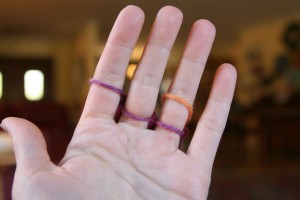
Lift the bottom loop over the top loop and release. Now your ring finger has only one loop. Pick up that loop and move it off your ring finger and place it on your middle finger, which now has two loops. Lift the bottom loop up and over and release. Now move the remaining loop on the middle finger to your index finger. Lift the bottom loop over the top loop and release. Now your index finger has only one loop and your other fingers are bare. You may now remove the final loop from your hand, cut your yarn, pull the working yarn through it, and pull it tight. Now pull the tail on the other end of your cord tight.

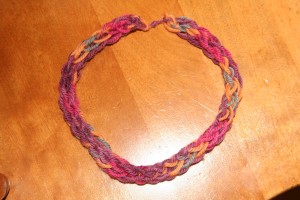
Now gently tug on your cord so that it becomes round rather than flat. Tie the two ends together, making a circle necklace.
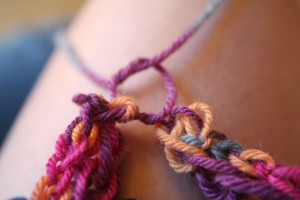
The necklace should be stretchy enough that it can easily go over head of the lucky person you give it to. She will treasure it more than she would any chain of gold.
Happy Mother’s Day!


(This tutorial was originally published in the Little Acorn Learning May Enrichment Guide. Check out all their many wonderful offerings at Little Acorn Learning.
Handwork Classes

This past Saturday I got to attend two wonderful handwork classes taught by fiber artist/teacher extraordinaire and homeschooling consultant Jennifer Tan of Syrendell. The classes were free and offered by the Friends of the Fair Oaks Library. (Thank you, Friends! Thank you, Jennifer!) The morning class was beginning crochet and the afternoon class was spinning. I had the pleasure of taking a spinning class from Jennifer earlier this year, too. Oh my, this stuff is challenging and fun! It’s supposed to become relaxing and even therapeutic once you get comfortable and good at it.

Tools and Yarns

Jennifer’s display of handspun yarns, crochet hooks of many sizes, a fiber batt, niddy-noddies, and drop spindles. I think the tools are gorgeous.

R's Crochet

My classmate R’s lovely crochet

Yarn of 9-Year-Old Girl Jennifer Tan, Fiber Artist/Teacher S's Handspun Yarn

The left photo is yarn spun by a 9-year-old girl; Jennifer Tan is in the middle; the right is yarn spun by our lovely Youth Librarian, Stephanie. It is thanks to her and the Friends of the Library that this class was offered.

My Crochet

My crochet! My hands made this!

Basket of Roving  Handspun by Jennifer Tan and Family

Basket of colorful roving and some handspun yarns made by Jennifer and her family, all of whom are tremendous fiber artists

Drop Spindles

Drop spindles

My Yarn

My yarn. We started with a lovely brown wool and moved on to some colors; mine has brown, red, navy, and a dark orange.

Wee Crocheted Pumpkin!

I crocheted this wee pumpkin, which is small enough to fit in my tightly cupped hand! I finished it at home and improvised a stem of sorts. My boys think I should sew a jack-o’-lantern face on it.

Started This at Home

And this is my attempt to apply what I learned at home without my patient teacher to correct me. I seem to have remembered how to start a circle and how to increase enough to keep it flat. This is a crummy acrylic yarn leftover from our Solstice sun project. It might become a Halloween decoration. I also practiced more on that green square—alas, it is definitely a triangle now.

The Fair Oaks Library is hosting two more handwork classes taught by Jennifer next Saturday, October 23. They are beginning crochet and Tunisian crochet, and both are free. Registration is required though. I would happily take those as well, but for the conflict with our school’s Harvest Faire.

New Fibers for Handwork

Ian and spent just about an hour in Placerville last weekend, on our way to South Lake Tahoe for a short getaway. Mom had said, “Why don’t you get out of town for a while?” Why not, indeed!

Since we didn’t have the boys in tow, I dragged Ian to Lofty Lou’s, where I pawed at the yarn and came home with these gems. He’s such a good sport!

Gorgeous Fiber from Lofty Lou's in Placerville

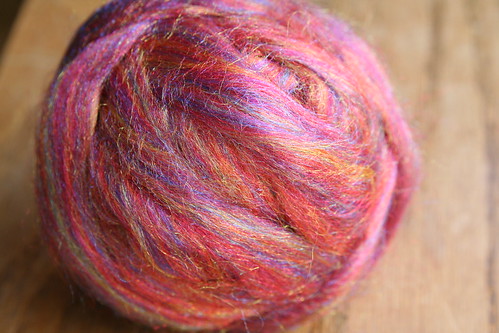
This is a four-ounce ball of Firestar, a sparkly nylon fiber that can be carded with wool or silk or other fibers and either spun or needle-felted. Pretty!

Hand-dyed Wool Roving for Felting

And this is a lovely hank of hand-painted wool in an array of autumn browns, golds, and russet reds that I’m hoping will inspire some lovely autumnal artwork. Or I could spin it into luscious yarn, which I haven’t done since last February and I really should practice so I don’t forget how.

Or maybe both. That’s what I love about roving; it can become so many things! And I’ve just spent a bit of time on abstractfiber.com and I must say, YUM!

Kitty, Kitty

This knitted kitty I made is far simpler than the knitted donkey I made a couple of weeks ago. Seriously, it’s all rectangles and all garter stitch. Easy, even for me.

Knitted Kitty

My cat is about 2 inches high and 3 inches long. The pattern I used is from Toymaking with Children by Freya Jaffke, but all you have to do to make this little cat is to knit a rectangle that’s almost a square (for the body). Then cast on half as many stitches as you used for the body to make a head, which you will knit until it is a long rectangle (almost three times as long as wide). Last, cast on less than half as many stitches as you used to make the head, to make a tail. Knit about the same number of rows as you knit for the head rectangle. Then sew up the tail into a long tube. If your cat will be small like mine, then no stuffing of the tail will be necessary. If your cat will be bigger, you might have to stuff the tail with wool roving. Fold your head piece in half, sew up three sides, stuff it with wool, and sew up the final side. You may wish to make a few stitches to accentuate the ears. For the body, pinch a corner of your rectangle and sew it into a cone (leg), then move to the next corner and do the same thing. Repeat for all four corners to make for legs. Stuff all of the legs and body and sew up the body at the cat’s tummy. Now attach head and tail in a way that looks appropriately catlike. Voilà! A kitty!

  • About Sara

    Thanks for visiting! I’m Sara, editor and writer, wife to Ian, and mother of two precious boys. I am living each day to the fullest and with as much grace, creativity, and patience as I can muster. This is where I write about living, loving, and engaging fully in family life and the world around me. I let my hair down here. I learn new skills here. I strive to be a better human being here. And I tell the truth.

    Our children attend Waldorf school and we are enriching our home and family life with plenty of Waldorf-inspired festivals, crafts, and stories.

    © 2003–2018 Please do not use my photographs or text without my permission.

    “Love doesn’t just sit there like a stone; it has to be made, like bread, remade all the time, made new.” —Ursula K. LeGuinn

  • Buy Our Festivals E-Books


  • Archives

  • Tags

  • Categories

  •  

  • Meta