Springing

Daffodils

Late Winter, Early Spring

Busy gnomes chip away
At the winter’s hard ground,
So that bulbs may burst forth
And spring’s beauty abound.
In the woods, damp and dark,
They must labor below
Crooked roots and cold stones,
Pushing stalks through the snow.
Undines melt snow until
Water can flow again,
Filling the leaves growing
Green with spring rain.
Sylphs, they are dreaming
Of winds softly streaming
Through petals all yellow
And purple and blue.

—Eugene Schwartz

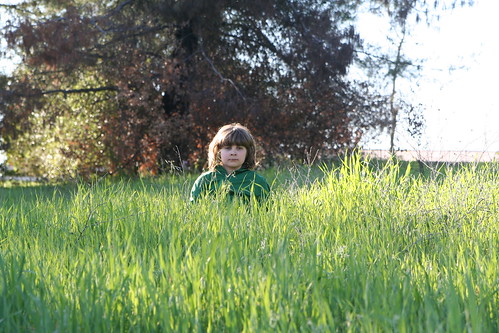
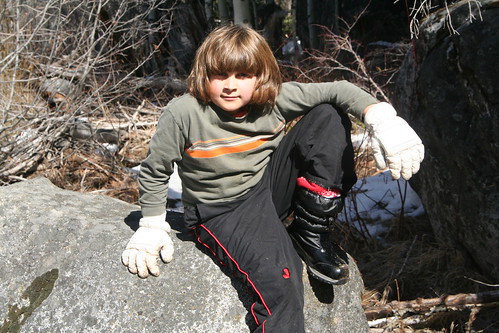
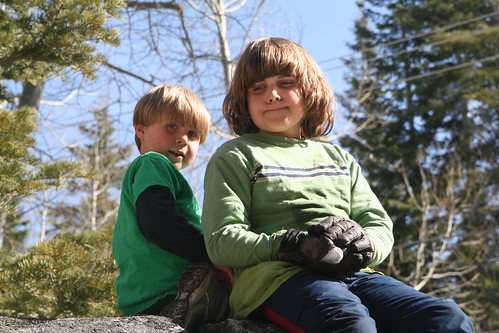
Lucas in Spring Grasses

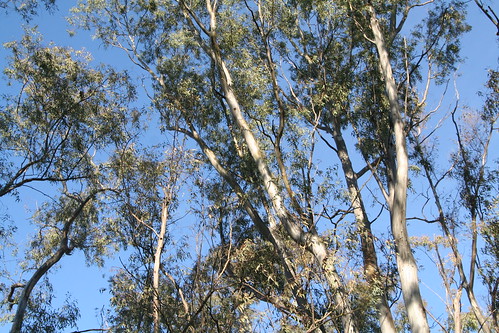
Eucalyptus and Sky

Nature Walk

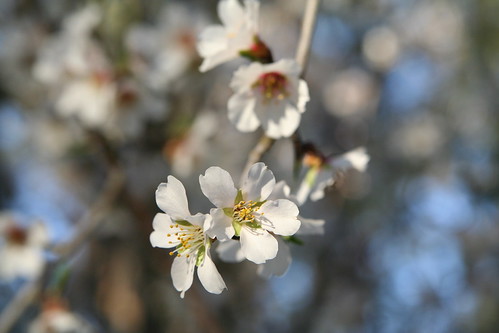
Almond

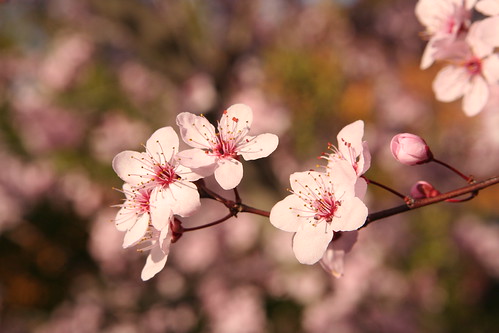
Plum Blossoms

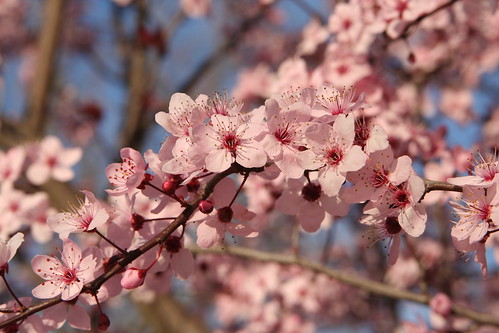
Plum Blossoms

Magnolia

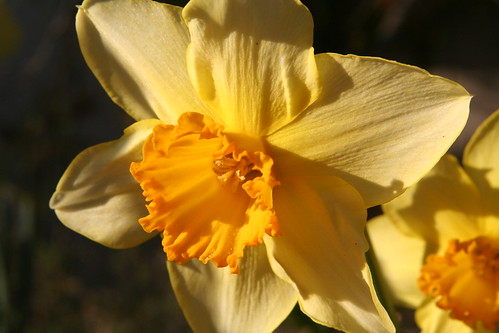
Daffodil

St. Patrick’s Day Leprechaun Mobile Tutorial

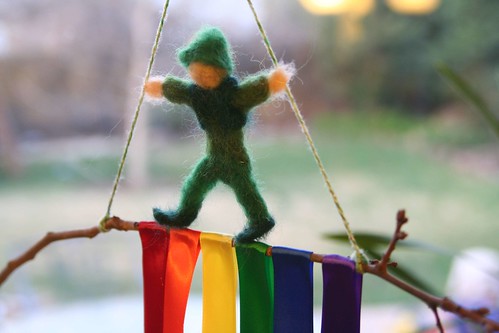
Leprechaun Mobile

I have a deep and abiding love for mobiles. Holiday decorations that hang can be very festive without taking up too much space or cluttering your nature table. Here’s a St. Patrick’s Day leprechaun mobile that is easy to make and quite whimsical.

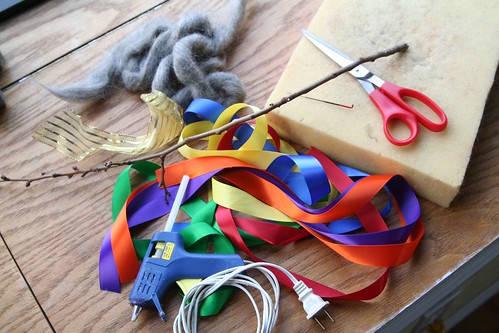
Materials

Materials

  • foam base and needle-felting needle
  • wool roving in gray or black, green(s), and skin colors
  • low-temperature glue gun and glue sticks
  • one twig approximately 18 inches long; ideally it will have a 6-inch straight section in the middle
  • gold ribbon, gold foil, or gold tissue paper
  • 1-inch ribbons in rainbow colors, approximately one yard of each color
  • yarn or string, approximately 2 yards
  • needle, thread, and scissors

Money-Saving Alternatives

  • Narrower ribbon in rainbow colors costs less. Although I used 1-inch ribbon, you could use several strips of the same color ribbon to create a 1-inch band of color for each color of the rainbow.
  • Instead of 1 yard of each color, you could use only a half yard. Your ribbons would be a single layer, not double as in the photos below.
  • Check your gift wrap stores. You may have some gold tissue paper or ribbon left over from a package.

Tutorial

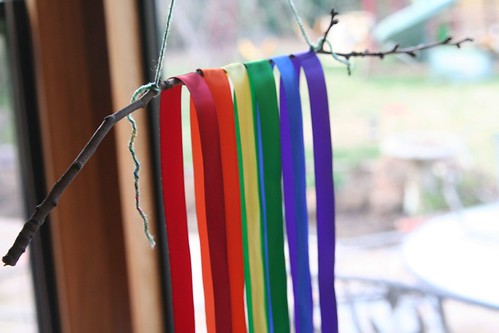
To begin, tie two pieces of yarn or string (each about a yard long) to your twig, approximately 8 inches apart. Hang the twig from the two strings more or less horizontally (adjust the position of the two ties on the twig as needed). Then tie a knot in the two strings about 8 inches up from the twig. This will make a triangle of string above your twig. Tie your twig to something so that it hangs freely at shoulder level so that you can work on it comfortably.

Rainbow Ribbons

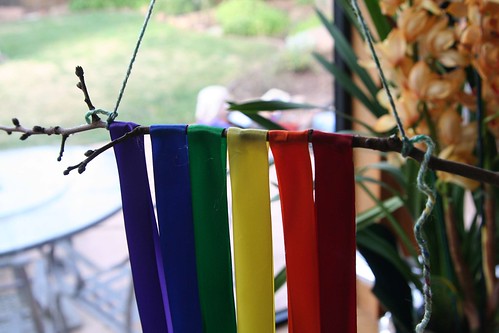
Lay your ribbons over the twig in rainbow order. Their two ends should be even at the bottom. Make sure you like the position of each ribbon before you affix any glue. (You can use clothes pins to hold them in place while you decide on their optimal positions.)

IMG_6426

With your glue gun, put a dab of glue on the inside of one layer of a ribbon and pinch the other layer over the top of the warm glue to fix the ribbon to itself. Repeat this for each color. See the photo above.

Pot

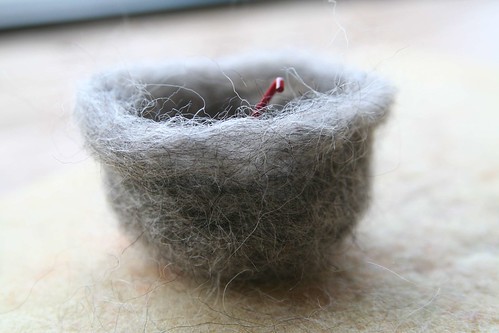
Now, take your gray or black wool roving, felting needle, and foam pad and needle-felt a pot. This will be your pot of gold. Mine was about 2 and ½ inches in diameter. If you wish to have a sleeker look for your wool pot, you can first shape it with your felting needle, then wet-felt the pot in hot water with soap. Gently rub your pot inside and out with soap until the fibers mat firmly together. Rinse it in both hot and cold water.) Shape it carefully into a pot and let it dry. You may still want to apply your needle again to perfect the pot’s shape.

Wet-Felting the Pot

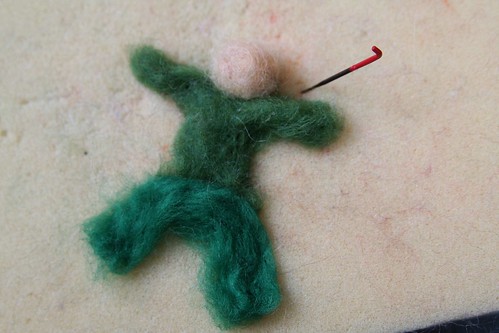
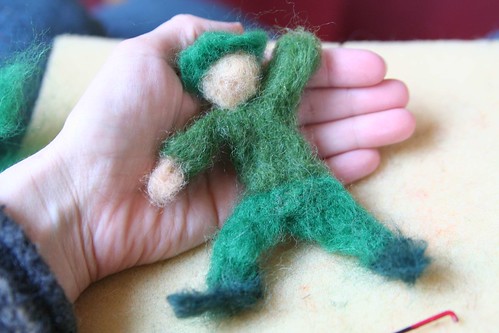
With your green and skin-colored wool roving, needle-felt a leprechaun. No wire skeleton is needed for this project and since this figure will not be played with, you can attach head, hands, legs, shoes, and hat by simply needling the fibers together. Start with a torso and arms. Add legs. Add a ball of skin-colored wool for a head.

Needle-Felted Leprechaun in Progress

Needle-Felted Leprechaun in Progress

Your leprechaun can be as traditional or as unique as you like. Mine was a kind of Waldorf-inspired figure dressed in several greens, with a jaunty hat and dark green vest.

Leprechaun on Top

Stand your leprechaun on top of your horizontal twig. With needle and thread, sew your leprechaun’s hands to the yarn or string hanger. (Feel free to adjust the knot above the leprechaun‘s head as needed to make it possible for the hands to hold both strings.) Finish off the two yarn/string knots on the twig by tying them securely and cutting off the excess.

Gold Suspended

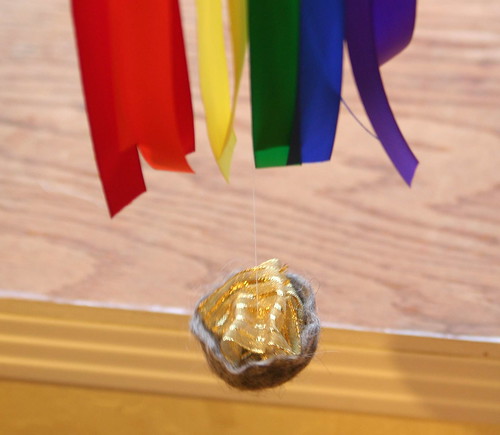
When your pot is dry, crumple your gold ribbon, foil, or tissue paper into a mound of gold and place it into your pot. You might want it to heap above the edge of your pot. With a long thread, sew up from the bottom center of your wool pot, through your gold, and back down a couple of times. On the way up again, extend your long thread all the way up to your rainbow-covered twig and tie your thread securely to the center of the twig. You’ll probably want to tie it in between the yellow and green ribbons. Cut of the excess thread tail. Your pot of gold should hang a couple of inches below your twig, at the end of your rainbow.

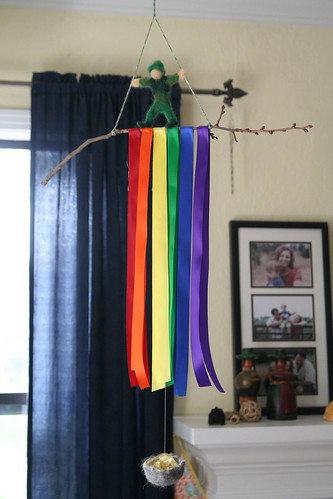
Finished Mobile

Find a nice spot in your home to hang your St. Patrick’s Day mobile with leprechaun and pot of gold, perhaps in front of a window, where fresh spring breezes will make your rainbow ribbons flutter.

* This article was originally published in the Little Acorn Learning March Enrichment Guide.

Glorious Saturday

Pink Open-Center Star and Red Flower

Oh, Saturday. How I love you! I swoon with love for you!

Any day that starts with an extra hour of delicious morning sleep is tops. Why does morning sleep feel better than any other sleep?

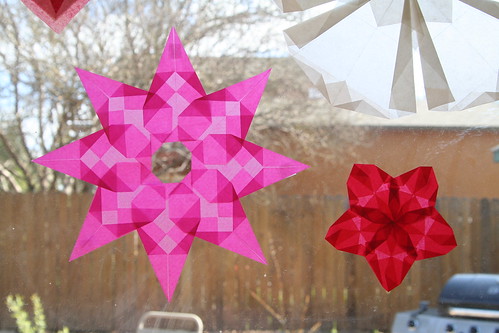
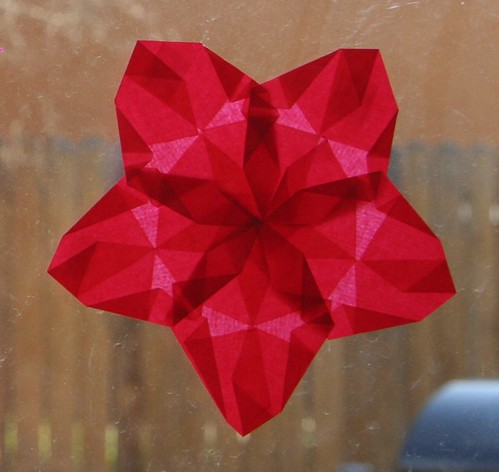
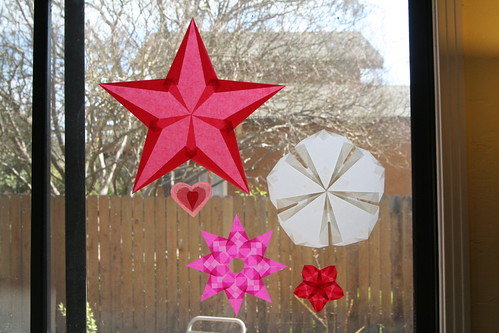
My day started with coffee and some new window stars. Both of these are first attempts at new patterns.  The red flower was tough because I had to trim my small 6 1/4 inch square kite paper into teeny-tiny rectangles with a particular height-to-width proportion. Like, with MATH.

Pink Open-Center Star and Red Flower

It would have been easier with bigger paper, as the instructions call for. But I’m happy with the result. See the little red star in the middle?

Grouped Window Stars

The pink one with the open center is kind of a showstopper, I think.

Stunned Goldfinch(?)

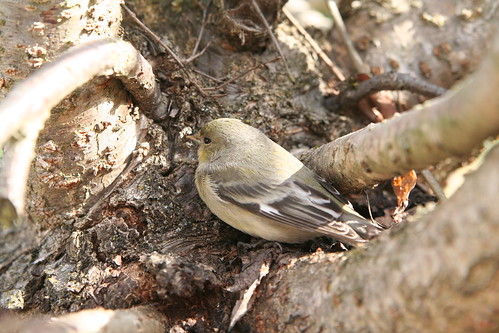
This little darling accidentally flew into our window today. She stunned herself pretty badly, and allowed Ian to pick her up and place her into this tree. At first her eyes were closed and her eyelids were kind of twitchy. Later on, she was like this, eyes open but not ready to fly away. Then, she was gone. I hope she’s OK now. She might be a goldfinch, but I’m not sure.

New Chicks

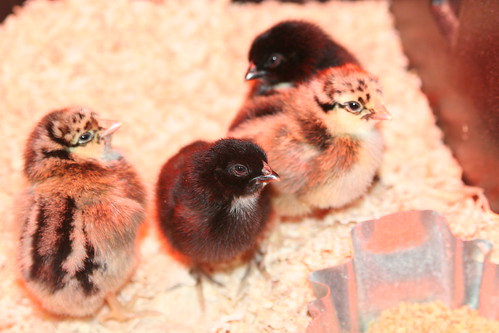
We have four two-day-old chicks in our home again. Here they are at one day old. We got two Black Sex-Link chicks (who are certain to be female because the male chicks look different at hatching) and two Silver Laced Wyandotts. At first I was sure I’d play it safe and get four Black Sex-Link chicks to guarantee we were getting females, but then the Silver Laced Wyandotts wooed me with their gorgeous adult plumage and I succumbed to temptation. Let’s all hope together that they’ll turn out to be hens, OK?

Lucas and New Peep (Silver Laced Wyandott)

The chicks are much more sturdy on their pins now. Lucas is enjoying them a lot. We are debating about their names. Ian wants to name them after sci-fi space princesses. Lucas is in favor of Norse goddess names, although he also likes the idea of calling them Bear, Raven, Duck, and Chipmunk because, well,  that’s funny. Asher seems to want to keep with the theme of nature oriented names like our other hens. He has thoughtfully suggested Moon, Star, Rain, and Tornado.

Japanese Maple Buds

My garden is coming alive again in small ways.

Forsythia

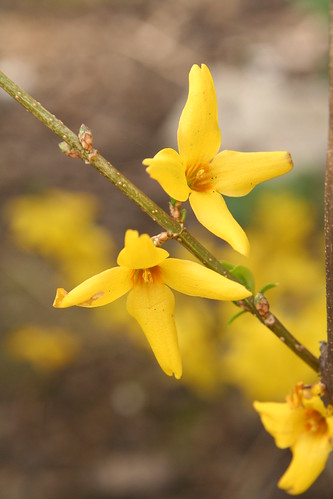
This new forsythia was allegedly a flowering quince when I bought it and planted it late last spring. I’m not sad because it’s gorgeous.

First Chess Lesson

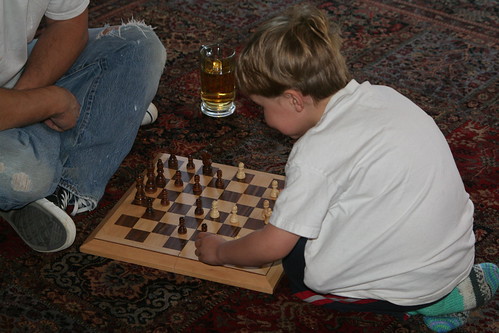
Asher received his first lessons in chess today. My heart skipped a beat when I saw this. Is he really old enough to start learning chess?

Practicing

Lucas practiced piano and cleaned his room today. We also went to the library and got him his own library card.

And although I don’t yet have a photo, I spent some time today painting my kitchen door turquoise. I’ve been wanting to paint this door for twelve years now. Ridiculous, but true. And why turquoise? Well, why ever not?

We had yummy French onion soup and steak and asparagus for dinner. We read leprechaun stories at bedtime.

Life is good. I love Saturdays.

RIP Midnight Chicken

Midnight and the Girls Ranging

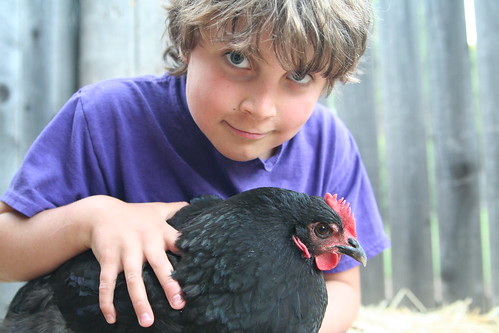
Lucas and Midnight/Scary

Midnight Enjoys the Leftover Kale

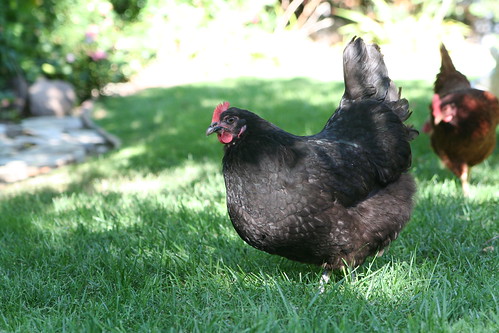
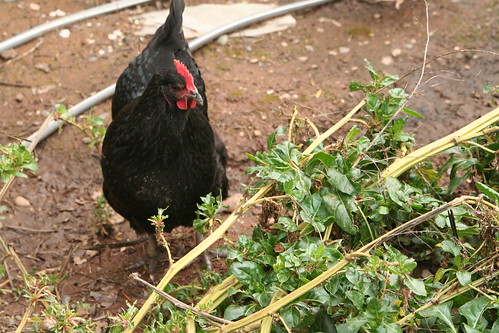
Yesterday we said good-bye to a favorite hen. Midnight passed away in the afternoon. She was a great hen with a lovely disposition and gentleness, and she laid gorgeous, huge brown eggs steadily for us for a year and a half. She was two or more years old when we rescued her. She seemed to have a steadying influence on the other hens. She was large and fluffy and her black feathers were soft and iridescent in the sunlight. She was Ian’s favorite of all of the girls.

Last fall, we noticed her belly was distended and so we researched online to find out what might be up with her. We found evidence to suggest that she was perhaps egg-bound, and although we did the things that were recommended to remedy it—ridiculous things like giving her a bath in warm water—nothing changed for the better. Yet, she didn’t die like the Internet said she surely would do within a few days. In fact, she lived another three months, ate heartily, grew her bottom feathers back in,  and …. then lost them again. Our theory is that she overwintered OK because she wasn’t laying, but now that spring has ramped up the hens’ egg-laying, she was egg-bound and it did her in.

Or we could be totally wrong about all of that. We’re just guessing.

Anyway, although I thought there might be great grief when I told my children about losing Midnight, they surprised me by taking it in stride. Lucas wanted to see her dead body, and then seemed to accept that she was gone. Asher was mildly interested but not upset. I’m grateful for Emily Mouse (our deceased pet), who paved the way for our experience of losing an animal. I also think that the addition of Solstice Dog to our family has given my children an understanding of what is a “proper” pet, and so the chicken seemed less important.

And while it’s quite silly to be very sad about losing our Midnight when we are a family who eats chicken three times a week, she was, nonetheless kind of a pet.

Rest in peace, Midnight. You were a great chicken.

Shamrock Window Transparency Tutorial

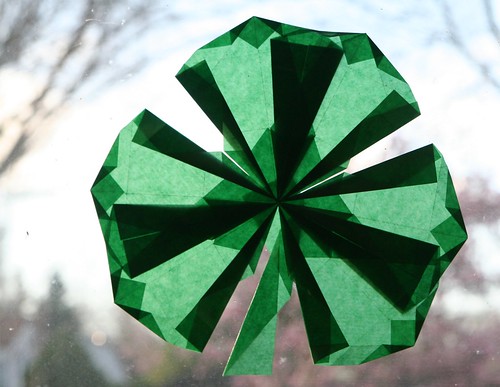
Finished Window Shamrock

Are you excited about Saint Patrick’s Day? I am because we can do anything we want to celebrate. I’m a big fan of “minor” holidays for this reason. We can be creative and silly and spontaneous, and even do something different every year, if we want.

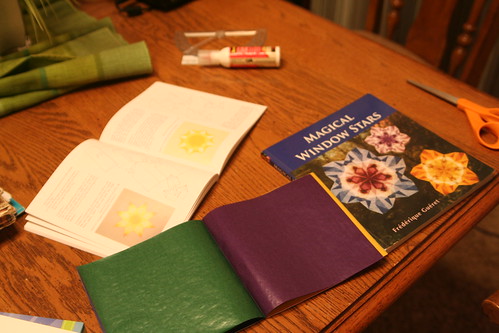
I thought I would share this with you. I made up this shamrock window transparency, building on what I’ve learned from Magical Window Stars by Frédérique Guéret. Although there is a beautiful clover leaf design in the book, this is not it. This design that I’ve created uses the square kite paper that is most commonly available. The basic point I teach below is Guéret’s invention, but the configuration and the assembly of the shamrock was my idea. I hope you like it. In any case, I fully recommend this book if you love window stars like I do.

Materials

  • 7 sheets of square kite paper in dark green
  • scissors
  • glue stick
  • tape
  • ruler or straight edge for making crisp folds

Tutorial
IMG_2205
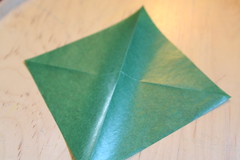
Fold your square into diagonals.

IMG_2207
Now fold opposing corners to the center line (photo above). The top is now a horizontal fold that is parallel to your horizontal crease.
IMG_2208
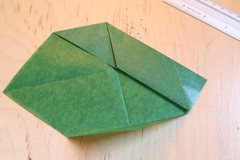
Unfold the bottom corner; the crease you made will be used later. From the top, folded edge, fold the right side down to meet the center horizontal line (photo above).
IMG_2211
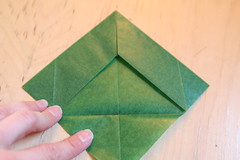
Do the same to the other side. Now you have a point at the top again (photo above).
IMG_2212
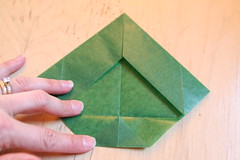
Fold the bottom corner up to the horizontal crease line (photo above).
IMG_2214
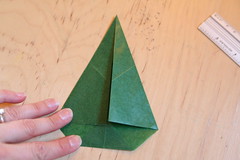
Now fold both sides in to the center vertical crease. This step looks like an airplane or maybe a sailboat. Do your best to keep the top point crisp.
IMG_2215
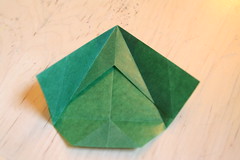
Open those sides out again.

IMG_2216
Now fold the bottom sides up so that the flat bottom edge aligns with the center vertical crease (photo above). Unfold those bottom sides again.
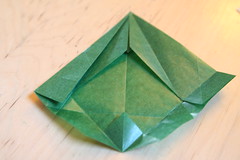
IMG_2218
Now fold the left top side in again, allowing the corner to touch the horizontal crease you made in the previous step. Your top point is becoming more acute.
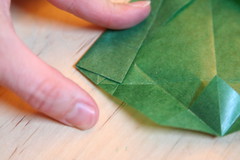
IMG_2219
Above is a detail of this step. See where the left edge folds in and meets the crease? The corner touches the horizontal crease.
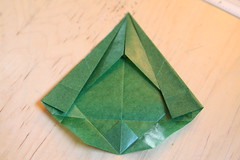
IMG_2220
Now do the same with the right side.

IMG_2221
Open out the innermost flaps of the top point, allowing their “wings” to extend beyond the edges of the sides.
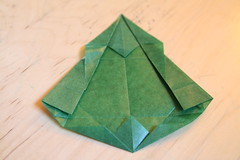
IMG_2223
From the bottom center, you have two diagonal creases. Fold the very bottom edge on both sides up, aligning the bottom edge with the diagonal creases.
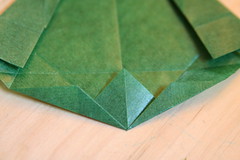
IMG_2224
This photo above is a detail of that final fold. Congratulations! You’ve make one point. Now— sorry about this part—you repeat that process five more times, so that you have six of these points. Two points will make one lobe of your shamrock.
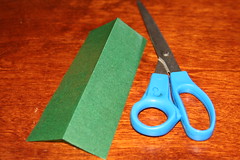
IMG_2153
Once you have six of those points, you can make the stem. Take another square of kite paper and fold and cut it in half. Now fold and cut piece in half again and cut along the fold. You should now have a skinny, rectangular strip that is one-quarter the width of the original square.

IMG_2154
This long strip is the stem of your shamrock. Fold the bottom of the strip like the photo above.
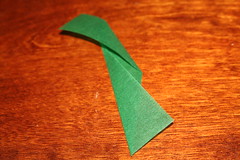
IMG_2155
And fold the top of the strip in the opposite direction, like so. This makes it kind of curve. You now have all the pieces you need and you can assemble the shamrock window transparency.
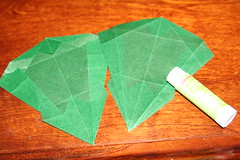
IMG_2156
For each lobe of the three-lobed shamrock, you’ll need two points. The sharpest point—what I was calling the top in the photos above— goes in the center. The front side of each piece is the side with the points. If you run your fingers across the front, they will catch on the little triangles created in the folding process. The back side is smooth; your fingers won’t catch on any part. Turn one of the two points over so that the back side is up, as in the picture above. Run your glue stick along the right edge (where the glue end of the glue stick is in the photo above).
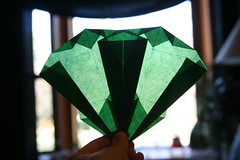
IMG_2159
Align the points at the bottom as close together as you can, hold your two points up to the light, and align the darkest edges side by side, as you see in this photo above. They make a very dark upside-down triangle in the middle. The broad (formerly bottom) end of your two points will be overlapping. You now have one lobe of your shamrock done. Do the same thing two more times to make two more lobes of your shamrock.
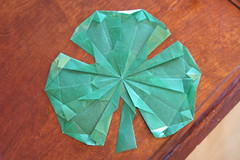
IMG_2161
If it helps, hold up each lobe to the light before gluing them together. You should see a medium green triangle in the center when all three points are aligned. Now put all the center points together on top of your stem. Glue them to the stem with your glue stick so that the points of the center are just barely touching and the three lobes are almost touching halfway up, just beyond the edge of that inner triangle. The stem should extend down in the gap between the left and right lobes of the shamrock.
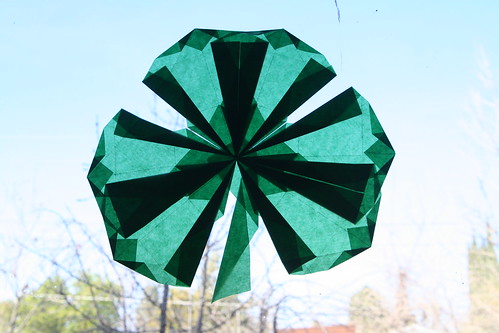
Finished Shamrock Window Transparency
Now you can hang your shamrock in the window. Make three or four loops of tape and put at least one on the back of each lobe to stick it to your window. Perhaps your window shamrock with bring you good luck!

The Dear Little Shamrock

There’s a dear little plant that grows in Ireland.
‘Twas Saint Patrick himself sure that set it.
And the sun on his labor with pleasure did smile.
And a tear from his eyes oft-times wet it.
It grows thro’ the bog, thro’ the brake, and the mireland,
And it’s called the dear little Shamrock of Ireland.

That dear little plant still grows in our land,
Fresh and fair as the daughters of Erin,
Whose smiles can bewitch, and whose eyes can command,
In each climate they ever appear in:
For they shine thro’ the bog, thro’ the brake, and the mireland,
Just like their own dear little Shamrock of Ireland.

That dear little plant that springs from our soil,
When its three little leaves are extended,
Denotes from the stalk we together should toil,
And ourselves by ourselves be befriended.
And still thro’ the bog, thro’ the brake, and the mireland,
From one root should branch, like the Shamrock of Ireland.

—Andrew Cherry

More Window Stars

Or, What I Did on My Vacation

IMG_1860

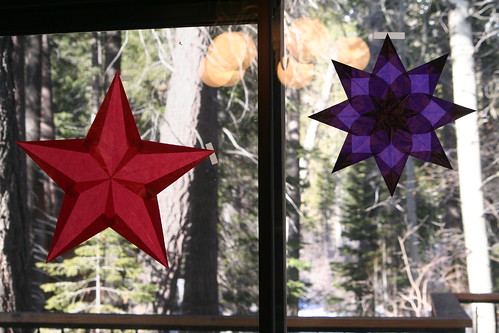
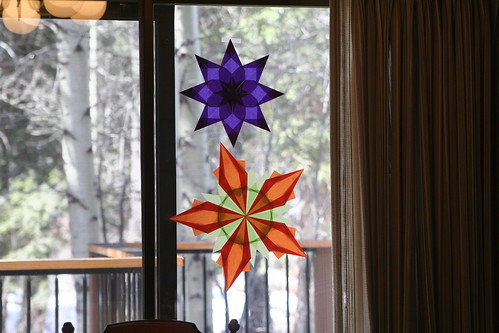
OK, I admit I’m completely obsessed with window stars lately. I think I mentioned that here a little while ago. Anyway, we had some time off last week and I took all my kite paper and window star books along with me to the mountains. I was determined to challenge myself to make some of the more complex stars. While I was there, in between working, eating, and playing outside, I made eight new stars.

IMG_1402

I also accidentally wrecked one, but shed only a few tears about that.

IMG_1857

The more you make them, the easier it becomes. I guess I got into a kind of flow.

IMG_1593

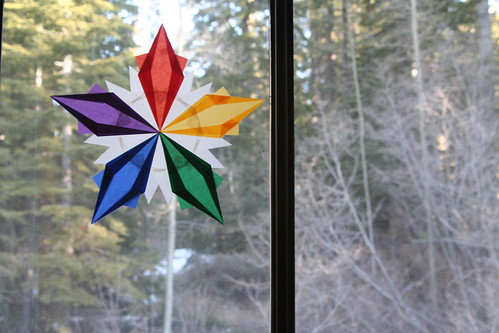
Lucas helped me make this beautiful multicolored star. He did most of the white center. I’m hoping he’ll want to make some more with me. I think stars like these may be our birthday gifts for everyone this year.

IMG_1597

I love the way the light shines through them and I confess I’m crazy about the colors.

Purple Eight-Point Window Star

Window Stars in Boys' Room

My boys wanted one for their room in their favorite colors, blue and green. Now that we’re home again, the stars have all found spots on our windows here, sharing space with the Valentine window transparencies I made last month, which are still up because I adore them.

New Window Star

I’ve also been experimenting and will share my results very soon, if it all works out the way I think it will.


Snow Days

IMG_1728

We were on a school vacation last week, and Ian carved a few days off his work week. So we were able to leave town for one of our delicious, infrequent snow vacations.

IMG_1763

IMG_1787

We had a new family member along with us this time. I fell even more in love with Solstice. What an intrepid snow dog he is!

IMG_1748

IMG_1519

IMG_1813

IMG_1701

I love to see my children roaming, to see them march off on their own mission in whatever direction they choose. I love to see them free.

IMG_1580

IMG_1598

IMG_1593

IMG_1590

IMG_1475

IMG_1467

IMG_1465

We had plenty of time for games and new hobbies, and that was enchanting, too.

IMG_1809

IMG_1371

IMG_1868

IMG_1815

IMG_1823

IMG_1843

IMG_1921

IMG_1929

IMG_1423

IMG_1793

IMG_1464

IMG_1666

What more can I say? It was perfect.

Spring Wreath Tutorial

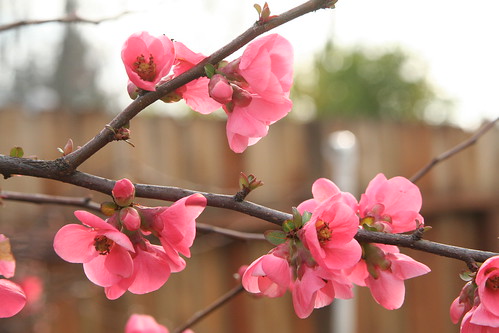
Flowering Quince

We all enjoy watching the signs of spring emerge out of the season of winter. The ground warms, birds return, and bulbs begin coming up. Some plants seem to feel the coming spring before others, like these flowering quince blossoms that were my inspiration for this project. I spot these everywhere I go these days because they are among the first bushes to bloom.

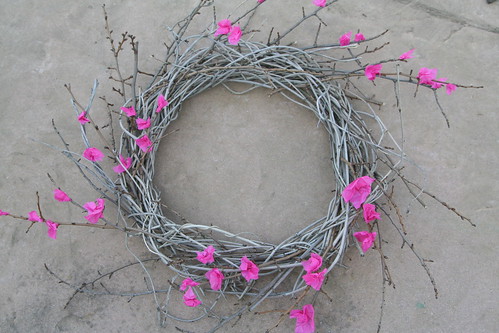
This wreath makes a perfect way to count down to the spring equinox, with small blossoms added day by day (perhaps one added by each child in the family) until March 20, the first day of spring. As you observe the days lengthening, you can make your wintery wreath bloom in your home. Or, if you prefer, do it all at once and enjoy the promise of spring it brings.
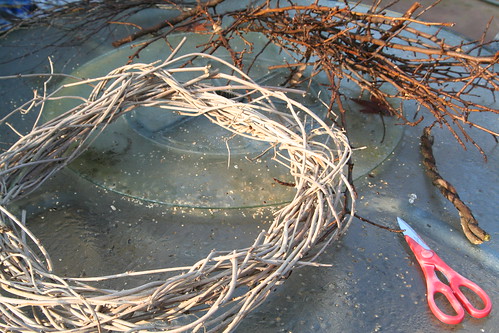
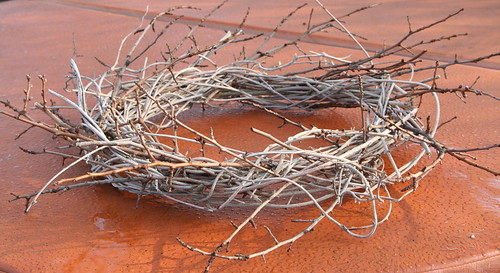
Wintery Vine Wreath and Twigs

Materials

  •  garden clippers or sturdy scissors
  •  grapevine or other bare vine wreath base (can be made by weaving vines together or purchased at a craft store)
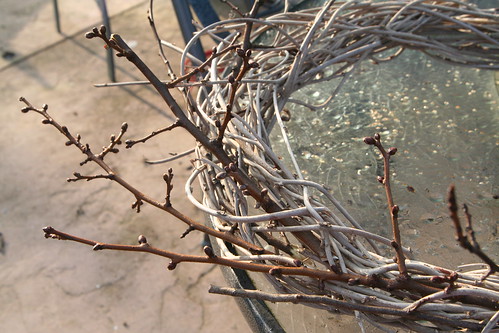
  •  branch tips, preferably found (and used with permission) or recently pruned from your yard (If you find any with small buds, that’s wonderful.)
  •  several sheets of tissue paper in a spring color (pink, yellow, or white, all one color or a mix)
  •  glue gun and glue sticks

Children of all ages can help with this project. Even the littlest ones can help you gather twigs, tear tissue paper, crumple the paper into buds and blossoms, and even glue (if you‘re using craft or tacky glue). Older children can use a low temperature glue gun with supervision.

Adding the Rays

Choose small pruned twigs and insert them into your vine wreath base, one at a time, with the tips ―pointing‖ around the wreath in a clockwise (conjuring, waxing) direction. Keep inserting the twigs, and endeavor to anchor their thick ends deep into your wreath.

Your wreath should start to look something like this. Keep adding twigs until your wreath base has twig ―rays‖ running all around the circle.

Cropped Wintery Wreath

Here is a wintery, bare wreath. Doesn‘t it seem to ache for spring?

Making Paper Blossoms

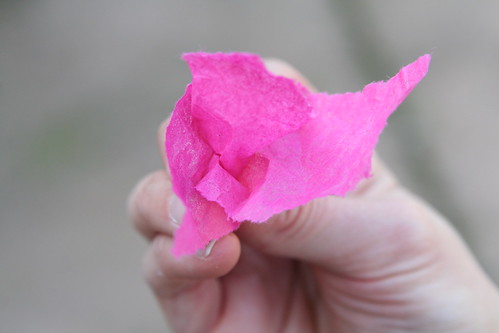
To decorate your wintery wreath and make it bloom, tear your tissue paper into small pieces, no larger than about 2 inches square. Your tears don‘t have to be precise, and you need not waste any tissue. Even the smallest pieces can be used in this project. Grasp the center of the back side of your torn tissue piece, pinch, and with your other hand to help, twist the center. The edges of your tissue piece should flare out a bit like the petals of a blossom. Crumple or twist until you‘re happy with the way your blossom looks.

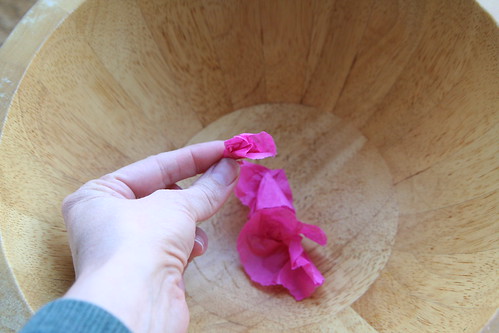
Making Paper Blossoms

Now make lots of these! Make as many as you like, or make 20 per child, or 20 per person in your home, if you plan to add one blossom per day to count down to the spring equinox. Even the tiniest pieces of paper can be crushed and rolled tightly into buds for your wreath.

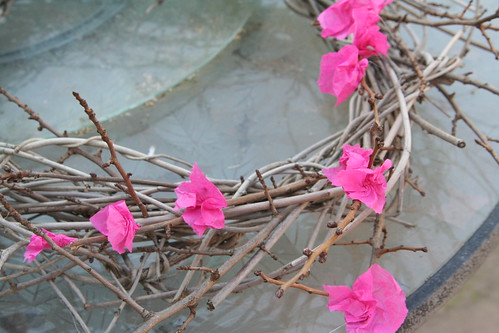
Blooming Winter Wreath in Progress

Now begin gluing your buds and blossoms onto your twig ―rays. Often, flowering bushes and trees bloom from the base of the branch to the tip, so if you‘re going for realism, glue your largest blossoms close to the vine wreath, and your smaller blossoms and buds nearer to the tips of your twigs.

Add blossoms day by day and watch your wreath bloom! Add as many or as few as you like.

Blooming Winter Wreath

How cheerful it will be hanging in your home, perhaps above your spring nature table, or on your front door!

Spring Wreath Finished

* This article was originally published in the Little Acorn Learning March Enrichment Guide.

Welcome, March

—Painting by Edith Holden, naturalist, artist, author, and art instructor (1871-1920)

Well, hello March. It’s been so long, and I’m delighted to see you back again. February and I don’t get along as well as I would like, but we’re making progress and our relations are more comfortable in recent years than they used to be. But you, March. You are lovely, a breath of potential that stirs me up and fills me with a yearning for adventure and romance.

Spring Signs

Everywhere the wind blows

There goes spring—

Red kites and blue kites

Are tugging at the string.

Walks have hardly dried

Until marbles roll about

Long before the colored flowers

In the fields are out.

Maybe there is frost yet

And a touch of snow,

But there are little spring-signs

Where the children go.

—Mildred Bowers Armstrong

  • About Sara

    Thanks for visiting! I’m Sara, editor and writer, wife to Ian, and mother of two precious boys. I am living each day to the fullest and with as much grace, creativity, and patience as I can muster. This is where I write about living, loving, and engaging fully in family life and the world around me. I let my hair down here. I learn new skills here. I strive to be a better human being here. And I tell the truth.

    Our children attend Waldorf school and we are enriching our home and family life with plenty of Waldorf-inspired festivals, crafts, and stories.

    © 2003–2018 Please do not use my photographs or text without my permission.

    “Love doesn’t just sit there like a stone; it has to be made, like bread, remade all the time, made new.” —Ursula K. LeGuinn

  • Buy Our Festivals E-Books


  • Archives

  • Tags

  • Categories

  •  

  • Meta