Another Sixth Birthday Gift: Earthbender Costume

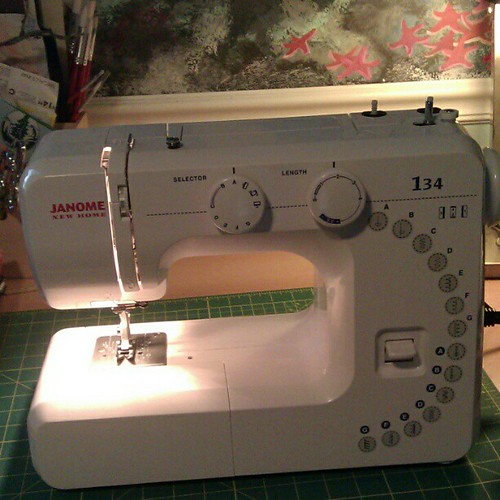
My new baby: Janome New Home Christmas present from my mom and dad.

My parents bought me this awesome sewing machine for Christmas. It’s my third machine. I am still learning and I’m kind of hard on them. (For the record, two of my sewing machines work and one of them is a perfect learning machine. I thought I might let Lucas take it for a spin.) But this new one—this Janome New Home—is all mine. (Besides, Mom gets nervous whenever I go near her Bernina.)

pieces

Back in December I conceived of giving Asher an Earthbender costume, inspired by one of our family’s favorite shows, Avatar the Last Airbender. Asher has always been fondest of the Earthbending skill, and when he plays at “bending,” he is always an Earthbender. Maybe it’s because green is his favorite color. At first, I thought this costume might be a Christmas gift, but then I realized it was more appropriate for his sixth birthday.

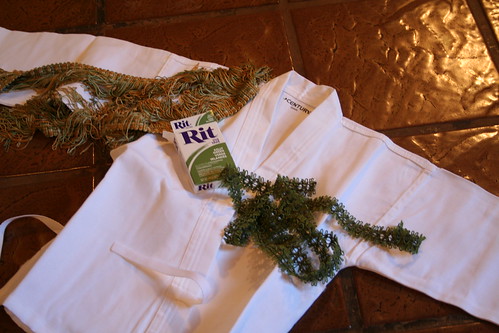
So I bought a mini gi. (Actually, I bought two. The first was too mini.) I know my limitations and I realized I could spiff-up a gi more efficiently than I could make one from scratch.

Dyed Earthbender Costume in Progress

I spent a day last week dyeing the top green and the pants and belt a taupe color. Pale yellow would have been nicer, but that wasn’t an option when buying dye.

IMG_4062

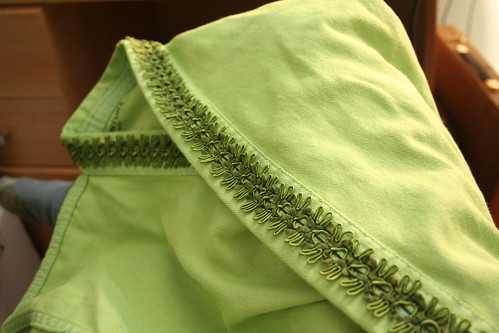
My mom and I carefully picked out some fancy trim, and last night I got my new sewing machine out and put it to use. I even changed the needle to a denim one, to go through all the layers of the gi edge! I read the manual and everything! Amazingly, my boys slept through my sewing.

IMG_4064

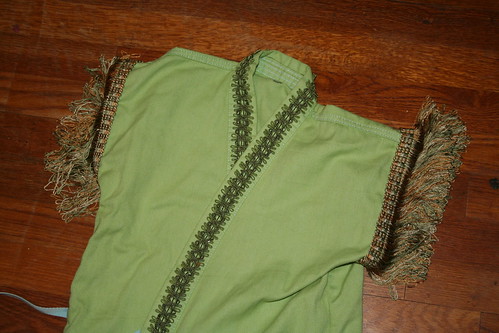
I cut off the sleeves and sewed on this gold and green fringe. I wanted the costume to look like a cool martial arts gi, but not exactly like a karate uniform. I have one day left before Asher’s birthday gift will be presented to him. I’m presently debating about whether to use the sleeves I cut off to make wrist bands or a headband. I hope to decorate this final item(s) with the Earthbender symbol.

150px-Earthbending_emblem

Today I spent the morning in Asher’s kindergarten class with him, to help celebrate his birthday at school. His teacher told me that yesterday she asked him what he wished for. He said he wished for infinite wishes, and for a closet full of costumes. A CLOSET FULL OF COSTUMES!

Maybe I actually have made him the right birthday gift. … Or maybe he won’t wear it at all. That’s also a possibility. If he does like it and wear it, I’ll be sure to get a photo.

Anyway, there’s just one hour left in this Circle of Moms Top 25 Creative Moms contest. Here’s the button to vote for me. My gratitude goes out to all the wonderful friends and readers who have voted for me daily over the last two weeks. Thank you for the support and for helping me get into and stay in the Top 25! Voting closes at 4 p.m. PST on 1/30.

Thanks again!

Sixth Birthday Gift: Lord of the Rings Peg Dolls

Before

My little guy turns 6 in a few days. I’ve been making gifts and planning his party. Here’s a sneak-peek of one gift I’ve made. Shhh! Don’t tell him.

upload

Guess

Fellowship

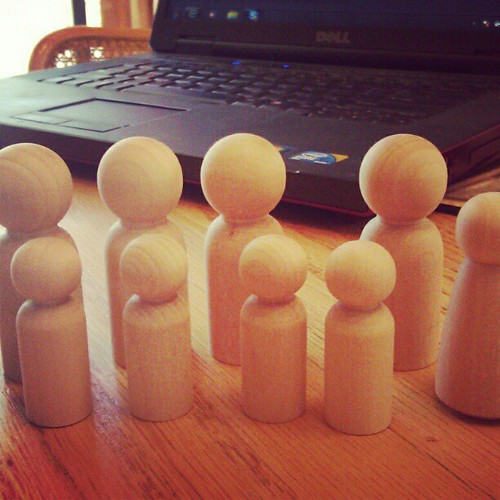
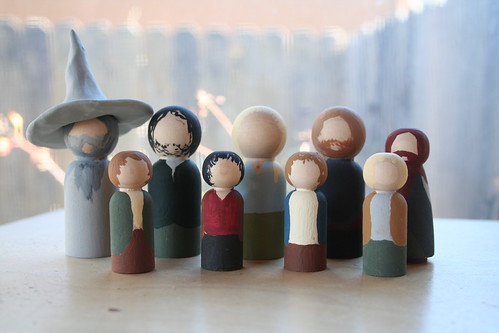
Do you recognize the characters? I’ve painted a set of nine peg dolls to look like the Fellowship of the Ring characters. Gandalf’s hat is made out of sculpey clay. He just didn’t look like Gandalf to me without a hat. I’m pretty happy with these. I need to do a bit of touch up work and then varnish them. Think I should make Gollum, too? I think I might, if I have time.

Another day this week, I’ll share the another gift I’ve been working on.

Snowflake Fairies Tutorial

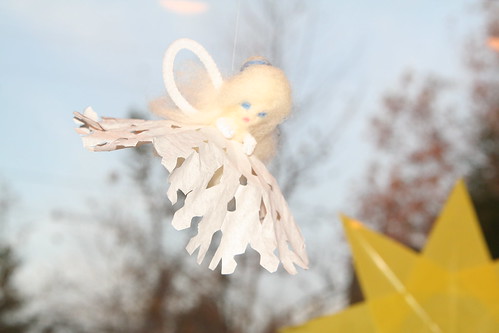
Snowflake Fairy with Face

In between chilly outings, when we’re inside warming up, is a wonderful time to appreciate the beauty of winter. Paper snowflakes are festive and look lovely decorating windows and our family cuts beautiful snowflakes every year.  Here is a project for making lovely snowflake fairies to flutter and dance in the air. Hang them over a heating vent to see them blow about, just like a real, falling snowflake.

Note: Some Waldorf educators recommend that you not make needle-felted figures and animals in the presence of young children, who may find the action of repeatedly needling the woolen bodies to shape them somewhat disturbing.

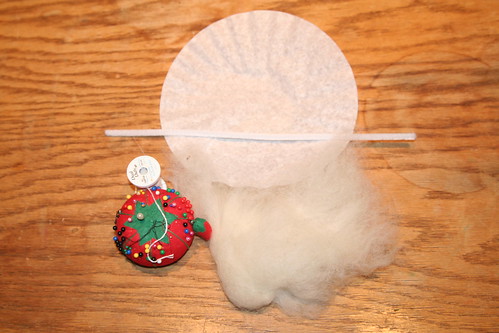
Materials

Materials

  • coffee filter
  • chenille stems
  • needle and thread
  • scissors
  • wool batting
  • needle-felting needle and pad

IMG_9664 IMG_9665

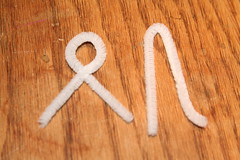
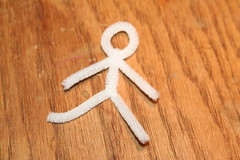
Start by forming the skeleton of your fairy. Cut your chenille stem in half. Twist a loop into the center of one half; this is your fairy’s head with arms attached. Fold the other half over (body and legs). Then put one leg of the folded chenille stem through the loop. The two pieces are now interlocked. About an inch farther down, where the pelvis of the figure would be, twist again to make two legs. You should now have a wire “stick figure” like you see in the right photo above. Fold the smallest possible bit of wire over at the end of each limb, to form tiny hands and feet and keep the cut wire from poking anyone.

IMG_9666

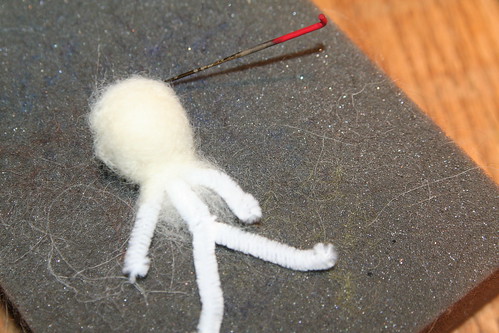
Take a small bit of wool roving, roll it into a ball, and insert it into the loop of the figure’s head. Then wrap a bit more roving around the head and begin to needle it in place into an attractive head shape.

IMG_9668

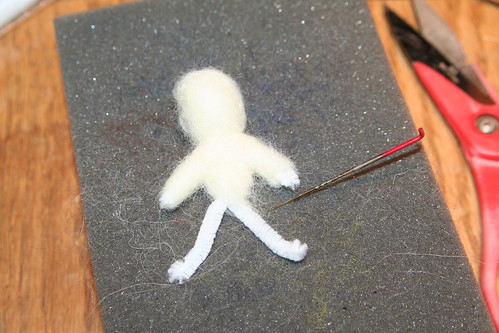
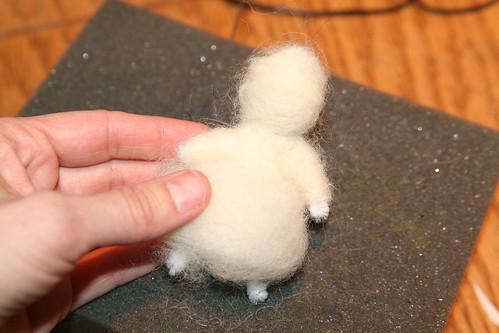
Using very small bits of wool, wrap around the figure’s body and arms. I find making a crisscross of wool that goes from shoulder to waist in both directions to be a good method. Needle this wool until it’s firm and stationary. The fairy’s arms may need more needling than the body to make them graceful and slender.

IMG_9677

Now add a bigger fluff of wool to create a woolen petticoat. You can either allow the fairy’s feet to show below the fluffy skirt, or make the skirt extend below the feet.

Cut

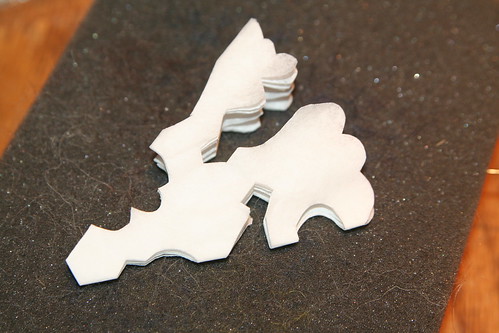
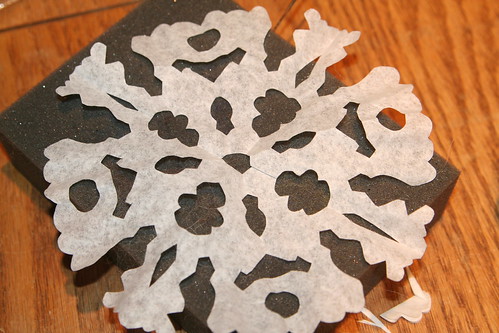
Fold a white, circular coffee filter into quarters or eighths and cut a snowflake. Cut a very small tip off the snowflake and unfold it.

Snowflake

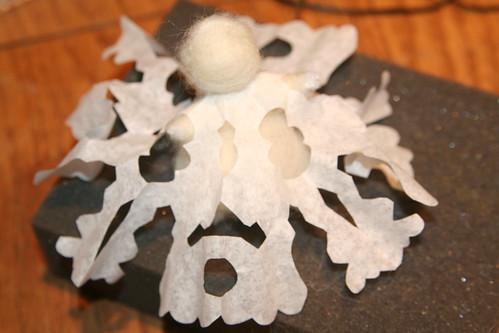
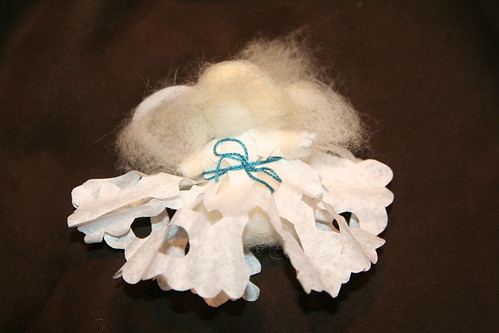
This is the only tricky part: Gently guide your fairy’s head through the center hole in your snowflake. Go slowly to avoid tearing the paper. If the head won’t fit through the hole, refold the snowflake and cut the tip just a tiny bit more to widen the hole and fit the head through.

Snowflake Fairy in Progress

You have a choice now. You can either put the fairy’s arms through holes in your snowflake (if you have such holes) to make a dress (see above), or you can gently move one arm at a time up through the neck hole of the snowflake to make it a skirt instead of a dress. This part is not unlike carefully dressing a small child, except your fairy will wiggle less.

IMG_9680

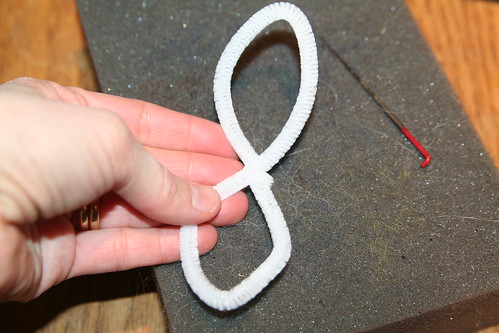
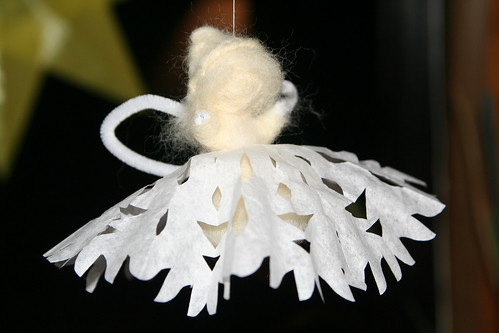
Next, use another chenille stem and form a circle. Twist the two ends together to seal the circle. Then twist the circle into a figure eight. These are your fairy’s wings. Use a bit of wool to tack the wings onto the fairy’s back. Now give your fairy some white hair, and allow it to flow over the center of her back where the wings meet the back.

Snowflake Fairy with Belt

If you made a dress, you might wish to belt it with a ribbon, bit of string, or a braid of wool roving.

Snowflake Fairy with Up-do

Here is a fairy with a skirt. You can give your fairy a fancy hairdo, if you like, by coiling wool into a bun and needling it onto her head. You can also add a face using tiny bits of color needled in for eyes and a mouth (as seen in the top photo). The fairies are adorable either way.

Snowflake Fairies

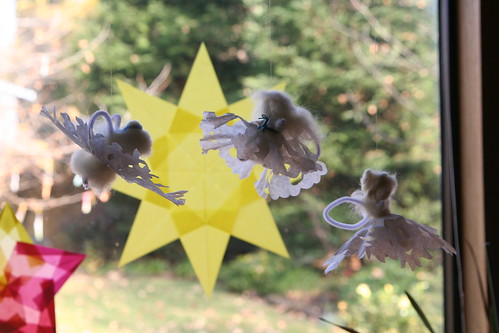
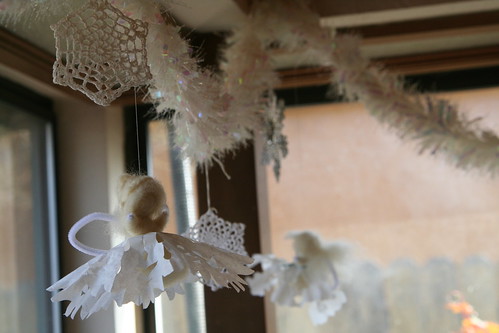
Now, you can make more snowflake fairies and hang them near each other to dance in the air, or display them with other snowflakes.

 Snowy Garland wih Snowflake Fairies

Please vote for Love in the Suburbs at the Circle of Moms Top 25 Creative Moms blog list. You can vote once per 24 hours until Jan 30, and you can vote for more than one blog on the list! Thank you!

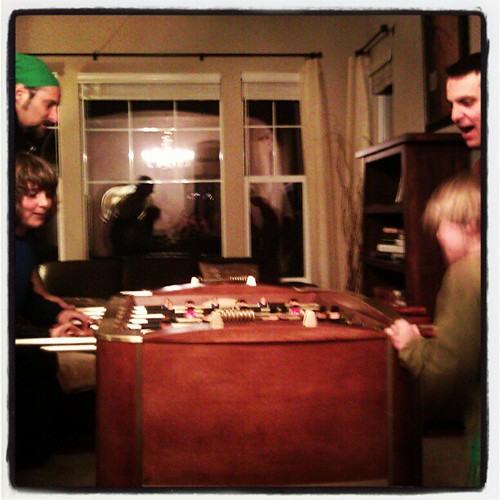
This Moment: Foosball

Foosball

I haven’t done a This Moment in a long time. 😉

Inspired by SouleMama {this moment} – A Friday ritual. A single photo – no words – capturing a moment from the week. A simple, special, extraordinary moment. A moment I want to pause, savor and remember.

Valentine Ideas

In this post I’m going to share with you a few links to some beautiful Valentine ideas and craft tutorials. I figure that late January is the time to start thinking about making Valentines if you have class sets to make. If you’ve got more than one child in school, and about 30 classmate for each child, well, that’s a heck of a lot of love that you have to create before Valentine’s Day!

I’ll start with a few of our own projects.

Valentine Stones

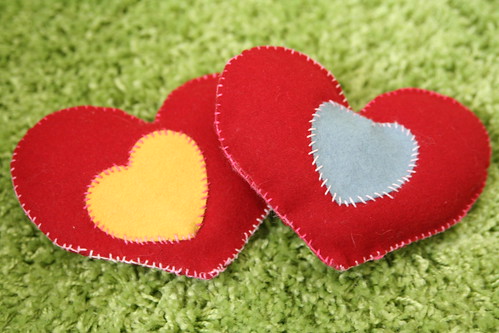
Here is an easy way to use up any fabric scraps you might have lying about your sewing basket: Valentine Stones. I made these for my family but they could be for classmates, too. Each stone has a fabric heart on one side, with a message of friendship on the other.

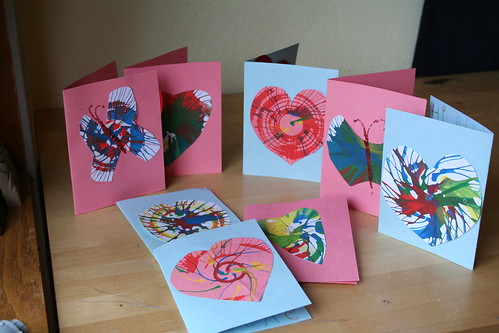
Spin Art Valentine's Day Cards for Lucas's Classmates

These Spin Art Valentines were created using a Spin Art painting toy. These are a little labor-intensive if your child is young. But the results are quite beautiful and each one is unique. I didn’t write out a full tutorial for these, but I think you get the idea from the photo. Spin the paint. When paintings are dry, cut out hearts or butterflies. Glue them to cards.

I’ll spare you the Crayon Heart Valentines. They’re all over the internetz. They are fun to make, though.

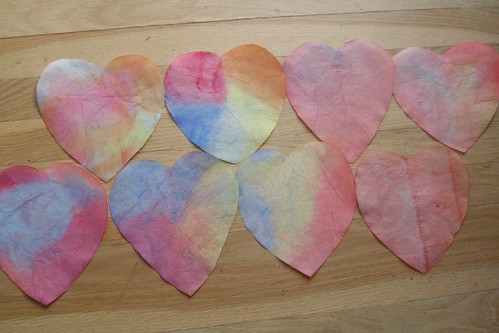
Watercolors on Coffee Filters

These Rainbow Valentines are painted coffee filters. They are easy even for the smallest children to make. Simply paint three or four colors of Stockmar watercolor paints onto painting paper or coffee filters. Allow the paintings to dry on a flat surface. When they are dry, cut paintings into smaller pieces, if necessary, and then fold each one in half and cut a heart shape. Add the child’s name to the back or a simple message, such as “You warm my heart.” Older children can embellish the fronts of their rainbow hearts with some glitter glue, or sew them onto colored cardstock with a needle and embroidery floss to make lovely Valentines.

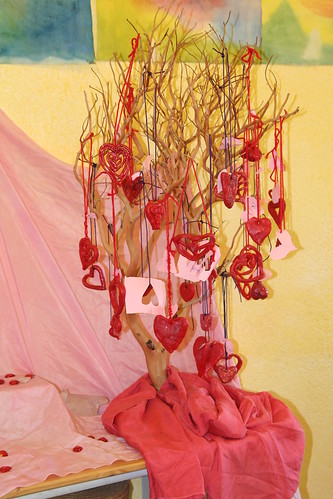
Third Grade Valentine Tree

Make a Valentine Tree and decorate it with beeswax hearts! Use pink, red, and white modeling beeswax to make pretty heart ornaments. Warm the beeswax in your hands or place in a pot of warm water for a few minutes to soften it up. Give each child a chunk of softened beeswax and ask them to make a heart. It can be solid, or just an outline, one color or several. Thin “snakes” of beeswax can be braided together and then formed into a heart shape. As the wax cools, it will stiffen and keep the shape you make. Poke a hole in any solid hearts. Add a ribbon or yarn loop for a hanger and then hang all the pretty hearts on a bare tree branch in a vase.

My Boys' Valentine Pillow Sachets from Mommy

I made these little Valentine Pillow Sachets for my kids one year. They are wool felt and stuffed with wool batting, lavender flowers and some essential oil. My boys keep these little pillows in their beds. And although they do get lost among the bedclothes, when they are found again my kids always take a long sniff. Even after several years, they still smell great. An older child can practice handwork skills by making one of these for a best friend, perhaps.

SAM_1604

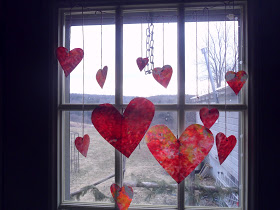
Here is a great tutorial for shaved crayon hearts (suncatchers?) by my friend Marcy at A Simple Life. I’m very tempted to do these this year. I think these look great in the window.

Heart Baby

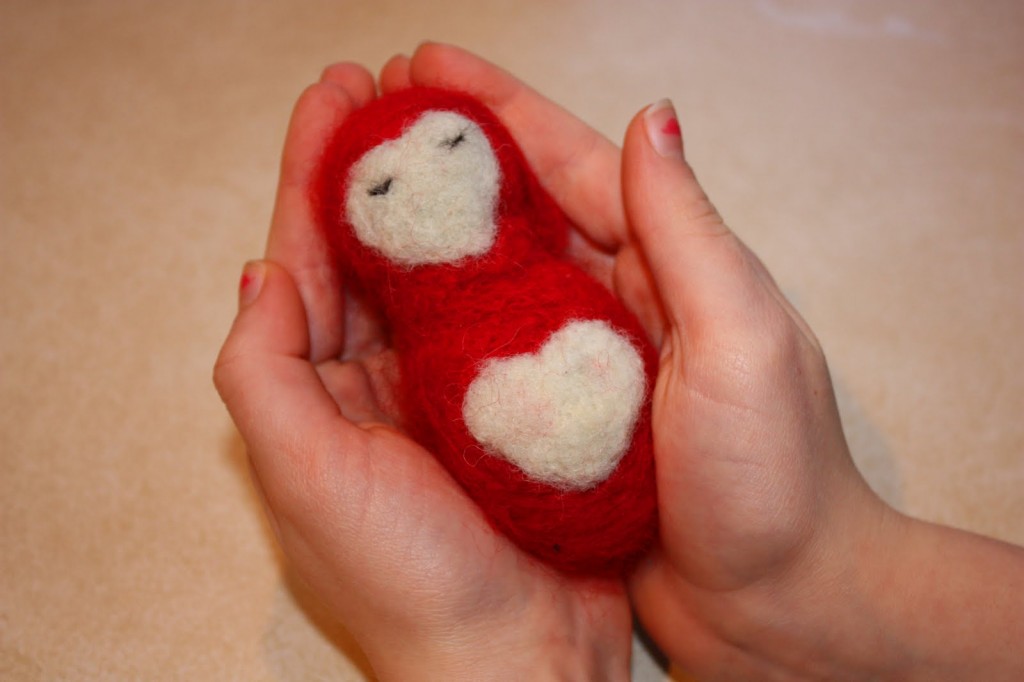
Eileen at Little Acorn Learning shares a sweet Little Heart Baby tutorial here. This little doll would be a perfect gift for a child or a teacher, and would make a charming addition to a classroom or home nature table.

January Sunsets

1/7/13 sunset

My eyes are trained to the sky these days. I eagerly await these pretty winter sunsets.

IMG_3871

They can be quite spectacular, I find. In the winter we get some beautiful cloud cover, so the sunsets are wonderful.

IMG_3966

Sometimes I catch them with my camera. I rush to the end of my street, where we have a big school field.

IMG_3864

Or I shoot from my doorstep. To me, these moments are peaceful and promising. If you are patient, you get to see a whole story of color unfold before your eyes. It’s like a reward at the end of the livelong day, if you take the time to notice it.

Yesterday evening

Sometimes I pull my car over to take a photo. My kids think I’m nutty but it’s worth it.

upload

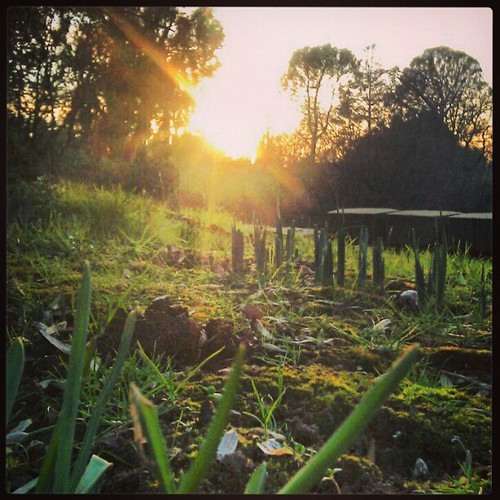
I love this one I took at my parents’ house. Their daffodils are coming up, so spring is on its way. Just thought you might like/need to know.

Seven Days of Increasing Kindness

“Kind hearts are the gardens, Kind thoughts are the roots, Kind words are the flowers, Kind deeds are the fruits, Take care of your garden And keep out the weeds, Fill it with sunshine, Kind words and kind deeds.” —Henry Wadsworth Longfellow

Do you ever get crabby or short-tempered? I do. Sometimes I have to work hard to be my best self. Kindness in everyday interactions makes pretty much every situation better. We can make kindness even more reflexive by taking some time to work on it.

Day 1: Set Your Intention

California Central Valley

“Constant kindness can accomplish much. As the sun makes ice melt, kindness causes misunderstanding, mistrust, and hostility to evaporate.” —Albert Schweitzer

First, you have to want to embrace kindness. Maybe kindness is already part of your spiritual beliefs or religious practice. Or perhaps no one has ever put it to you that living virtuously is largely a matter of being kind to others. If you’re ready to embark on this little seven-day experiment, sit for a moment with yourself and commit to it. Over the course of this week, you will endeavor to keep kindness in the forefront of your mind. You will do your best to notice kindness, engage in it, share it with others, and give thanks for it. Read ahead on this first day, if you wish. Know what you’re getting into. Really, you do this stuff already, so relax and set your intention. Making a mindful practice of kindness will be simple and rewarding.

Day 2: Plan Your Kindness
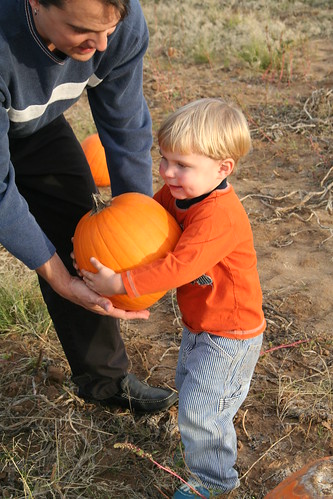
Daddy Helps

“My religion is very simple. My religion is kindness.” —Dalai Lama

Just as you write out the week’s grocery list or daily tasks, you can plan kindness into your life. I believe you already do this, but you’re perhaps not aware of it. Every time you agree to pick up your girlfriend’s kids from school, take your Mom to tea, pack your child’s lunch, or iron a shirt you are being kind. Those everyday kindnesses are wonderful and important. Chances are, they shape your days. With just a little more mindfulness, however, you can plan something extra—some out-of-the-ordinary kindness—into your week that could really mean the world to someone. So get out your calendar. What things have you been meaning to do lately? Who has been in your thoughts or your dreams? What can you say or do to touch their lives this week?

Day 3: Think Kind Thoughts
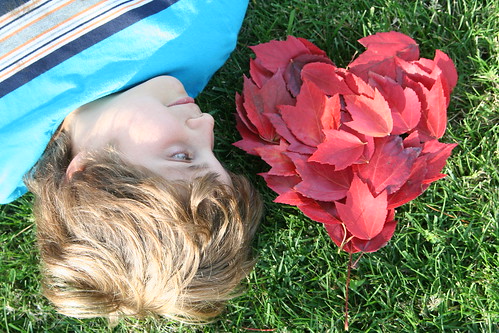
Lucas Love

“Kindness in words creates confidence. Kindness in thinking creates profoundness. Kindness in giving creates love.” —Lao Tzu

Think for a few minutes today about your family members and pay attention to all the things you appreciate about them. Overlook failings or hurts and focus on the good stuff. What do you wish for these beloveds today, this week, or this year? What good do you hope for them? Now expand your kind thoughts to include friends, coworkers, students, acquaintances, etc. Think of the people who are facing challenges, ill health, or difficult change. Imagine all the kind things you would like to say to them or do to help them. Think about the wonderful communities to which you belong. This next part is harder: Think of people you usually do not like or with whom you have difficulty getting along. Think kind thoughts about them; find something you appreciate in the situation. There’s always something. You’ll find it.

Day 4: Say Kind Words

Rainbow of Handmade Quills

“Kind words do not cost much. Yet they accomplish much.” —Blaise Pascal

Some days pass by without our paying much attention to what we say, especially when we are busy. We show our love and concern for others (or lack of it) in our choice of words and our tone of voice. All people deserve respectful, kind words. You might be surprised to observe you’re always polite to the restaurant server, but sometimes are snappish or dismissive to those you love most in the world. Take a deep breath and allow the kindness of your heart to ride forth on your words. Here are some ideas for cultivating kindness in what you say: Greet your family after sleeping or an absence. Smile. Tell them how happy you are to be with them again. Call a friend or elderly person on the phone. Say that you were thinking of them and wanted to hear their voice. Ask them how they are. Give compliments as often as possible. Write a letter or an email. A handwritten letter these days can have a tremendous impact, so take out your stationary and write. Show your appreciation for the help you receive by saying thank you. You’ll melt when you see your child’s smile after you say those blessed words.

Day 5: Do Kind Deeds
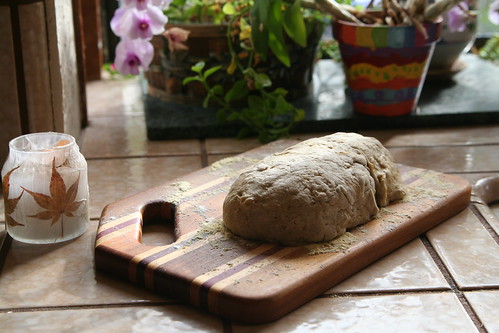
Pumpkin Rye Bread Rising

“The best portion of a good man’s life is his little, nameless, unremembered acts of kindness and of love.” —William Wordsworth

This one is easy. You do kind deeds every day! And now that you’ve been thinking a lot about kindness you probably have many new ideas of kind things you can do for others. Pay for someone’s food or toll. Help someone with a chore. Make a favorite meal. Volunteer. Teach someone something they need to know. Save someone some time or effort by taking on a task and lightening their load. Share what you have with someone who has none. Give a gentle, healing touch or a hug. Make something especially for someone, personalizing it and pouring your kindness into the gift. The possibilities are endless, and the joy that results from kind deeds is sublime.

Day 6: Make Kind Wishes
Morning Walk to Preschool

“If you want a love message to be heard, it has got to be sent out. To keep a lamp burning, we have to keep putting oil in it.” —Mother Teresa

You may be accustomed to meditation or prayer in which you send out your love to others. You may already say blessings at mealtimes that express your care and concern for humanity and the health of our planet. This is your kindness spreading to all beings, to all corners of the earth. Even if this feels alien or uncomfortable, try it. Think of all the good you’d like to exist in the world: peace, sufficient food and resources, sustainable living, the end of human rights abuses, the end of horrible violence and murder, love and support for the world’s children, education for all. Wish it for all our sakes. Let your kindness radiate from your heart into the universe. Let your kindness waft on the breeze to all beings everywhere.

Day 7: Reflect on Kindness
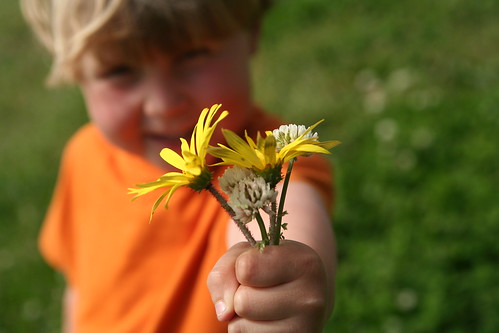
Asher's Bouquet

“How far you go in life depends on your being tender with the young, compassionate with the aged, sympathetic with the striving and tolerant of the weak and strong. Because someday in your life you will have been all of these.” —George Washington Carver

You are here because of the kindness of others. In your life, you have received a million small acts of kindness, gifts, boons, words of encouragement, and good wishes. Adopting a reflective attitude about this can lead to a deep sense of gratitude. When you truly appreciate the gifts of your life, you will give to others in turn with intention and generosity. So, make a list. Take a few minutes and start writing down the names of people who have been kind to you. You will most likely immediately write the names of your partner, your parents, and your children. After you get through all of the obvious ones, you will expand your awareness of all the people who do or say kind things for you: your boss, your coworkers, your child’s teacher, your grocery clerk, the librarian at your elementary school when you were a child. Before long, you’ll have a list of names a mile long. Now, don’t you feel supported and cherished? How have you benefited from these kindnesses? I’m sure that’s a long list, too.

Finally, reflect on your week of increasing kindness and know that others noticed and benefited. You touched lives with your many kindnesses. How do you feel? Now notice how you yourself have benefited from your kindness experiment. Know also that you have modeled a beautiful way of being to your children and others.

“A single act of kindness throws out roots in all directions, and the roots spring up and make new trees. The greatest work that kindness does to others is that it makes them kind themselves.” —Amelia Earhart
Nomination and Other News

I was recently nominated for an award of sorts at Circle of Moms. Some kind soul (I don’t know who) nominated my blog for the Top 25 Creative Moms list there and folks can vote for their favorite blogs. The voting continues until the end of January and you can vote for more than one blog, once each 24 hours. I’d be honored if you’d vote for me, and keep voting for me. It would be very nifty to get into that Top 25 list.

This button takes you to the voting site. Vote for me!

I’ve never been involved in one of these things before, but there’s always a (typically awkward) first time, right? It’s neat because I’m planning to ramp up and improve my attention, involvement, and content here. So please check back often for new, more useful material. A girl with a writer’s soul just has to write. And a girl with an artist’s eye just has to share her visions.

IMG_3928

In other news, my little guy turns six years old in two weeks. I’ve finally figured out the outline of his birthday party and sent invitations. Usually I’m more on top of things like this, but I’ve been working quite a lot lately. Well, we’re getting RSVPs back now, so that’s great. Crisis averted!

I’ve got a few homemade gifts in mind for him, and must carve away some time to work on them. I am making Asher an Earthbending costume, inspired by Avatar the Last Airbender, which is a show that my whole family adores. Great story-telling, good characters, plenty of heart, and featuring themes of friendship, commitment, duty, forgiveness, family, courage, peace, and finding one’s own way, Avatar is good TV. Asher has always liked the Earth Kingdom in the show the best. He has started dressing up for play in recent months, finally using the King’s costume I made for him two years ago. I think this Earthbending outfit idea is a winner.

Yesterday we scouted the location of his “Fantasy Wizards in a Forest” party.

IMG_3930

IMG_3932

IMG_3947

IMG_3953

IMG_3900

IMG_3923

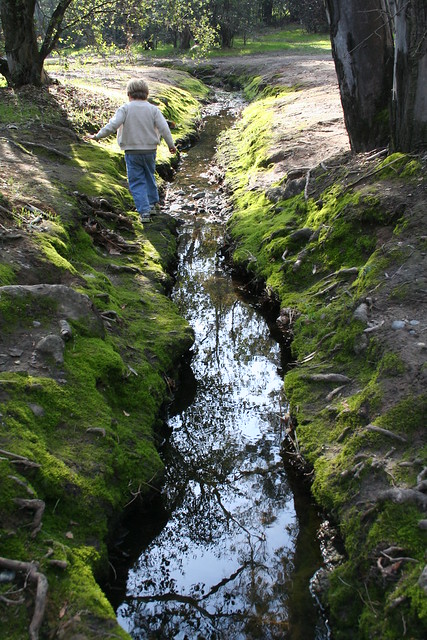
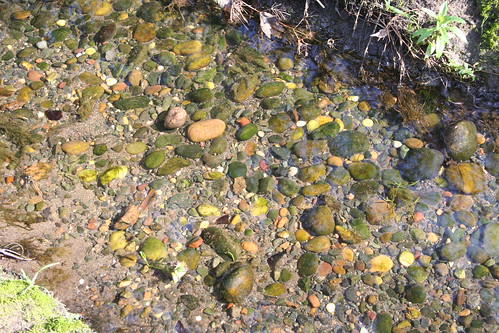
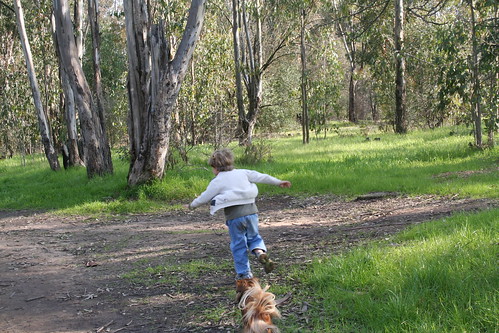
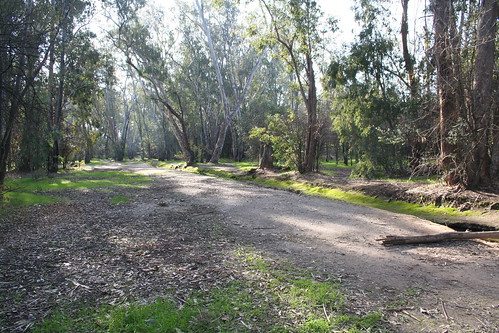
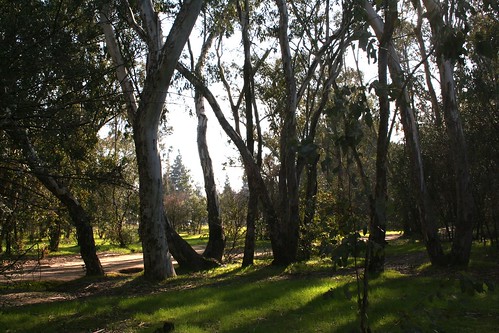
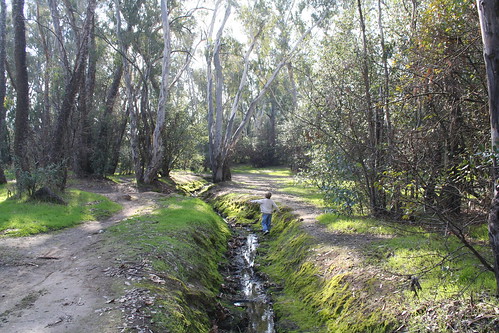
This place will fit the bill nicely, I think! This is a is 17 acre undeveloped park right here in Fair Oaks, just five minutes from our home. It features tall, beautiful eucalyptus trees, a tiny creek with mossy banks, green meadows, fallen logs, wild mushrooms, and plenty of crisscrossing paths that you might call “trails.” Our plan for the party is to allow the children as much space to roam and explore as is safe. The park is big enough that it feels wild, but not really big enough to get lost in, and I expect a small gaggle of 6- and 7-year-olds to make plenty of noise.

Wishing you a bright and happy day!

Winter Hikes

IMAG3164

This is the beautiful Auburn Recreation Area, which is just 25 to 30 minutes’ drive up the hill from where we live.

upload

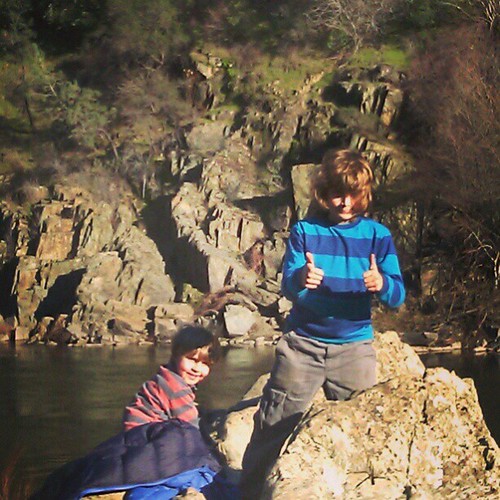
We went hiking there with the boys in early January. It was a beautiful day and we all had lots of fun.

upload upload

upload

We found some glorious rock formations right at the river’s edge that looked like a huge castle. The children naturally climbed to the top immediately.

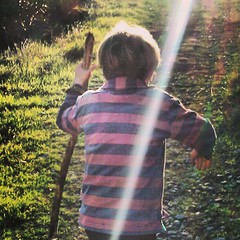
We were reminded that we all feel good when we go on nature walks together; we get out of our house and routine, we leave the argued-over toys and housework behind, we get to bring our fluffy friend Solstice along, and we can be together with a little buffering space between us. The boys like to roam out far ahead and that’s so good for them. Ian and I can have a conversation. It’s inexpensive. Overall, it’s really a great solution for family fun.

upload upload upload upload upload Stone colors

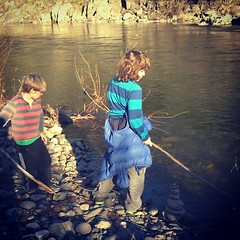
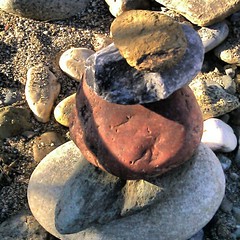
We tossed stones, looked for dragons’ eggs, found great sticks, climbed, and explored. Perfect.

We have been having really nice weather (if a little cold for my taste), and that inspired me to ask my dear friend Nicole to go on a local hike with me on the American River parkway while the kids were at school. As much as it is good for my kids to be out in nature, so it is also good for me!

IMAG3309

We went on a Thursday in the middle of the day. We walked for two hours, got just a bit happily lost, and then found our way back again. This is an amazing pond area we found right near my kids’ school, isolated from the running river. I don’t think this body of water is there during the summer, but I could be wrong. I’m hoping I can find it again.

River hike Fishing boat

Fair Oaks footbridge

This is the iconic Fair Oaks footbridge.

Pond upload My beautiful hiking buddy, Nicole Reeds

upload

Such a pleasant way to spend a few hours! We are going out again this Thursday—grown-ups and no kids. But you can bet Ian and I will be doing another winter hike with our kiddos soon enough!

How are you enjoying nature this winter? Are you skiing? Snow-shoeing? Playing on the beach?

Drawing Animals with Children

Bears

Winter days can be long and dreary if you don’t find happy ways to pass the time together indoors. When weather is especially inclement, take the opportunity to sit down with your children and draw. Even if you don’t consider yourself to be artistic, your children will most likely be delighted to have you by their side, making art. The impulse to create is so very strong in children. As parents and caregivers, we can nurture their creative impulse by modeling creative behavior.

Materials

  • paper
  • block crayons and stick crayons
  • inspiration photos from books or Internet
  • a story about animals in wintertime, perhaps

Tutorial

Take a little time to play with the crayons. Experiment how you can make different kinds of strokes and lines. Block crayons are beautifully suited for shading, blending, and giving dimension to your pictures.

Donna Simmons, author of Drawing with your Four to Eleven Year Old, says “By pressing firmly or lightly, you can achieve both depth and movement in clouds or sea, for example. Wavering strokes of red, yellow and orange can bring fire to life. Direction of stroke can also emphasize muscling or roundness in animals, depth in caves, or distance of, say, mountains in the background.” Her book holds specific tips for drawing in Kindergarten through Fifth grade Waldorf curriculum.

Inspiration

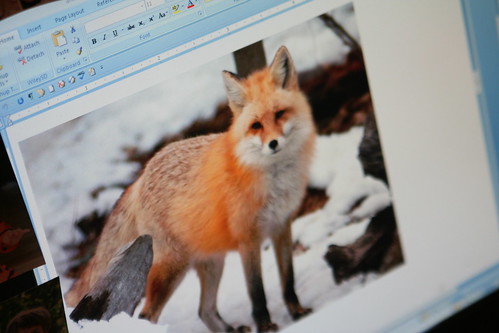
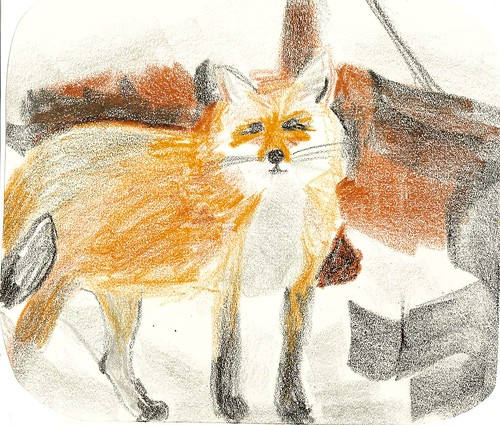
Picture books or books with lots of inspiring photographs are always nice to have around. We found this fox photo online and drew using it as our example.

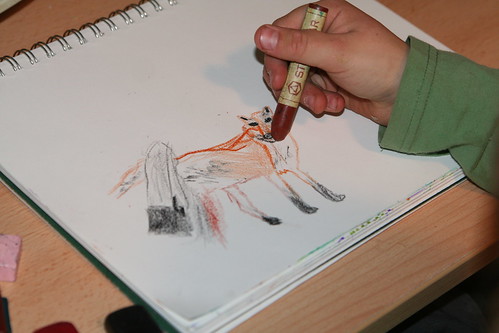
Lucas Drawing

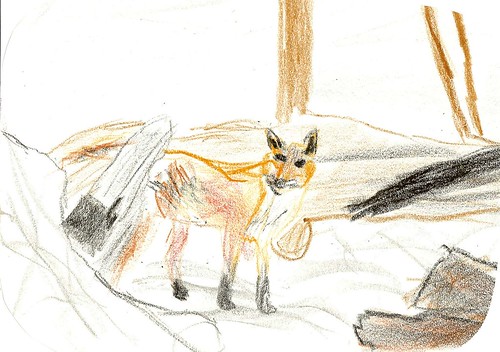
Lucas's Fox in the Snow (Age 9)

My 9-year-old’s drawing of the fox in the snow

My Fox in the Snow

My drawing of the fox in the snow

Here are some general drawing tips for children:

  • Avoid outlining.
  • Aim to capture the mood or movement of your subject, not the superfine detail.
  • Young children need not worry about eyes, whiskers, nose, etc.
  • Try to find your subject’s major shapes: where are the circles, ovals, triangles, and rectangles? Use these instead of outlining to avoid adding too much detail too soon.
  • Block out where the figures will fit on the page to help make them large and bold. Some children resist using the whole page.
  • Finish your picture with a decorative border.

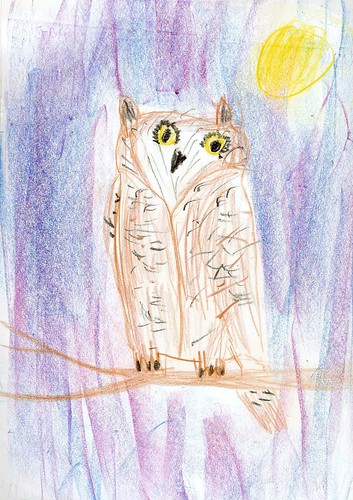
Lucas's Owl at Night (Age 9)

My son’s drawing of an owl at night

You may find that you need to lead by example. After story time, try drawing an animal in your story. Or while your child is having free time, try drawing beside him or her. Encourage your child if he or she chooses to draw with you. “I like to be with you like this.”

Avoid saying things that imply a judgment of the child’s work (“good drawing,” “sloppy drawing,” etc.). Instead try to find something that you can comment on that feels neutral. “I wonder if that fox has cold feet.” or “What a fluffy coat it has!” Nor should you say that your own drawing is “bad” or “didn’t turn out right.”

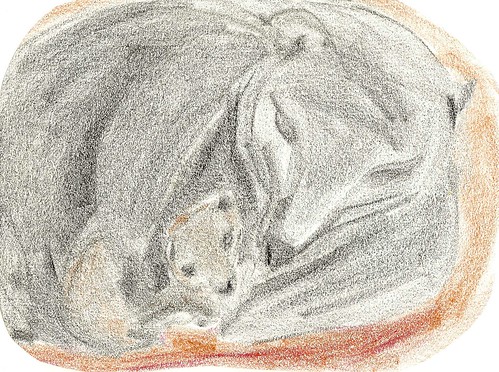
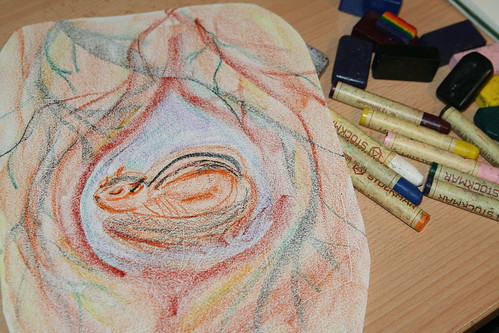
My Chipmunk Drawing

Practice and your own drawings will improve. We are all learning as we go.

Display drawings made by your child. A wooden “card stand” works well for displaying small drawings. A cork board works nicely for larger ones. Refrigerators are a good standby, too, for showcasing family art. And never underestimate the delight a child will feel if you should put his or her artwork in a real frame.

  • About Sara

    Thanks for visiting! I’m Sara, editor and writer, wife to Ian, and mother of two precious boys. I am living each day to the fullest and with as much grace, creativity, and patience as I can muster. This is where I write about living, loving, and engaging fully in family life and the world around me. I let my hair down here. I learn new skills here. I strive to be a better human being here. And I tell the truth.

    Our children attend Waldorf school and we are enriching our home and family life with plenty of Waldorf-inspired festivals, crafts, and stories.

    © 2003–2018 Please do not use my photographs or text without my permission.

    “Love doesn’t just sit there like a stone; it has to be made, like bread, remade all the time, made new.” —Ursula K. LeGuinn

  • Buy Our Festivals E-Books


  • Archives

  • Tags

  • Categories

  •  

  • Meta