St. Patrick’s Day Leprechaun Mobile Tutorial

Leprechaun Mobile

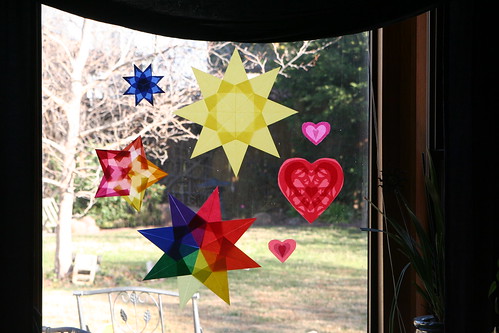
I have a deep and abiding love for mobiles. Holiday decorations that hang can be very festive without taking up too much space or cluttering your nature table. Here’s a St. Patrick’s Day leprechaun mobile that is easy to make and quite whimsical.
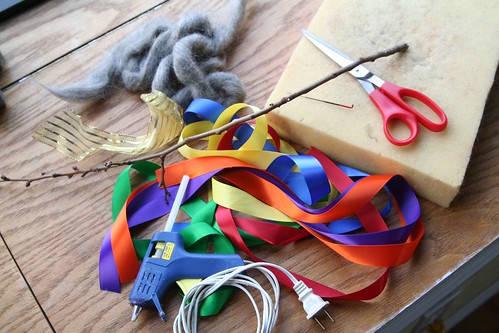
Materials

Materials

  • foam base and needle-felting needle
  • wool roving in gray or black, green(s), and skin colors
  • low-temperature glue gun and glue sticks
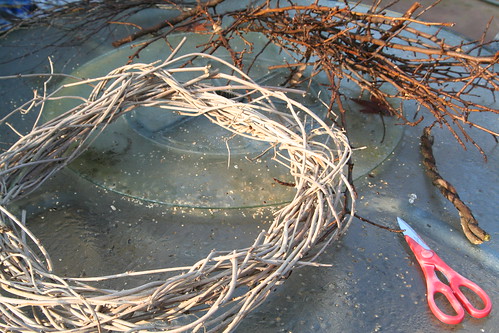
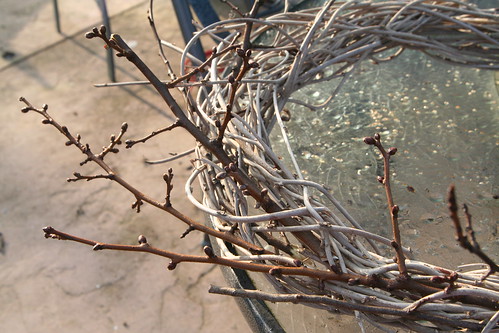
  • one twig approximately 18 inches long; ideally it will have a 6-inch straight section in the middle
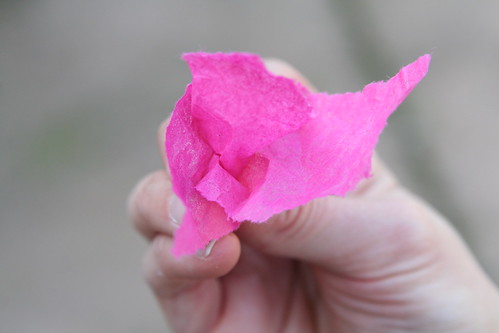
  • gold ribbon, gold foil, or gold tissue paper
  • 1-inch ribbons in rainbow colors, approximately one yard of each color
  • yarn or string, approximately 2 yards
  • needle, thread, and scissors

Money-Saving Alternatives

  • Narrower ribbon in rainbow colors costs less. Although I used 1-inch ribbon, you could use several strips of the same color ribbon to create a 1-inch band of color for each color of the rainbow.
  • Instead of 1 yard of each color, you could use only a half yard. Your ribbons would be a single layer, not double as in the photos below.
  • Check your gift wrap stores. You may have some gold tissue paper or ribbon left over from a package.

Tutorial

To begin, tie two pieces of yarn or string (each about a yard long) to your twig, approximately 8 inches apart. Hang the twig from the two strings more or less horizontally (adjust the position of the two ties on the twig as needed). Then tie a knot in the two strings about 8 inches up from the twig. This will make a triangle of string above your twig. Tie your twig to something so that it hangs freely at shoulder level so that you can work on it comfortably.

Rainbow Ribbons

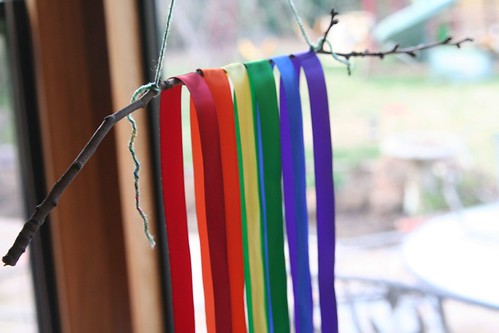
Lay your ribbons over the twig in rainbow order. Their two ends should be even at the bottom. Make sure you like the position of each ribbon before you affix any glue. (You can use clothes pins to hold them in place while you decide on their optimal positions.)

IMG_6426

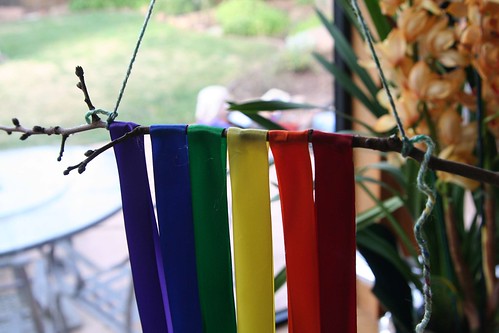
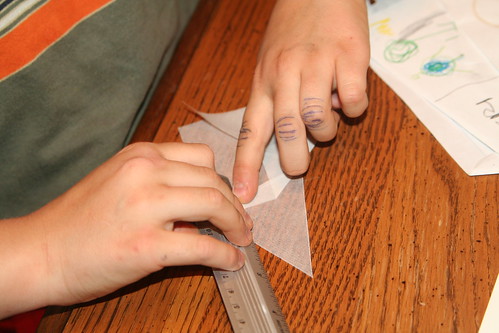
With your glue gun, put a dab of glue on the inside of one layer of a ribbon and pinch the other layer over the top of the warm glue to fix the ribbon to itself. Repeat this for each color. See the photo above.

Pot

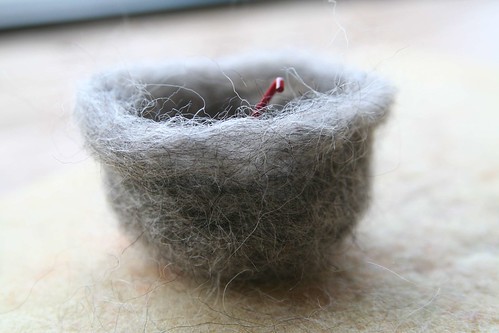
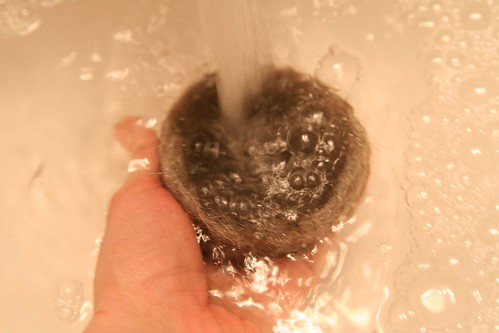
Now, take your gray or black wool roving, felting needle, and foam pad and needle-felt a pot. This will be your pot of gold. Mine was about 2 and ½ inches in diameter. If you wish to have a sleeker look for your wool pot, you can first shape it with your felting needle, then wet-felt the pot in hot water with soap. Gently rub your pot inside and out with soap until the fibers mat firmly together. Rinse it in both hot and cold water.) Shape it carefully into a pot and let it dry. You may still want to apply your needle again to perfect the pot’s shape.

Wet-Felting the Pot

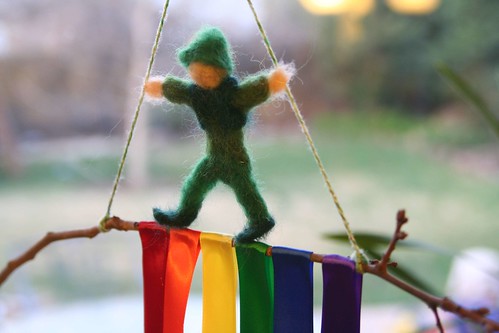
With your green and skin-colored wool roving, needle-felt a leprechaun. No wire skeleton is needed for this project and since this figure will not be played with, you can attach head, hands, legs, shoes, and hat by simply needling the fibers together. Start with a torso and arms. Add legs. Add a ball of skin-colored wool for a head.

Needle-Felted Leprechaun in Progress

Needle-Felted Leprechaun in Progress

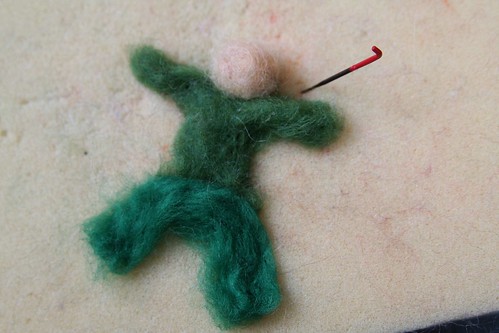
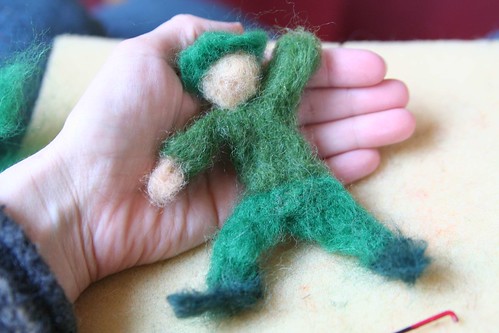
Your leprechaun can be as traditional or as unique as you like. Mine was a kind of Waldorf-inspired figure dressed in several greens, with a jaunty hat and dark green vest.

Leprechaun on Top

Stand your leprechaun on top of your horizontal twig. With needle and thread, sew your leprechaun’s hands to the yarn or string hanger. (Feel free to adjust the knot above the leprechaun‘s head as needed to make it possible for the hands to hold both strings.) Finish off the two yarn/string knots on the twig by tying them securely and cutting off the excess.

Gold Suspended

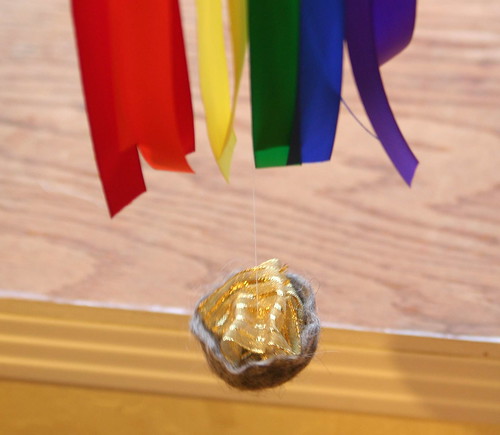
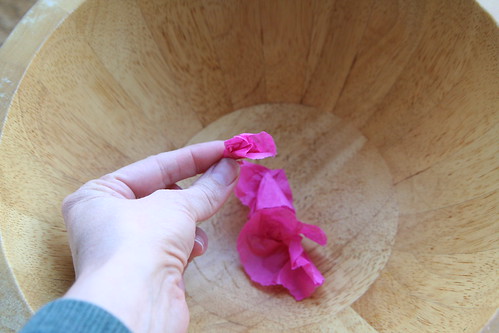
When your pot is dry, crumple your gold ribbon, foil, or tissue paper into a mound of gold and place it into your pot. You might want it to heap above the edge of your pot. With a long thread, sew up from the bottom center of your wool pot, through your gold, and back down a couple of times. On the way up again, extend your long thread all the way up to your rainbow-covered twig and tie your thread securely to the center of the twig. You’ll probably want to tie it in between the yellow and green ribbons. Cut of the excess thread tail. Your pot of gold should hang a couple of inches below your twig, at the end of your rainbow.

Finished Mobile

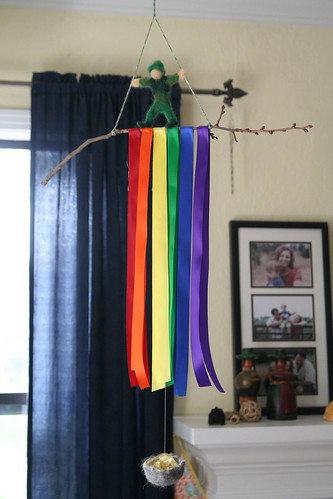
Find a nice spot in your home to hang your St. Patrick’s Day mobile with leprechaun and pot of gold, perhaps in front of a window, where fresh spring breezes will make your rainbow ribbons flutter.

* This article was originally published in the Little Acorn Learning March Enrichment Guide.

Glorious Saturday

Pink Open-Center Star and Red Flower

Oh, Saturday. How I love you! I swoon with love for you!

Any day that starts with an extra hour of delicious morning sleep is tops. Why does morning sleep feel better than any other sleep?

My day started with coffee and some new window stars. Both of these are first attempts at new patterns.  The red flower was tough because I had to trim my small 6 1/4 inch square kite paper into teeny-tiny rectangles with a particular height-to-width proportion. Like, with MATH.

Pink Open-Center Star and Red Flower

It would have been easier with bigger paper, as the instructions call for. But I’m happy with the result. See the little red star in the middle?

Grouped Window Stars

The pink one with the open center is kind of a showstopper, I think.

Stunned Goldfinch(?)

This little darling accidentally flew into our window today. She stunned herself pretty badly, and allowed Ian to pick her up and place her into this tree. At first her eyes were closed and her eyelids were kind of twitchy. Later on, she was like this, eyes open but not ready to fly away. Then, she was gone. I hope she’s OK now. She might be a goldfinch, but I’m not sure.

New Chicks

We have four two-day-old chicks in our home again. Here they are at one day old. We got two Black Sex-Link chicks (who are certain to be female because the male chicks look different at hatching) and two Silver Laced Wyandotts. At first I was sure I’d play it safe and get four Black Sex-Link chicks to guarantee we were getting females, but then the Silver Laced Wyandotts wooed me with their gorgeous adult plumage and I succumbed to temptation. Let’s all hope together that they’ll turn out to be hens, OK?

Lucas and New Peep (Silver Laced Wyandott)

The chicks are much more sturdy on their pins now. Lucas is enjoying them a lot. We are debating about their names. Ian wants to name them after sci-fi space princesses. Lucas is in favor of Norse goddess names, although he also likes the idea of calling them Bear, Raven, Duck, and Chipmunk because, well,  that’s funny. Asher seems to want to keep with the theme of nature oriented names like our other hens. He has thoughtfully suggested Moon, Star, Rain, and Tornado.

Japanese Maple Buds

My garden is coming alive again in small ways.

Forsythia

This new forsythia was allegedly a flowering quince when I bought it and planted it late last spring. I’m not sad because it’s gorgeous.

First Chess Lesson

Asher received his first lessons in chess today. My heart skipped a beat when I saw this. Is he really old enough to start learning chess?

Practicing

Lucas practiced piano and cleaned his room today. We also went to the library and got him his own library card.

And although I don’t yet have a photo, I spent some time today painting my kitchen door turquoise. I’ve been wanting to paint this door for twelve years now. Ridiculous, but true. And why turquoise? Well, why ever not?

We had yummy French onion soup and steak and asparagus for dinner. We read leprechaun stories at bedtime.

Life is good. I love Saturdays.

More Window Stars

Or, What I Did on My Vacation

IMG_1860

OK, I admit I’m completely obsessed with window stars lately. I think I mentioned that here a little while ago. Anyway, we had some time off last week and I took all my kite paper and window star books along with me to the mountains. I was determined to challenge myself to make some of the more complex stars. While I was there, in between working, eating, and playing outside, I made eight new stars.

IMG_1402

I also accidentally wrecked one, but shed only a few tears about that.

IMG_1857

The more you make them, the easier it becomes. I guess I got into a kind of flow.

IMG_1593

Lucas helped me make this beautiful multicolored star. He did most of the white center. I’m hoping he’ll want to make some more with me. I think stars like these may be our birthday gifts for everyone this year.

IMG_1597

I love the way the light shines through them and I confess I’m crazy about the colors.

Purple Eight-Point Window Star

Window Stars in Boys' Room

My boys wanted one for their room in their favorite colors, blue and green. Now that we’re home again, the stars have all found spots on our windows here, sharing space with the Valentine window transparencies I made last month, which are still up because I adore them.

New Window Star

I’ve also been experimenting and will share my results very soon, if it all works out the way I think it will.


Spring Wreath Tutorial

Flowering Quince

We all enjoy watching the signs of spring emerge out of the season of winter. The ground warms, birds return, and bulbs begin coming up. Some plants seem to feel the coming spring before others, like these flowering quince blossoms that were my inspiration for this project. I spot these everywhere I go these days because they are among the first bushes to bloom.

This wreath makes a perfect way to count down to the spring equinox, with small blossoms added day by day (perhaps one added by each child in the family) until March 20, the first day of spring. As you observe the days lengthening, you can make your wintery wreath bloom in your home. Or, if you prefer, do it all at once and enjoy the promise of spring it brings.

Wintery Vine Wreath and Twigs

Materials

  •  garden clippers or sturdy scissors
  •  grapevine or other bare vine wreath base (can be made by weaving vines together or purchased at a craft store)
  •  branch tips, preferably found (and used with permission) or recently pruned from your yard (If you find any with small buds, that’s wonderful.)
  •  several sheets of tissue paper in a spring color (pink, yellow, or white, all one color or a mix)
  •  glue gun and glue sticks

Children of all ages can help with this project. Even the littlest ones can help you gather twigs, tear tissue paper, crumple the paper into buds and blossoms, and even glue (if you‘re using craft or tacky glue). Older children can use a low temperature glue gun with supervision.

Adding the Rays

Choose small pruned twigs and insert them into your vine wreath base, one at a time, with the tips ―pointing‖ around the wreath in a clockwise (conjuring, waxing) direction. Keep inserting the twigs, and endeavor to anchor their thick ends deep into your wreath.

Your wreath should start to look something like this. Keep adding twigs until your wreath base has twig ―rays‖ running all around the circle.

Cropped Wintery Wreath

Here is a wintery, bare wreath. Doesn‘t it seem to ache for spring?

Making Paper Blossoms

To decorate your wintery wreath and make it bloom, tear your tissue paper into small pieces, no larger than about 2 inches square. Your tears don‘t have to be precise, and you need not waste any tissue. Even the smallest pieces can be used in this project. Grasp the center of the back side of your torn tissue piece, pinch, and with your other hand to help, twist the center. The edges of your tissue piece should flare out a bit like the petals of a blossom. Crumple or twist until you‘re happy with the way your blossom looks.

Making Paper Blossoms

Now make lots of these! Make as many as you like, or make 20 per child, or 20 per person in your home, if you plan to add one blossom per day to count down to the spring equinox. Even the tiniest pieces of paper can be crushed and rolled tightly into buds for your wreath.

Blooming Winter Wreath in Progress

Now begin gluing your buds and blossoms onto your twig ―rays. Often, flowering bushes and trees bloom from the base of the branch to the tip, so if you‘re going for realism, glue your largest blossoms close to the vine wreath, and your smaller blossoms and buds nearer to the tips of your twigs.

Add blossoms day by day and watch your wreath bloom! Add as many or as few as you like.

Blooming Winter Wreath

How cheerful it will be hanging in your home, perhaps above your spring nature table, or on your front door!

Spring Wreath Finished

* This article was originally published in the Little Acorn Learning March Enrichment Guide.

Lent and Sacrifice

Blossoms and Blue Sky

Today is the first day of Lent. At 39, I’m still negotiating my way through and around the beliefs and rites of my childhood. I think I’m not alone in this. One thing I do know is that I enjoy examining the whys and wherefores of traditional holidays, taking what I like and incorporating it into my family life, and leaving the rest behind.

The forty-day period of Lent begins with Ash Wednesday and ends at Easter. Lent is observed in the Roman Catholic Church and some Protestant churches, and is a generally a period of fasting, as it recalls Christ’s forty day fast in the wilderness. It is traditional for people to fast during Lent, giving up rich foods such as meats on Fridays, or other special favorites. Lent provides an opportunity for self-denial, simplicity, and penitence—a kind of spiritual “spring cleaning.” The very name Lent is derived from the Germanic word for springtime.

Giving up something you love for a period of time is a kind of sacrifice, a discipline that you can choose to impose upon your life out of religious conviction and a desire to become closer to Christ through deprivation. For people who aren’t Christian, Lent offers a means of meditating on the differences between needs and wants, separating out those things that are nonessential to your life and true happiness.

Sacrifice is both comfortable and odious to many parents and teachers of children. We often must place the needs of others ahead of our own needs in caring for children and people in need. We are often aware we have sacrificed small things on the altar of our family ideals, such as late-night movies or fancy vacations. Our lives, whatever they were before, were immeasurably changed the moment we became parents. We gave up things we were, and gave up things we did. We may even feel we have sacrificed in big ways, perhaps our own personal goals or dreams, on behalf of the family we are blessed to have. Realizing what we have given up or put on hold “for now” or indefinitely can be a slap in the face; it can bring up feelings of dismay or discouragement. It can make us feel resentful.

Contemplating our own sacrifices in life may be uncomfortable. It is, however, a worthwhile endeavor. It can lead to clarity about ourselves, our values, and our life’s goals. It can lead to a greater appreciation for what we do have. We can ask ourselves, what have we gained in return for our sacrifice? What paths are we now walking that were closed to us before? What lessons have we been given, by virtue of our self-denial?

Lent is a perfect time for this kind of contemplation, whether your purpose is to become closer to God, or to accomplish a little “spring cleaning” of your psyche. Lent is usually observed in three ways: fasting, almsgiving (charity), and prayer.

Fasting: Imposing a small restriction on yourself, whether it is literally or figuratively a fast, can sharpen your awareness, making you more mindful of your thoughts and actions and whether they are in line with your values. Here are some ideas for fasting; you can decide if they are appropriate for yourself only or for your whole family:

  • Give up meat on Fridays during Lent, and on Ash Wednesday and Good Friday
  • Give up drinking alcohol or eating foods containing sugar for the whole period of Lent
  • Give up smoking for good and forever
  • Give up drinking coffee or tea
  • Give up your favorite other food
  • Give up watching TV and/or movies during Lent
  • Give away items you don’t really need, such as clothing, toys, and housewares

Almsgiving: Another way of observing Lent is to do something positive in the world. Finding ways to help others, donating time or money to charity, and cultivating an attitude of kindness and generosity toward people who are both intimates and strangers are other good ways to explore the idea of sacrifice. Give of yourself. You already know how to do this, but put some extra effort into it. The obvious place to start is in the home, so use your heightened Lenten awareness to practice acts of kindness and gentle words. You will gain more than you lose.

  • Donate money to a charity that helps people who have less than you do
  • Volunteer time to help an organization you respect
  • Help your neighbors in some way, perhaps with carpooling or yard work
  • Dedicate an hour or two of special one-on-one time with each member of your family
  • Prepare a meal or bake a cake together as a family, then give it away to someone who needs it more than you

Prayer: Lent can be an opportunity to develop a habit of daily prayer, and there are numerous liturgies used for this purpose. Set aside some time every day to pray, think, or meditate. Not everyone is comfortable praying, but one form of praying that may work for you is called “contemplative prayer.” It is a kind of quiet meditation in which one listens for God, or Source, or one’s own heart to speak in the stillness. Pay attention to that voice.

  • Find a few moments every day to sit quietly and listen to whatever rises within you; be kind to yourself even if what rises doesn’t seem “prayerful”
  • Read from scripture; there are many prayers specific to Lent
  • Read a poem in praise of nature or humanity; perhaps read the same poem every day or find a book of inspiring poems and read one each day
  • Meditate on Rudolf Steiner’s Calendar of the Soul verses
  • Choose a historical figure that you deeply admire and read a biography about that person’s life; notice his or her struggles and sacrifices
  • Incorporate a morning or evening verse into your family’s daily rhythm; one that invokes our highest selves and our sense of wonder is appropriate

Finally, you can draw on examples and symbols of sacrifice from myth, religion, and human history to inspire you. Consider adding such symbols to your nature table, home altar, or place of prayer/meditation. Such visual symbols might include:

  • Jesus or Buddha
  • Mohandas Ghandi, Mother Theresa, Martin Luther King, Jr., Nelson Mandela, or other such historical figure
  • A favorite saint; many were martyred and made the ultimate sacrifice for their faith
  • An ancestor who serves as a role model and/or who made sacrifices on behalf of your family
  • Purple cloth (purple is a traditional color of Lent)
  • A portion of a meal set aside as a sacrifice (as is practiced in Buddhism and Hinduism)
  • An image of Persephone, Greek goddess of the springtime, who sacrifices herself for a portion of the year to live in the underworld and minister to the dead
  • Flowers, incense, grains, or seeds
  • A lamb (Christ is often called the “Lamb of God”); lambs are symbols of innocence and often served as sacrifices in the ancient world
  • A pelican; a medieval myth about the pelican made the bird a symbol of sacrifice (when mother pelicans returned to the nest to find their hatchlings slain, they pierced their own breasts with their beaks, and the blood of their wounds revived their offspring)
  • Personal symbols of something you have freely given up for the sake of someone else


Whatever you choose, place these symbols intentionally and spend a moment or two each day looking at them. They will speak to you as you move through the season of Lent.

Feel free to leave a comment and tell me if and how you observe Lent. Are your observations traditional or ones you’ve invented for yourself? How do they help or serve you? I love to hear from you.

* This article was originally published in the Little Acorn Learning March Enrichment Guide.

Highlights

I’ve spent a good deal of the last few days working on boring work and business financial stuff. But here are some highlights of life lately. These are things I’m happy to have spent time and energy working on and can share.

Iris

I’ve worked quite a bit in my garden (yard? yards? gardens?) to spruce it up in preparation for a fabulous spring. I’ve planted about twenty purple iris rhizomes that I bought from the Waldorf school farm. (I still have six more to plant.) I planted sixteen canna rhizomes (pale yellow and orange) and sixty-five (scarlet) crocosmia bulbs, variety “Lucifer.” I divided an agapanthus into four new plants—this is an experiment, as I’m not sure I did it correctly, having never divided these before. But I was feeling lucky, especially since I’m also pretty new to dividing my daylilies (Hemerocallis), too, and the new divisions I’ve made over the last year have all taken beautifully. I put in Iris feotisissima seeds from my parents’ garden. These seem to grow great from seed in their yard, so I’m trying them out. I also planted hollyhock seeds from my mother in law’s garden. My fingers and toes are crossed.

RRK Farmhouse and Family Puppet Donation

RRK Farmhouse and Family Puppet Donation

I got to participate in a Kindergarten work night to prepare the Red Rose Kindergarten parent gift to the school fundraising auction that is coming up in March. I did a very, very small job (I helped felt the grassy playmat) to help create this beautiful farmhouse and family puppet scene, which is the work of many hands and hearts. It was fun to spend a couple of hours with my son’s teachers and a few other mommies. Any opportunity to get to know these wonderful people better is good, and spending an evening stabbing wool with a needle is always fun. Anyway, see the girl on the swing? So cute!

D&D Dice

There is a new obsession in my home and it involves these dice. My sons and husband have begun playing Dungeons and Dragons together. It’s really cool. Ian is creating custom adventures for my little boys, who couldn’t be more happy to sit around a table (go figure!) and engage in interactive storytelling with Daddy. Lucas and Asher are being asked in the story to work together and support each other and fight for the forces of good. There are fantastical creatures and puzzles to solve and treasure to find and a bit of fantasy battling of orcs or whatever (mediated via dice), and while I would like to think my dear sons have nothing but peace and love in their hearts, I know for certain from experience that they were going to do all that battling in their minds anyway—and quite possibly accidentally-on-purpose bash each other in the process. They are literally spending hours together at the kitchen table, and Daddy is doing funny character voices, and my sons have composed extemporaneous poetry in character (as elf and dwarf), and Asher keeps trying to help Ian tell the story because, well, his ideas are pretty great. The game may be too old for Asher, but Ian has modified it to fit him (as we would for lots of other games) and Asher’s fully engaged and loving it. Daddy is a shining Paragon of Cool in Lucas’s eyes right now and Ian is having fun, too! It all adds up to this: I wouldn’t trade a second of it.

Pretty Eggs

Colors

The girls are finally starting to lay again. Yesterday was a great day, resulting in five gorgeous Easter-ready eggs. We’ve had several weeks of only one or two eggs a day. Some winter days brought no eggs at all. This is frustrating for me, as I have 13 hens that I feed every day. But when they do their magic, it’s really magical. Another sign that spring is coming.

Signs

Star Bursting

Little signs are popping up …

Bulbs

here and there …

First Plum Blossom

The first plum blossom opened yesterday and started singing to the sky.

Bulbs

Others are pushing through, getting ready, …

Trimmed and Ready to Regrow

sprucing up, trimmed and waiting to grow.

Day Lily Coming

New fellows are arriving on the scene, eager to make their mark.

Spring is coming.

Spreading the Love

Valentine's Day Breakfast

Decoration

Heart Composition Books

Valentine's Day Nature Table

Valentines from Friends

Valentines from Friends

Redwork Pillow from Grandma

Valentine for the Birdies

Happy Valentine’s Day from our family to yours.

You can find this post also on Homespun Waldorf’s Winter Carnival
Homespun Grab Button

Valentine Window Transparencies Tutorial

Hello! [This post has been edited to remove a broken Pinterest link. 2-13-15]

10-Pointed Window Star

Anyway, I’m kind of obsessed with window stars lately. I got some new supplies for Christmas (kite paper and a new book and paper kit for making window stars). They are challenging for me and so rewarding when you get it right. I made a ten-pointed star the other day and I had to enlist Ian’s help to get the angles right when assembling the points. Then we had to buy a protractor!

Green Window Star

This eight-pointed star I made is new.

Rose Window, Not My Creation

And I accidentally-on-purpose bought this rose window transparency from an 11-year-old kid on Etsy, a shop named Knitting Momma. I couldn’t help myself. It’s so pretty and I like the gnome head shapes within it. See them? (Pay no attention to my dirty windows.)

Heart Window Transparency Cropped

And that got me experimenting with my kite paper. I made this transparent window valentine using three pieces of square kite paper, two red and one white. I like this one a lot. The kite paper is only 6.25 by 6.25 inches, and I wondered if I could do something similar but bigger with tissue paper.

Red and Pink Heart Transparency

Now, I wouldn’t say my valentine window transparencies are perfect, but we learn in the doing, right? So here is what I did, and what I learned along the way, in case you would like to play along.

Materials

  • tissue paper or kite paper in valentine colors (red, pink, dark pink, white, purple)
  • scissors
  • iron on medium heat and ironing board
  • glue stick
  • tape

Tutorial

First, lay several pieces of tissue paper of different colors on top of each other. Iron them flat on your ironing board with the heat on medium. Any wrinkles should iron out nicely. Do not spray with water while ironing.

Cutting Hearts Tissue Paper Hearts
Then, with your papers still stacked, fold it once in half and then in half again. You should now have four stacks of tissue paper. Take one stack, fold it in half, and cut out a big heart shape. Iron out the center crease. Separate the hearts that you’ve just made. They are pretty much the same size, so they can be stacked up again in layers as you make your designs.

Cutting a Smaller Heart from a Bigger Heart  Assorted Sizes

Try cutting one heart into smaller hearts by cutting along the heart’s edge. You’ll end up with two usable pieces: the smaller heart and the heart-shaped edge with an open center. Do this a few times and also cut additional hearts out of the scraps from the big hearts.

Take one large heart layer and fold it into quarters or eighths, like you would if you were going to cut a paper snowflake. Along the main fold line, cut a small half heart. When you unfold, you’ll have four or eight cut out hearts. Be careful about where you’re cutting, as it’s easy to cut beyond the border of your heart since it’s not a symmetrical shape. This heart transparency shows the four small cutouts. (While it’s folded, you can cut additional shapes such as diamonds or triangles if you wish, like you would for a snowflake.)

Pink Heart Transparency

Cut Out Designs

Try folding one layer in half and cutting a simple design. Here is one with tulips.

Now play with the layers you have made. Put a whole heart on the bottom and start stacking other layers. Arrange them in a pleasing way, mixing the colors as you like. Hold them up to the window or a lamp to see how the layers affect each other when the light shines through them. The more layers you have, the darker the shapes will seem. You can also put layers on the back of your heart.

Pink and Red Heart Transparency

Keep in mind that you want the valentine window transparency to look nice both when the sun shines through it during the daylight, but also when it’s dark outside, when the interior light of your home will shine on the front of the heart.

When you have the papers arranged the way you like them. Use a small amount of glue from your glue stick to stick the layers together—and be very gentle because the tissue paper rips easily. Try to keep the outer edges lined up precisely. Gently add dabs of glue until all the layers seem sandwiched together. Now iron the valentine window transparency flat again. You can use a small dab of glue stick glue to stick the transparency to the window, or use tape.

I Made These!

You most likely have small hearts leftover from making the big ones. You can make small transparencies as well. The smaller the valentine transparency, the simpler your design will probably be. Several sizes look great all together, I think.

Valentine Window Transparencies

This Magical Window Stars book is terrific. Many of the designs are very complicated, which is a thrill for me. Maybe I’ll work up to them. The book has many star designs that require rectangular papers. In the meantime, you can find a wonderful free tutorial on folding a simple window star here at GardenMama’s blog.

This Origami Suncatchers kit is the one I got for Christmas. It contains the kite paper, a book of 20 star designs, and a glue stick. I find the instructions and photos in this kit to be easy to follow.

A Toy Garden sells both square and rectangular kite paper. This shop is where I buy lots of gifts for my children. A Toy Garden also sells the Magical Window Stars book and a book about rose windows called Rose Windows and How to Make Them.

And finally, if you want to purchase window stars, I recommend peeking in the Etsy shop of Harvest Moon by Hand. Ann is the best at making window stars. Her work is stunning.

Happy Valentine’s Day to you and your loves!


  • About Sara

    Thanks for visiting! I’m Sara, editor and writer, wife to Ian, and mother of two precious boys. I am living each day to the fullest and with as much grace, creativity, and patience as I can muster. This is where I write about living, loving, and engaging fully in family life and the world around me. I let my hair down here. I learn new skills here. I strive to be a better human being here. And I tell the truth.

    Our children attend Waldorf school and we are enriching our home and family life with plenty of Waldorf-inspired festivals, crafts, and stories.

    © 2003–2018 Please do not use my photographs or text without my permission.

    “Love doesn’t just sit there like a stone; it has to be made, like bread, remade all the time, made new.” —Ursula K. LeGuinn

  • Buy Our Festivals E-Books


  • Archives

  • Tags

  • Categories

  •  

  • Meta