Santa Lucia Day

We had a modest celebration this morning of Santa Lucia, the Italian saint adopted and beloved by Swedes. Lucia was a young woman who lived in 304 A.D. and gave her dowry to the poor. She was blinded, tortured, and decapitated for it. Saint stories are so grim! For me, well, I’ll skip that part.

Recipe for Santa Lucia Buns (Lussekatter) Lussekatter Dough Ready to Rise

It’s said that Lucia appeared to a starving village in Sweden with food and drink for all in need. She has captured the heart of Sweden ever since. (I wish wish wish I had a photo of collage-age Ian as a Star Boy singing to his professors in Upsala, Sweden, in 1993!)

1993 Ian as Star Boy in Upsala, Sweden
Edit 12/14/2010: I got my wish!!! Ian’s mom came over today and brought some mementos from Sweden, including this photo from 1993. Ian’s in the back row, third from the right.

Fresh Baked Lussekatter (Santa Lucia Buns)

Last year was a big year for Lucas‘s second-grade class to celebrate Santa Lucia Day, since they were studying saints. They dressed up and walked through the whole school, singing to all the classes and delivering hundreds of Lucia Buns, which I helped to bake. There is a wonderful blog post here, which gives lyrics to the Santa Lucia song.

This year I tried a different recipe (from a Swedish cookbook we bought at Ikea) and made them in the “Christmas cross” shape. Because Ian and I went to a Christmas party last night, I was baking buns at 11:20 p.m. folks. They were yummy and lovely on our breakfast table this morning.

Santa Lucia Buns for Breakfast

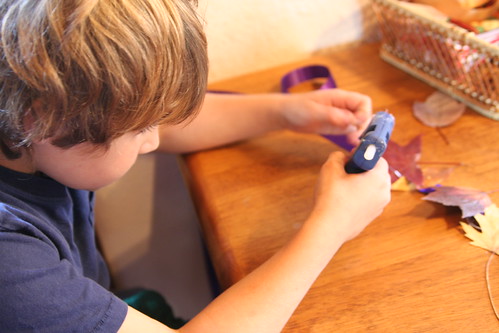
Today Lucas is home sick after being feverish through the night. Maybe we’ll make Star Boy hats for fun.

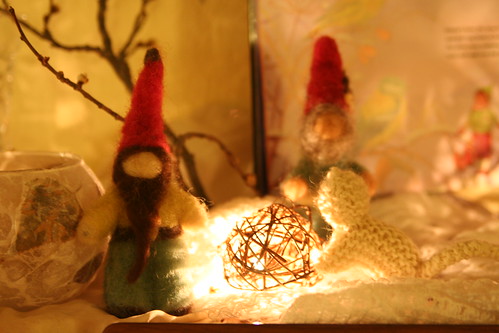
By the way, we’ve been reading a great book we found at the library called Lucia and the Light, by Phyllis Root and illustrated by Maria Grandpré. It is not the story of Saint Lucia, but is a story of a courageous young girl who must go and rescue the sun from mountain trolls, who have captured it. (Asher isn’t too sure about those trolls.)

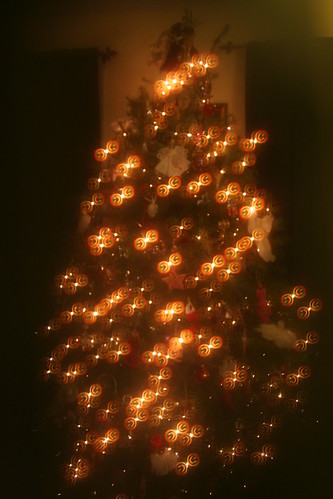
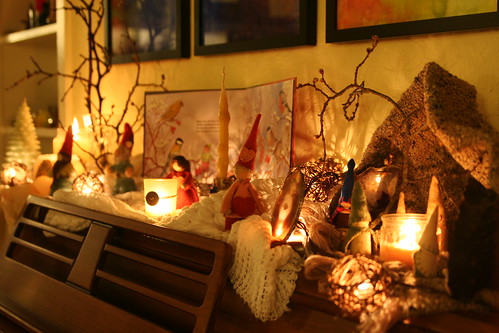
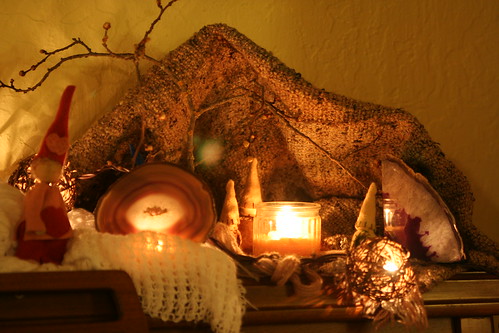
Hope you’re finding plenty of ways to bring the light into your homes and hearts this season.

Autumn Meets Winter

The seasons around here are mellow for the most part; they flow into one another, back and forth—a bit like a river meeting the ocean, where fresh and salt waters intermingle with the tides. So autumn meets winter in Northern California, little by little. They exchange pleasantries and take turns, like friends having a conversation. A biting, cold day kissed by Jack Frost makes way for warm autumn sunshine and shirt-sleeve weather, then we pull on sweaters again.

Mom's Tree
Our trees are taking their time. Some have already disrobed for their long winter’s sleep, scattering their colorful garments about them and delighting small leaf-pile jumpers and kickers. Some trees are still carrying on in their resplendent finery, like this one in my parents’ yard, into the darkness of winter. Personally, I resolve to admire their colors for as long as they last.

Red Meets Yellow
These plum leaves and the elm leaves litter my front yard in great patches of red and yellow. This is where they mingle.

My Liquidambar

Asher at Grandparents' House
Rainstorms offer opportunities to tromp about in the wetness and mud, to observe the green mosses. The jolly mushrooms are back!
Peek-a-Book Mushrooms

Sunset, December 4, 2010

Cloudy skies bring some dramatic sunsets.

Finally Orange!
Our liquidambar (sweet gum) tree has finally turned orange! In the afternoon sun it is glorious.

December Oranges on Neighbor's Tree
Cooler temps bring a new kind of bounty. We’ve watched the neighborhood squirrels steal all the pecans over the last couple of months. I put out some birdseed yesterday to feed the birds; I like it when they visit our yard. They ate all the berries off my dogwood tree, but were far too intuitive and fast to let me catch them on camera.

Smiley Tree—Happy Yule!

Today is gray and cloudy, but we might see sun later and a high of 64 degrees. We’re attending Lucas’s school Winter Concert this afternoon. Day by day we march toward the solstice, and we bring a little winter dazzle inside. We coax and conjure winter with our rituals.

This Moment: Afternoon Fire

Fire in the Fireplace

Inspired by SouleMama {this moment} – A Friday ritual. A single photo – no words – capturing a moment from the week. A simple, special, extraordinary moment. A moment I want to pause, savor and remember.

Soap-Making

My dear friend Dakini came over last Sunday night and taught me how to make glycerine soaps. It was tons of fun and very easy, and the results are so pretty!

Block of Glycerine Soap Melting Glycerine Rose Soap in the Pot Fragrance Options

We used herbs from my garden, such as lavender leaves and rosemary, dried lavender flowers we both had been saving, and several essential oils. We also used kitchen goodies like honey and oatmeal.

Assortment of Finished Soaps

We made clear lavender; pinkish lavender rosemary; honey oatmeal orange; honey beeswax lavender oatmeal; and finally, rose with pink dye. The golden soaps are colored only with natural honey.

Finished Soaps

I think they look spectacular. They are going to make great gifts.

Finished Soaps

The only limiting factor was the number of molds we had. (Silicone molds are the best because the soaps pop out so easily!) We made five batches of soap in one evening, using only one sausepan and a couple of tools like a measuring cup for pouring the melted soap and a spatula. We let the poured soap cool and set outside under the porch. We still have materials left over. Cleanup was … soapy; hot water was all we needed to melt away the congealed soap on our tools.

I would say this project is perfectly suited for children with adult supervision. Even little ones can help gather herbs, drip in fragrance or dye, and stir the pot. The soap melts on very low heat.

Then, when we were done with our project, we got to drink wine and eat a delicious chicken fricasée that Ian made. A perfect evening. Thank you, Dakini and Ian!

This Moment: Music-Making

Piano Practice
Inspired by SouleMama {this moment} – A Friday ritual. A single photo – no words – capturing a moment from the week. A simple, special, extraordinary moment. A moment I want to pause, savor and remember.

Winter Nature Table

Winter Nature Table

The piano top nature table was in need of freshening, a new look for this increasingly frosty season. This one features handmade gnomes of several types, an old, lacy white baby blanket, a handwoven cloth that I made many years ago that’s now a cozy cave, hand-dipped and assorted candles, bare branches, and a string of lights inside wicker balls. I love these, and must look for more.

Winter Nature Table Detail

Winter Nature Table: Gnome Cave

In my house full of boys, this is about as close as I get to playing with dolls.

Ice Lanterns

Third Ice Lantern Close-up
I read about making ice lanterns on one of my favorite blogs, Ordinary Life Magic, and just had to try it. Stephanie is brilliant and you should read her tutorial if you want to do this. Thanks for the inspiration, Stephanie!

Trouble is, where we live in California, we don’t have snow or freezing temps. But we do have …. (drumroll) …. freezer technology!

Lucas helped me clip and gather lots of little bits from our garden, which these days is looking a lot soggier, muddier, and more cluttered with decaying leaves than usual. Still, there are plenty of colorful bits and bobs to find: autumn leaves, berries, sprigs from our redwood trees, and even a few stubborn flowers still.

Yard Clippings for Ice Lantern

Fortunately, Ian hadn’t yet succeeded in his bid to get rid of the old and mismatched food storage containers, so I was able to use them. We had to find rocks to weigh down the inner container. This is when my kids lost interest, so I carried on bravely without them.

First, I froze an inch of water in my large, cylindrical container to make a base of the lantern. Then I set the smaller, weighted cylindrical container inside the bigger one. I put the nature bits and bobs into the space between the inner and outer containers, then poured water into the space and set the whole thing carefully on a level shelf in the freezer. I tested the ice after a few hours and decided it wouldn’t really be done until the morning.

The next day, we carefully transported the whole thing, containers and all—frozen solid—to brunch the next morning at our friends’ house. It was the hostess’s birthday and she is, and always has been, a candle nut, so we presented our ice lantern to her as a gift, with a gaily burning tea light inside it. It turned out beautiful!

Ice Lantern Birthday Gift

Some things I learned in doing this:

* Ice expands when it freezes (of course) and may make your outer container bulge if it’s plastic, so don’t use something you wouldn’t want to be ruined. (A coffee can might work best.)

* Don’t use glass; I used a glass jar as my inner container of one of my lanterns and it broke before it released from the ice.

* You can easily remove your inner container by pouring in some warm water. Just make sure you haven’t accidentally spilled water into the inner container before freezing, for of course, that will freeze too and make it difficult to pull out the inner container.

* If your ice lantern breaks into two pieces like mine did, you can put it back into the freezer (still protected within the outer container) and the broken parts will freeze together again.

* If you put your ice lantern on a plate or flat surface to display it indoors, it will probably slide around as it melts. I improvised a solution by putting down a paper towel first, setting the lantern atop it, and then disguising the towel with autumn leaves. If you have snow, you can put your lantern on a pile of snow, or I suppose sand would work to keep it centered, too, and would be naturally pretty.

Third Ice Lantern

And More Colors of Autumn

Maple Branch

Dappled, fading Japanese maple in the late afternoon sun

November Sunset

November sunset

Pokeweed Stalk in the Woods

Brilliant pokeweed stem in the woods

Rose Hips at My Home

Rosehips in my garden

Good Morning

Sunrise over the Waldorf school’s woods

Cherry Leaves

The last of the cherry leaves on the tree

Thanksgiving Frost: Cana Leaves

Thanksgiving frost on my canas

Sunset on Plum Leaves

Sunlight through the plum tree

Thanksgiving

We have a quiet Thanksgiving Day today. Quiet enough to think a bit about what I’m grateful for.

* My beautiful sons, strong, brilliant, and hale. They are the sunlight of my days. They have transformed me.
* My loving, noble husband who takes care of all of us and brings out the real me. He is my shelter and my heart.
* My parents and Ian’s parents, for all that they are and do, and for all they helped us to become.
* My precious, clever, quirky, shining friends. They know why.
* My safe, comfortable home filled with all that I really need and lots more besides.
* My ever-hungry brain and my many hobbies, which nourish me in so many ways. I am still growing.
* My undeniable, abundant opportunities, a plethora of blessings and experiences that I’ve enjoyed all my days. I am especially grateful that we can now offer amazing opportunities to our children as they grow.
* My family members whose love and courage are so great that they do the tasks that no one else wants to do.

We are so very, very rich. I am sending out my love to all of you on this Thanksgiving Day. Blessed be.

Second Grade Form Drawing

Easy Autumn Garland

Finished Pressed Leaf Garland

We’ll call this a tutorial, shall we? Here’s a super easy project that Lucas and I made together in about 40 minutes today. You could easily have one or several of these ready for Thanksgiving Day, if you’re still wondering how to decorate for the holiday. The cost of this project was about $2. This garland works best hanging straight, with the ribbon flat against a wall surface, counter edge, or the like. I bought 1 inch purple ribbon at the craft store weeks ago. Any color you like will do nicely. Find, gather, and press beautiful fallen leaves. Go for a walk through your yard or neighborhood. Notice all the colors and different types of deciduous trees in your area and pick up the ones that still feel fresh—the ones that haven’t yet started to dry and curl up. I do this constantly because I adore autumn leaves. Some are so beautiful they make me tear up. I looked for variety in type of leaf, size, and color. Any leaves that strike your fancy are the right ones to collect! Pull that old paper phone book out of the closet or mud room. Or maybe a new one was recently delivered to your driveway. I have no use for a paper phone book other than this: Put your collected leaves in the pages, in a single layer. Leave a few pages in between each page with leaves. Cram as many into the phone book as you like. Weight the phone book down with something very heavy, like a big stack of books or a cast-iron pot. Wait two to four days. Pull out your scissors, ribbon, and glue gun. Make sure you have glue sticks (I often don’t). Carefully remove your very flat leaves from the phone book.

Making the Pressed Leaf Garland

Tape your ribbon to your table so it doesn’t slide around. Glue pressed leaves on the ribbon in a jaunty way. Vary their colors, shapes, and sizes as you like, or make a garland of all one type, if that’s your style. Maybe you like the look of all the leaves “pointing” in the same direction. Maybe you like them arranged sort of haphazardly. If you’re not sure, lay them down a few different ways until you decide what you like and only then start gluing. If you use big leaves, your project will go even quicker.

Making the Pressed Leaf Garland Any child who is old enough to operate a glue gun can help with this. Only a drop or two is needed to fix each leaf to the ribbon. Lucas Gluing

The hardest part of this is hanging the garland. It is fragile, and you may need an extra pair of hands to hold it while you fix it to the wall, either with tape or thumb tacks (I used both).

Finished Pressed Leaf Garland Finished Pressed Leaf Garland

Pretty, no? Well I like it. I like that it was cheap. I like that it was easy. I like that we have brought some of those gorgeous leaves into my home. And I really like that Lucas and I made it together.

  • About Sara

    Thanks for visiting! I’m Sara, editor and writer, wife to Ian, and mother of two precious boys. I am living each day to the fullest and with as much grace, creativity, and patience as I can muster. This is where I write about living, loving, and engaging fully in family life and the world around me. I let my hair down here. I learn new skills here. I strive to be a better human being here. And I tell the truth.

    Our children attend Waldorf school and we are enriching our home and family life with plenty of Waldorf-inspired festivals, crafts, and stories.

    © 2003–2018 Please do not use my photographs or text without my permission.

    “Love doesn’t just sit there like a stone; it has to be made, like bread, remade all the time, made new.” —Ursula K. LeGuinn

  • Buy Our Festivals E-Books


  • Archives

  • Tags

  • Categories

  •  

  • Meta