Drawing Animals with Children

Bears

Winter days can be long and dreary if you don’t find happy ways to pass the time together indoors. When weather is especially inclement, take the opportunity to sit down with your children and draw. Even if you don’t consider yourself to be artistic, your children will most likely be delighted to have you by their side, making art. The impulse to create is so very strong in children. As parents and caregivers, we can nurture their creative impulse by modeling creative behavior.

Materials

  • paper
  • block crayons and stick crayons
  • inspiration photos from books or Internet
  • a story about animals in wintertime, perhaps

Tutorial

Take a little time to play with the crayons. Experiment how you can make different kinds of strokes and lines. Block crayons are beautifully suited for shading, blending, and giving dimension to your pictures.

Donna Simmons, author of Drawing with your Four to Eleven Year Old, says “By pressing firmly or lightly, you can achieve both depth and movement in clouds or sea, for example. Wavering strokes of red, yellow and orange can bring fire to life. Direction of stroke can also emphasize muscling or roundness in animals, depth in caves, or distance of, say, mountains in the background.” Her book holds specific tips for drawing in Kindergarten through Fifth grade Waldorf curriculum.

Inspiration

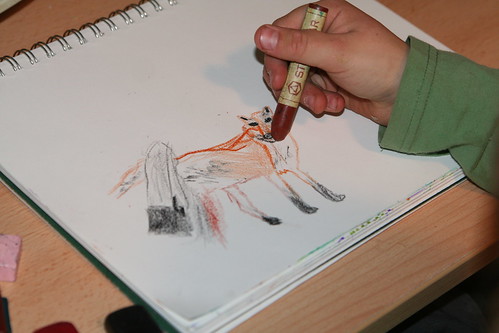
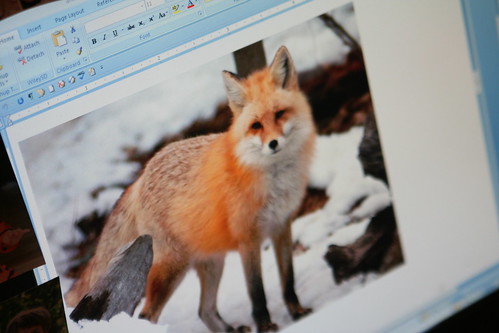
Picture books or books with lots of inspiring photographs are always nice to have around. We found this fox photo online and drew using it as our example.

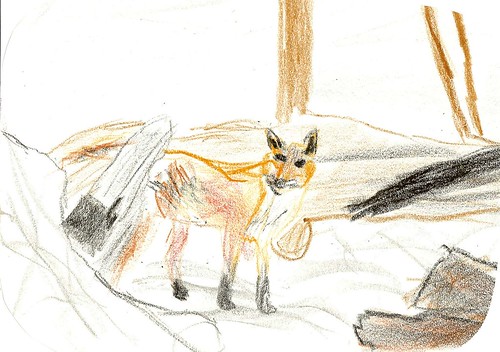
Lucas Drawing

Lucas's Fox in the Snow (Age 9)

My 9-year-old’s drawing of the fox in the snow

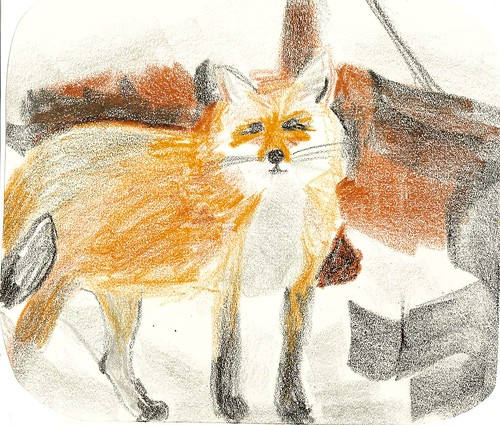
My Fox in the Snow

My drawing of the fox in the snow

Here are some general drawing tips for children:

  • Avoid outlining.
  • Aim to capture the mood or movement of your subject, not the superfine detail.
  • Young children need not worry about eyes, whiskers, nose, etc.
  • Try to find your subject’s major shapes: where are the circles, ovals, triangles, and rectangles? Use these instead of outlining to avoid adding too much detail too soon.
  • Block out where the figures will fit on the page to help make them large and bold. Some children resist using the whole page.
  • Finish your picture with a decorative border.

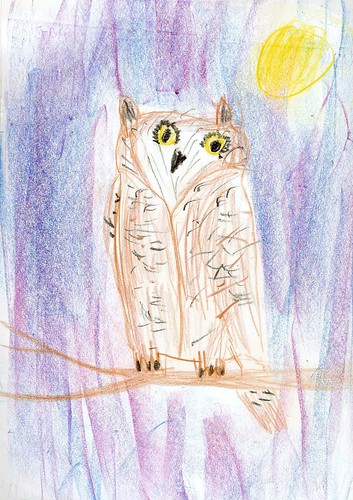
Lucas's Owl at Night (Age 9)

My son’s drawing of an owl at night

You may find that you need to lead by example. After story time, try drawing an animal in your story. Or while your child is having free time, try drawing beside him or her. Encourage your child if he or she chooses to draw with you. “I like to be with you like this.”

Avoid saying things that imply a judgment of the child’s work (“good drawing,” “sloppy drawing,” etc.). Instead try to find something that you can comment on that feels neutral. “I wonder if that fox has cold feet.” or “What a fluffy coat it has!” Nor should you say that your own drawing is “bad” or “didn’t turn out right.”

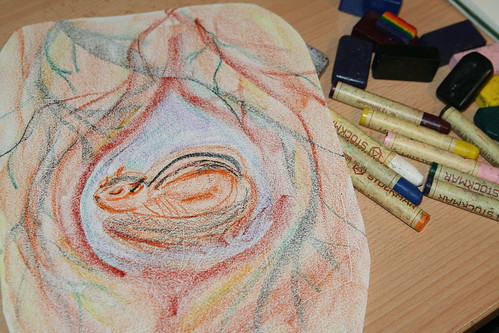
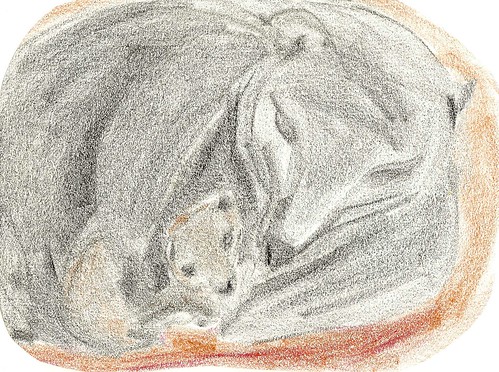
My Chipmunk Drawing

Practice and your own drawings will improve. We are all learning as we go.

Display drawings made by your child. A wooden “card stand” works well for displaying small drawings. A cork board works nicely for larger ones. Refrigerators are a good standby, too, for showcasing family art. And never underestimate the delight a child will feel if you should put his or her artwork in a real frame.
Borax Crystal Snowflakes

upload

It’s January, so that means snow, right? Well, it does mean snow in lots of places, but not here in Northern California. So, we usually make our own snowflakes to brighten what inevitably becomes a month of fog and rain and mud. These snowflakes are made with Borax laundry booster (sodium borate) to add an ice crystal texture and shine. It takes a few days to make these.

Materials

  • white paper or coffee filters
  • scissors
  • Borax laundry booster
  • plates
  • boiling water
  • needle and thread

Tutorial

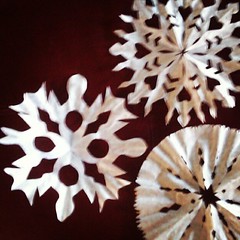
Start by cutting out your snowflakes. I tend to love very lacy snowflakes, but for this project I suggest you leave some nice solid areas. My son Lucas theorized that small cuts were better for these, and he may be right.

January upload

Boil a little water on the stove. Pour it into a glass mixing bowl and then add Borax until it will no longer dissolve into the water. When you see some borax sitting as a sediment in your bowl, you know your solution is right.

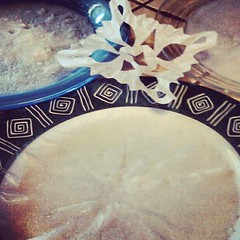
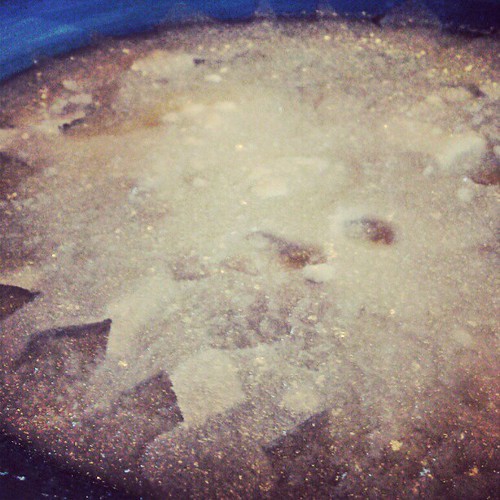
Place each snowflake on a dinner plate. Pour a little of the Borax solution onto the plate—just enough to cover the whole snowflake. Now you wait.

upload

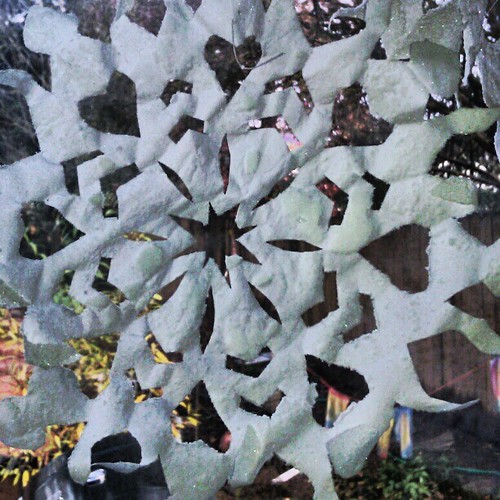
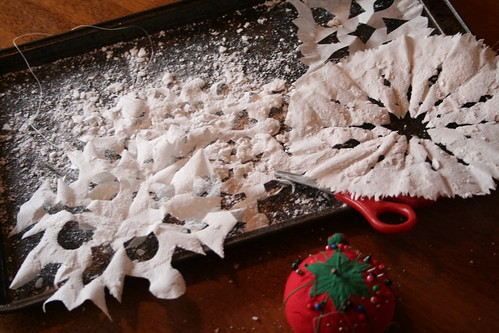
The Borax will start to crystallize on the paper and plate. As it dries, the water will become clearer. You can gently pour off the excess water to speed the drying process. Allow the snowflakes to dry completely, the very carefully pry them up off the plate with a butter knife.

IMG_3852

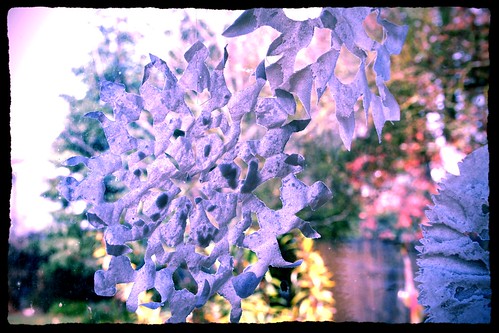
Some of the Borax may fall off, but most of it will stick to the paper. With your needle and thread, sew a few stitches at the top of your crystal snowflakes and then hang them in the window where they sun can glint off their crystals.

IMG_3857

Enjoy!

Finished, Released, and Relieved

Winter Mosaic 10x3

This is a teaser photo mosaic that shows just a little of what my friend and I have been up to lately. For the last two months, Eileen Straiton (of Little Acorn Learning) and I have been diligently working on our latest e-book. We had so many fantastic ideas and so enjoyed inspiring each other that we kept crafting and writing right up until our self-imposed deadline. Furthermore, we created so much content that we decided to release it as TWO e-books instead of one.

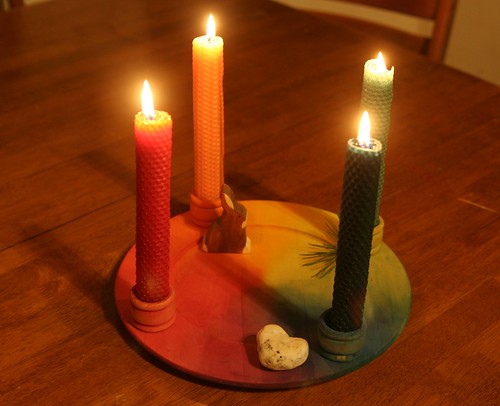
Wooden Advent Wreath

One book is our Advent and Saint Nicholas Festival E-Book, which offers poems, stories, songs, crafts, and myriad special ways that families, schools, or childcare professionals can celebrate the whole month of December with children. The advantage to doing so is that you get a more thoughtful, heartfelt approach to the holidays, with less rushing commercialism and more time in each other’s company while making and giving of yourselves. A measured, calm approach to the winter holidays gives children time to dream, live into the stories of their faith and the season, and count the days of Advent. Children can savor the passing of time with peaceful, delicious anticipation and gentle, useful activity, rather than experience the holiday as a single, frenzied, blowout day that is over all too soon. A peaceful Advent full of simple pleasures and togetherness is what they’ll remember later, not the package-ripping and specific, expensive gifts.

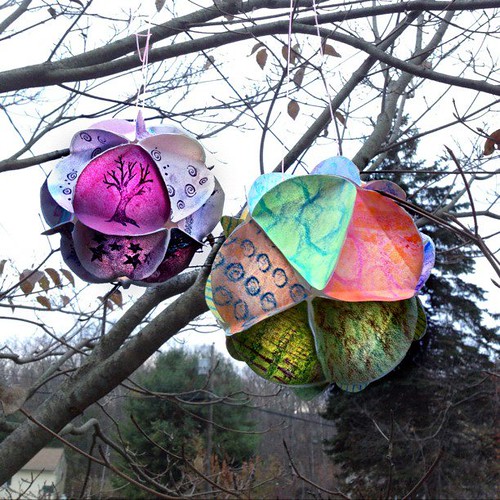
Solstice Spheres

The other e-book we created is the Winter Festivals E-Book, and it’s full of ways to celebrate the festivals of Santa Lucia, Hanukkah, Solstice, Yule, and Christmas. Maybe now it makes sense that we have two offerings instead of one? See, the season of winter festivals is packed with beautiful symbols; messages of peace, hope, rebirth, brotherhood, generosity, and love; and so many inspiring and edifying traditions that it was tough to contemplate leaving out anything. And cold and dark days give us the opportunity to dive into the rich and various traditions that inform the winter festivals. This e-book also offers songs, ancient poems and carols, recipies, rhymes for circle time, caregiver meditations, crafts and natural decorations you can make, and a whole bunch of ideas for enjoying the many festivals of light.

We would be honored and delighted if you’d check out these e-books and spread the word a little. We have poured our hearts and souls into them.

It is our aim to provide nourishing opportunities for families and groups of children at school/daycare environments. Our content is firmly based in Waldorf instructional methods and theories of child development. We value the whole person—head, heart, and hands—both the child and the adult alike. We strive to be original, to use natural, affordable materials, and to create beautiful artwork and handwork without it being so complex that readers are intimidated. We strive to inspire and encourage frequent artistic expression and to share the joy and satisfaction of creating handmade gifts. We are Waldorf moms (and Eileen is a professional childcare provider) and we offer this work with love.

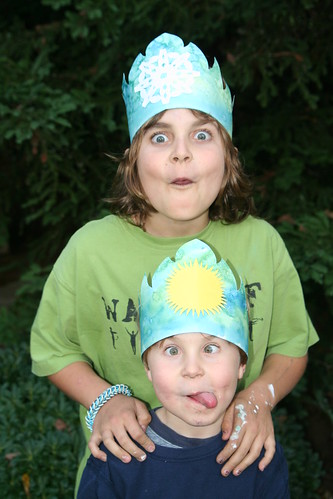
Here are a few “making of” shots from the last two months. I’d like to say thank you to my little helpers and models, Lucas and Asher, for being willing to go along with Mommy’s visions, and to Ian who tolerated my clutter of tools and supplies, my having four different holidays’ décor spread throughout our home at once for photo shoots, and my “Just a minute, I’m writing” excuses. I’m grateful for the opportunity to do this work.

IMG_1931

Reborn Solstice Sun Watercolor pants

IMG_2447

IMG_2364

Halloween: Flygon

IMG_2043

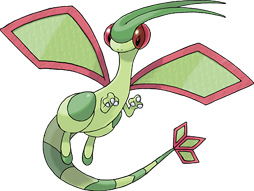
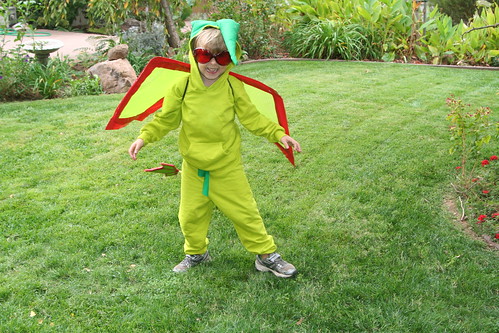
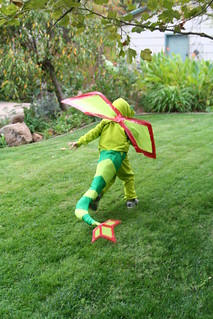
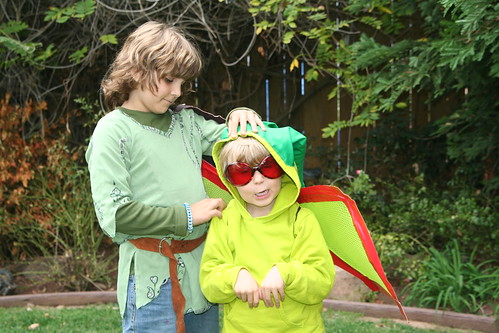
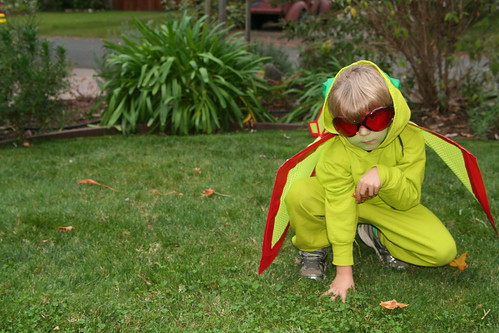
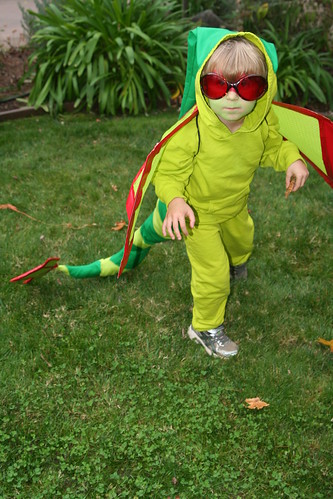
This, my friends, is Flygon. Flygon is a Pokémon, a Ground and Dragon type, to be exact. Asher loves dragons, loves this chartreuse color, and loves coming up with challenging Halloween costumes. At first he was talking about being the Grim Reaper. I think he got it into his head that big kids go for scary costumes and wanted to do the same, but I drew the line. I think five-year-olds aren’t really ready for scary costumes. So when Asher picked Flygon out of an old Pokédex book, I said yes and kept my doubts private.

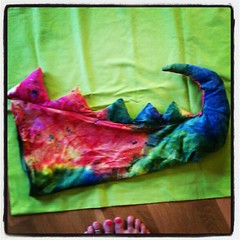
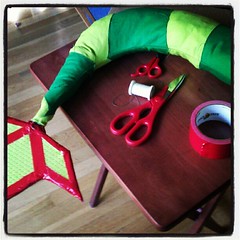
Last Year's Rainbow Dragon Tail with this Year's Future Flygon Tail. Hmmm... #pokemon #halloween #costume #dragon Chartreuse Beginning of costume Making Flygon Wings Flygon tail in progress Tail almost finished

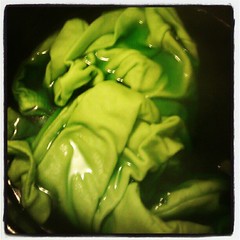
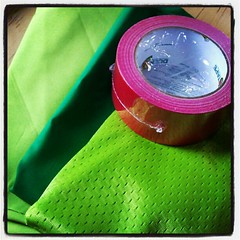
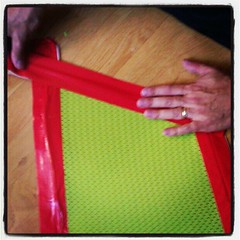
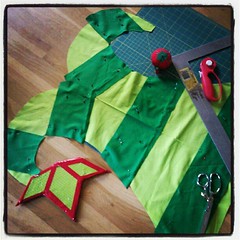
This costume is more involved than anything I’ve made to date. It started with some green fabric and some red duct tape. I had no pattern, but I did have the experience of making the rainbow dragon tail last year. Figuring out how to make the stipes on the tail concentric was a bit tricky for me. I consulted with my pro costumer friend Nicole to get her advice before I did any cutting. I bought a white cotton sweatsuit from Dharma Trading Company and some chartreuse dye. That was great because I’m not much of a seamstress. But just dyeing the outfit took half a day. I worked on this costume little by little over about a week. The wings were bumble bee wings until I pulled off the yellow fabric and bent them into diamond shapes. Ian helped me recover the wing wire with fabric and hot glue; we needed several hands. Then we added the red tape to the edges. The tail piece is made of cardboard, covered in the same wing fabric, and then outlined with red tape.
This is what we were going for. Super cute, right?

IMG_2032

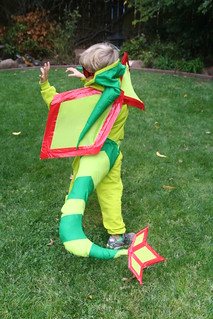
I think it turned out pretty well! I sewed the tail and stuffed it with a little wool and then some bubble wrap. There’s a coat hanger inside that made it stand up and wobble around nicely when he walked. It tied around his middle and was also supported by suspenders that he wore underneath his hoodie.

IMG_2054 IMG_2037

IMG_2099

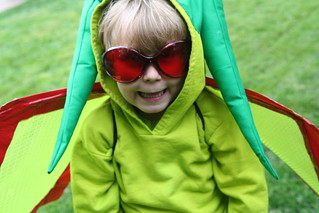
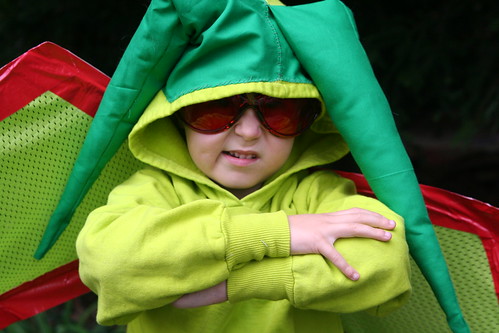
I had just enough dark green to make the head spikes. They are stuffed with wool and hand-sewn to the hood of the shirt. He liked when they flopped over his face.

IMG_2107

The glasses we bought years ago for Burning Man. I think they made the costume. I really feel that I sneaked up on this costume. I pondered and plotted a lot before I did anything, and I took it on one bite at a time.

IMG_2125

At the last minute, Asher decided he had to have green and red makeup too. No problem. I’ve got that!

IMG_2119

I love the way he got into character!

IMG_2198

I am kind of amazed he was able to keep up with all the big kids that night. He enjoyed trick-or-treating immensely.

And now it’s time to remove the head spikes so he can wear the hoodie.

Halloween: The Wood Elf

I realize November 10 is a bit late to write about Halloween, but I’m just getting to it now. We worked way too hard on these costumes to not show them here.

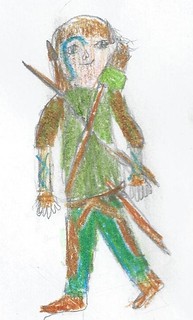
Lucas's Halloween Costume Design: Wood Elf

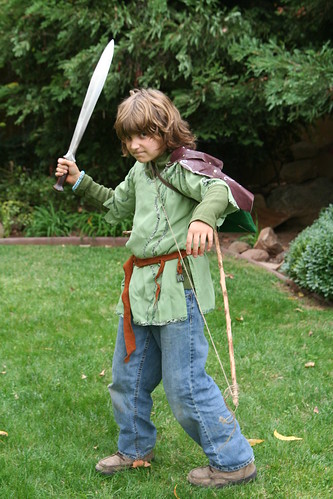
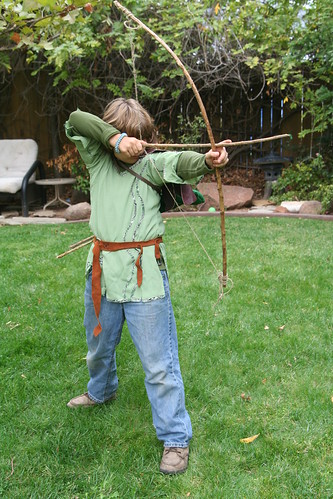
Lucas decided to be a Wood Elf. This year Ian read all three books of The Lord of the Rings to our boys, and the stories have really taken root in Lucas’s and Asher’s minds. Lucas didn’t want to be Legolas or any specific elf, or a fancy High Elf. He drew this picture of himself as a Wood Elf, so this is what we had to work toward.

Making leather armor for his wood elf costume.

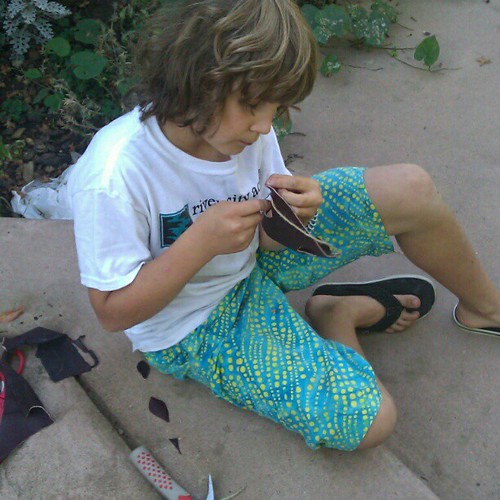
We brought our cow hide out and allowed Lucas to use some leather to make himself some armor. The hide was purchased back in 1991 when I wanted to make a medicine bundle for Ian—back when there was no Michael’s-type craft store in town. I had to buy a whole hide to get the little bit of leather I needed, and for my college-age self it cost a lot of money. I never dreamed in 1991 that this purchase would help us create a Halloween costume for our 10-year-old son!

IMG_2063

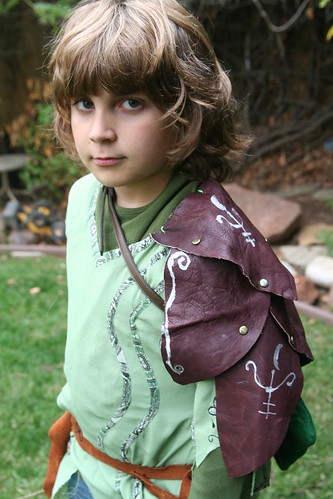
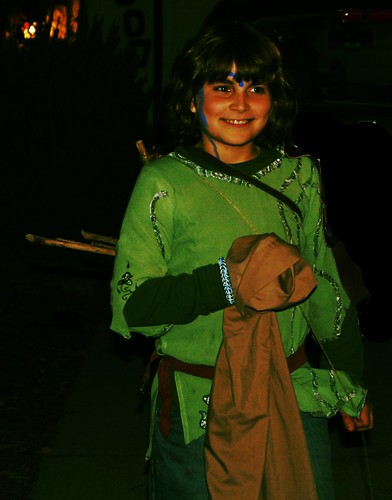
We lucked out at the thrift store this year and found a green tunic-like shirt. It had vine-like details and some beautiful leaf and vine embroidery on it. At first Lucas was nervous about the few flower details on it. He didn’t want to wear flowers. We had to argue for a moment or two, then I pulled out my shears and made some cuts to remove the flowers. I ripped and distressed the tunic just enough to make it look like he had spent several weeks traveling in the woods. That seemed to satisfy him. I also removed a seam to make the arms wider and more comfortable.

IMG_2076

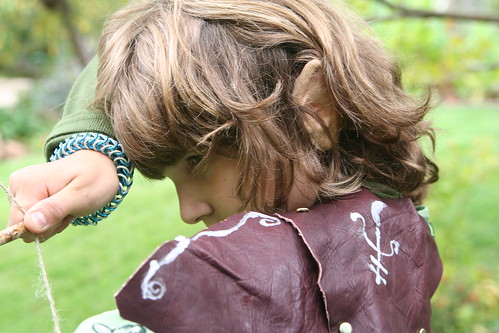
For the shoulder armor, we cut “scales” of leather to look a bit like leaves. We fitted this onto his body, piece by piece, and marked where we needed the scales to connect to each other with a Sharpie. Lucas made all the holes in the leather himself. We used brass-colored paper fasteners to quickly fasten the scales together, and we did the whole piece on the afternoon of the 31st. He decorated the armor with a silver paint pen. “They are runes of protection, Mom.” We sewed the leather to the shirt. The whole thing looks awesome!

IMG_2090

If we had had more time, we would have made a piece of armor to cover his his thigh, too. We pressed into service a leather belt from Ian’s old Renaissance Faire stuff. Lucas sewed a quiver out of green felt using the sewing machine. His first time on the machine! We used a small thrift-store belt to hold the quiver on his back; he used hot glue and stitches to attach the quiver to the belt.He made his own bow from a stick and string, and his quiver held five or six stick arrows.

IMG_2072

I’m not sure why he wanted to wear jeans, but he did. The last piece was a set of pointy elf ears held on by spirit gum. They had to be subtle ears! He added a blue tattoo to his face.

IMG_2159

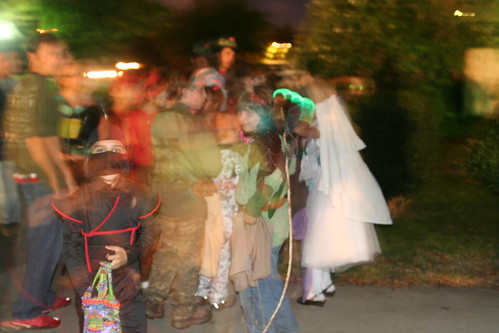
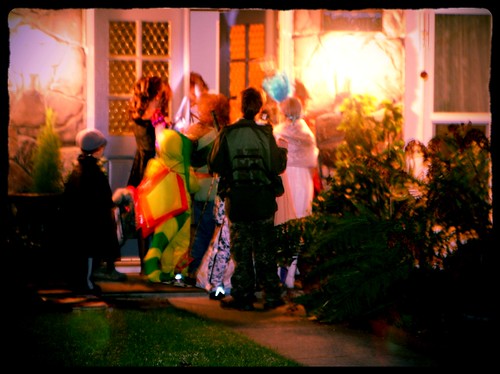
And then, with no time to spare, we went to an awesome party with a few other families from school. We ate yummy soup and went trick-or-treating in a big group.

IMG_2154

IMG_2201

The kids got loads of candy and had a blast running door to door at night. They all looked amazing!

I’m so proud of Lucas. He knew what he wanted. He worked hard to create it, doing many of the tasks on his own. He was a terrific Wood Elf!

Asher’s costume is up next.

Growth and Change

IMG_2245

I try not to get too sentimental about my children growing up. They grow. They are made to. They strive and learn and change and discover and grow every day, with or without my consent. And I approve. Most of the time I am too busy being astounded and amazed by their leaps of intelligence, judgement, compassion, and understanding, and feats of strength and skill to be the least bit sad about their not being babies anymore.

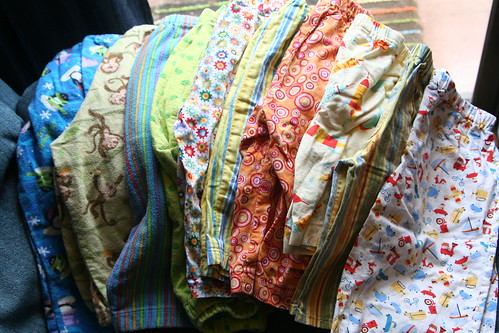
These are pants and shorts and pajamas that my mother and I have for Asher to wear. They were sewn for him and made with love (and in my case, with mistakes and a fair amount of learning frustration). They are all too small for Asher now, and I have sent them on their merry way to another sweet boy (and his baby sister) who may get some further use out of them. They are not the first set of handmades to be passed along, and they certainly won’t be the last. Growth and change are guaranteed.

Nevertheless, I was sentimental enough to take a photo before passing them on. These clothes are loved, soft and colorful, and unique in the world. They are special not only because they once covered my sweet son’s soft skin, but because they were created with loving hands and clever tools and eyes for detail. They are special because they were made first in our hearts before they came to be objects in the world.

May they be useful in the years to come, until they are once again outgrown.


Tough Mudder 2012

IMG_0630

IMG_0631 IMG_0925

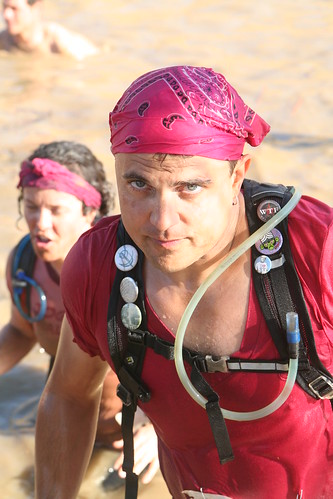
Once again, my dear husband tackled a huge dragon and completed the Tough Mudder in Patterson, California. He trained hard for it and had a great time. Somehow this was a kind of birthday celebration for him. I don’t know. He’s kind of weird. (That is a safety pin in his mouth, not a piercing. He was pinning his number onto his shirt when I snapped the photo above.)

IMG_0792

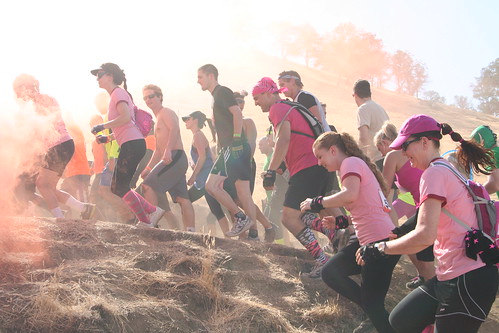
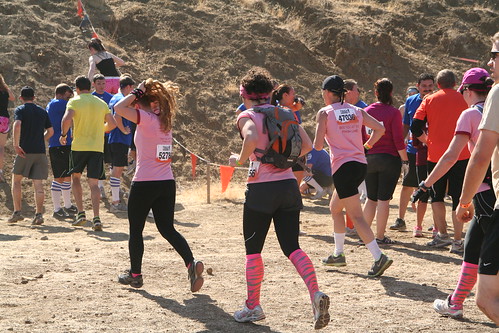
Ian joined our friend Cherylyn and her family’s team, the Jog-or-Naughts. They were all in pink, and Ian gamely donned their color for the event. I was able to follow them from the start and to the first couple of obstacles.

IMG_0901

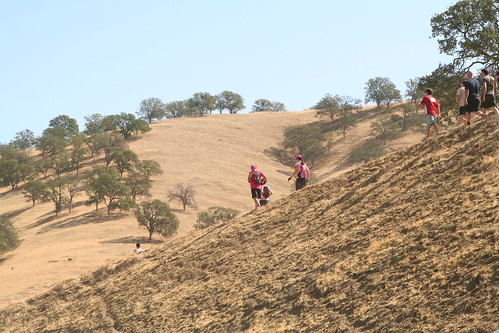
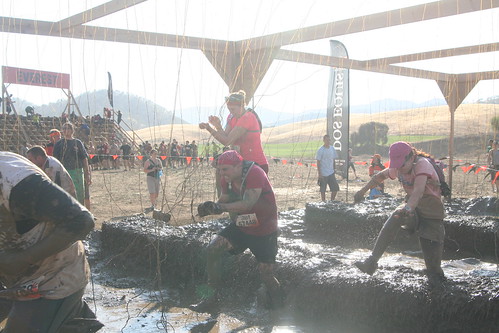
We mistakenly thought it would be relatively flat terrain. Wrong. Tons of climbing through hot, dusty hills.

IMG_0879

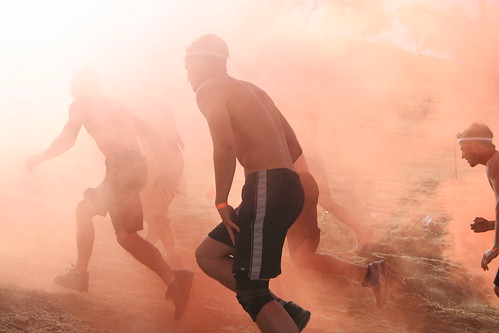
I soon lost track of Ian and the team because I couldn’t follow. I spent my time eating a hot dog, drinking a beer, and taking photos of hunky hot athletes. That was just fine. The mud spatters on my clothes were worth it. I got some terrific photos.

IMG_0715

IMG_1005

IMG_1315

IMG_1209

IMG_1437

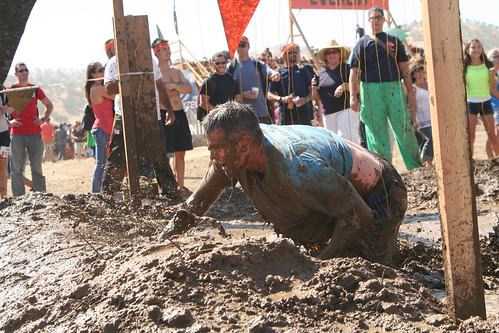
It was a very hot day, 95 degrees or more. I never really could check because I had no Internet connection. Unlike the previous Tough Mudder he did in Squaw Valley up on Tahoe, in Patterson the water/mud events were actually a little refreshing, and not freezing cold. I sat a very long time by this muddy pond to wait for my Mudders to swim and wade through here and to get this one close-up photo of Ian. I also got a stinky, muddy kiss for my troubles. After hours of waiting while my friends were miles away, climbing hills, slogging through mud, going over and under umpteen yucky, dangerous obstacles, I was very relieved to see them coming down the hill and entering this gross pond, hale and safe.

IMG_1476

Here is the last obstacle, named “Electroshock Therapy.” Those are electrified wires hanging down and the Mudders have to run (or fall, slip, crawl, and slide) through them, getting shocks all the while. This was the second obstacle with electricity. Ian had already gotten shocked pretty bad, which he says felt like being kicked in the head.

IMG_1490

IMG_1492

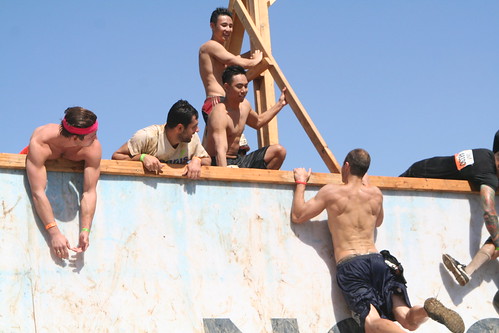
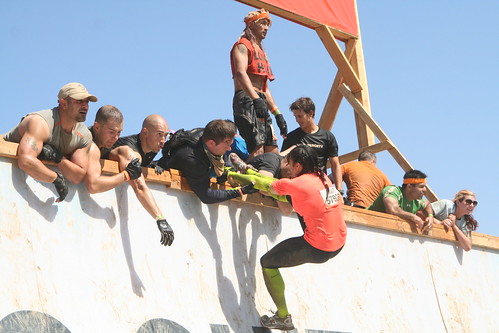
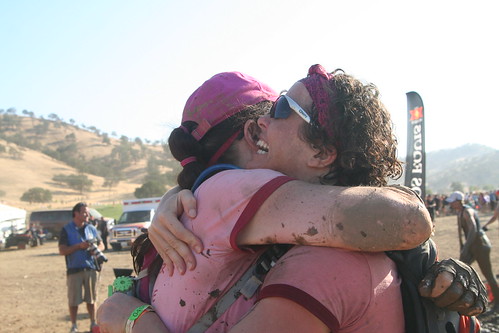
All six of our Mudders completed the course. What I like about this event is the emphasis on camaraderie and helping one another through it. Our Jog-or-Naughts stuck together and everyone tackled the obstacles that were right for them.

IMG_1536

Here is their celebratory beer, which I am told, never tasted so good. I am terribly impressed by all of them! Congratulations, Ian, Cherylyn, Kimberly, Cybil, Susan, and Nina!

Autumn Equinox and Michaelmas Festival E-Book

E-Book Cover

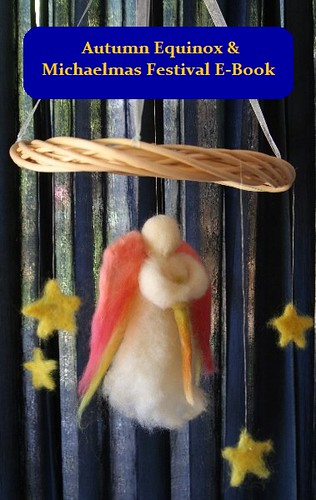
I’ve been a bit quiet in this space lately. We’ve been adjusting to a new school year and working through some projects. I am delighted to announce that my dear friend Eileen Straiton (of Little Acorn Learning) and I have finished another big e-book. This one is our Autumn Equinox & Michaelmas Festival E-Book and I’d be honored if you’d check it out and spread the word a little. It was a pleasure to work with Eileen on this and I’m really proud of it. We have such a great rapport and similar values, and I think this comfort and compatibility reflects in our e-book. So here’s to healthy, joyful, creative collaboration!

Here is a little teaser: a mosaic of just some of the images from the projects and activities we offer in our e-book.

Taste of the Contents of Our Autumn Equinox & Michaelmas Festival E-Book

133 PAGES of verses, fingerplays, poems, song, crafts, meditations, book recommendations, circle times, recipes, and much more to guide you in celebrating the Autumn Equinox and Michaelmas
in your home or school!

  • Needle Felt a Beautiful Apple Mother Doll
  • Go on an Apple Picking Field Trip and Learn
    About Different Varieties of Apples
  • Design a Breathtaking Early Autumn Nature Table
  • Read Books with the Children Celebrating
    Autumn and Michaelmas
  • Make Your Own Apple Stamps
  • Enjoy Homemade Applesauce Together
  • Crochet an Apple for Your Nature Table or Play Kitchen
  • Create a Beautiful Autumn Candle Holder Centerpiece
  • Make an Archangel Michael Mobile
  • Harvest Natural Dye Materials from Outdoors and
    Make Capes of Light Playsilks
  • Hold a Michaelmas Family Feast
  • Create Dragons out of Nature Items
  • Bake Dragon Bread with the Children
  • Make a Dragon Tree Block Checker Set
  • Sculpt Dragons out of Modeling Material
  • Cut Out Paper Flying Dragons to Display on Your Wall
  • Make a Michaelmas Felt Play Set
  • Paint an Autumn Leaf Stencil Painting with Watercolors
  • Crochet Beautiful Autumn Leaves for Your Nature Table
  • Paint Your Own Interpretation of Michael and the Dragon
  • Look Inward and Face Your Own Dragons with our Caregiver Meditation
  • Share Verses and Songs About Autumn and Michaelmas
  • Meditate on Quotes from Steiner and Other Inspirational Individuals
  • Enjoy Pinecone Weaving
  • Share Circle Time Together
  • Make Michael Sword Napkin Holders
  • Sculpt Michaelmas Worry Beads
  • Craft an Autumn Equinox Wreath
  • And more!

So, if you’re wondering how to make this time of year feel magical, this e-book may be just what you need. Thanks for peeking!

Only $24.99

Authors:
~ Eileen Straiton,
Little Acorn Learning

~ Sara Wilson, Love in the Suburbs

With Guest Contribution from Jennifer Tan, Syrendell

First Days of School

IMG_9386

I am delighted that school has begun. We’ve had a goooooood LOOOOOOONG stretch of summer vacation (88 days, to be precise), and we enjoyed so many wonderful adventures. But the time has come to try new things, learn more, make new friends, and engage with the world around us in a new way. The boys are both ready for it. They’ve embraced going back to school with enthusiasm.

Lucas is in fifth grade now. Suddenly that seems amazing. He is charming, capable, dynamic, and creative. He is looking forward to this year, especially studying the Greeks and the end-of-fifth-grade pentathlon. This semester he is taking woodworking for the first time, and is very excited about that. He’s waffling about staying with violin or switching to flute. He seems, well, ready to take on a lot more now. He wants to study. He wants to make his own lunch. He wants to spend his own money on school supplies. Our job is to support him in his new responsibilities. I’m grateful that we established a good chore routine this summer, as I feel schoolwork will fit in nicely.

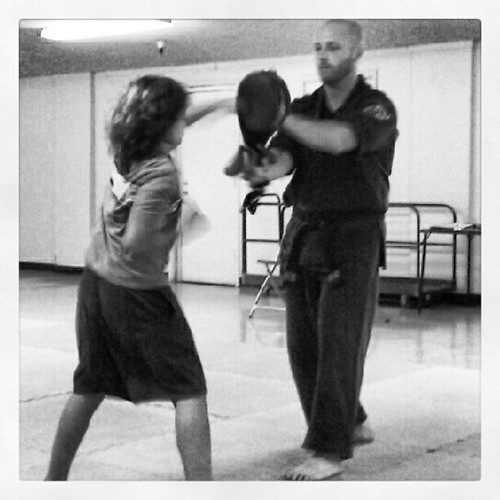
First Karate class punches

Also this week, Lucas has started his first karate class, which is being offered through the local Parks and Recreation department. He has wanted to do martial arts for a long time, especially after an exciting and brief taste of Brazilian jiujitsu. Since we are dabbling and on a budget, this is the right solution for the time being. It helps that Lucas’s best friend is also in the class. Both Ian and I are favorably impressed with the sensei.

IMG_9445

Asher’s first day of his second year of Kindergarten was a day after Lucas’s first day of school. Asher is an “older” this year, which means he is an older Kindergartner who will be going to first grade next year. He knows the ropes, and is expected to help the younger students adjust to school. The olders get to work on making their Michael swords right away. This is a big deal for a little boy. He has looked with covetous eyes on Lucas’s wooden sword for many years. Apart from some new children, the Kindergarten is the same and he’s comfortable and happy there. His lovely teachers have welcomed him back with open arms.

Now, I do feel a tiny little bit bittersweet about the end of summer. Rather than focusing on the longed-for experiences that we didn’t have, I’m going to think about all we did to celebrate life and living together. Not only did we make it through, we made it beautiful too.


Calendula and Mint Herbal Soaps Tutorial

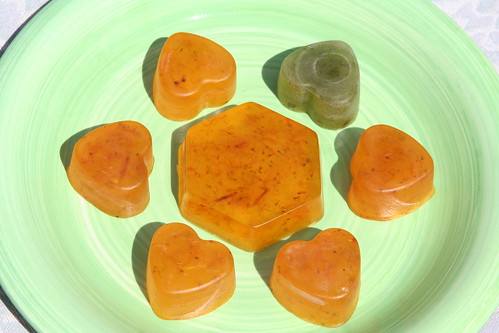
Finished Soaps

Earth’s bounty is always all around us, but it is perhaps even more apparent in the summer, when crops are ripening and plant life flourishes. Wild or cultivated herbs can be useful friends, growing perhaps right outside our kitchen doors. Herbs are commonly used as food, as decorations, as dyes, as flavorings. They also are used the world over to clean and heal.

You can easily make herbal soaps for your family to use and enjoy, right in the comfort of your own kitchen. There are two soap-making techniques. This tutorial teaches you the simpler of the two. Technically, you’re really embellishing this soap, rather than making it from scratch. Because the process is simple, even small children can help to make these beautiful, healing soaps, as long as you carefully monitor them around the stove and hot soap. (Of course you will!)

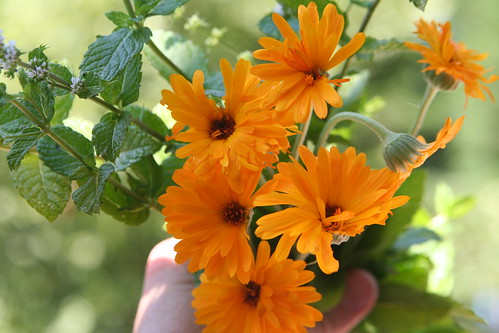
Calendula

Calendula (also known as pot marigold) is a common and prolific garden annual that reseeds itself. It is known to have been used as early as Roman times as both a dye and a flavoring. Calendula is known to have antiseptic properties, which make it perfect as a soap additive. Many natural first aid preparations include calendula.

Peppermint grows in many cottage and kitchen gardens. You can use it in teas, desserts, and body care potions, such as lotions, shampoos, balms, and soap. Mint may have a calming and soothing effect for skin irritations, itching and hives. It is believed to have anesthetic and anti-inflammatory properties.

Materials for Making Herbal Soaps

  • glycerin soap base (I used a glycerin and olive oil base)
  • calendula (pot marigold) and mint herbs from the garden (I used a mix of dried calendula petals and fresh flower heads, and fresh mint leaves)
  • stovetop pan, cutting board, knife, ladle
  • soap molds (also silicone muffin pans work very well; these come in fun shapes )
  • essential oils for fragrance (optional)
  • soap colorant (optional)

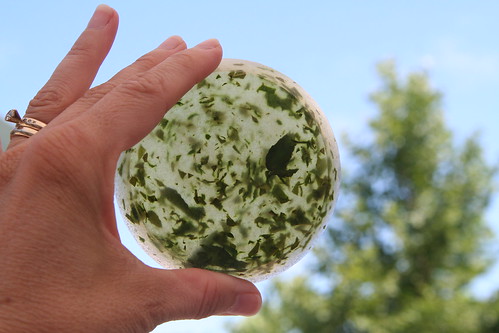
A word about glycerin soaps: You can buy glycerin at the craft store, along with lots of other fun soap-making and body product supplies (dyes, fragrances, molds, etc.). Using pure glycerin soap in this project will result in soaps with a layered effect, since your herbal additives float to the top of your molds as your soap sets. There’s nothing wrong with this, and the result can be quite beautiful and rustic. Another kind of glycerin soap base that you can buy has olive oil added to it, and a property that keeps any additives in suspension, meaning you won’t get layers and your herbs will stay mixed throughout the soap. This is the look that I was going for with these two batches. You can decide what’s right for you. There is no difference in how you make the soap. Just be sure to read the packaging carefully so you get what you really want.

Making Soap

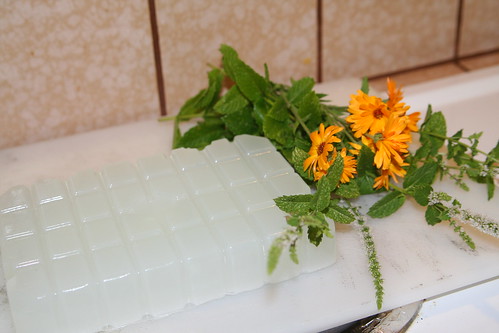
Begin by gathering your materials. You will need a clean cutting board and a table top to work on.

Glycerin Soap

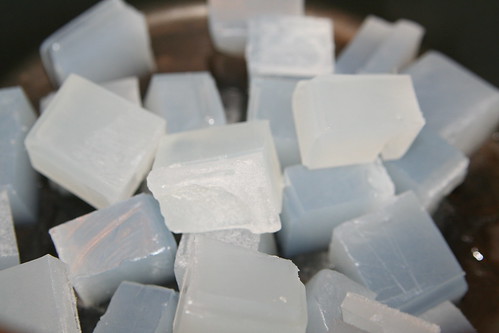
First, cut your glycerin soap base into small cubes. This makes it easier to melt at low temperatures, and you want to keep the temp quite low when you‘re making soap. You can use a double boiler or just put your glycerin cubes into your pot. (Cleanup is easy with hot water and a scrub brush!) Stir the soap often until all pieces of glycerin are melted.

Making Soap

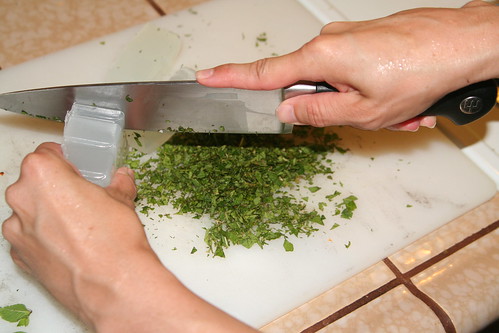
Meanwhile, chop your mint leaves into very small pieces. You may wish to set aside some of the tiniest leaves to be used as a decoration later on. Of course, this is optional.

If you have lots of soap molds or muffin pans, you might be able to make both types of soap at the same time. Since I had to reuse the molds after the first soaps were fully set, I made two batches—first calendula, then mint—cleaning up in between batches.

Calendula

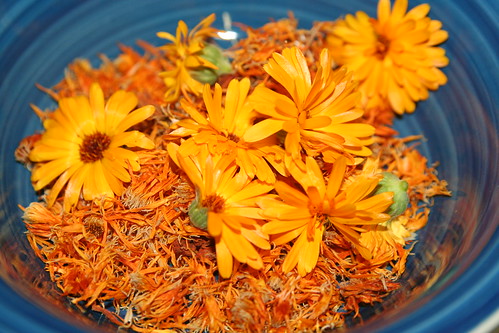
Before starting, I saved the dried petals from my calendula flowers for a week or so. For my soap, I also used a few fresh flower heads to maximize its potency as an antiseptic.

Making Soap

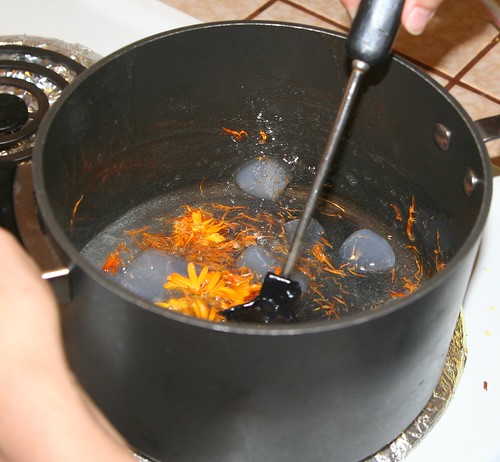
Add your petals and flower heads to your melting soap cubes. The heat will begin to cook the flowers.

Making Soap

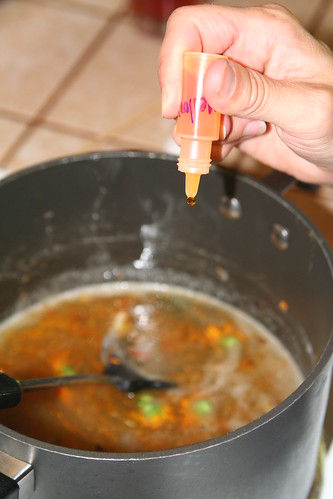
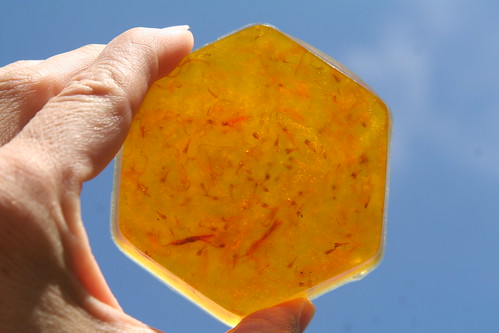
If you want your calendula soap to have a rich yellow coloring, add a few drops of soap colorant to the pot. You don’t have to do this, and if you cook the petals in the soap a while, it will begin to take on a natural yellow color. At this point, you can also add fragrance, if you wish. I added a few drops of geranium essential oil. Geranium is known to be a comforting scent, and since I envision my children washing their scrapes with my calendula soap, comfort seemed to be just the right feeling to evoke by smell.

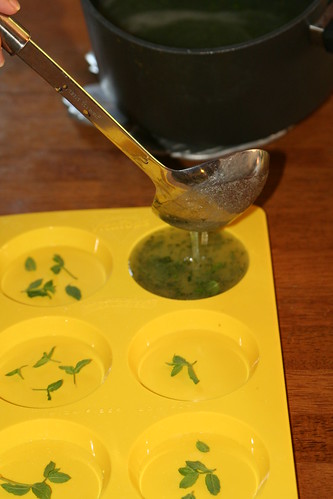
If you used fresh flowers, you should fish out the centers now. When you’re satisfied with your soap’s color and fragrance, it’s time to pour it into molds to set. Using a ladle, gently fill each cup to the brim. Keep the mold flat. The soap will begin to cool quickly, but it may take an hour or so for the soap to become very firm to the touch. You can speed the cooling by placing the mold flat in your refrigerator.

Making Soap

When the soap is completely firm and set, gently pop each soap out of the mold. They should separate from the mold’s sides with some gentle twisting and come out cleanly.

Making Soap

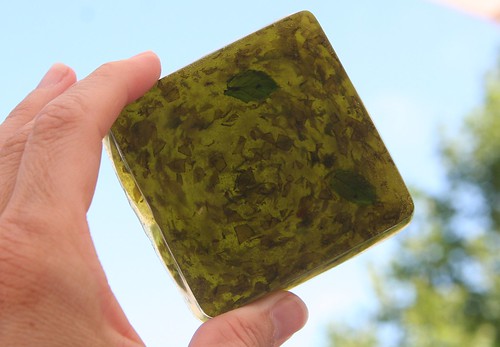
My second batch of soap was mint. You’ll repeat all the same steps as with the calendula soap. Begin by cutting soap cubes and then just add the chopped mint in with the glycerin. The longer you allow your mint soap to cook on the stove over low heat, the greener it will become. I added a few drops of eucalyptus and mint essential oils to the warm pot. The smell is calming and relieves stress.

Making Soap

You can add your reserved tiny mint leaves into your mold if you wish. They won’t stay exactly in place when you ladle in your mint soap, but you will be able to see pretty whole leaves in your soaps after they have set.

Homemade Mint Soap

In this photo, you can see my two different pours. The greener bars were poured from soap that had been on the stove longer. The natural green from the mint leaves colored the soaps. I like them both.

Mint Soap

A finished mint soap, with lots of gorgeous herbal goodness visible.

IMG_3691

And here’s a darker one. This soap was on the heat longer and became a dark green.

Calendula Soap

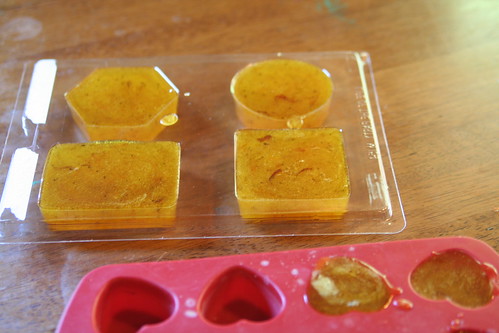
Here is the finished calendula soap, with pretty golden-orange petals showing inside.

Homemade soaps make wonderful gifts for family, friends, and teachers. Consider adding a mint and a calendula soap to your outdoor adventure box or your first aid kit. Use both types to cleanse and to heal.

  • About Sara

    Thanks for visiting! I’m Sara, editor and writer, wife to Ian, and mother of two precious boys. I am living each day to the fullest and with as much grace, creativity, and patience as I can muster. This is where I write about living, loving, and engaging fully in family life and the world around me. I let my hair down here. I learn new skills here. I strive to be a better human being here. And I tell the truth.

    Our children attend Waldorf school and we are enriching our home and family life with plenty of Waldorf-inspired festivals, crafts, and stories.

    © 2003–2018 Please do not use my photographs or text without my permission.

    “Love doesn’t just sit there like a stone; it has to be made, like bread, remade all the time, made new.” —Ursula K. LeGuinn

  • Buy Our Festivals E-Books


  • Archives

  • Tags

  • Categories

  •  

  • Meta