Drawing Animals with Children

Bears

Winter days can be long and dreary if you don’t find happy ways to pass the time together indoors. When weather is especially inclement, take the opportunity to sit down with your children and draw. Even if you don’t consider yourself to be artistic, your children will most likely be delighted to have you by their side, making art. The impulse to create is so very strong in children. As parents and caregivers, we can nurture their creative impulse by modeling creative behavior.

Materials

  • paper
  • block crayons and stick crayons
  • inspiration photos from books or Internet
  • a story about animals in wintertime, perhaps

Tutorial

Take a little time to play with the crayons. Experiment how you can make different kinds of strokes and lines. Block crayons are beautifully suited for shading, blending, and giving dimension to your pictures.

Donna Simmons, author of Drawing with your Four to Eleven Year Old, says “By pressing firmly or lightly, you can achieve both depth and movement in clouds or sea, for example. Wavering strokes of red, yellow and orange can bring fire to life. Direction of stroke can also emphasize muscling or roundness in animals, depth in caves, or distance of, say, mountains in the background.” Her book holds specific tips for drawing in Kindergarten through Fifth grade Waldorf curriculum.

Inspiration

Picture books or books with lots of inspiring photographs are always nice to have around. We found this fox photo online and drew using it as our example.

Lucas Drawing

Lucas's Fox in the Snow (Age 9)

My 9-year-old’s drawing of the fox in the snow

My Fox in the Snow

My drawing of the fox in the snow

Here are some general drawing tips for children:

  • Avoid outlining.
  • Aim to capture the mood or movement of your subject, not the superfine detail.
  • Young children need not worry about eyes, whiskers, nose, etc.
  • Try to find your subject’s major shapes: where are the circles, ovals, triangles, and rectangles? Use these instead of outlining to avoid adding too much detail too soon.
  • Block out where the figures will fit on the page to help make them large and bold. Some children resist using the whole page.
  • Finish your picture with a decorative border.

Lucas's Owl at Night (Age 9)

My son’s drawing of an owl at night

You may find that you need to lead by example. After story time, try drawing an animal in your story. Or while your child is having free time, try drawing beside him or her. Encourage your child if he or she chooses to draw with you. “I like to be with you like this.”

Avoid saying things that imply a judgment of the child’s work (“good drawing,” “sloppy drawing,” etc.). Instead try to find something that you can comment on that feels neutral. “I wonder if that fox has cold feet.” or “What a fluffy coat it has!” Nor should you say that your own drawing is “bad” or “didn’t turn out right.”

My Chipmunk Drawing

Practice and your own drawings will improve. We are all learning as we go.

Display drawings made by your child. A wooden “card stand” works well for displaying small drawings. A cork board works nicely for larger ones. Refrigerators are a good standby, too, for showcasing family art. And never underestimate the delight a child will feel if you should put his or her artwork in a real frame.

Finished, Released, and Relieved

Winter Mosaic 10x3

This is a teaser photo mosaic that shows just a little of what my friend and I have been up to lately. For the last two months, Eileen Straiton (of Little Acorn Learning) and I have been diligently working on our latest e-book. We had so many fantastic ideas and so enjoyed inspiring each other that we kept crafting and writing right up until our self-imposed deadline. Furthermore, we created so much content that we decided to release it as TWO e-books instead of one.

Wooden Advent Wreath

One book is our Advent and Saint Nicholas Festival E-Book, which offers poems, stories, songs, crafts, and myriad special ways that families, schools, or childcare professionals can celebrate the whole month of December with children. The advantage to doing so is that you get a more thoughtful, heartfelt approach to the holidays, with less rushing commercialism and more time in each other’s company while making and giving of yourselves. A measured, calm approach to the winter holidays gives children time to dream, live into the stories of their faith and the season, and count the days of Advent. Children can savor the passing of time with peaceful, delicious anticipation and gentle, useful activity, rather than experience the holiday as a single, frenzied, blowout day that is over all too soon. A peaceful Advent full of simple pleasures and togetherness is what they’ll remember later, not the package-ripping and specific, expensive gifts.

Solstice Spheres

The other e-book we created is the Winter Festivals E-Book, and it’s full of ways to celebrate the festivals of Santa Lucia, Hanukkah, Solstice, Yule, and Christmas. Maybe now it makes sense that we have two offerings instead of one? See, the season of winter festivals is packed with beautiful symbols; messages of peace, hope, rebirth, brotherhood, generosity, and love; and so many inspiring and edifying traditions that it was tough to contemplate leaving out anything. And cold and dark days give us the opportunity to dive into the rich and various traditions that inform the winter festivals. This e-book also offers songs, ancient poems and carols, recipies, rhymes for circle time, caregiver meditations, crafts and natural decorations you can make, and a whole bunch of ideas for enjoying the many festivals of light.

We would be honored and delighted if you’d check out these e-books and spread the word a little. We have poured our hearts and souls into them.

It is our aim to provide nourishing opportunities for families and groups of children at school/daycare environments. Our content is firmly based in Waldorf instructional methods and theories of child development. We value the whole person—head, heart, and hands—both the child and the adult alike. We strive to be original, to use natural, affordable materials, and to create beautiful artwork and handwork without it being so complex that readers are intimidated. We strive to inspire and encourage frequent artistic expression and to share the joy and satisfaction of creating handmade gifts. We are Waldorf moms (and Eileen is a professional childcare provider) and we offer this work with love.

Here are a few “making of” shots from the last two months. I’d like to say thank you to my little helpers and models, Lucas and Asher, for being willing to go along with Mommy’s visions, and to Ian who tolerated my clutter of tools and supplies, my having four different holidays’ décor spread throughout our home at once for photo shoots, and my “Just a minute, I’m writing” excuses. I’m grateful for the opportunity to do this work.

IMG_1931

Reborn Solstice Sun Watercolor pants

IMG_2447

IMG_2364

Autumn Equinox and Michaelmas Festival E-Book

E-Book Cover

I’ve been a bit quiet in this space lately. We’ve been adjusting to a new school year and working through some projects. I am delighted to announce that my dear friend Eileen Straiton (of Little Acorn Learning) and I have finished another big e-book. This one is our Autumn Equinox & Michaelmas Festival E-Book and I’d be honored if you’d check it out and spread the word a little. It was a pleasure to work with Eileen on this and I’m really proud of it. We have such a great rapport and similar values, and I think this comfort and compatibility reflects in our e-book. So here’s to healthy, joyful, creative collaboration!

Here is a little teaser: a mosaic of just some of the images from the projects and activities we offer in our e-book.

Taste of the Contents of Our Autumn Equinox & Michaelmas Festival E-Book

133 PAGES of verses, fingerplays, poems, song, crafts, meditations, book recommendations, circle times, recipes, and much more to guide you in celebrating the Autumn Equinox and Michaelmas
in your home or school!

  • Needle Felt a Beautiful Apple Mother Doll
  • Go on an Apple Picking Field Trip and Learn
    About Different Varieties of Apples
  • Design a Breathtaking Early Autumn Nature Table
  • Read Books with the Children Celebrating
    Autumn and Michaelmas
  • Make Your Own Apple Stamps
  • Enjoy Homemade Applesauce Together
  • Crochet an Apple for Your Nature Table or Play Kitchen
  • Create a Beautiful Autumn Candle Holder Centerpiece
  • Make an Archangel Michael Mobile
  • Harvest Natural Dye Materials from Outdoors and
    Make Capes of Light Playsilks
  • Hold a Michaelmas Family Feast
  • Create Dragons out of Nature Items
  • Bake Dragon Bread with the Children
  • Make a Dragon Tree Block Checker Set
  • Sculpt Dragons out of Modeling Material
  • Cut Out Paper Flying Dragons to Display on Your Wall
  • Make a Michaelmas Felt Play Set
  • Paint an Autumn Leaf Stencil Painting with Watercolors
  • Crochet Beautiful Autumn Leaves for Your Nature Table
  • Paint Your Own Interpretation of Michael and the Dragon
  • Look Inward and Face Your Own Dragons with our Caregiver Meditation
  • Share Verses and Songs About Autumn and Michaelmas
  • Meditate on Quotes from Steiner and Other Inspirational Individuals
  • Enjoy Pinecone Weaving
  • Share Circle Time Together
  • Make Michael Sword Napkin Holders
  • Sculpt Michaelmas Worry Beads
  • Craft an Autumn Equinox Wreath
  • And more!

So, if you’re wondering how to make this time of year feel magical, this e-book may be just what you need. Thanks for peeking!

Only $24.99

Authors:
~ Eileen Straiton,
Little Acorn Learning

~ Sara Wilson, Love in the Suburbs

With Guest Contribution from Jennifer Tan, Syrendell

Tutorial: Create a Mermaid Crown and Wrist Ribbons

Mermaid Crown

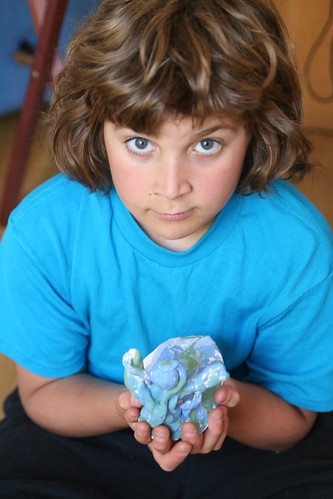
Who wouldn’t want to be as graceful as a beautiful mermaid or noble merman, living in an underwater wonderland? This play costume—a mermaid crown and wrist ribbons—is something you can create in stages, or do only the part you like best. Mermen might prefer just the crown, without the veil. The wrist ribbons encourage so much imaginative play for boys and girls alike. They can be water flowing while your merfolk swim. They can be magical water powers made visible.

Materials for Mermaid Crown
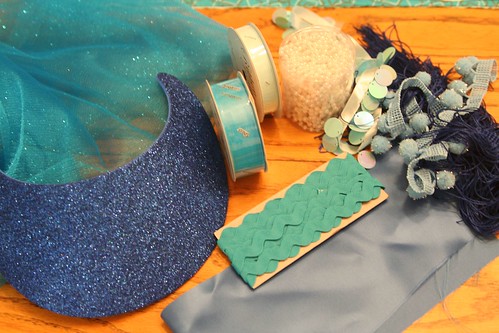
  • a craft-foam visor
  • jewels, beads, and/or small seashells (Tip: look for packages of jewels and rhinestones for decorating flip flop sandals! Craft stores have inexpensive kits.)
  • low temperature glue gun and glue sticks
  • ½ yard of veil fabric (tulle, netting, etc.)
  • scissors, sewing pins, hand-sewing needle and thread
  • sewing machine
  • notions and ribbons

Materials for Mermaid Wrist Ribbons

  • ¼ yard satin or acetate fabric
  • ½ inch wide elastic
  • notions and ribbons

Materials

Make Your Mermaid Crown

Begin by gathering your materials. You will need a clean, flat surface to work on. First, remove the elastic or plastic coil that is the back of your foam visor. You will put it back on later.

Now decide how you want your headdress to look. Will it have points like a queen’s crown? Will it be scalloped like a seashell? Turn your craft-foam visor over and sketch the shape you want. When you’re happy with what you see, cut your foam with scissors.

Cut the Visor into a Crown Shape

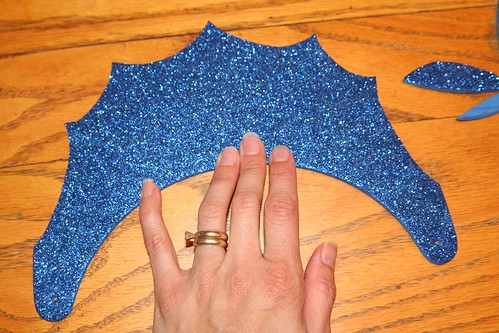
Now play with your notions and jewels, beads, and/or shells, placing them on the visor here and there, until you have an idea how you want them to be arranged. Take some time with this part because once you glue the items to your visor, it will be hard to remove them if you change your mind about their placement.

Adding Fringe

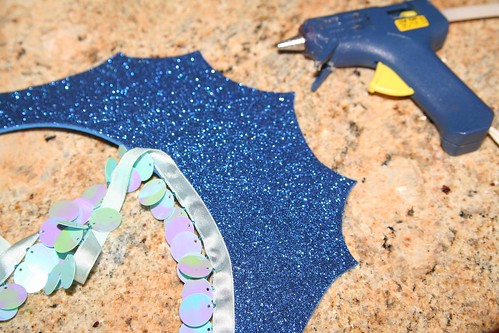
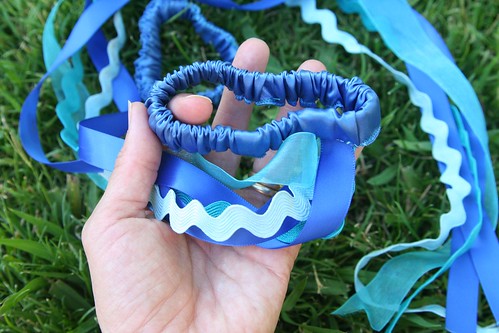
With your low-temp glue gun, glue on any trim (such as in this photo) and your decorations.

Gluing on Gems
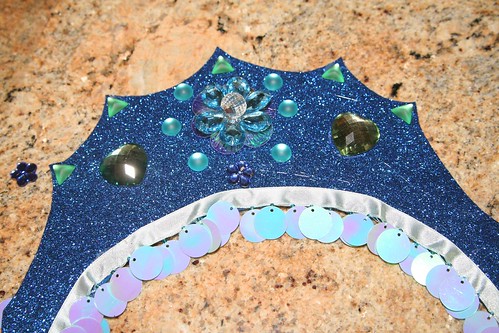
It’s a good idea to measure to find the visor’s center. Try to arrange your biggest, most impressive or most special decorative item in the very center.

Using your glue gun and the smallest drops of glue, begin by gluing the special center item. Other smaller jewels or seashells can then be glued on. If your design is symmetrical, do the same item on both sides before moving on to a different jewel. You’ll have to pull off the strings of glue that may result from gluing on the jewels.

Have you decided to make a veil for your mermaid crown? (If you’re making this for a boy to play a merman, you may wish to skip this part.) Take your veil material (tulle, netting, etc.) and fold it in half so that it has two layers. You might measure your child to decide how long you want the veil to be. I decided I wanted the top layer of the veil to be shorter than the bottom layer. (Depending on the fabric you chose, you may wish to hem the bottom edges of your veil.) Pin the layers in place and then sew a seam about 1 inch from the top fold. This creates a tube through which you can pull the visor’s back elastic or plastic coil.

Mermaid Crown Back

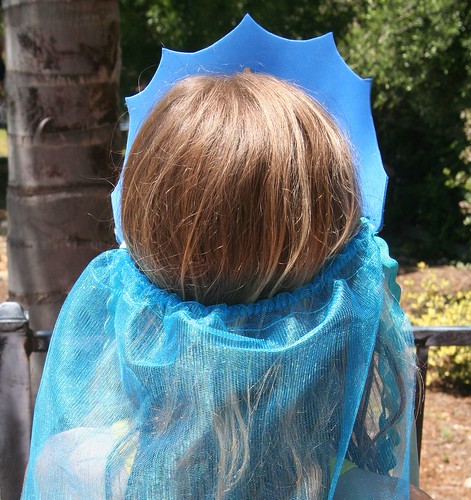
Measure the visor on the head of your child, and shorten the elastic or plastic coil accordingly, so that it fits. (The coil on my visor is visible in the photo above.) You might wish to glue this part onto the visor so that it’s permanently attached. This spot, where the crown attaches to the back can be decorated with another jewel if you wish (see below at the child’s temple).

Mermaid Crown Detail

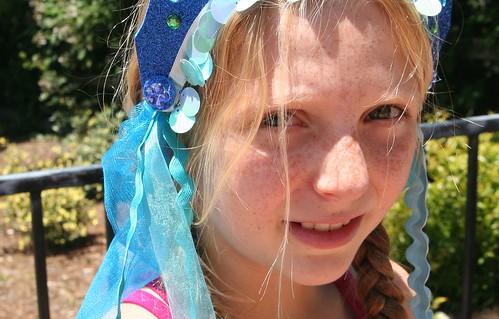
If you have ribbons or notions for decoration or long mermaid locks, fold them in half and with a needle and thread, sew them on to the corner of your veil, where the elastic attaches to the visor, so that they are firmly attached and can trail either in front of the shoulder or behind like hair. Keep in mind the age of the child who will wear this costume. The more decorations you add, the harder it will be for the child to put the crown on herself. (I ended up not using several items that are in the photo at the beginning of the tutorial.)

Congratulations! You’ve made a beautiful headdress for a lucky mermaid, or a handsome crown for a merman.

Sew Your Mermaid Wrist Ribbons

Wrist ribbons are a huge part of dress-up play in our home. You might be surprised at how well your child takes to these simple accessories. There is a bit of sewing involved, but it’s pretty easy.

The first step is to measure your child’s wrist using the elastic. You want the elastic band to be snug enough not to fall off the wrist, but not too snug as to feel tight. You also want to have about a 1 inch overlap, so that you can sew the elastic securely closed.

Now that you know how long it needs to be, cut two pieces of elastic that length. Lay out your covering fabric (satin or acetate). You could be very careful and measure this, but you don’t really need to do so. The object is to cut two strips of fabric so that they are twice as long as your elastic pieces and about 2 ½ inches wide. Turn in ¼ inch on both sides of your fabric strip and the ends and iron it flat. Sew the flat rectangle’s ends together to make a ring. Now fold your wide ring in half to make a long skinny ring with the right side of the fabric out. Make sure the width of your skinny ring will accommodate your elastic, but don’t actually put the elastic into the ring yet.

Sewing the Wristband

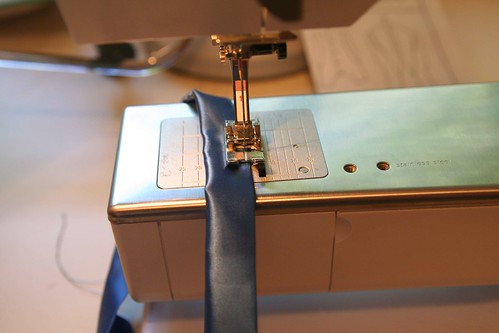
Top sew along the very edge of the long skinny ring to make a skinny tube. Don’t sew the ring completely closed. Leave an opening of a few inches so that you can insert your elastic.

Insert the Elastic

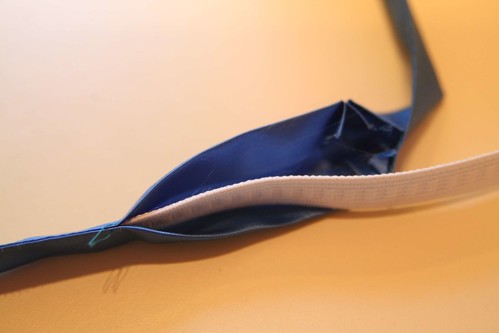
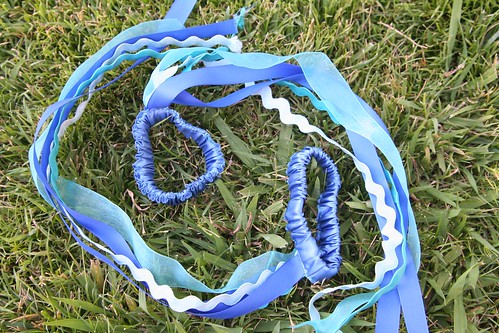
With a safety pin on one end of the elastic, insert your elastic into your skinny tube of fabric. Bunch up the tube and join the ends of your elastic together with the appropriate overlap. Sew the elastic ring securely with a good zigzag stitch. You don’t want the elastic ring to pull apart when the child is putting the band around his or her wrist. At this point you have what looks like a hair scrunchie with a small opening in the side.

Gather up your ribbons that will be trailing and, with a few stitches, tack them all together at one end. I used the same notions as on the mermaid headdress, but you can use any ribbon. Consider painting some white satin ribbon with watercolors to create a watery effect.

Painted Ribbon

Now, insert the tacked end of your trailing ribbons into the hole of your ring and pin them in place.

Wrist Ribbon Detail

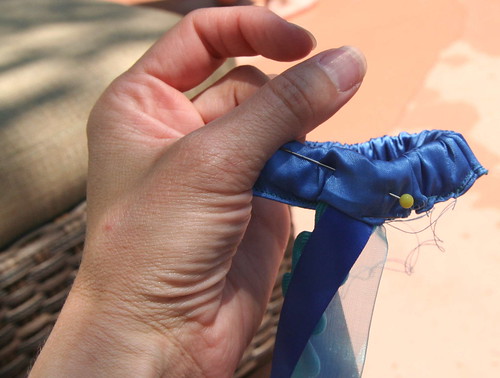
By hand, with needle and thread, sew the ribbons in place to the elastic and sew the satin ring closed around them. I simply whip-stitched the opening closed and sewed the ribbons in firmly.

Finished Wrist Ribbons

Repeat all the steps so that you have two wrist ribbons.

Finished Wrist Ribbons

If the ends of your ribbons want to fray, you can sometimes use a match and carefully melt the fibers at the ribbon ends to seal them. I suggest you first test this out on a ribbon scrap before you try to melt the ends of your finished wrist ribbons. You don’t want to harm your creation.

Now all you need to complete your mermaid or merman costume is a play silk tied around the child’s waist for a tail!

Merboy and Mermaid

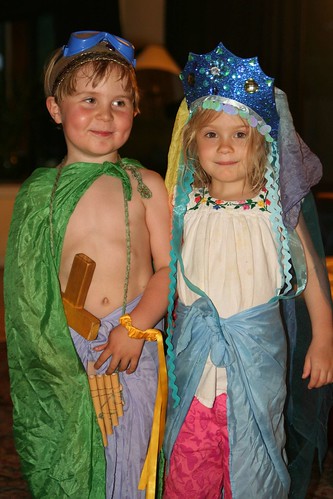
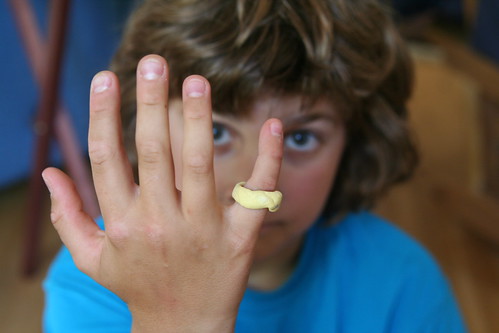
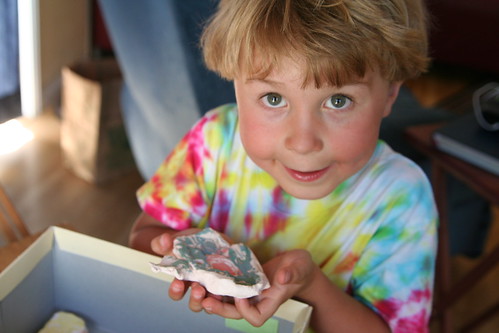
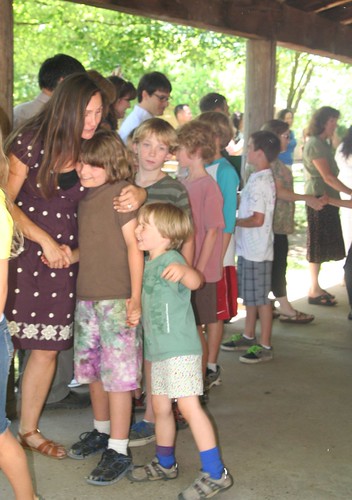
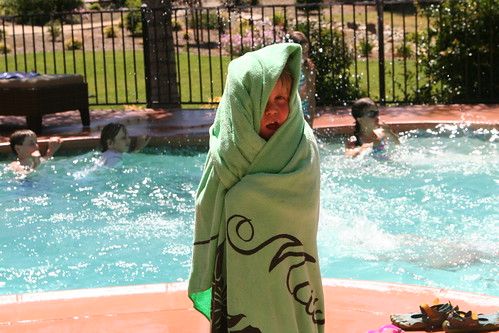
You might be surprised at how your child uses these costume pieces. Perhaps the headdress or crown and the wrist ribbons you make will be used all together, or in different ways at different times. In this final photo, you can see that my son and his friend felt like using some of them at that moment, and found plenty of extra accessories (sword, goggles, pan pipes, cape) to transform themselves into a happy merfolk couple!

Happy sewing!

Family Clay Camp

Family Clay Camp

Right at the beginning of summer vacation, my boys and I participated in Family Clay Camp, which was offered through our local Parks and Rec. Michelle Leuth was our wonderful teacher. Lucas and I had taken a clay/pottery class from her a few years ago. Now that Asher is 5, he can start doing some of these fun activities, too!

We had a blast. Camp was four days, for two hours each day. Some friends from the boys’ school were also enrolled, so that made it extra fun. We had unlimited clay to play with for three days. On the fourth day, we painted everything. Then our pieces dried and were fired, and we picked them up a couple weeks later.

IMG_7426

This is Lucas’s piece de resistance: A hand reaches up out of the ooze to clasp a golden ring. The ring is separate from the hand.

IMG_7446

(It’s been a good, long season of reading The Lord of the Rings books in our home and these stories have clearly  fired up my children’s imaginations.)

IMG_7429

Asher thoroughly enjoyed this class, and got really into the feel of the clay and the fact that it took impressions. He spent a lot of time pressing textures of all kinds into his clay objects.

IMG_7427

This is Asher’s “design collection”—a series of clay objects with many textures. They are right in keeping with Asher’s appreciation for treasures.

IMG_7431

This is a small mask he made. I noticed that Asher had little interest in painting his creations—for him it was all about the forming of the objects.

IMG_7436 IMG_7433

This is a kind of creature sculpture that Lucas made for his father as a Father’s Day present. The back view is on the left, front view is on the right. Asher made a lovely, lumpy candle-holder for his daddy for Father’s Day.

IMG_7439

The expressive artist holding his sculpture.

IMG_7451

I made this little gnome, using the coil method. I started at his feet and worked up, taking care to avoid having any air spaces inside the figure without a means for the air to escape during the firing process. My gnome now stands in my garden and I am rather fond of him. I also made a sunshine face and a pinch-pot style bowl. It catches my earrings on my bedside table at night.

I like making art with my boys!

Lucas’s Recent Artwork

The Spirit of the Wind June 2012

My 10-year-old recently created these beautiful artworks. The one above is called “The Spirit of the Wind.” Colored pencils and metallic ink on paper.

The Sun Sets Over the Water June 2012

This is “The Sun Sets Over the Water.” I believe it’s pastels on paper.

Usually he draws knights and ninjas and soldiers of fortune with all kinds of bad-ass weaponry and explosions. Those are awesome, too.

“Everything you can imagine is real.”  —Pablo Picasso


Hello, Summer

IMG_6756

Summer vacation is off to a good start! The school year ended at our Waldorf school with a beautiful ceremony for the graduating seniors and the symbolic moving of classrooms for the other grades. Lucas’s fourth grade packed up and moved to the fifth-grade classroom. On the last day, all the students lined up and shook the hands of all the teachers, who wished them a happy summer. It was a day full of celebration and a great exhalation. It felt like coming to the end of a favorite book—a little bittersweet. This year has been a marvelous journey for our whole family and we are so blessed to be where we are, who we are, and with these loving people around us.

IMG_6793

A lot of heavy, heartbreaking things have been and are going on these days among our friends. This has lead me to need to circle the proverbial wagons a bit. I am looking for ways to take care of us, myself included, in the hopes that our hearts will mend. And frankly Band-Aid solutions are totally acceptable, such as an extra glass of wine for parents, or the impulse-buy ice-cream maker, or babysitting extra kids just so we can squeeze and giggle with a beautiful baby for a while.

IMG_6859

Never underestimate the power of Baby Therapy.

I am also counting mercies, big and small:

• my son is loving swim team this summer
• my dog doesn’t chew on my kids’ toys
• my husband feeds us so well
• we have friends in the activities we’ve enrolled in
• my flowers bloom whether I feel happy or sad, and my hydrangeas are out of this world
• my new painting class starts this Thursday
• my little son is enjoying Clay Camp, even though he was afraid to try it at first
• we have received a dinner invitation for Friday
• I’ve had some time to visit some friends going through difficult times
• most of my cotton summer skirts still fit
• I’ve had time off from work this week to help us find a new rhythm
• my boys don’t have any cavities
• I got my Mother’s Day card from Lucas on the last day of school

IMAG0171

IMG_6893

And so we enter another summertime. Here we are again, bumping into each other—with love, (im)patience, and familiarity—trying to figure out once again how to spend long summer days together, while adapting to all the growth and changes we’ve all undergone since the last time. We’ll get the hang of it soon. Hello, summer!

Midsummer Festival E-Book

Sun_Child-311x426

I am delighted to announce that my dear friend Eileen Straiton (of Little Acorn Learning) and I wrote a Midsummer Festival E-Book! It has been a marvelous journey and I loved every step we took in making it. Please spread the word!

Little Acorn Learning
Monthly and Seasonal Guides
for Childcare, School and Home

*New* Midsummer Festival Book is Available!

This wonderful Midsummer Festival E-Book will bring the magic of summer into your home and help you keep celebrating throughout the season!  It is packed full of Waldorf songs, stories, verses, crafting tutorials and much more to help you celebrate Midsummer and the Summer Solstice with the children in your home, classroom, or childcare environment.

  • Read Stories and Fairy Tales Filled with Sunshine to the Children
  • Enjoy Verses, Songs, Poems and Fingerplays that Celebrate the Coming of Summer
  • Learn about the History, Background and Symbolism of the Summer Solstice
  • Get Ideas for How to Create Your Own Meaning of this Special Festival
  • Enjoy a Solstice Feast
  • Play Solstice Games
  • Make a Midsummer Bonfire
  • Create Simple Beeswax Suns with the Children
  • Make a Solstice Wreath for the Birds
  • Design Midsummer String Art Sunbursts
  • Read a Story of The Sun Child and Create a Sun Child Necklace
  • Craft a Shiny Garden Suncatcher
  • Use a Rock Garden Sundial to Tell Time in Your Garden
  • Make a Catch the Sun Throw Toy for Your Child
  • Create a Paper Solstice Sun
  • Read How to Create Daytime and Nightime Midsummer Magic
  • Hang Summer Solstice Flags Indoors or Outdoors this Season
  • Plant a Midsummer Indoor Herb Garden
  • Craft a Sun Mosaic Birdbath
  • Make a Sunshine Fairy out of Wool Roving and Felt
  • Sew and Stuff Herbal Dream Pillows for St. John’s Eve
  • Needle Felt a Summer Sun Wall Hanging
  • Create Sweet Pocket Sun Sprites for the Children
  • Bake Sun Bread with the Children
  • Go on a Sun Hunt
  • Make a Sun Mask
  • Design a Sunshine Banner
  • Crochet Sun Medallion Necklaces

mosaic681a08dd7f492074d30d638319d71c78eb0cd22f

In addition to our Midsummer Festival eBook, Little Acorn Learning has lots of wonderful offerings to fill your summer months with enriching, creative activities for your family, daycare, summer camp, or homeschool group, so please check out their other fine products.

40

Poppies

A lot is going on right now and I’ve not had much time to write. I had a birthday this week and it got me ruminating. Here’s some of what I’ve learned in my 40 years. (Some of these say “you,” but they all mean “me.”)

1. clean something every day, even if it’s only your hands

2. read to your kids; it is food for life

3. mothering well is largely a matter of knowing what things to get excited about, and what not to

4. wine is wonderful

5. smiling makes you feel good and it’s free (sometimes I forget this one)

6. make a place for butterflies and birds in your world; you won’t be sorry

7. stuff is only stuff; it all wears out eventually

8. beware of modeling beeswax in the laundry

9. tell your story, but don’t get so caught up in telling it that you forget to live the next chapter

10. children are resilient; however, test this only with careful discrimination

11. make your own meaning, don’t swallow anyone else’s

12. read poetry; read everything

13. when you fuck up, breathe, and then start over

14. being married to your best friend is ideal

15. try new things every day

16. exercise is good for me even if I don’t like it

17. fashion is stupid—occasionally fun, but stupid

18. it feels good to help people

19. somehow, time can both fly and drag—at the same time

20. words can indeed hurt

21. onions and Brussels sprouts are actually delicious

22. sing more, dance more

23. be your own beautiful freaky self out loud; if you don’t you’re cheating everyone

24. avoid the pink aisle and boys need dolls

25. sometimes the best course of action is to set it on fire

26. vote

27. gardening is cheaper than therapy

28. feminism benefits everyone

29. art is important, and more important to make than to consume

30. boys are actually sweeter than they want you to think they are

31. love and kindness is all the religion I need

32. equality for only some is no equality at all

33. find your cause; better yet, find a dozen of them and get to work

34. miracles are everywhere and often go by the names of “humanity” and “nature,” “life” and “science”; as such, they are no less miraculous

35. making it often feels better than buying it

36. I cannot “do all the things”; nor should I try to

37. a whole lot of things that bother me today won’t matter a bit tomorrow, so I should just chill

38. I am still learning

39. friendship is as necessary to me as air

40. my ultimate career goal is still philanthropist

Painting Is Wonderful

Magnolias Oil Painting

It’s been a little while since I posted about my experience of learning to paint with oils. I’m finishing my third set of studio classes now.

This is my biggest painting yet—a 16 by 20 canvas. I used my photograph of my neighbor’s magnolia blossoms as a reference. I am very pleased with how this came out. I tried to paint quickly and with emotion. I allowed the underpainting to show through for the first time in the hopes that it would lend a dreamy kind of atmosphere. I see a couple of things about this that I would like to fix, but I think it’s basically done. I think I’ll even sign this one.

Magnolia Painting in Studio

I’m really enjoying my teacher, Randy Blasquez, and my classmates. I’ve now been coming to class long enough that I’m getting to know other painters and see and learn from their processes, too. Everyone is different. Everyone struggles with different aspects of painting. Each subject we attempt has its own challenges. I love tackling new things, and I feel I’m learning with each painting I do.

Painting at Home

I’ve done a very little bit of work at home, which was very fun. My new easel, whom I named Anaïs, and my new “French Mistress,” whom I named Genevieve, are working out really well. Genevieve is a wood palette box that holds my glass palette and keeps paint from getting everywhere. These gizmos are beautiful and functional. I waited about six months before investing in these items. I think I had to prove to myself that this painting this wasn’t a fly-by-night whim.

Damaged Painting

This is a shot of my slightly damaged painting I did in class back in February. Some “helper” seems to have dragged a little finger from the dark center of the poppy down into the pot and the blue of the tablecloth. I’ve managed to take out most of the line with some very careful scrubbing, but I still have to repaint part of the poppy. I like this painting, too. I like the shadows especially. While working on this painting I was consciously trying to use more paint. That probably sounds funny, but I have a tendency to be conservative—oils are pricey. I wanted this painting to have more flow and texture.

Last Friday I got to go to a plein air workshop. It was my first experience painting landscapes outside. I’ll write about that another time. For now, I’ll say it was amazing and fun—and full of new challenges.


  • About Sara

    Thanks for visiting! I’m Sara, editor and writer, wife to Ian, and mother of two precious boys. I am living each day to the fullest and with as much grace, creativity, and patience as I can muster. This is where I write about living, loving, and engaging fully in family life and the world around me. I let my hair down here. I learn new skills here. I strive to be a better human being here. And I tell the truth.

    Our children attend Waldorf school and we are enriching our home and family life with plenty of Waldorf-inspired festivals, crafts, and stories.

    © 2003–2018 Please do not use my photographs or text without my permission.

    “Love doesn’t just sit there like a stone; it has to be made, like bread, remade all the time, made new.” —Ursula K. LeGuinn

  • Buy Our Festivals E-Books


  • Archives

  • Tags

  • Categories

  •  

  • Meta