A Messy, Dangerous Process

New Adventure

Yep. Tonight I begin. I was delayed slightly in this, my most recent, foray into madness. But that was a temporary setback, a mere postponement. Tonight I step into my first oil painting class with a humble, fearful heart. Nevertheless I step because my friends believe in me—so much so, they’ve funded my class fee as a birthday gift.

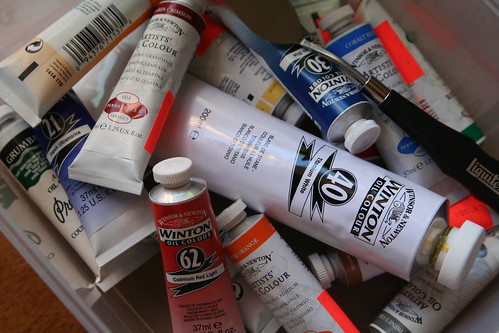
Yesterday evening I went to the art store and bought $200 worth of oil paints and canvas, much of which was on clearance.

OMG. That’s a lot of money for a lark, a whim, a hobby!

Yep. The voices in my head are really loud about all this, and mostly they are unkind. The harpies are out in full flight, screeching about how ridiculous is it to start this. Who am I to think I might paint? They’re dive-bombing me with doubt and scornful comments. It’s too expensive. It’s impractical. I don’t have enough time to fold all the laundry or work to earn my living, so what in the world do I think I’m doing taking a painting class?

And yet, I’m going. I’m going to try this because I’ve always, always wanted to. And because if a girl cannot find a way to fulfill a dream once in a while, what’s the point?

Both art and living share this: they are a messy, dangerous process. Might as well get messy.


Painting

I love to paint. So far, I paint only wall murals and eggs and the occasional watercolor. But I have a dream …

My loves pooled resources recently to buy me a spot in an oil painting class for my birthday. I mentioned my desire to take this class a few weeks ago and, although I didn’t know I was doing it, in hindsight I realize I was saying out loud what I want—and doing so despite the considerable cost, or the impracticality of it, or all the million and one other reasons not to do it. It’s quite amazing and I am (repeatedly) blessed to find that often when I do that, someone is listening, and ultimately I somehow get what I want. I never dreamed that my darlings would do this for me and was/am totally awestruck by the thoughtfulness of the gift.

Me. Oil painting.

I have wanted to do this since I was 9. No kidding.

This week I popped over to the gallery/art studio and paid for my class. I have six evening sessions (6-9 p.m.) to use over the next four months. I have a materials list in hand, and some cash left over from my patrons to put toward the supplies I’ll need.

The painting teacher is on vacation now but will return at the end of June. So next month, I will be painting. With oils. On canvas. And if it is even half as sublime and satisfying as I’ve always imagined it to be, I will rejoice. Even if I suck.

Thank you.

May Afterschool Enrichment Guide from Little Acorn Learning

Weave

The May Afterschool Enrichment Guide ebook, published by Little Acorn Learning is now available!. Publisher Eileen Foley Straiton creates marvelous ebooks that are perfect for homeschooling, preschool programs, and families. They are full of crafts, stories, poems, songs, activities, caregiver meditations, recipes, holiday celebration ideas, and more. Little Acorn Learning also publishes seasonal and festival ebooks, childcare menu guides, and lesson plan guides.

For this May ebook, I was delighted to create an original song, a bee and honeycomb mobile craft tutorial, a tutorial on making a Mother’s Day yarn necklace, and a piece about hosting a very scientific and super-sweet honey-tasting party.

Here is a peek at what the May guide contains:

Week One, May
May Day, Dancing

~Enjoy a May Dance Song
with Sheet Music!
~Make a Miniature Maypole for
Your Nature Table
~So Many Verses and Songs to Share with the Children
~Meditate on Living Your Life in Rhythm Like a Beautiful Dance
~Practice the Pennywhistle or Flute and Play ‘A Dance’ (click to hear
sample above) – also Recieve the MP3 Version to Listen!
~Make a Finger Woven Mother’s Day Necklace
~Learn About Walpurgus and Celebrate
Spring in the Swedish Tradition
~Read Books that Were Handpicked for You to
Celebrate the First Week of May!

Finger Weaving a Mother's Day Necklace Finished Mother's Day Yarn Necklace

Week Two, May
Flowers, Unfolding

~Make Felted Flowers
~Share Verses and Song Celebrating Growth
and Blooming Life
~Grow Eggshell Seedlings to Transplant into
Your Garden
~Make Flower Crowns to Celebrate Beltane
~Design a Beautiful Flower Window Star
~Make Edible Flower Ice and Share a Pitcher of
Colorful Lemonaide
~Meditate on Blooming in Your
Current Conditions to Bring Joy
and Love into Your Surroundings
and Find a Life of Peace

Honeycomb and Bee Mobile Project

Week Three, May
The Bee, Community

~Read Sweet Stories About These
Beautiful, Life
Spreading Creatures
~Host a Honey-Tasting Party in Your Own Backyard!
~Sing Songs of Honey, Nectar and Bees
~Make a Honeycomb and Bee Mobile
and Hang it Over Your Nature Space
~Play ‘When Bees Come Out’ (see sample above)
on Your Penny Whistle or Flute and
Receive the MP3 to Listen!
~Bake Honey Buns and Serve with Fresh
Honey Butter
~Make a Commitment to Get More Involved in
Your Local Community

Week Four, May
The Caterpillar, Transformation

~Make Caterpillar and Butterflies Out of Nature
~Create a Wool Caterpillar
~Needle Felt Butterflies
~Make a Cocoon
~Share a Story Verse as You Introduce Your Creations
to the Children
~Make a Pom-Pom Caterpillars
~Transform Your Current Situation by Living
Colorfully in the Present Moment
~Play a Sweet Caterpillar Cocoon Game using
Silks with the Children
~Sing Songs and Fingerplays of Butterflies,
Caterpillars and Change

Honey-Tasting Party

http://www.littleacornlearning.com/index.html

Tutorial: Earth Day Art Project

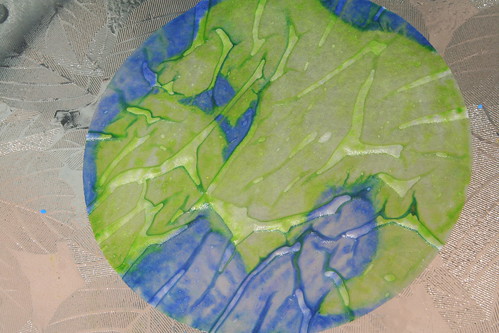
Finished Earth Art

We did a lickety-split Earth Day art project today. This is a quick, fun project for all ages. It couldn’t be easier and chances are pretty good you have these items on hand.

Materials

paper coffee filters
washable markers
spray bottle with water

Tutorial

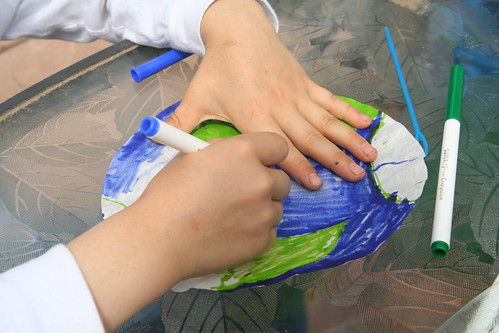
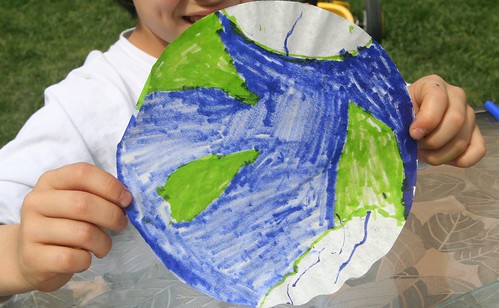
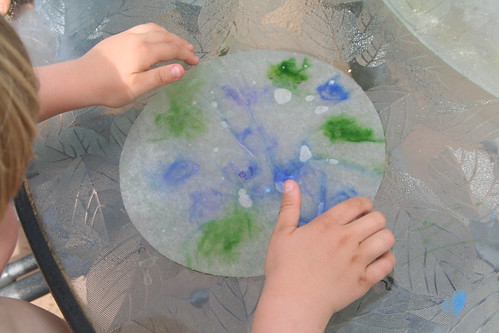
Using washable marker pens in blues and greens, color your coffee filter with continents and oceans. Although it can be fun to think about the shapes of the Earth’s real continents and try to draw them accurately, this isn’t at all important. You just want to create a “blue-green marble,” like our planet as seen from outer space.

Earth Day Art Project

Marker ink seeps quickly into the coffee filter, which is meant to absorb moisture. You don’t even have to worry about the white space in between marker pen strokes.

Earth Day Art Project

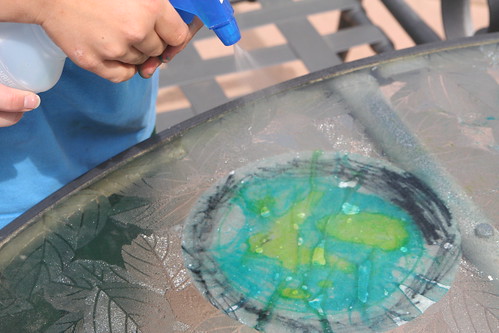
When you are satisfied with your continents and oceans, lay your coffee filter down flat on your table surface and spray it lightly with water from the spray bottle.

Earth Day Art Project

The ink will begin to run together and spread, like a watercolor painting.

Earth Art

I recommend that you don’t spray too much water on the earth; if you do, the colors may get very mixed and muddy. Stop while you’re ahead, as soon as the earth is saturated. This is difficult for children, because spraying is so much fun! My kids kept picking up their earth. I think this contributed to their colors mixing so much.

Earth Art

Leave your wet earth on the table top to dry. We did ours outside and they were dry within 20 minutes or so. As they dry, they may try to blow away.

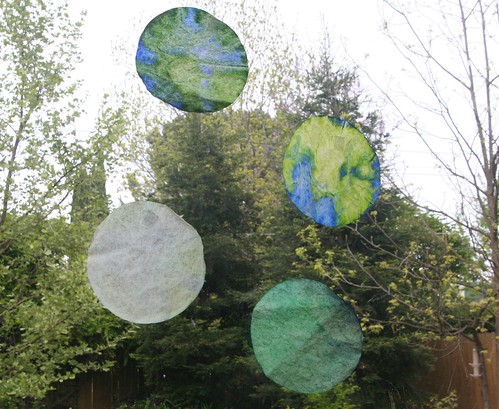
As soon as your earths are dry, they can be taped up in a window. If they are too wrinkly for your taste, gently iron them on medium heat (and without any water spray or steam). Of course, you may wish to make a whole solar system, or perhaps yet-to-be discovered planets of your children’s own invention. Have fun!

Eggs and Bunnies

Cherry Blossoms

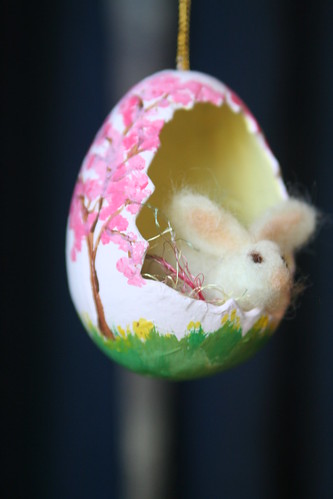
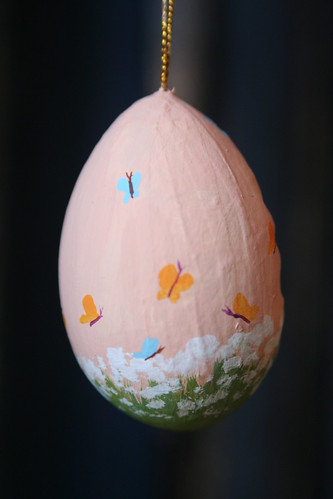
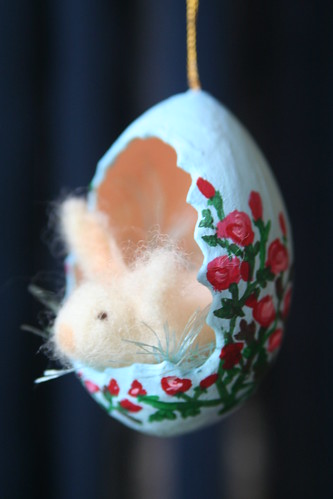
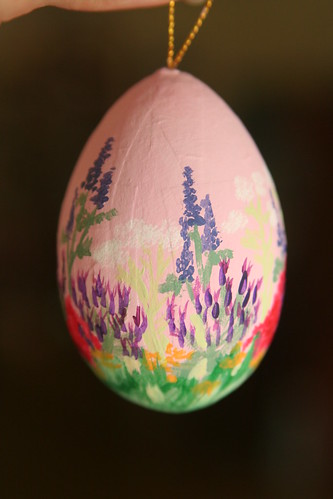
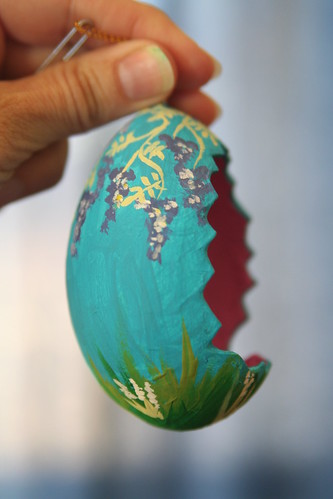
A darling old friend of mine asked me to make some Easter eggs and bunnies for her to give as gifts for Easter. The 2.5-inch egg bases are a paper mache with a cutout and are from the craft store. The needle-felted bunnies I made from scratch fit nicely inside, with a bit of colorful eyelash yarn that looks rather like Easter basket grass. Making these has been an exciting project and super fun, but also a little bit nerve-wracking. I mean, what makes me think I can paint well enough for someone else? (Hear that? Those are the Weasles of Doubt and Fear talking.) The above design is cherry trees in blossom.

Wildflowers: Daisies and California Poppies

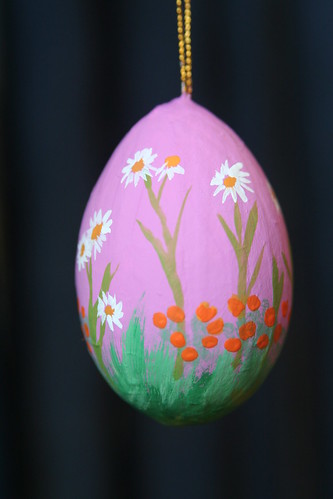
Here is a kind of wildflower design, with daisies and California poppies.

Meadow with Butterflies

A low-key meadow with butterflies. This one isn’t quite as girly, in my opinion.

Roses

Here is one with red roses that wrap all the way around the egg.

Bamboo

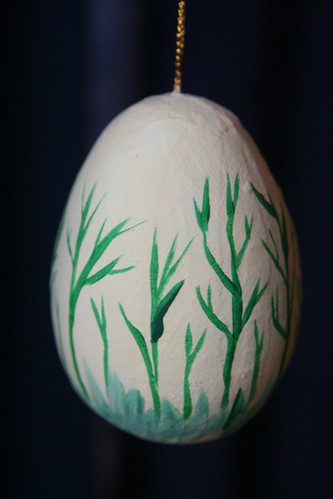
A kind of stylized bamboo design, meant for a male recipient. Simple and elegant, I hope.

Irises

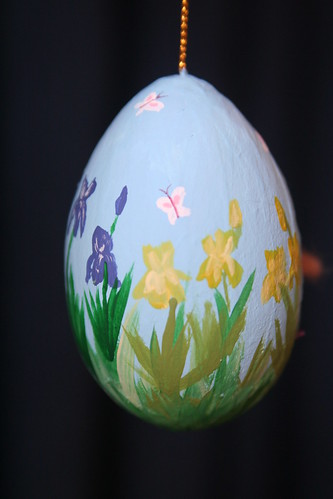
More butterflies and bearded irises, which are now in bloom.

English Garden

English country garden in spring, with azalea, Spanish lavender, and white Queen Anne’s lace.

Wisteria

Wisteria vines in bloom.

I also have two others that feature bright tulips and delphinium flowers. There are ten egg and bunny pairs in all. I am shipping them out to my friend today. I hope she likes them!

This Moment: I Can Draw!

This Moment: I Can Draw!

Inspired by SouleMama {this moment} – A Friday ritual. A single photo – no words – capturing a moment from the week. A simple, special, extraordinary moment. A moment I want to pause, savor and remember.

Tutorial: Make a Leprechaun Ring

I decided I wanted to make a new decoration for St. Patrick’s Day this year, and since Lucas was home sick for a couple of days, I took some time to work on it. Although it’s probably too late for anyone to make this for this year, I’m going to walk you through the steps to make a jolly ring of dancing leprechauns. Because this project has multiple pieces to it, this will be long.

I would say that anyone with a medium amount of needle-felting experience can make one of these, as I consider myself to be an intermediate-level needle-felter. So, without further ado, let’s get started.

Materials

* wool roving in plain white and multiple greens and browns; you may also want scarlet (leprechauns in some Irish stories wear scarlet caps or scarlet vests)
* foam base and felting needle (any guage)
* chenille stems for crafts (aka pipe cleaners)
* multiple-needle felting tool (optional)
* carding brushes (optional)

Step 1: Fashion a round mat of white wool. Use your multineedle felting tool if you have one, for it will make the creation of the wool mat faster. You want your mat to be a good 1/2 inch thick, when it’s firmly felted.
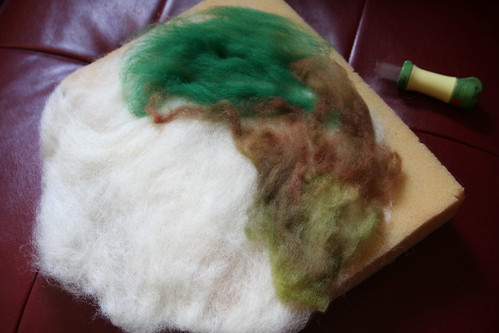
Leprechaun Ring Base in Progress

Step 2: Now add thin layers of colored wool in any arrangement you like to the top of your white mat. I used a mix of greens and browns to create a realistic patch of earth.
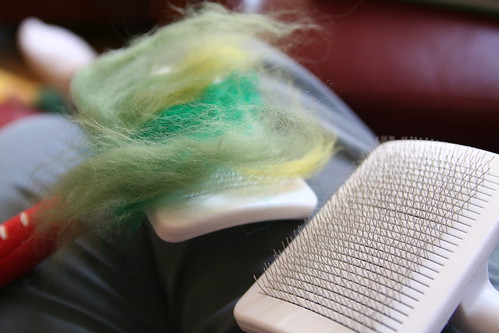
Carding Green Wool

You’ll get more realism if you card some greens and browns together to create a blend of colored wool for your mat. Occasionally lift your round mat off the foam felting pad and needle it from the back for a while. Flip it again, working the wool from both sides to felt the fibers together.
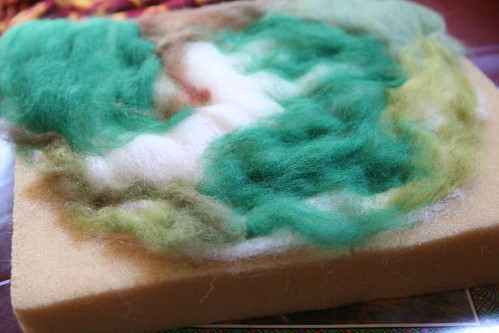
Leprechaun Ring Base in Progress

Keep felting until the whole mat is fairly firm and holds together when you lift it up. Here’s how my mat looked when I felt it was done.
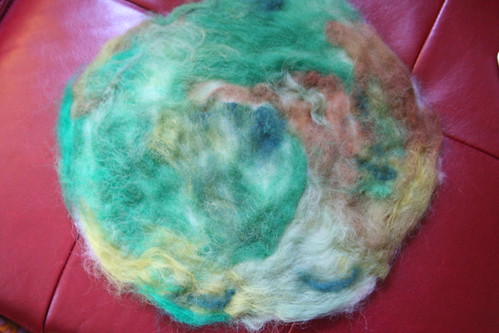
Leprechaun Dancing Ring Base

Step 3: Begin your first leprechaun. Bend one whole chenille stem (I like to use white) in half gently. Now hold it about an inch down from the top bend and twist the top using your other hand. You’ve just created a loop at the top. Open it out into an oval shape of wire. Cut another chenile stem in half. This will be your figure’s arms. Just where the neck is, twist your small chenille stem so that it anchors onto the neck like you see in the photo below. Now you have a wire skeleton. Bend over the ends where the feet and hands are a tiny bit so that there’s no pointy wire sticking out. Roll a small ball of wool and place it inside the wire oval. Begin felting it into a nice head shape.
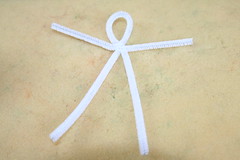
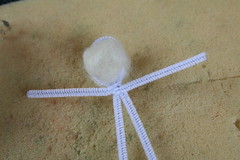
Skeleton Leprechaun in Progress

Step 4: Now begin wrapping your skeleton with small bands of wool roving, needling it down into place so that it stays together by attaching the fibers. Wrap more and more wool and continue needling until your Leprechaun has a “body” of white wool. The hands are the trickiest part, in my opinion. You have to wrap them enough so that the chenille stem is invisible, but not so much that you have big, puffy hands.
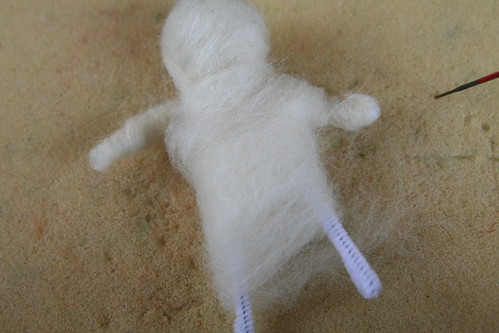
Leprechaun in Progress

Here’s my lady Leprechaun in progress. She is just about ready for clothing. The more you needle your figure, the denser the wool will become. By focusing on certain parts, you can sculpt the wool to be dense and narrow where you want it to be, such as at the figure’s neck and arms.
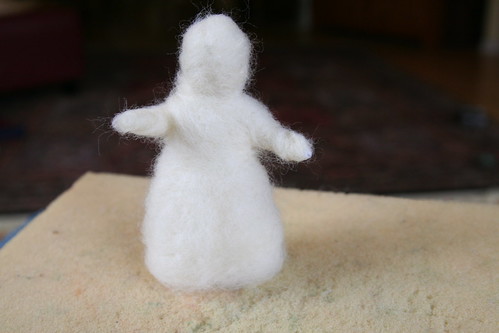
Leprechaun Woman in Progress

Below is a male Leprechaun in progress. For male figures (or female figures wearing trousers), you have a choice: You can fashion the legs together (just like you would for a skirt for a female form) and then create the impression of separate legs by needling a line down the front of the figure, or you can wrap each leg separately. The advantage to creating separate legs is that your Leprechaun will look more like he’s dancing. The disadvantage is that it’s much harder to get the Leprechaun to stand upright and not fall over. (More about that later.) If you intend for children to handle or play with your Leprechauns, you should create a sturdy base by keeping the legs together.
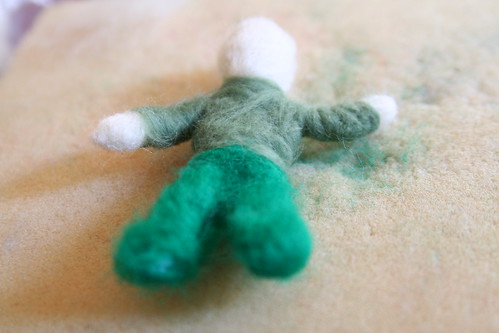
First Leprechaun in Progress

Step 5: Dress your Leprechaun with bits of colored wool, needled down into the white body. I decided my Leprechauns would all wear greens, but in my reading about Leprechauns, I’ve found a number of stories that refer to little men in scarlet caps or red vests, too. Obviously, if you are making gnomes or fairies rather than Leprechauns, your “clothing” can be in any colors you wish to reflect their characters.
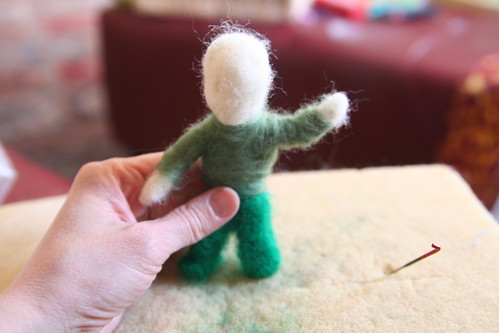
First Leprechaun in Progress

Step 6: Now give your figure some hair and/or a beard. My Leprechaun men didn’t look complete to me until I gave them caps for their heads also. It’s easy to create elaborate hairstyles for your lady Leprechauns, if you want. If you prefer your soft sculpture dolls to be in the Waldorf style, then leave their faces blank. Your child’s and your imaginations will fill in their features. If you’d rather give your Leprechauns faces, feel free to do so. Your needle can even sculpt delicate or bulbous noses, eyes, mouths, and eyebrows, if you like. Hmmm … I wonder what color eyes Leprechauns have.
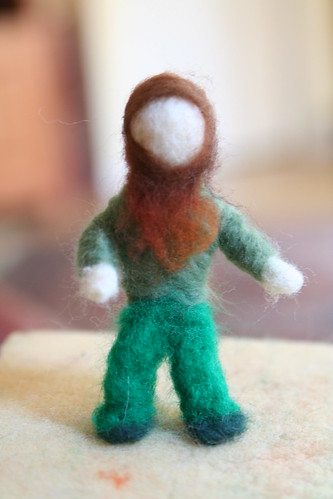
First Leprechaun in Progress

Step 7: Repeat steps 3 through 6 until you have as many Leprechauns as you want! I managed to make four, two men and two women. I think I’d like to craft two Leprechaun children to add to my group, but I ran out of time this year.
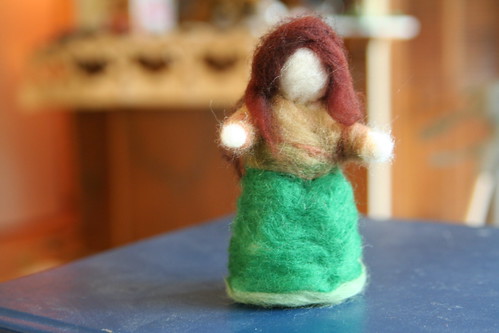
Finished Leprechaun Woman

Step 8: Now arrange your Leprechauns in a ring on your needle-felted mat, and begin needling their feet into the mat. You may have to do this a long time to get them to stand, especially if you made the male Leprechauns with separated legs. Mine wanted to fall over a lot (that’s the disadvantage I mentioned earlier). I opted to place “ribbons” or cords in their hands, to help complete the ring. My son Lucas enjoyed braiding bits of roving to create the cords for the figures to hold. If there were more than four figures, I don’t think the ribbons would be necessary. Once you get them balanced, you may want to leave them be! Will your Leprechauns face outward or face into the ring?
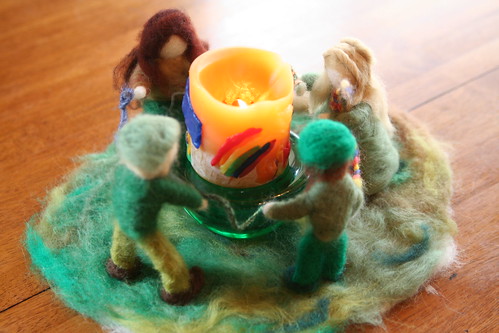
Leprechaun Ring

Here’s my finished Leprechaun ring. I also took a shot of them dancing around a pot of gold.
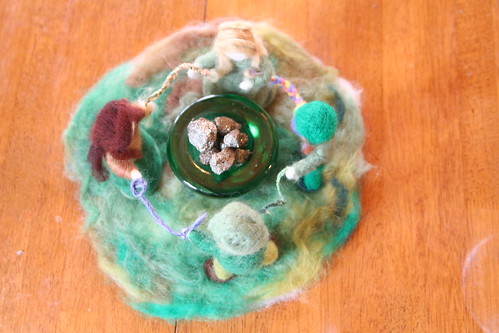
Leprechaun Ring with Pot of Gold

Now put on some Irish music and dance like your Leprechauns! Please let me know if this tutorial is helpful to you.

Needle-Felted Tapestries by Lucas

Lucas's Needle-Felted Picture: Butterfly

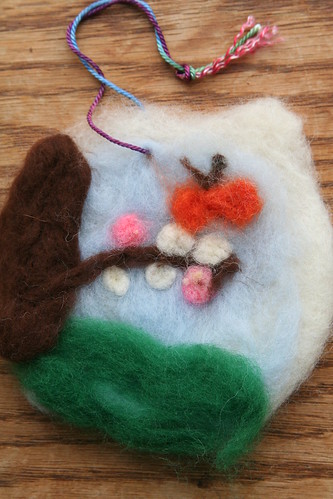
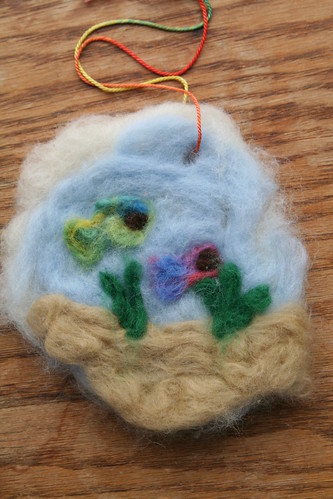
Here are two needle-felted tapestries that Lucas recently made to give as gifts. The above tapestry was given to Aunt Kellie for her birthday. These were both wholly conceived and executed by my darling almost-9-year-old. Both are about six inches in diameter.
Lucas's Needle-Felted Picture: Fish

This one of tropical fish is a belated birthday gift for another family member. We still have to give it, though, so I won’t say who the recipient will be.

I’ve been crafting a bit myself in fits and spurts, but I’m not ready to show my creations yet. I also have a big fat book edit going on now and it’s eating up my time. I am grateful for my glorious weekend spent among friends; I am trying hard to let it buoy me up this week.

I don’t have many words right now. I’m shocked and grieving for the people of Japan, and I wish I had resources to send.

Doctors Without Borders is taking donations here.

The American Red Cross is accepting donations here.


Treasure: The Stars Will Still Shine

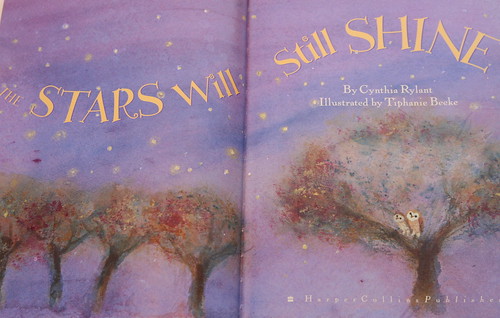
Title Page Stars Will Still Shine

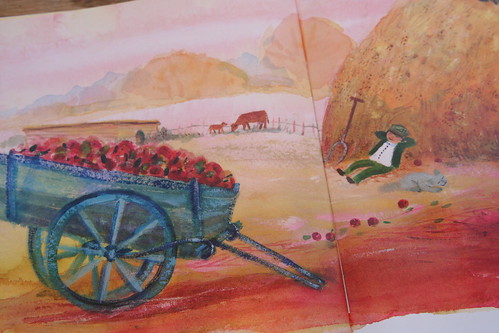
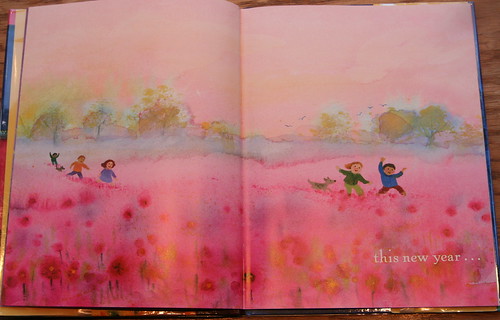
I’ve been meaning to share this picture book for weeks now. The Stars Will Still Shine  is by Cynthia Rylant, a powerhouse of a children’s author. Pretty much everything she writes turns to gold and her credentials are impressive, to say the least. This simple book reminds us that even as things change, they still stay the same, a reassuring message that even I need to hear once in a while.

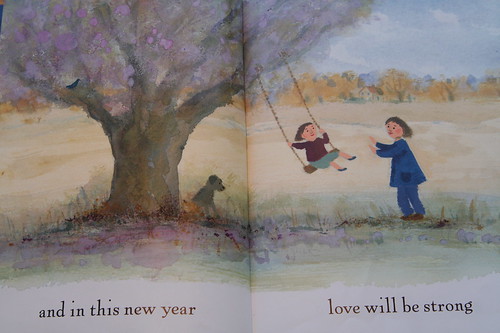
This new year

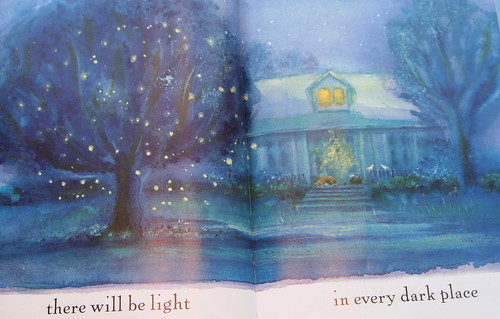
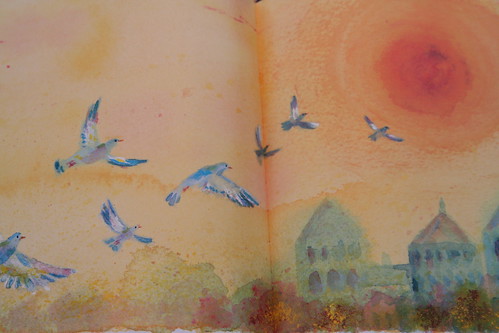
Tiphanie Beeke is the illustrator and I think her watercolor paintings are sublime, full of a dreamy sweetness and plenty of lush color.

Love will be strong

The words and images are simple. The good things in life are celebrated in this book—ice cream, cuddly pets, swinging on the swing.

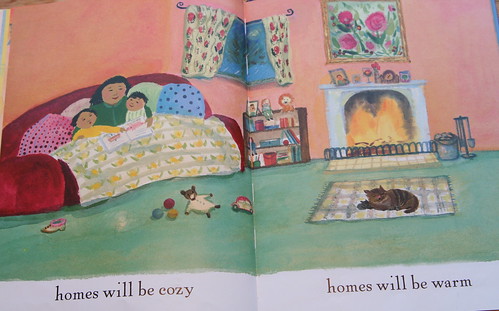
Homes will be cozy

There will be light in every dark place

Family gathered around a table, playing with friends, flying kites, birds flying in the sky, seasons changing—these are the essential experiences of children everywhere. Any child, from baby to first grader, will easily relate. Furthermore, I would fully recommend this book for any child who is feeling stressed, grieving, or going through a difficult transition.

Harvest rest

“The sky will still be there, the stars will still shine …

Birds

birds will fly over us, church bells will chime.”

March Afterschool Guide from Little Acorn Learning

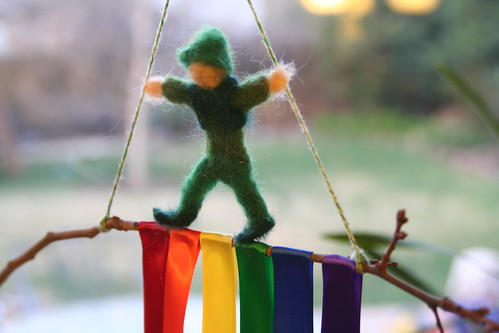
Leprechaun Mobile

I’m taking this opportunity to crow a moment and say how pleased I was to be invited to contribute to the March Afterschool Enrichment Guide ebook, published by Little Acorn Learning. Publisher Eileen Foley Straiton creates marvelous ebooks that are perfect for homeschooling, preschool programs, and families. They are full of crafts, stories, poems, songs, activities, caregiver meditations, recipes, holiday celebration ideas, and more. Little Acorn Learning also publishes seasonal and festival ebooks, childcare menu guides, and lesson plan guides.

For this March Afterschool Enrichment Guide ebook, I created two original craft project tutorials and wrote an article on observing Lent and the concept of sacrifice.

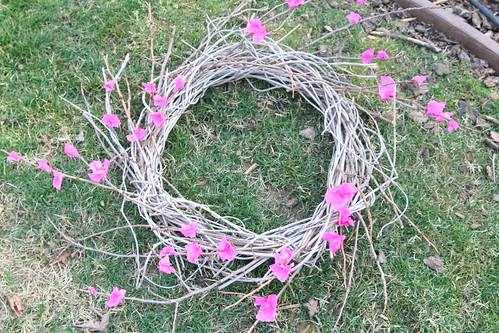
Blooming Winter Wreath

I was surprised and happy to see that my little leprechaun is featured on the front “cover” of the ebook.

By all means, check out the Little Acorn Learning website and see the week-by-week activities; here is a brief list of the themes for March.

Week 1: Fairies and Dragons, Magic

Week 2: the Season of Lent, Sacrifice

Week 3: St. Patrick’s Day, Luck

Week 4: Spring’s Return, New Life

Week 5: Rainbows, Creating Color

You can also download a FREE 23-page ebook all about rainbows (from Week 5). Who doesn’t love rainbows? It’s a sample of what you’ll get if you buy the March Afterschool Enrichment Guide. It’s fun for the whole family!

It was tons of fun to work on these projects and I’m honored to have my work presented alongside that of so many talented, creative, wise women! Thank you, Eileen!


  • About Sara

    Thanks for visiting! I’m Sara, editor and writer, wife to Ian, and mother of two precious boys. I am living each day to the fullest and with as much grace, creativity, and patience as I can muster. This is where I write about living, loving, and engaging fully in family life and the world around me. I let my hair down here. I learn new skills here. I strive to be a better human being here. And I tell the truth.

    Our children attend Waldorf school and we are enriching our home and family life with plenty of Waldorf-inspired festivals, crafts, and stories.

    © 2003–2018 Please do not use my photographs or text without my permission.

    “Love doesn’t just sit there like a stone; it has to be made, like bread, remade all the time, made new.” —Ursula K. LeGuinn

  • Buy Our Festivals E-Books


  • Archives

  • Tags

  • Categories

  •  

  • Meta