Tutorial: Make a Leprechaun Ring
I decided I wanted to make a new decoration for St. Patrick’s Day this year, and since Lucas was home sick for a couple of days, I took some time to work on it. Although it’s probably too late for anyone to make this for this year, I’m going to walk you through the steps to make a jolly ring of dancing leprechauns. Because this project has multiple pieces to it, this will be long.
I would say that anyone with a medium amount of needle-felting experience can make one of these, as I consider myself to be an intermediate-level needle-felter. So, without further ado, let’s get started.
Materials
* wool roving in plain white and multiple greens and browns; you may also want scarlet (leprechauns in some Irish stories wear scarlet caps or scarlet vests)
* foam base and felting needle (any guage)
* chenille stems for crafts (aka pipe cleaners)
* multiple-needle felting tool (optional)
* carding brushes (optional)
Step 1: Fashion a round mat of white wool. Use your multineedle felting tool if you have one, for it will make the creation of the wool mat faster. You want your mat to be a good 1/2 inch thick, when it’s firmly felted.
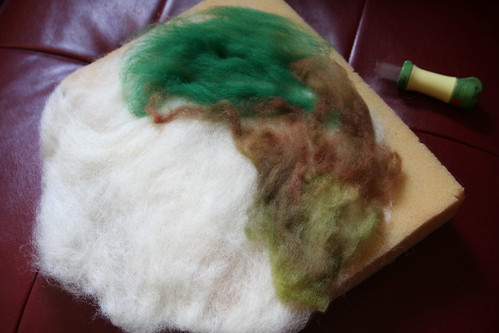
Step 2: Now add thin layers of colored wool in any arrangement you like to the top of your white mat. I used a mix of greens and browns to create a realistic patch of earth.
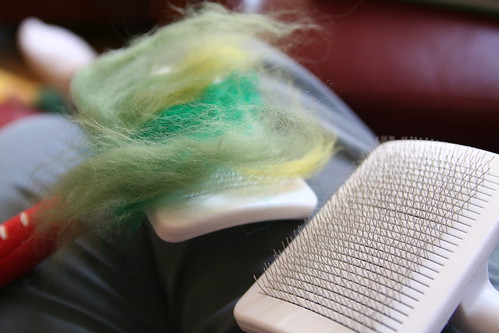
You’ll get more realism if you card some greens and browns together to create a blend of colored wool for your mat. Occasionally lift your round mat off the foam felting pad and needle it from the back for a while. Flip it again, working the wool from both sides to felt the fibers together.
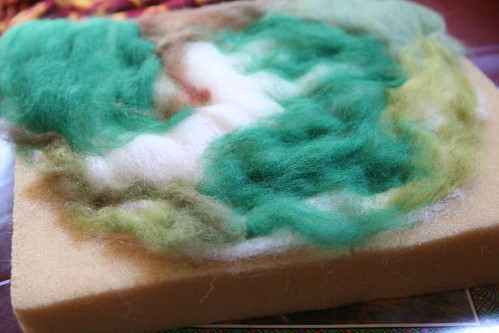
Keep felting until the whole mat is fairly firm and holds together when you lift it up. Here’s how my mat looked when I felt it was done.

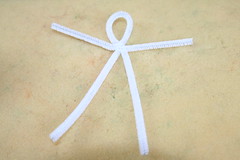
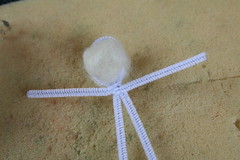
Step 3: Begin your first leprechaun. Bend one whole chenille stem (I like to use white) in half gently. Now hold it about an inch down from the top bend and twist the top using your other hand. You’ve just created a loop at the top. Open it out into an oval shape of wire. Cut another chenile stem in half. This will be your figure’s arms. Just where the neck is, twist your small chenille stem so that it anchors onto the neck like you see in the photo below. Now you have a wire skeleton. Bend over the ends where the feet and hands are a tiny bit so that there’s no pointy wire sticking out. Roll a small ball of wool and place it inside the wire oval. Begin felting it into a nice head shape.
Step 4: Now begin wrapping your skeleton with small bands of wool roving, needling it down into place so that it stays together by attaching the fibers. Wrap more and more wool and continue needling until your Leprechaun has a “body” of white wool. The hands are the trickiest part, in my opinion. You have to wrap them enough so that the chenille stem is invisible, but not so much that you have big, puffy hands.
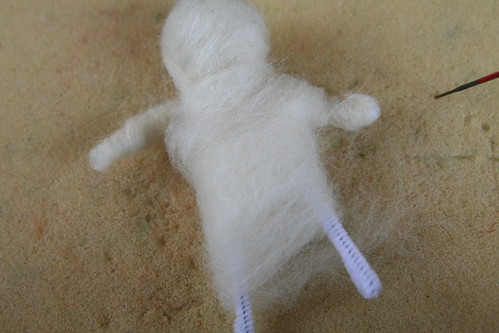
Here’s my lady Leprechaun in progress. She is just about ready for clothing. The more you needle your figure, the denser the wool will become. By focusing on certain parts, you can sculpt the wool to be dense and narrow where you want it to be, such as at the figure’s neck and arms.

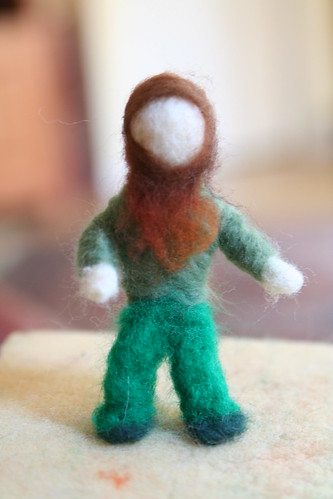
Below is a male Leprechaun in progress. For male figures (or female figures wearing trousers), you have a choice: You can fashion the legs together (just like you would for a skirt for a female form) and then create the impression of separate legs by needling a line down the front of the figure, or you can wrap each leg separately. The advantage to creating separate legs is that your Leprechaun will look more like he’s dancing. The disadvantage is that it’s much harder to get the Leprechaun to stand upright and not fall over. (More about that later.) If you intend for children to handle or play with your Leprechauns, you should create a sturdy base by keeping the legs together.
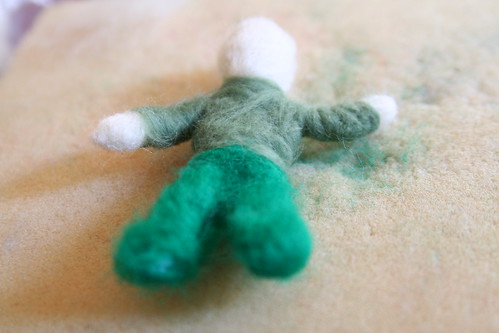
Step 5: Dress your Leprechaun with bits of colored wool, needled down into the white body. I decided my Leprechauns would all wear greens, but in my reading about Leprechauns, I’ve found a number of stories that refer to little men in scarlet caps or red vests, too. Obviously, if you are making gnomes or fairies rather than Leprechauns, your “clothing” can be in any colors you wish to reflect their characters.
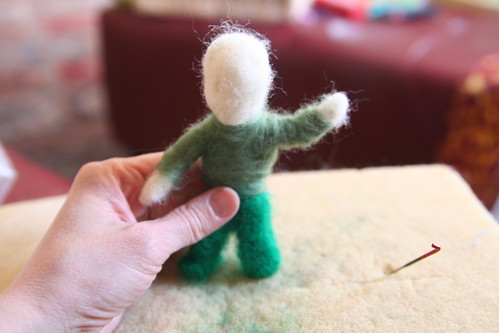
Step 6: Now give your figure some hair and/or a beard. My Leprechaun men didn’t look complete to me until I gave them caps for their heads also. It’s easy to create elaborate hairstyles for your lady Leprechauns, if you want. If you prefer your soft sculpture dolls to be in the Waldorf style, then leave their faces blank. Your child’s and your imaginations will fill in their features. If you’d rather give your Leprechauns faces, feel free to do so. Your needle can even sculpt delicate or bulbous noses, eyes, mouths, and eyebrows, if you like. Hmmm … I wonder what color eyes Leprechauns have.
Step 7: Repeat steps 3 through 6 until you have as many Leprechauns as you want! I managed to make four, two men and two women. I think I’d like to craft two Leprechaun children to add to my group, but I ran out of time this year.

Step 8: Now arrange your Leprechauns in a ring on your needle-felted mat, and begin needling their feet into the mat. You may have to do this a long time to get them to stand, especially if you made the male Leprechauns with separated legs. Mine wanted to fall over a lot (that’s the disadvantage I mentioned earlier). I opted to place “ribbons” or cords in their hands, to help complete the ring. My son Lucas enjoyed braiding bits of roving to create the cords for the figures to hold. If there were more than four figures, I don’t think the ribbons would be necessary. Once you get them balanced, you may want to leave them be! Will your Leprechauns face outward or face into the ring?
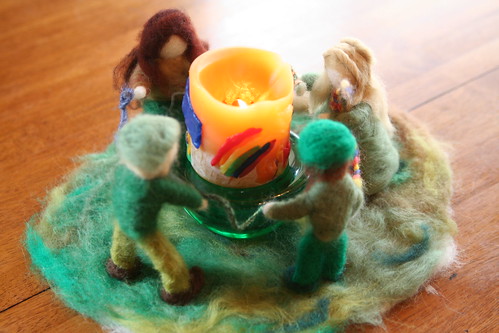
Here’s my finished Leprechaun ring. I also took a shot of them dancing around a pot of gold.

Now put on some Irish music and dance like your Leprechauns! Please let me know if this tutorial is helpful to you.


March 17, 2011 at 9:36 am
I love the tutorial! You make needle felting look so easy.
I love that we call pipe cleaners, ‘chenille stems’ now. 🙂
March 17, 2011 at 1:42 pm
Thanks, Amani! It was fun and I plan on writing more of these. Just had to get up the confidence.
March 30, 2011 at 5:02 pm
I love this! What a great way to encourage imagination. I might have to work on my skills and try this.
April 2, 2011 at 9:07 am
Thanks, Amy! You can do it! Needle-felting is easier than I thought it could be.
April 5, 2011 at 1:42 pm
Just loved this. Loved it so much, I included it in my Easter Crafts blog post! Love to you and all your boys, big and small! 🙂
http://gatesofgrace.wordpress.com/the-gates-family-circus/here-comes-peter-cottentail/
March 8, 2012 at 8:43 pm
This is beautiful ! I love the little people, I haven’t done much neeedle felting, but I must try making some of these. thanks for this tutorial !
March 12, 2012 at 10:44 am
Thank you, Carole. I find needle-felting to be quite easy and very rewarding. I hope you enjoy it!