Harry Potter 2.0

IMG_2742

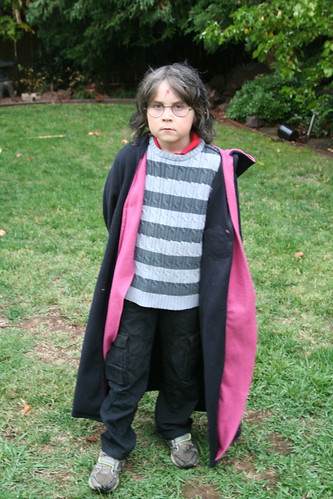
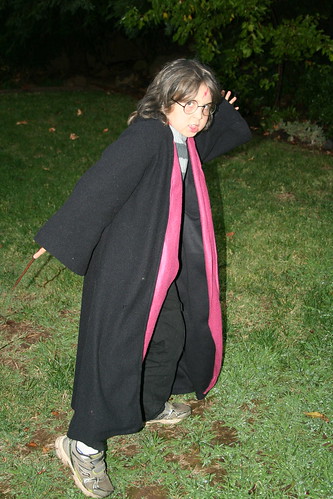
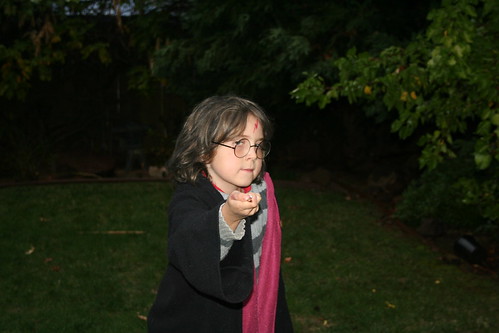
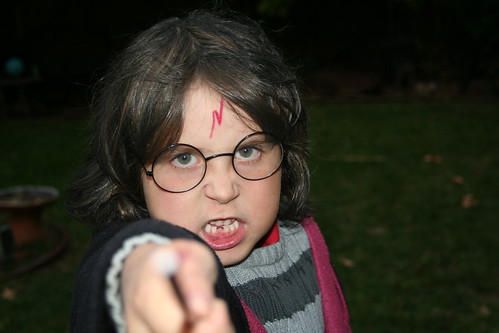
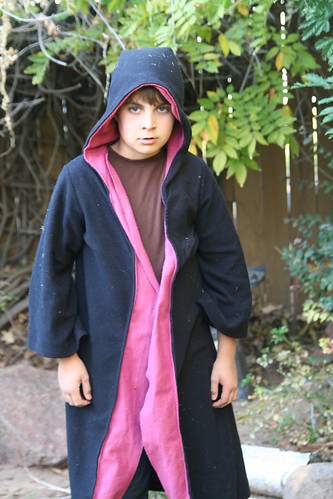
I wasn’t the least bit surprised when Asher decided to be Harry Potter for Halloween this year. Ian had been reading Harry Potter books aloud to our family since April. But I was surprised to learn that he was coming up with costume ideas that weren’t his first choice (devil, dementor)—until we told him it didn’t matter that his hair is blond and Harry Potter’s hair is black, that he could still be Harry Potter by either ignoring the difference or changing his hair color for the night of Halloween. Once Asher heard that it was possible to spray his hair black for the costume, he was all in, and didn’t once mention devil or dementor after that.

It got me thinking: How many kids confront this and get stuck believing they can’t dress the way they want for Halloween because they don’t already look exactly like the character they want to be—their hair isn’t the right color, their skin isn’t the right color. Or worse, that they cannot be who they want because they “don’t look” the part. Ooooof.

IMG_2739

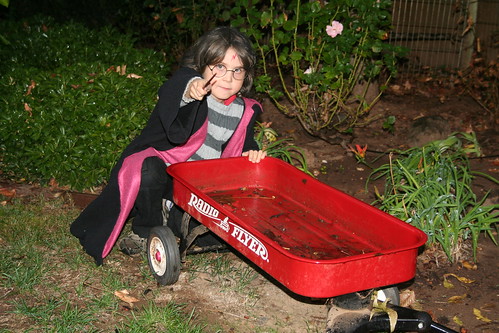
As parenting conundrums go, I feel that I got off easy on this one. A can of black hair spray for $2.99 and our problem was solved. Confidence and daydreaming was thereafter restored to full capacity.

IMG_2745

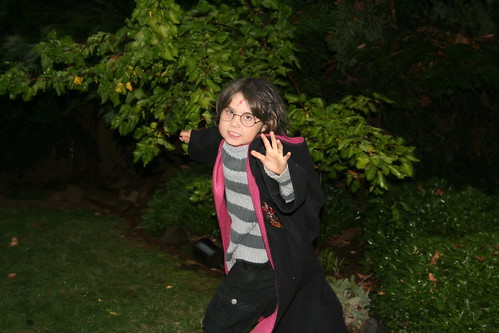
We were able to use Lucas’s old Gryffindor robe again. We just had to glue the Gryffindor patch back on it. Asher was adamant about not wearing a Gryffindor tie and button-down shirt, and with the second kid, well, you don’t argue about that stuff. Especially when your kid is willing to wear warm pants, a sweater, and a jacket-like robe on Halloween night.

IMG_2744

IMG_2743

IMG_2749

20141031_153357

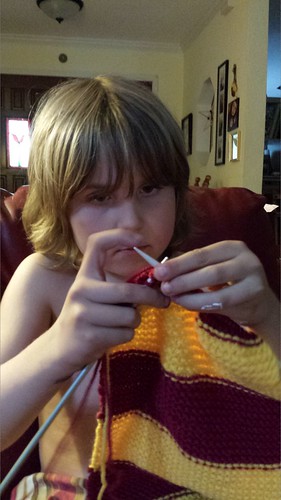
He even helped me finish knitting the Gryffindor scarf—which he wore trick-or-treating—that Lucas and I started a long time ago.

Harry Potter #7yearold #secondgrader #secondgrade #halloween

IMG_2750

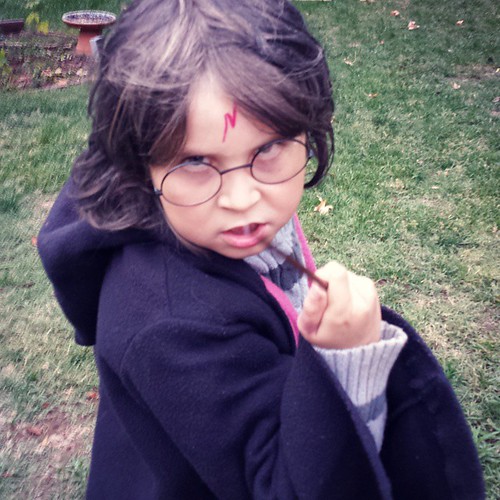
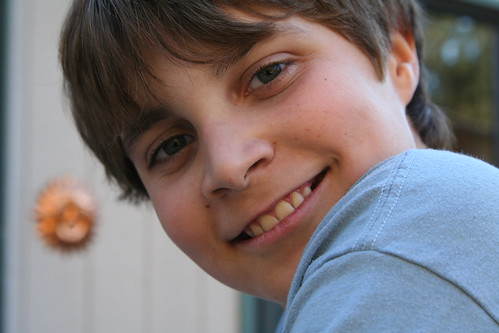
And this—this boy—kills me with his intensity, his passion, his drive, his imagination. His black hair, lightning bolt scar, and genuine green eyes. The boy who lived.

He inspires me every day.

Here’s a throwback to when Lucas was Harry Potter for Halloween; that year (2010), Asher was Hedwig.

Halloween Fun 2013

IMG_9167

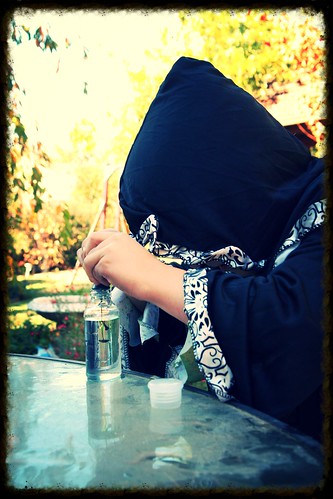
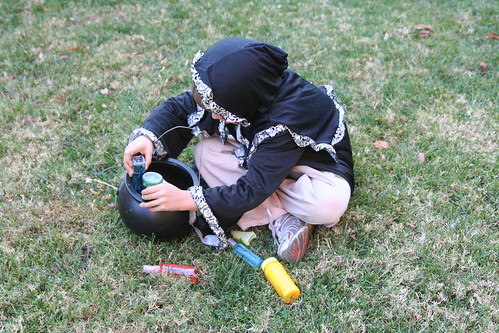
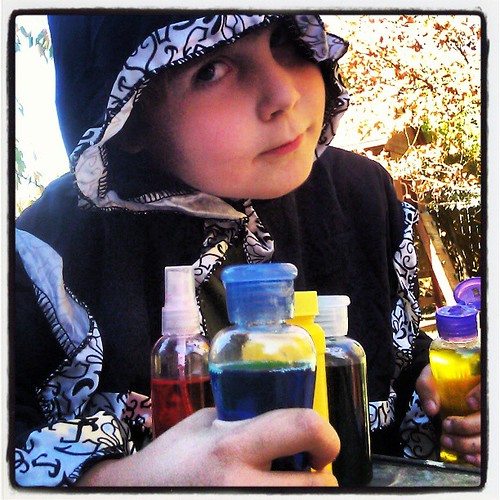
Well, with store-bought costumes and some travel toiletry bottles we had a wonderful Halloween. My little Potion-Maker loved everything about making the potions he wanted to carry along with him as part of his costume. So instead of spending the afternoon sewing, we did this.

IMG_9172

With four little clear bottles, some food dye, water, and one bottle of bubbles, Asher had a ton of fun. He even picked herbs from our garden to add into his potions, elixirs, philtres, and tonics.

IMG_9158

IMG_9214

IMG_9276

He really got into the part.

Potion-Maker

“Would you like a sample, my dear?”

IMG_9244

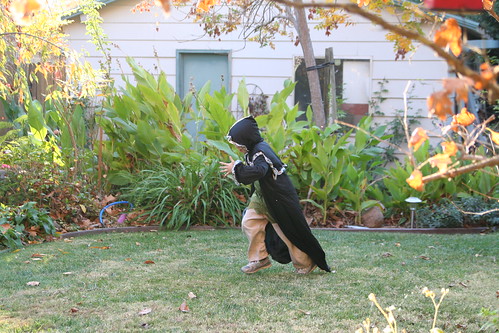
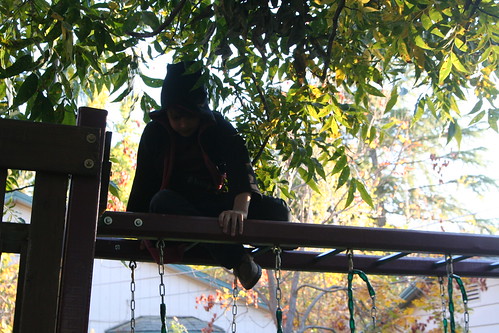
Lucas was an Assassin. With a plastic katana and an old Harry Potter robe, he was quite happy. I think the blooming adolescent in him may have been relieved that his costume was a little downplayed. (But it didn’t stop him from playing assassin, running, climbing, jumping, and slicing with his sword.) I suspect next year he will want to be something really scary or gruesome.

IMG_9247

Watch out. Assassins are everywhere.

IMG_9195

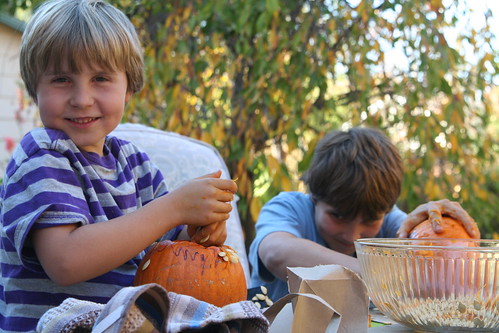
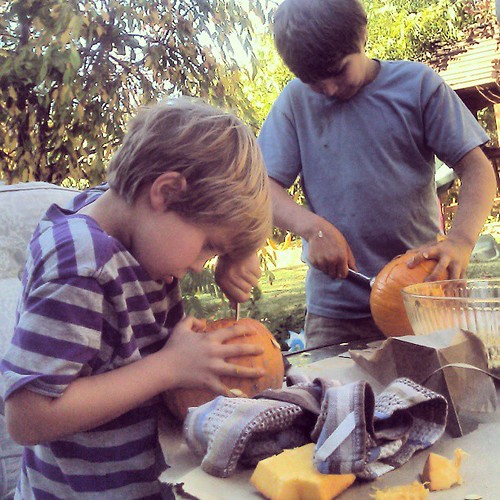
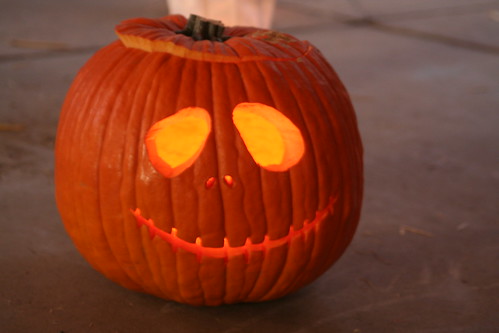
Because it was a half-day at school, we had a little time to carve jack-o’-lanterns on this beautiful autumn afternoon.

IMG_9187

upload

(Since Halloween, our chickens have enjoyed eating the remains of our jacks.)

IMG_9242

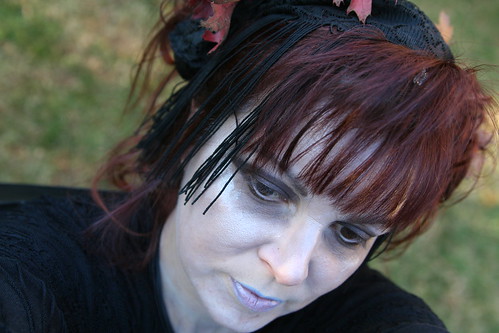
I figured out a costume for myself too: I went as the Cemetery Fairy. I figure that if there are fairies of the woods, meadows, fields, and seashores, there must also be fairies that take care of cemeteries too. At first, Asher didn’t like seeing me in white makeup with dark circles under my eyes and pale blue lips. But after a moment of thought, he decided he wasn’t going to be upset about it. “Go ahead, Mama. It’s OK.” Lucas took this cool photo above for me.

IMG_9290

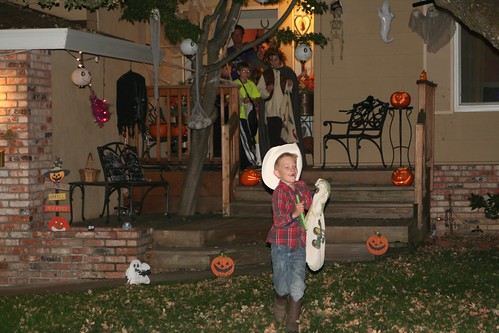
We spent the rest of the evening at a party at our friends’ home. Lucas and Asher enjoyed seeing their school friends and trick-or-treating with them. The neighborhood was really decorated and all the neighbors seemed to enjoy the spooky fun. Many people answered their doors wearing costumes! Lots of trick-or-treaters were out roaming. There’s something really marvelous about being a kid outside at night, running wild. Kids don’t get to do that much nowadays, so I think Halloween is just what the witch doctor ordered.

IMG_9323

My kids got a huge haul of candy, some of which they sacrificed to the Halloween Fairy, aka Candy Fairy or Sugar Sprite. She was generous, I tell ya! Both kids got LEGO sets.

Another Sixth Birthday Gift: Earthbender Costume

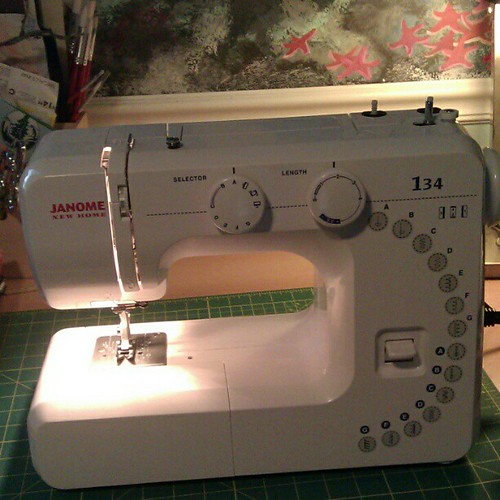
My new baby: Janome New Home Christmas present from my mom and dad.

My parents bought me this awesome sewing machine for Christmas. It’s my third machine. I am still learning and I’m kind of hard on them. (For the record, two of my sewing machines work and one of them is a perfect learning machine. I thought I might let Lucas take it for a spin.) But this new one—this Janome New Home—is all mine. (Besides, Mom gets nervous whenever I go near her Bernina.)

pieces

Back in December I conceived of giving Asher an Earthbender costume, inspired by one of our family’s favorite shows, Avatar the Last Airbender. Asher has always been fondest of the Earthbending skill, and when he plays at “bending,” he is always an Earthbender. Maybe it’s because green is his favorite color. At first, I thought this costume might be a Christmas gift, but then I realized it was more appropriate for his sixth birthday.

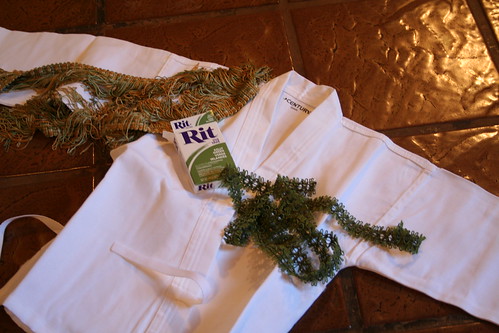
So I bought a mini gi. (Actually, I bought two. The first was too mini.) I know my limitations and I realized I could spiff-up a gi more efficiently than I could make one from scratch.

Dyed Earthbender Costume in Progress

I spent a day last week dyeing the top green and the pants and belt a taupe color. Pale yellow would have been nicer, but that wasn’t an option when buying dye.

IMG_4062

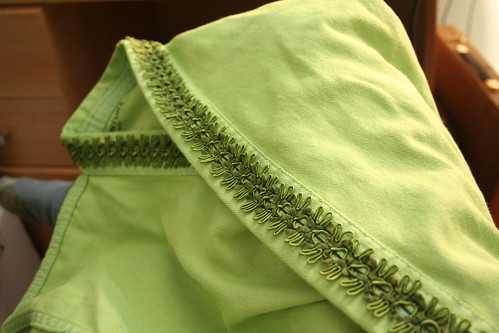
My mom and I carefully picked out some fancy trim, and last night I got my new sewing machine out and put it to use. I even changed the needle to a denim one, to go through all the layers of the gi edge! I read the manual and everything! Amazingly, my boys slept through my sewing.

IMG_4064

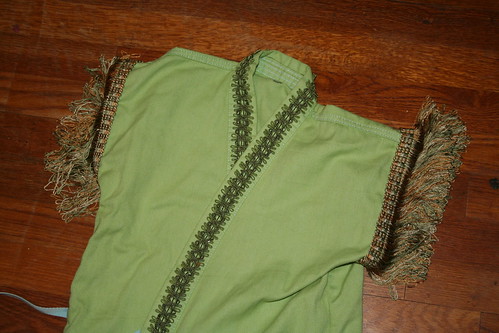
I cut off the sleeves and sewed on this gold and green fringe. I wanted the costume to look like a cool martial arts gi, but not exactly like a karate uniform. I have one day left before Asher’s birthday gift will be presented to him. I’m presently debating about whether to use the sleeves I cut off to make wrist bands or a headband. I hope to decorate this final item(s) with the Earthbender symbol.

150px-Earthbending_emblem

Today I spent the morning in Asher’s kindergarten class with him, to help celebrate his birthday at school. His teacher told me that yesterday she asked him what he wished for. He said he wished for infinite wishes, and for a closet full of costumes. A CLOSET FULL OF COSTUMES!

Maybe I actually have made him the right birthday gift. … Or maybe he won’t wear it at all. That’s also a possibility. If he does like it and wear it, I’ll be sure to get a photo.

Anyway, there’s just one hour left in this Circle of Moms Top 25 Creative Moms contest. Here’s the button to vote for me. My gratitude goes out to all the wonderful friends and readers who have voted for me daily over the last two weeks. Thank you for the support and for helping me get into and stay in the Top 25! Voting closes at 4 p.m. PST on 1/30.

Thanks again!

Halloween: Flygon

IMG_2043

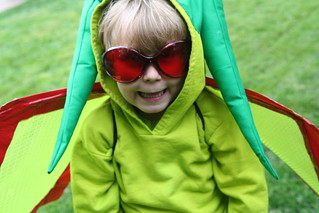
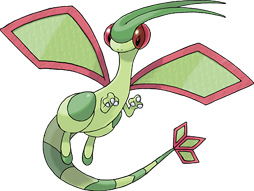
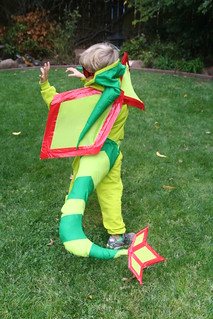
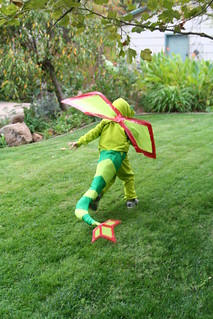
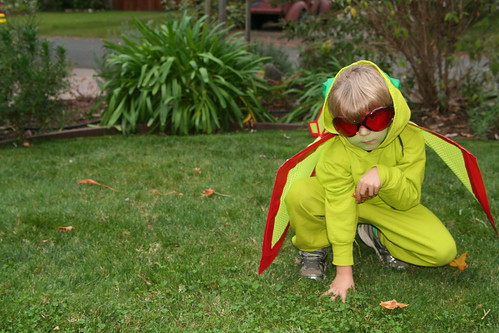
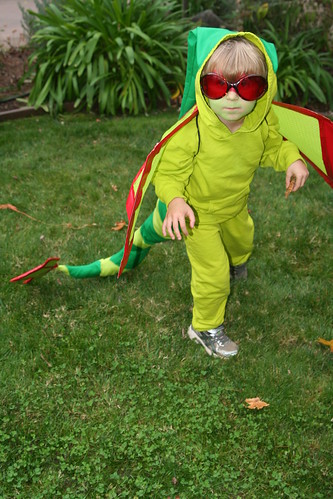
This, my friends, is Flygon. Flygon is a Pokémon, a Ground and Dragon type, to be exact. Asher loves dragons, loves this chartreuse color, and loves coming up with challenging Halloween costumes. At first he was talking about being the Grim Reaper. I think he got it into his head that big kids go for scary costumes and wanted to do the same, but I drew the line. I think five-year-olds aren’t really ready for scary costumes. So when Asher picked Flygon out of an old Pokédex book, I said yes and kept my doubts private.

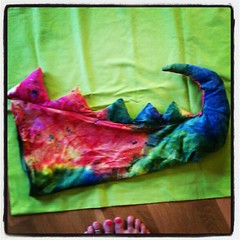
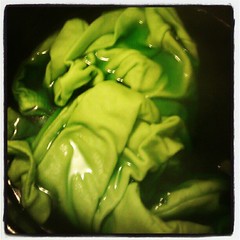
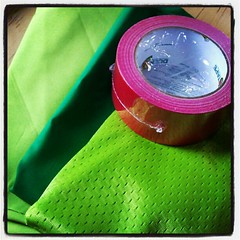
Last Year's Rainbow Dragon Tail with this Year's Future Flygon Tail. Hmmm... #pokemon #halloween #costume #dragon Chartreuse Beginning of costume Making Flygon Wings Flygon tail in progress Tail almost finished

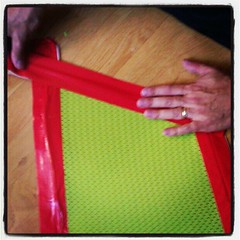
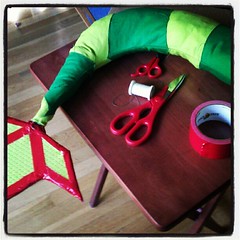
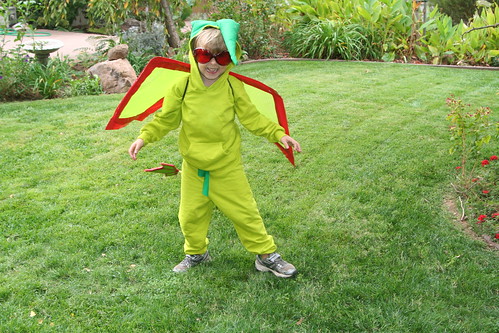
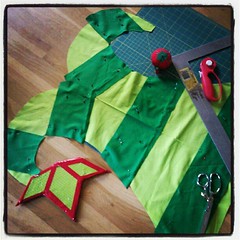
This costume is more involved than anything I’ve made to date. It started with some green fabric and some red duct tape. I had no pattern, but I did have the experience of making the rainbow dragon tail last year. Figuring out how to make the stipes on the tail concentric was a bit tricky for me. I consulted with my pro costumer friend Nicole to get her advice before I did any cutting. I bought a white cotton sweatsuit from Dharma Trading Company and some chartreuse dye. That was great because I’m not much of a seamstress. But just dyeing the outfit took half a day. I worked on this costume little by little over about a week. The wings were bumble bee wings until I pulled off the yellow fabric and bent them into diamond shapes. Ian helped me recover the wing wire with fabric and hot glue; we needed several hands. Then we added the red tape to the edges. The tail piece is made of cardboard, covered in the same wing fabric, and then outlined with red tape.

This is what we were going for. Super cute, right?

IMG_2032

I think it turned out pretty well! I sewed the tail and stuffed it with a little wool and then some bubble wrap. There’s a coat hanger inside that made it stand up and wobble around nicely when he walked. It tied around his middle and was also supported by suspenders that he wore underneath his hoodie.

IMG_2054 IMG_2037

IMG_2099

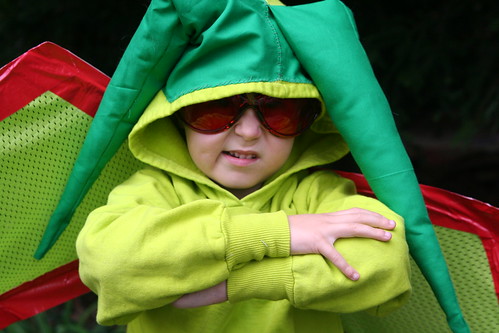
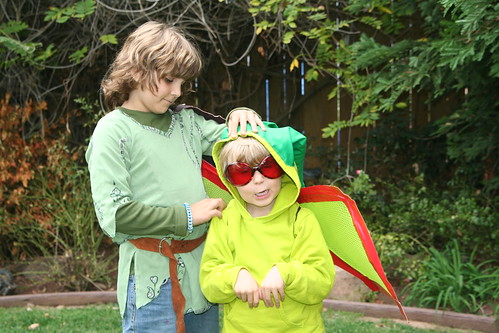
I had just enough dark green to make the head spikes. They are stuffed with wool and hand-sewn to the hood of the shirt. He liked when they flopped over his face.

IMG_2107

The glasses we bought years ago for Burning Man. I think they made the costume. I really feel that I sneaked up on this costume. I pondered and plotted a lot before I did anything, and I took it on one bite at a time.

IMG_2125

At the last minute, Asher decided he had to have green and red makeup too. No problem. I’ve got that!

IMG_2119

I love the way he got into character!

IMG_2198

I am kind of amazed he was able to keep up with all the big kids that night. He enjoyed trick-or-treating immensely.

And now it’s time to remove the head spikes so he can wear the hoodie.

Halloween: The Wood Elf

I realize November 10 is a bit late to write about Halloween, but I’m just getting to it now. We worked way too hard on these costumes to not show them here.

Lucas's Halloween Costume Design: Wood Elf

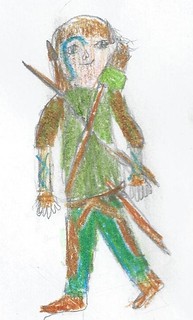
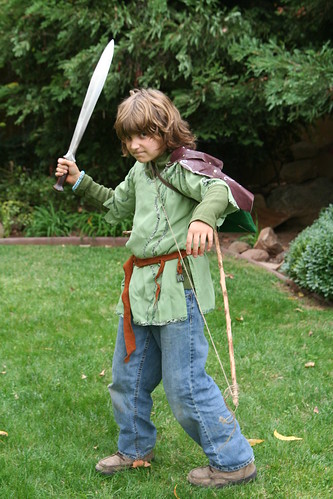
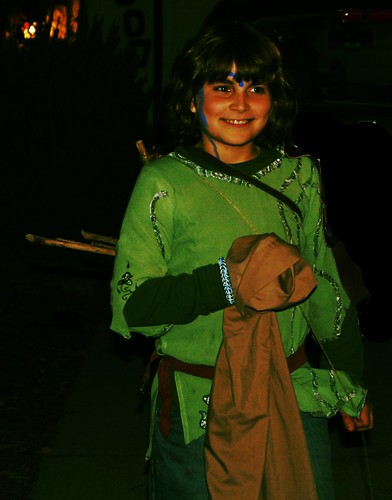
Lucas decided to be a Wood Elf. This year Ian read all three books of The Lord of the Rings to our boys, and the stories have really taken root in Lucas’s and Asher’s minds. Lucas didn’t want to be Legolas or any specific elf, or a fancy High Elf. He drew this picture of himself as a Wood Elf, so this is what we had to work toward.

Making leather armor for his wood elf costume.

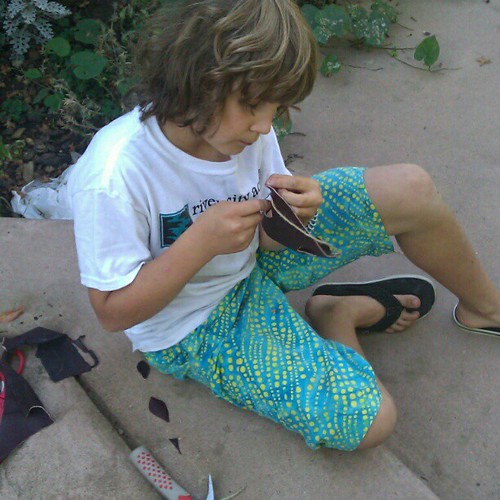
We brought our cow hide out and allowed Lucas to use some leather to make himself some armor. The hide was purchased back in 1991 when I wanted to make a medicine bundle for Ian—back when there was no Michael’s-type craft store in town. I had to buy a whole hide to get the little bit of leather I needed, and for my college-age self it cost a lot of money. I never dreamed in 1991 that this purchase would help us create a Halloween costume for our 10-year-old son!

IMG_2063

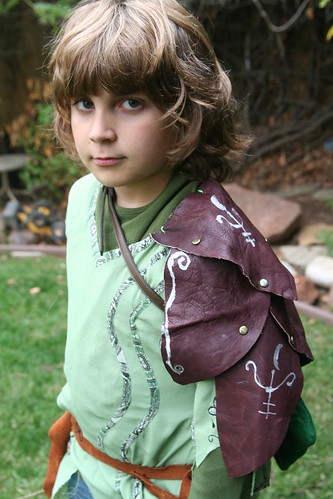
We lucked out at the thrift store this year and found a green tunic-like shirt. It had vine-like details and some beautiful leaf and vine embroidery on it. At first Lucas was nervous about the few flower details on it. He didn’t want to wear flowers. We had to argue for a moment or two, then I pulled out my shears and made some cuts to remove the flowers. I ripped and distressed the tunic just enough to make it look like he had spent several weeks traveling in the woods. That seemed to satisfy him. I also removed a seam to make the arms wider and more comfortable.

IMG_2076

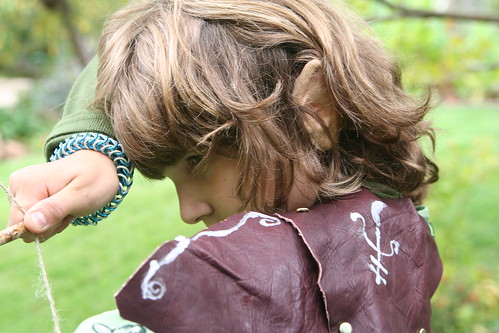
For the shoulder armor, we cut “scales” of leather to look a bit like leaves. We fitted this onto his body, piece by piece, and marked where we needed the scales to connect to each other with a Sharpie. Lucas made all the holes in the leather himself. We used brass-colored paper fasteners to quickly fasten the scales together, and we did the whole piece on the afternoon of the 31st. He decorated the armor with a silver paint pen. “They are runes of protection, Mom.” We sewed the leather to the shirt. The whole thing looks awesome!

IMG_2090

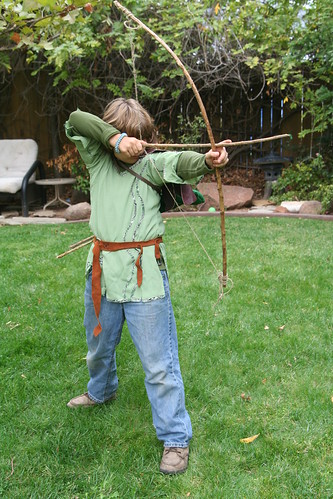
If we had had more time, we would have made a piece of armor to cover his his thigh, too. We pressed into service a leather belt from Ian’s old Renaissance Faire stuff. Lucas sewed a quiver out of green felt using the sewing machine. His first time on the machine! We used a small thrift-store belt to hold the quiver on his back; he used hot glue and stitches to attach the quiver to the belt.He made his own bow from a stick and string, and his quiver held five or six stick arrows.

IMG_2072

I’m not sure why he wanted to wear jeans, but he did. The last piece was a set of pointy elf ears held on by spirit gum. They had to be subtle ears! He added a blue tattoo to his face.

IMG_2159

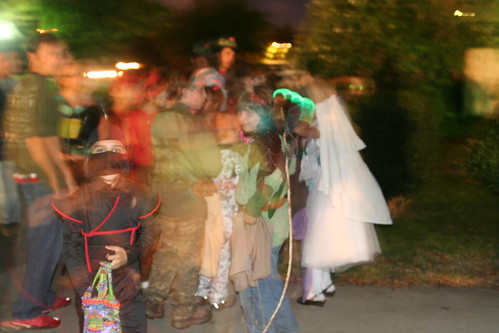
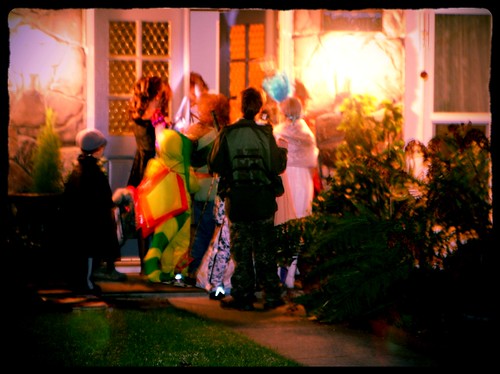
And then, with no time to spare, we went to an awesome party with a few other families from school. We ate yummy soup and went trick-or-treating in a big group.

IMG_2154

IMG_2201

The kids got loads of candy and had a blast running door to door at night. They all looked amazing!

I’m so proud of Lucas. He knew what he wanted. He worked hard to create it, doing many of the tasks on his own. He was a terrific Wood Elf!

Asher’s costume is up next.

Tutorial: Create a Mermaid Crown and Wrist Ribbons

Mermaid Crown

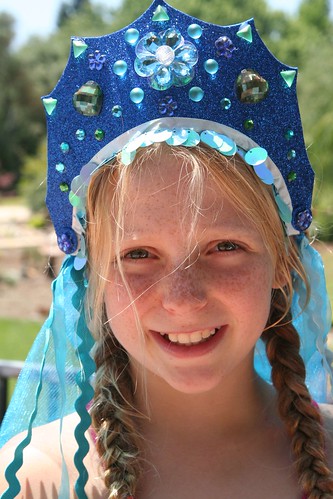
Who wouldn’t want to be as graceful as a beautiful mermaid or noble merman, living in an underwater wonderland? This play costume—a mermaid crown and wrist ribbons—is something you can create in stages, or do only the part you like best. Mermen might prefer just the crown, without the veil. The wrist ribbons encourage so much imaginative play for boys and girls alike. They can be water flowing while your merfolk swim. They can be magical water powers made visible.

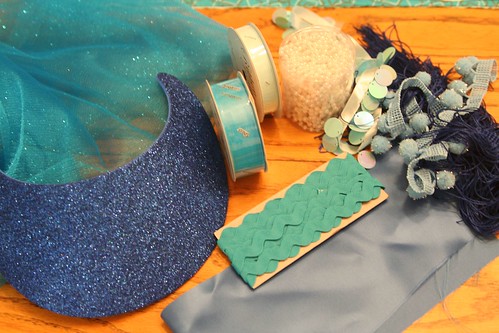
Materials for Mermaid Crown

  • a craft-foam visor
  • jewels, beads, and/or small seashells (Tip: look for packages of jewels and rhinestones for decorating flip flop sandals! Craft stores have inexpensive kits.)
  • low temperature glue gun and glue sticks
  • ½ yard of veil fabric (tulle, netting, etc.)
  • scissors, sewing pins, hand-sewing needle and thread
  • sewing machine
  • notions and ribbons

Materials for Mermaid Wrist Ribbons

  • ¼ yard satin or acetate fabric
  • ½ inch wide elastic
  • notions and ribbons

Materials

Make Your Mermaid Crown

Begin by gathering your materials. You will need a clean, flat surface to work on. First, remove the elastic or plastic coil that is the back of your foam visor. You will put it back on later.

Now decide how you want your headdress to look. Will it have points like a queen’s crown? Will it be scalloped like a seashell? Turn your craft-foam visor over and sketch the shape you want. When you’re happy with what you see, cut your foam with scissors.
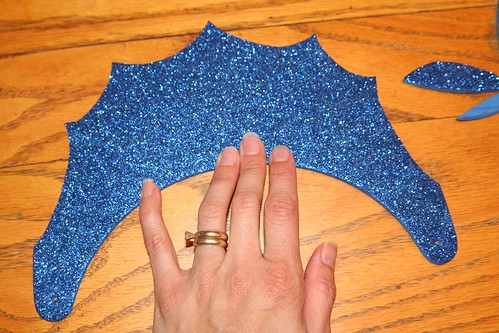
Cut the Visor into a Crown Shape

Now play with your notions and jewels, beads, and/or shells, placing them on the visor here and there, until you have an idea how you want them to be arranged. Take some time with this part because once you glue the items to your visor, it will be hard to remove them if you change your mind about their placement.
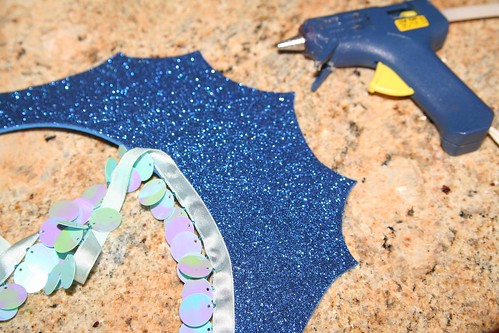
Adding Fringe

With your low-temp glue gun, glue on any trim (such as in this photo) and your decorations.
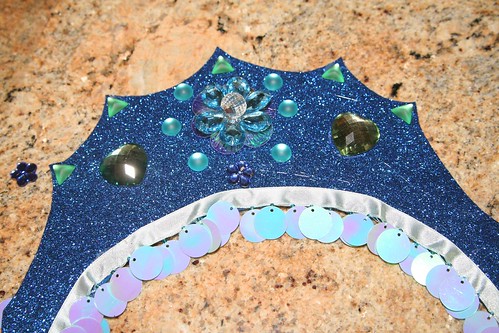
Gluing on Gems
It’s a good idea to measure to find the visor’s center. Try to arrange your biggest, most impressive or most special decorative item in the very center.

Using your glue gun and the smallest drops of glue, begin by gluing the special center item. Other smaller jewels or seashells can then be glued on. If your design is symmetrical, do the same item on both sides before moving on to a different jewel. You’ll have to pull off the strings of glue that may result from gluing on the jewels.

Have you decided to make a veil for your mermaid crown? (If you’re making this for a boy to play a merman, you may wish to skip this part.) Take your veil material (tulle, netting, etc.) and fold it in half so that it has two layers. You might measure your child to decide how long you want the veil to be. I decided I wanted the top layer of the veil to be shorter than the bottom layer. (Depending on the fabric you chose, you may wish to hem the bottom edges of your veil.) Pin the layers in place and then sew a seam about 1 inch from the top fold. This creates a tube through which you can pull the visor’s back elastic or plastic coil.
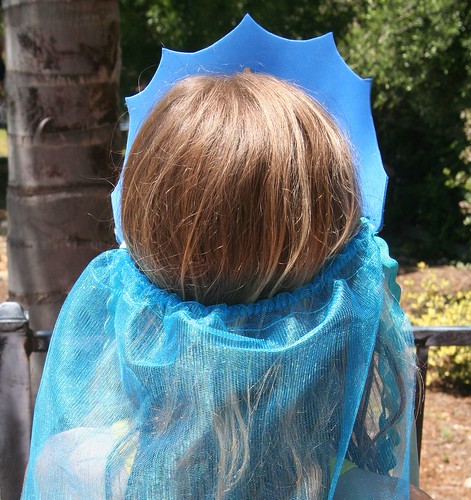
Mermaid Crown Back

Measure the visor on the head of your child, and shorten the elastic or plastic coil accordingly, so that it fits. (The coil on my visor is visible in the photo above.) You might wish to glue this part onto the visor so that it’s permanently attached. This spot, where the crown attaches to the back can be decorated with another jewel if you wish (see below at the child’s temple).
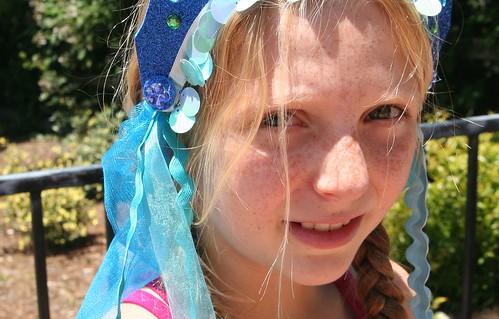
Mermaid Crown Detail

If you have ribbons or notions for decoration or long mermaid locks, fold them in half and with a needle and thread, sew them on to the corner of your veil, where the elastic attaches to the visor, so that they are firmly attached and can trail either in front of the shoulder or behind like hair. Keep in mind the age of the child who will wear this costume. The more decorations you add, the harder it will be for the child to put the crown on herself. (I ended up not using several items that are in the photo at the beginning of the tutorial.)

Congratulations! You’ve made a beautiful headdress for a lucky mermaid, or a handsome crown for a merman.

Sew Your Mermaid Wrist Ribbons

Wrist ribbons are a huge part of dress-up play in our home. You might be surprised at how well your child takes to these simple accessories. There is a bit of sewing involved, but it’s pretty easy.

The first step is to measure your child’s wrist using the elastic. You want the elastic band to be snug enough not to fall off the wrist, but not too snug as to feel tight. You also want to have about a 1 inch overlap, so that you can sew the elastic securely closed.

Now that you know how long it needs to be, cut two pieces of elastic that length. Lay out your covering fabric (satin or acetate). You could be very careful and measure this, but you don’t really need to do so. The object is to cut two strips of fabric so that they are twice as long as your elastic pieces and about 2 ½ inches wide. Turn in ¼ inch on both sides of your fabric strip and the ends and iron it flat. Sew the flat rectangle’s ends together to make a ring. Now fold your wide ring in half to make a long skinny ring with the right side of the fabric out. Make sure the width of your skinny ring will accommodate your elastic, but don’t actually put the elastic into the ring yet.
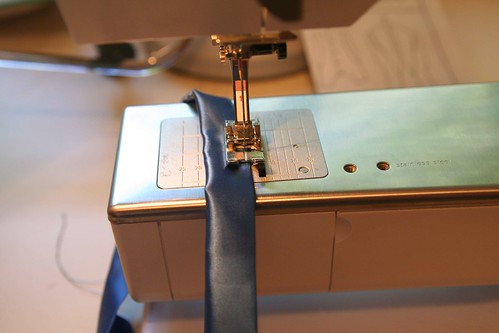
Sewing the Wristband

Top sew along the very edge of the long skinny ring to make a skinny tube. Don’t sew the ring completely closed. Leave an opening of a few inches so that you can insert your elastic.
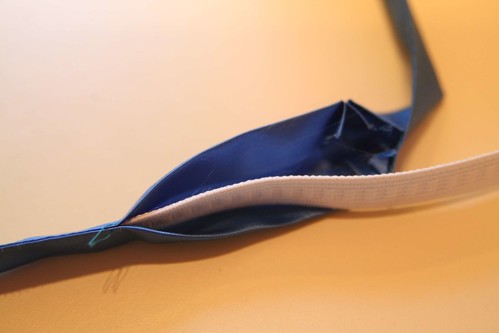
Insert the Elastic

With a safety pin on one end of the elastic, insert your elastic into your skinny tube of fabric. Bunch up the tube and join the ends of your elastic together with the appropriate overlap. Sew the elastic ring securely with a good zigzag stitch. You don’t want the elastic ring to pull apart when the child is putting the band around his or her wrist. At this point you have what looks like a hair scrunchie with a small opening in the side.

Gather up your ribbons that will be trailing and, with a few stitches, tack them all together at one end. I used the same notions as on the mermaid headdress, but you can use any ribbon. Consider painting some white satin ribbon with watercolors to create a watery effect.

Painted Ribbon

Now, insert the tacked end of your trailing ribbons into the hole of your ring and pin them in place.
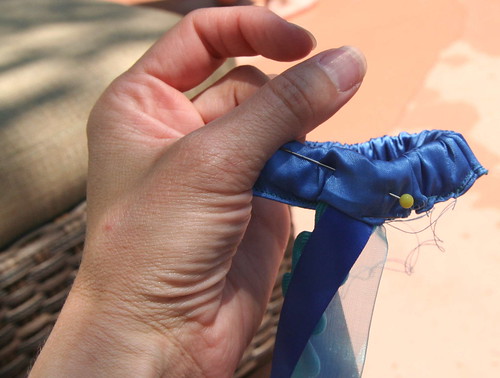
Wrist Ribbon Detail

By hand, with needle and thread, sew the ribbons in place to the elastic and sew the satin ring closed around them. I simply whip-stitched the opening closed and sewed the ribbons in firmly.
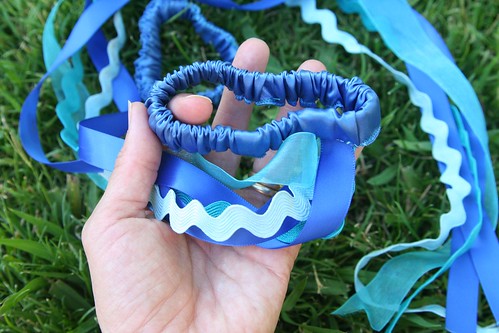
Finished Wrist Ribbons

Repeat all the steps so that you have two wrist ribbons.
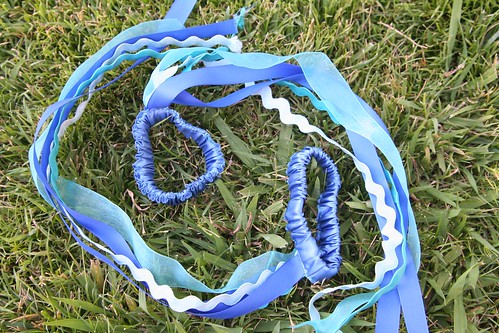
Finished Wrist Ribbons

If the ends of your ribbons want to fray, you can sometimes use a match and carefully melt the fibers at the ribbon ends to seal them. I suggest you first test this out on a ribbon scrap before you try to melt the ends of your finished wrist ribbons. You don’t want to harm your creation.

Now all you need to complete your mermaid or merman costume is a play silk tied around the child’s waist for a tail!
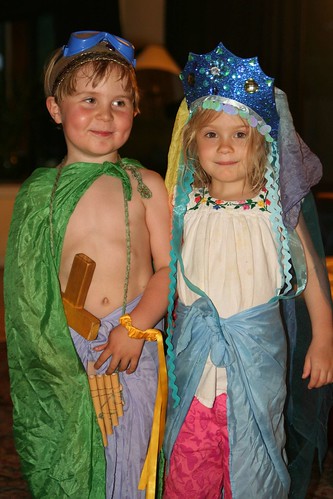
Merboy and Mermaid

You might be surprised at how your child uses these costume pieces. Perhaps the headdress or crown and the wrist ribbons you make will be used all together, or in different ways at different times. In this final photo, you can see that my son and his friend felt like using some of them at that moment, and found plenty of extra accessories (sword, goggles, pan pipes, cape) to transform themselves into a happy merfolk couple!

Happy sewing!
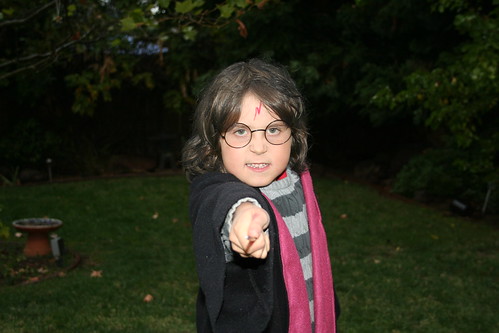
Rainbow Dragon and Ninja Halloween

Ninja and Rainbow Dragon

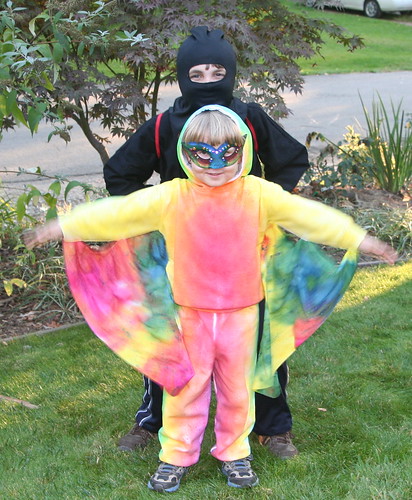
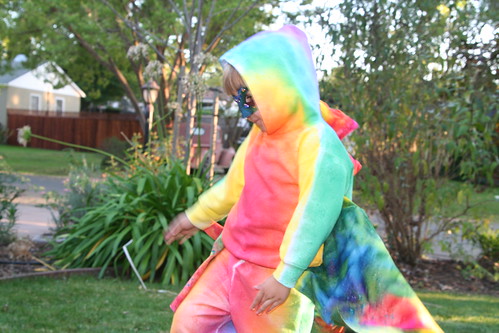
These are my fellas in their Halloween costumes: the all-colorful Rainbow Dragon and the Invisible-Like-the-Night Ninja. They were both pleased as punch with their costumes.

Rainbow Dragon

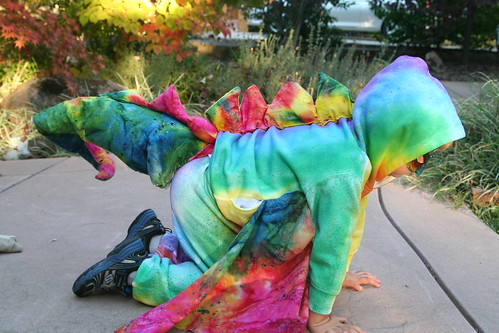
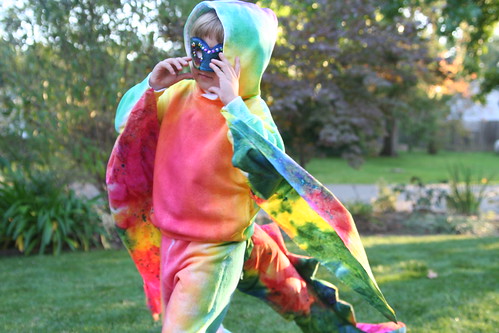
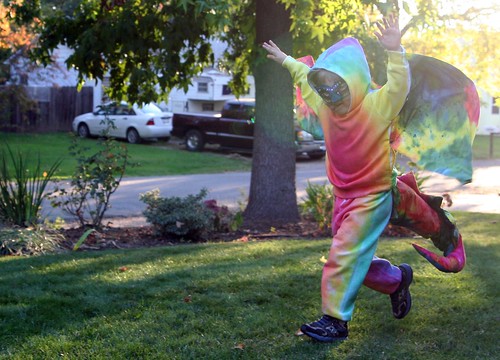
This Rainbow Dragon costume is a great triumph for me. I sprayed with fabric paint a white sweat suit (used for last year’s Hedwig the owl costume!). It was slow-going with little pump-spray bottles and I did it over many days to let all the sections dry in between.

Rainbow Dragon

The day of Halloween — heaps of work and a family wedding prevented me from doing this any sooner — I sewed the tail, spine plates, and wings from a yard and a half of rainbow batik cotton. It was quite a feat of engineering for me and I was very happy to be able to show my design plan to my dear Ritsa, a magnificent professional costumer, and get her OK and encouragement. I feel like my spatial thinking and ability to plan in 3D is somewhat lacking.

Anyway, the tricky sewing parts for me were 1) threading the machine (as always), and 2) figuring out how to sew the spines into the single dorsal seam of the tail so that all the fabric was right side out. The spines/plates are stuffed with wool to make them puffy. To make the tail stand out from Asher’s body, I bent a coat hanger into an oval to set against his back with a long wire to hold the tail up. Thanks for the suggestion, Ritsa! Then I stuffed the tip of the tail with wool roving and the rest with plastic air pillows that are used for shipping. The result was full and delightfully lightweight, and I love that the tail curls at the end. The whole rig just ties around his waist.

Rainbow Dragon

I did a fair amount of inelegant hand-sewing, too. The wings are tacked on in four places each with sloppy stitches.The spines on the back of the sweatshirt are attached by running stitches almost an inch long. I really had to hurry to finish! I painted the mask with my trusty craft acrylics and stuck on sticky rainbow jewels. I literally finished this costume 20 minutes before we had to leave for our visit to the Pumpkin Path.

Rainbow Dragon

We had just enough time to get a few photos before leaving. I was so thrilled to see that Asher loved it!

Ninja!

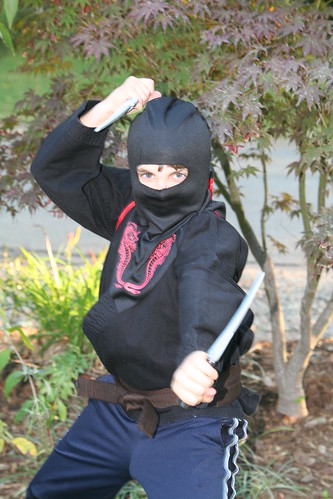
Lucas had mentioned several times over the last year that he wanted to be a ninja for Halloween. As we got closer to the date, that decision wavered a few times. We looked at costumes in the Halloween store and he felt they were all kind of creepy. But then we found the ninja kit: Lucas got to buy a kit with a plastic sword and sais, a throwing star, and a fancy hood. We cobbled the other pieces of his costume together from his wardrobe and the thrift store. Ian dyed the belt blackish on the stovetop. I tell you, in the night, that kid disappeared!

Pumpkin Path

The Sacramento Waldorf School Pumpkin Path this year was fun as always. The children went on a quest to find the pirates who had stolen King Neptune’s treasure. Along the way, they encountered mermaids, the Lady of the Lake, sea dragons, an explorer, a shark, and more. Some of Lucas’s and Asher’s classmates were in our group, so that was fun.

Pumpkin Path

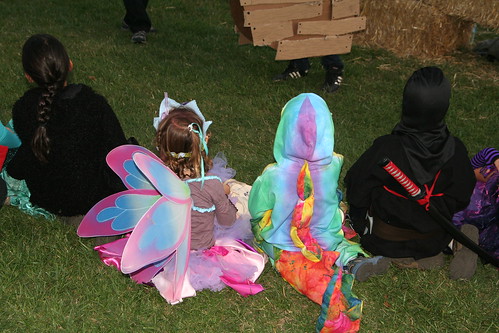
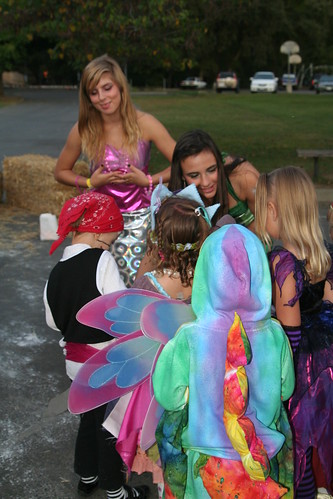
At each story station, the kids received a gift, such as a gem or a bit of soap or a seashell. There are few things in the world cuter than a bunch of kids in costumes.

Jack

The path was lined with jacks of all types and paper luminaries that glowed in the dusk. There were yummy treats to eat at the end.

Trick-Or-Treating

Then we met up with Grandma and our newlywed aunt and uncle and some friends and trick-or-treated in our neighborhood. Lots of neighbors get into the spirit of Halloween and decorate with lights and creepy things. We finally visited a giant Frankenstein statue that Asher has been obsessed with for weeks. Yes, it is indeed a giant doll. Only a doll.

Trick-Or-Treating

Trick-Or-Treating

Sweet X was a shiny, sparkly dragon. Two dragons and a ninja!

Sleepy Rainbow Dragon

The kids scored loads of candy, which we will soon be giving up to the Halloween Fairy. Asher couldn’t walk all the way home and fell asleep on Daddy’s back and shoulders.

The Fellas Jack

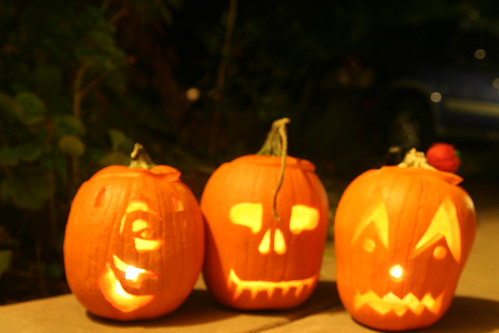
We were greeted at home by our three Jacks and fell into bed, satisfied and happy.

[Shared with Saturday’s Artist on Ordinary Life Magic.]

Sweater for Harry Potter

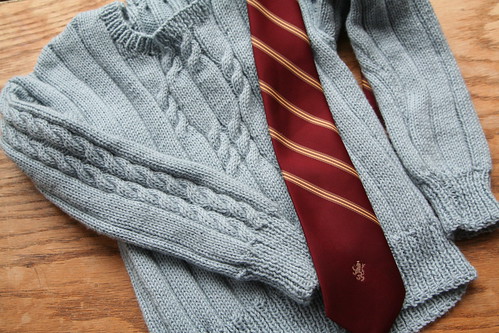
My son wants to be Harry Potter for Halloween. He’s been adamant about it for several months, and frankly, Harry’s cool, so we’re down with this idea. In early October, much to our surprise, Lucas approached his grandmother and asked, “Grandma, will you please knit me a gray sweater for my Harry Potter costume?”

Grandma's Sweater for Lucas as Harry Potter

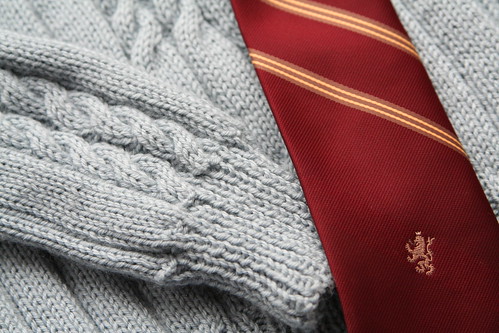
Nine days and three yarn shops later (looking for the right gray yarn), Grandma Sydney showed up with this gem. How’s that for grandmotherly love and kickass knitting skillz? If only Harry himself were so lucky as to have such a grandma.

Grandma's Sweater for Lucas as Harry Potter

Ian found this super Gryffindor House tie at a thrift shop and it goes perfectly. We still have more work to do on this costume, but this is a magnificent start!

  • About Sara

    Thanks for visiting! I’m Sara, editor and writer, wife to Ian, and mother of two precious boys. I am living each day to the fullest and with as much grace, creativity, and patience as I can muster. This is where I write about living, loving, and engaging fully in family life and the world around me. I let my hair down here. I learn new skills here. I strive to be a better human being here. And I tell the truth.
    Our children attend Waldorf school and we are enriching our home and family life with plenty of Waldorf-inspired festivals, crafts, and stories.

    © 2003–2018 Please do not use my photographs or text without my permission.

    “Love doesn’t just sit there like a stone; it has to be made, like bread, remade all the time, made new.” —Ursula K. LeGuinn

  • Buy Our Festivals E-Books


  • Archives

  • Tags

  • Categories

  •  

  • Meta