Autumn Equinox and Michaelmas Festival E-Book

E-Book Cover

I’ve been a bit quiet in this space lately. We’ve been adjusting to a new school year and working through some projects. I am delighted to announce that my dear friend Eileen Straiton (of Little Acorn Learning) and I have finished another big e-book. This one is our Autumn Equinox & Michaelmas Festival E-Book and I’d be honored if you’d check it out and spread the word a little. It was a pleasure to work with Eileen on this and I’m really proud of it. We have such a great rapport and similar values, and I think this comfort and compatibility reflects in our e-book. So here’s to healthy, joyful, creative collaboration!

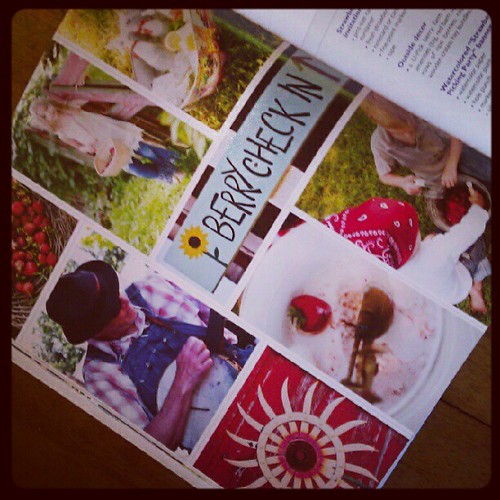
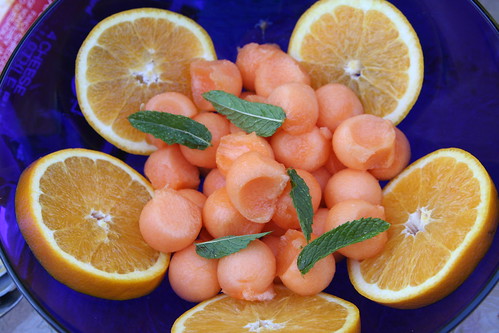
Here is a little teaser: a mosaic of just some of the images from the projects and activities we offer in our e-book.

Taste of the Contents of Our Autumn Equinox & Michaelmas Festival E-Book

133 PAGES of verses, fingerplays, poems, song, crafts, meditations, book recommendations, circle times, recipes, and much more to guide you in celebrating the Autumn Equinox and Michaelmas
in your home or school!

  • Needle Felt a Beautiful Apple Mother Doll
  • Go on an Apple Picking Field Trip and Learn
    About Different Varieties of Apples
  • Design a Breathtaking Early Autumn Nature Table
  • Read Books with the Children Celebrating
    Autumn and Michaelmas
  • Make Your Own Apple Stamps
  • Enjoy Homemade Applesauce Together
  • Crochet an Apple for Your Nature Table or Play Kitchen
  • Create a Beautiful Autumn Candle Holder Centerpiece
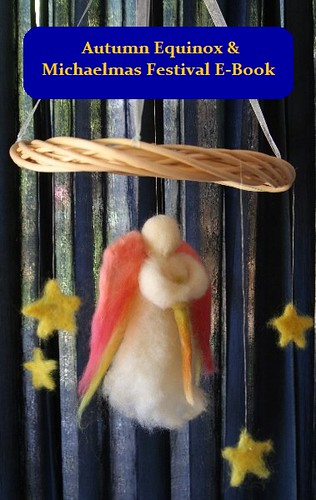
  • Make an Archangel Michael Mobile
  • Harvest Natural Dye Materials from Outdoors and
    Make Capes of Light Playsilks
  • Hold a Michaelmas Family Feast
  • Create Dragons out of Nature Items
  • Bake Dragon Bread with the Children
  • Make a Dragon Tree Block Checker Set
  • Sculpt Dragons out of Modeling Material
  • Cut Out Paper Flying Dragons to Display on Your Wall
  • Make a Michaelmas Felt Play Set
  • Paint an Autumn Leaf Stencil Painting with Watercolors
  • Crochet Beautiful Autumn Leaves for Your Nature Table
  • Paint Your Own Interpretation of Michael and the Dragon
  • Look Inward and Face Your Own Dragons with our Caregiver Meditation
  • Share Verses and Songs About Autumn and Michaelmas
  • Meditate on Quotes from Steiner and Other Inspirational Individuals
  • Enjoy Pinecone Weaving
  • Share Circle Time Together
  • Make Michael Sword Napkin Holders
  • Sculpt Michaelmas Worry Beads
  • Craft an Autumn Equinox Wreath
  • And more!

So, if you’re wondering how to make this time of year feel magical, this e-book may be just what you need. Thanks for peeking!

Only $24.99

Authors:
~ Eileen Straiton,
Little Acorn Learning

~ Sara Wilson, Love in the Suburbs

With Guest Contribution from Jennifer Tan, Syrendell

Review: Naturally Fun Parties for Kids

Review: Naturally Fun Parties for Kids

I was tickled to be asked to review Anni Daulter and Heather Fontenot’s new book, Naturally Fun Parties for Kids. Alas, I should have done so in a more timely fashion, as the book released earlier this year. But hopefully late is better than never. I’ve paged through this book dozens of times and I think it’s marvelous. Every time I pick it up I light upon a brilliant idea that hadn’t ever occurred to me before.

Daulter’s and Fontenot’s book is all about throwing parties with kid-friendly themes. As a huge fan of parties in general and, really, ANY excuse to dress up, I can totally relate. We all need celebrations and we all need to exercise our creativity muscles. This book is just the ticket to show what’s possible, with a little ingenuity, patience, and planning. A party for children doesn’t have to glorify a licensed media character! The book is organized into seasons and the authors provides three awesome party ideas per season. My favorites are the Summer Solstice Beach party, the Winter Solstice Party, the Forest Fairy Dress-up Party (Oh, to have girls!), and the Knights and Dragon Quest party.

The book offers “tips and tricks for making the parties green, natural, simple, and organic in style and content.” I like the emphasis on taking inspiration from nature and keeping it simple. The authors suggest thrifting, upcycling, borrowing, and making items from scratch to make the parties doable and special.

Review: Naturally Fun Parties for Kids

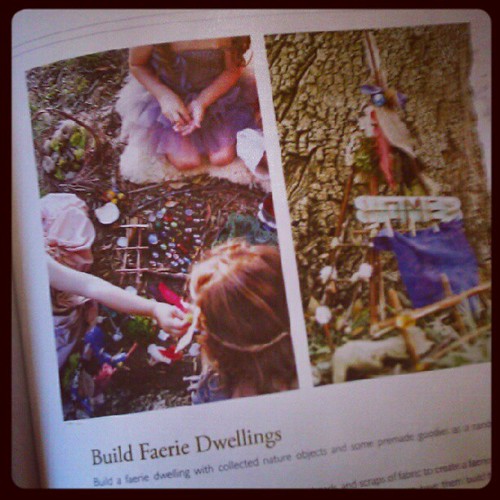
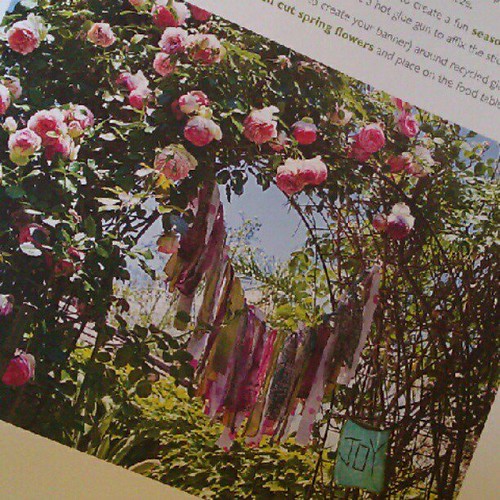
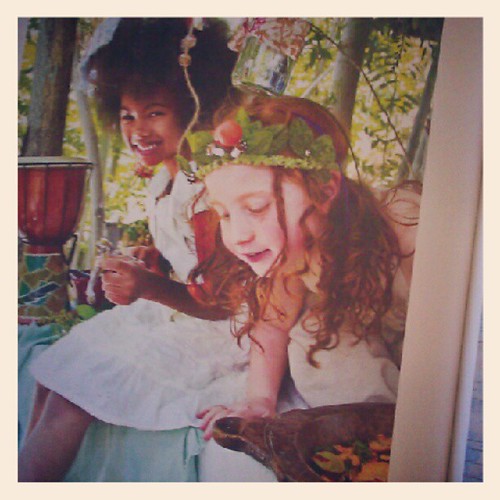
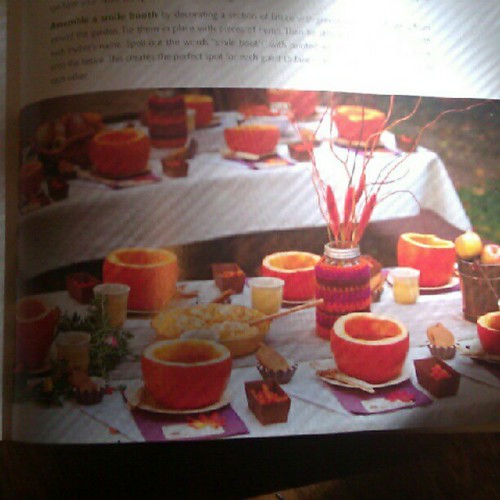
The book’s photography, by Tnah and Mario Di Donato, is simply gorgeous. Do NOT take my silly snapshots as an indication of the book’s beauty. I just wanted to give a little teaser. Their photos are vivid and inspiring.

Review: Naturally Fun Parties for Kids

What is kind of fun is how much the authors’ esthetic matches my own. Several of the projects in this book are ones we have done in the past, or ones that I’ve always wanted to do with my kids. I’m particularly intrigued by the beeswax ornaments (Winter Solstice Party), the upcycled sweater aprons (Community Cooking Party), and the grapefruit sugar scrub (Natural Spa Party). But there is much more.

Review: Naturally Fun Parties for Kids

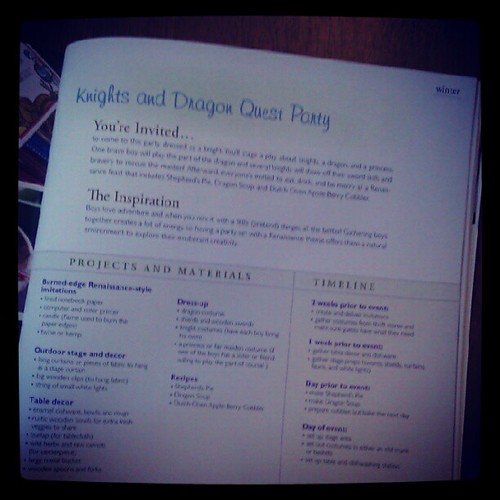
Each party comes with a project and materials list, and a timeline for getting things put together in advance of the big party day. That’s just the sort of thing people like me need! I’m often full of ideas at the too-late last minute and don’t have time to execute them. These handy lists fix that deficiency.

Review: Naturally Fun Parties for Kids

Activities are provided for each party, too: games and crafts, and even a play! And the party themes are well chosen to appeal to kids, such as pajama parties, berry picking, art, egg-dying in spring.

Review: Naturally Fun Parties for Kids

The authors also provide plenty of delicious-looking recipes and, frankly, you don’t need to throw the party to make them. Herbal tea spice cake and mushroom and onion mini crustless quiches both sound like they’ll be visiting my kitchen soon. Furthermore, the recipes are geared toward kid palates. Nothing too fussy and plenty of fun: Italian ices; black bean, corn, and cheese quesadillas; grilled flatbread pizzas; Dutch oven apple-berry cobbler, etc. Now, where the heck does one find a donut pan for baking donuts? (The Internet, I suppose.)

Those who like to do paper crafts will love all the invitation making in this book. That’s mostly not my thing, to be honest. So I’d probably skip some of that stuff. Anyone with a flare for scrapbooking and stamps and stuff will dig it.

So, if you’re looking for inspiration for celebrating with children, check out Naturally Fun Parties for Kids by Anni Daulter with Heather Fontenot.  I wonder if I could con my boys into a Forest Fairy Party? Well, maybe not that one, but definitely the Pancake P.J. Party. They’ll go for that!

Calendula and Mint Herbal Soaps Tutorial

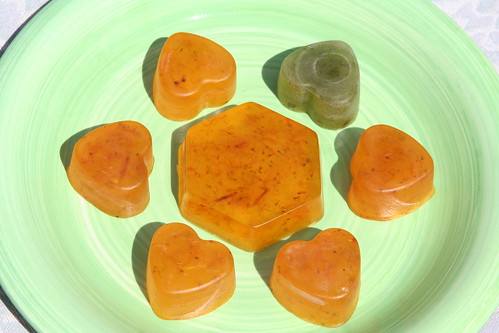
Finished Soaps

Earth’s bounty is always all around us, but it is perhaps even more apparent in the summer, when crops are ripening and plant life flourishes. Wild or cultivated herbs can be useful friends, growing perhaps right outside our kitchen doors. Herbs are commonly used as food, as decorations, as dyes, as flavorings. They also are used the world over to clean and heal.

You can easily make herbal soaps for your family to use and enjoy, right in the comfort of your own kitchen. There are two soap-making techniques. This tutorial teaches you the simpler of the two. Technically, you’re really embellishing this soap, rather than making it from scratch. Because the process is simple, even small children can help to make these beautiful, healing soaps, as long as you carefully monitor them around the stove and hot soap. (Of course you will!)
Calendula

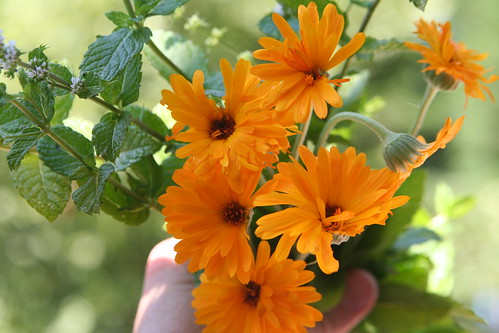
Calendula (also known as pot marigold) is a common and prolific garden annual that reseeds itself. It is known to have been used as early as Roman times as both a dye and a flavoring. Calendula is known to have antiseptic properties, which make it perfect as a soap additive. Many natural first aid preparations include calendula.

Peppermint grows in many cottage and kitchen gardens. You can use it in teas, desserts, and body care potions, such as lotions, shampoos, balms, and soap. Mint may have a calming and soothing effect for skin irritations, itching and hives. It is believed to have anesthetic and anti-inflammatory properties.

Materials for Making Herbal Soaps

  • glycerin soap base (I used a glycerin and olive oil base)
  • calendula (pot marigold) and mint herbs from the garden (I used a mix of dried calendula petals and fresh flower heads, and fresh mint leaves)
  • stovetop pan, cutting board, knife, ladle
  • soap molds (also silicone muffin pans work very well; these come in fun shapes )
  • essential oils for fragrance (optional)
  • soap colorant (optional)

A word about glycerin soaps: You can buy glycerin at the craft store, along with lots of other fun soap-making and body product supplies (dyes, fragrances, molds, etc.). Using pure glycerin soap in this project will result in soaps with a layered effect, since your herbal additives float to the top of your molds as your soap sets. There’s nothing wrong with this, and the result can be quite beautiful and rustic. Another kind of glycerin soap base that you can buy has olive oil added to it, and a property that keeps any additives in suspension, meaning you won’t get layers and your herbs will stay mixed throughout the soap. This is the look that I was going for with these two batches. You can decide what’s right for you. There is no difference in how you make the soap. Just be sure to read the packaging carefully so you get what you really want.
Making Soap

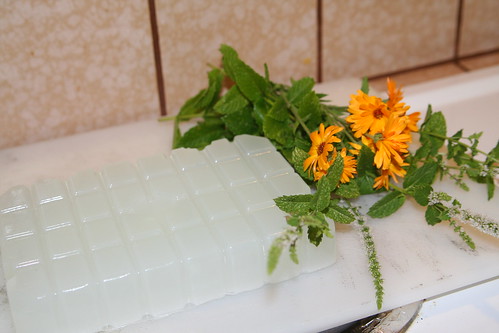
Begin by gathering your materials. You will need a clean cutting board and a table top to work on.
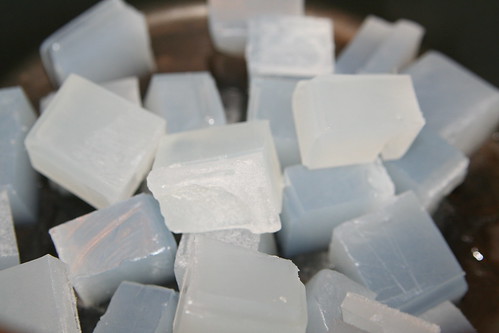
Glycerin Soap

First, cut your glycerin soap base into small cubes. This makes it easier to melt at low temperatures, and you want to keep the temp quite low when you‘re making soap. You can use a double boiler or just put your glycerin cubes into your pot. (Cleanup is easy with hot water and a scrub brush!) Stir the soap often until all pieces of glycerin are melted.
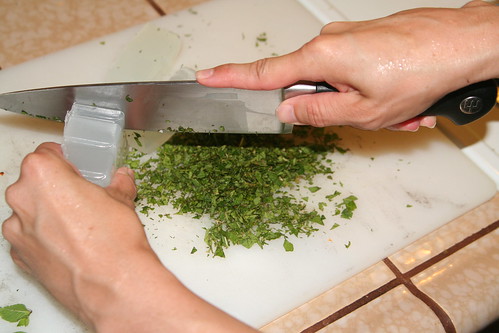
Making Soap

Meanwhile, chop your mint leaves into very small pieces. You may wish to set aside some of the tiniest leaves to be used as a decoration later on. Of course, this is optional.

If you have lots of soap molds or muffin pans, you might be able to make both types of soap at the same time. Since I had to reuse the molds after the first soaps were fully set, I made two batches—first calendula, then mint—cleaning up in between batches.
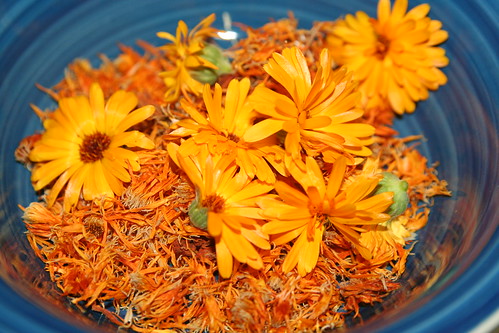
Calendula

Before starting, I saved the dried petals from my calendula flowers for a week or so. For my soap, I also used a few fresh flower heads to maximize its potency as an antiseptic.
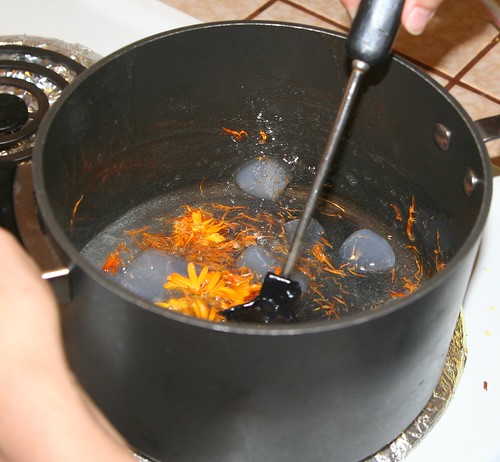
Making Soap

Add your petals and flower heads to your melting soap cubes. The heat will begin to cook the flowers.
Making Soap

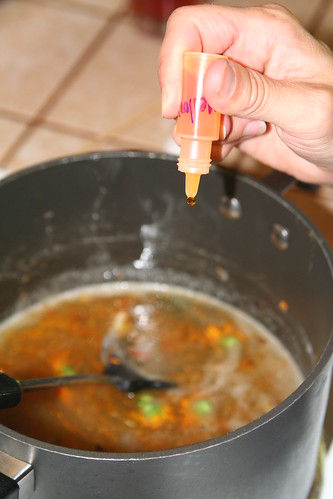
If you want your calendula soap to have a rich yellow coloring, add a few drops of soap colorant to the pot. You don’t have to do this, and if you cook the petals in the soap a while, it will begin to take on a natural yellow color. At this point, you can also add fragrance, if you wish. I added a few drops of geranium essential oil. Geranium is known to be a comforting scent, and since I envision my children washing their scrapes with my calendula soap, comfort seemed to be just the right feeling to evoke by smell.

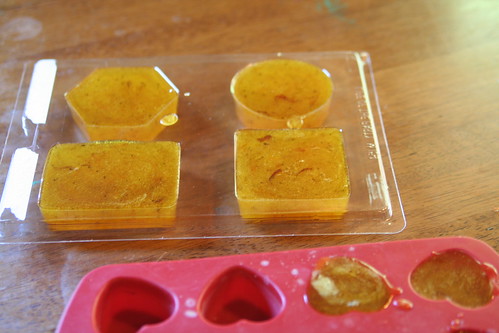
If you used fresh flowers, you should fish out the centers now. When you’re satisfied with your soap’s color and fragrance, it’s time to pour it into molds to set. Using a ladle, gently fill each cup to the brim. Keep the mold flat. The soap will begin to cool quickly, but it may take an hour or so for the soap to become very firm to the touch. You can speed the cooling by placing the mold flat in your refrigerator.
Making Soap

When the soap is completely firm and set, gently pop each soap out of the mold. They should separate from the mold’s sides with some gentle twisting and come out cleanly.

Making Soap

My second batch of soap was mint. You’ll repeat all the same steps as with the calendula soap. Begin by cutting soap cubes and then just add the chopped mint in with the glycerin. The longer you allow your mint soap to cook on the stove over low heat, the greener it will become. I added a few drops of eucalyptus and mint essential oils to the warm pot. The smell is calming and relieves stress.
Making Soap

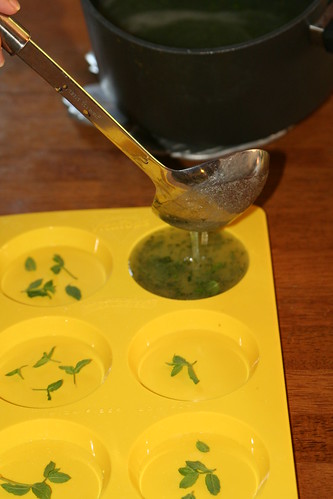
You can add your reserved tiny mint leaves into your mold if you wish. They won’t stay exactly in place when you ladle in your mint soap, but you will be able to see pretty whole leaves in your soaps after they have set.

Homemade Mint Soap

In this photo, you can see my two different pours. The greener bars were poured from soap that had been on the stove longer. The natural green from the mint leaves colored the soaps. I like them both.
Mint Soap

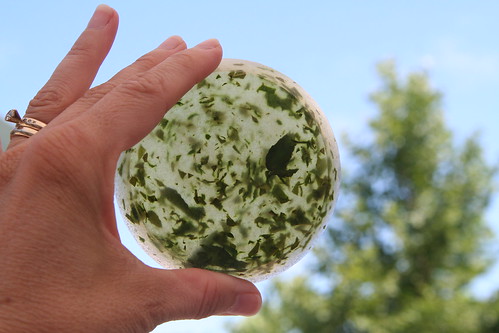
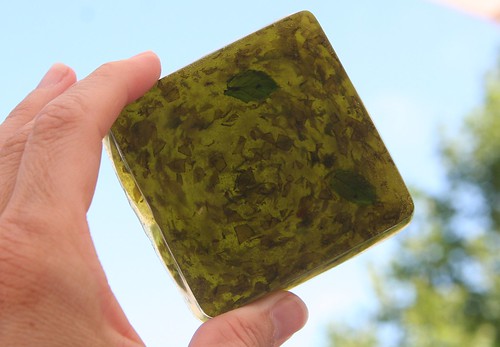
A finished mint soap, with lots of gorgeous herbal goodness visible.
IMG_3691

And here’s a darker one. This soap was on the heat longer and became a dark green.
Calendula Soap

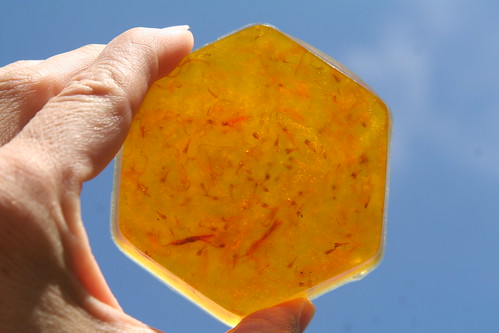
Here is the finished calendula soap, with pretty golden-orange petals showing inside.

Homemade soaps make wonderful gifts for family, friends, and teachers. Consider adding a mint and a calendula soap to your outdoor adventure box or your first aid kit. Use both types to cleanse and to heal.
Family Clay Camp

Family Clay Camp

Right at the beginning of summer vacation, my boys and I participated in Family Clay Camp, which was offered through our local Parks and Rec. Michelle Leuth was our wonderful teacher. Lucas and I had taken a clay/pottery class from her a few years ago. Now that Asher is 5, he can start doing some of these fun activities, too!

We had a blast. Camp was four days, for two hours each day. Some friends from the boys’ school were also enrolled, so that made it extra fun. We had unlimited clay to play with for three days. On the fourth day, we painted everything. Then our pieces dried and were fired, and we picked them up a couple weeks later.

IMG_7426

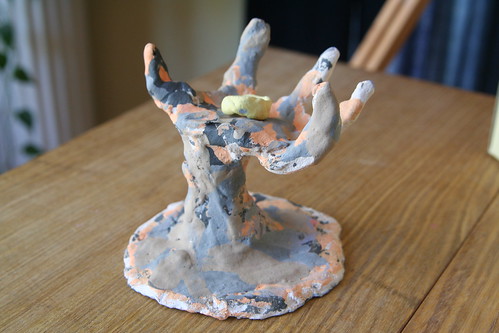
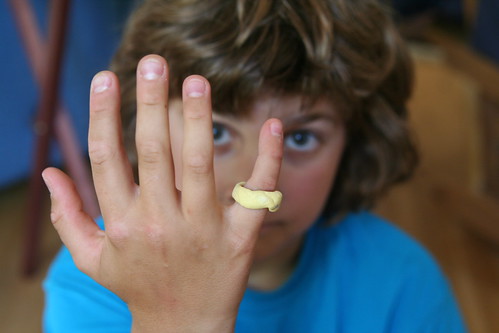
This is Lucas’s piece de resistance: A hand reaches up out of the ooze to clasp a golden ring. The ring is separate from the hand.

IMG_7446

(It’s been a good, long season of reading The Lord of the Rings books in our home and these stories have clearly  fired up my children’s imaginations.)

IMG_7429

Asher thoroughly enjoyed this class, and got really into the feel of the clay and the fact that it took impressions. He spent a lot of time pressing textures of all kinds into his clay objects.

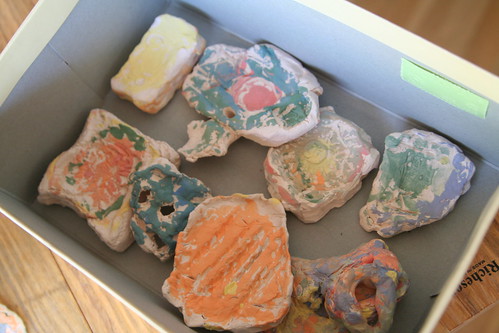
IMG_7427

This is Asher’s “design collection”—a series of clay objects with many textures. They are right in keeping with Asher’s appreciation for treasures.

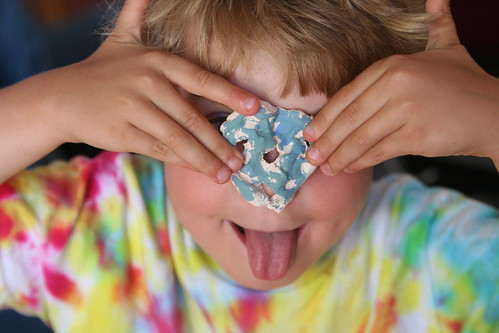
IMG_7431

This is a small mask he made. I noticed that Asher had little interest in painting his creations—for him it was all about the forming of the objects.

IMG_7436 IMG_7433

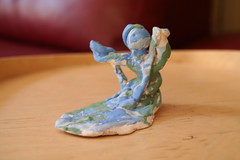
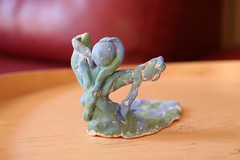
This is a kind of creature sculpture that Lucas made for his father as a Father’s Day present. The back view is on the left, front view is on the right. Asher made a lovely, lumpy candle-holder for his daddy for Father’s Day.

IMG_7439

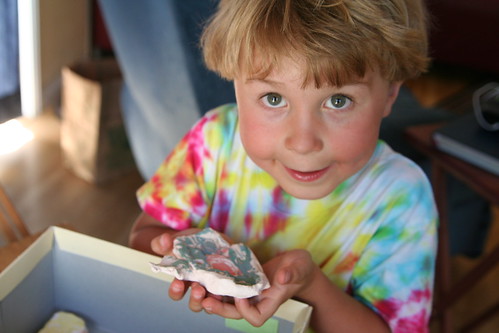
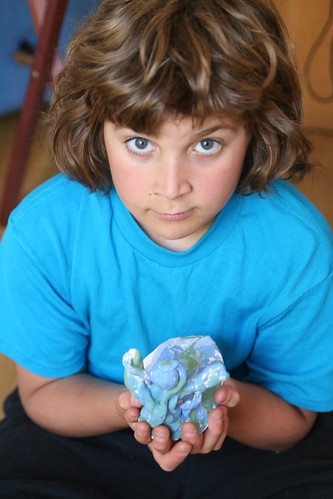
The expressive artist holding his sculpture.

IMG_7451

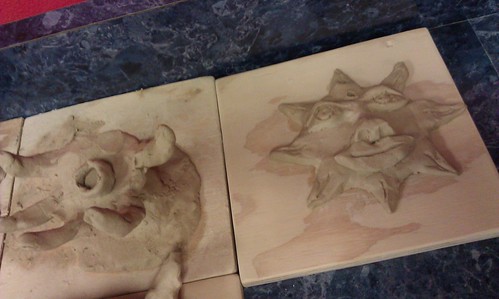
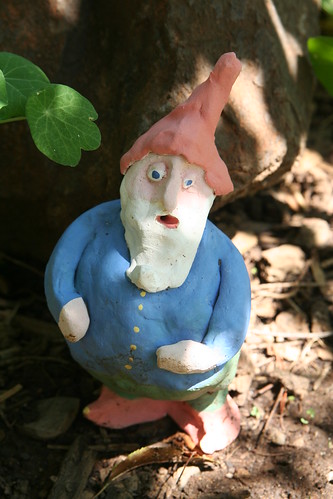
I made this little gnome, using the coil method. I started at his feet and worked up, taking care to avoid having any air spaces inside the figure without a means for the air to escape during the firing process. My gnome now stands in my garden and I am rather fond of him. I also made a sunshine face and a pinch-pot style bowl. It catches my earrings on my bedside table at night.

I like making art with my boys!

Mermaid Aquarium Tutorial

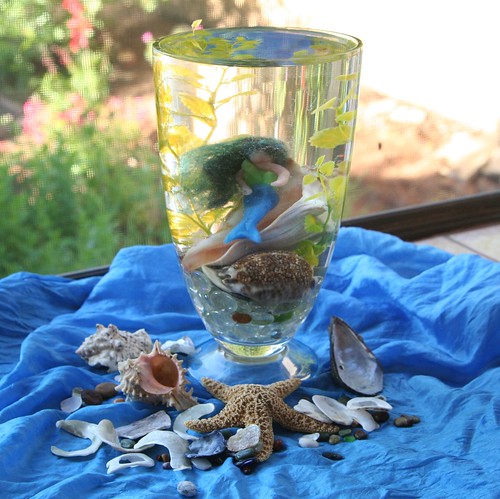
Mermaid Aquarium Finished

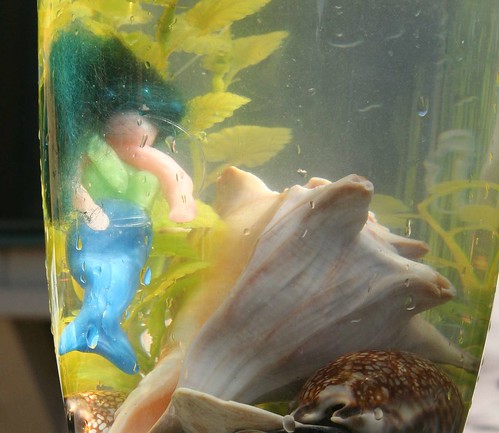
Have you ever wished that a mermaid would visit your home and be your best friend? You might get your wish, if you set up the perfect place for her to stay: a mermaid aquarium in your home or school! This is a simple project that older children can create by themselves or with a little help from you, and which may truly enchant younger children. While you’re assembling your mermaid aquarium, dream up some stories that feature your mermaid friend. With your mermaid visitor beside your child’s bed, tell mermaid bedtime stories.

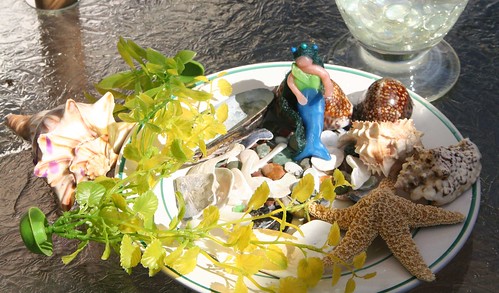
Mermaid Aquarium materials

Materials

  • beeswax (color choice is up to you; I used blue, green and flesh colors for my mermaid)
  • wool roving (any color you like works for mermaid hair)
  • fishing line or thread
  • straight sewing pins
  • a large, clear-glass vase (a gold-fish bowl or small aquarium would also work very well)
  • seashells
  • found beach glass, beach pebbles, or glass gems from the craft store
  • a plastic aquarium plant (if your container is very large, you might want two of these)
  • water

Begin by gathering your materials together. This is a nice project to do outdoors, especially since you may spill some water, so craft outside and enjoy the fresh air. If you don’t have a plastic aquarium plant or would rather use a natural material, you can wet-felt or needle-felt some seaweed out of wool. There are many kinds of seaweed, so any shape of plant will do nicely.

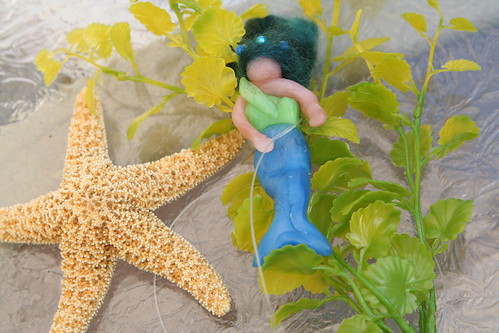
Mermaid out of Beeswax

Model Your Mermaid

Your first task is to fashion your mermaid out of beeswax. Mermaids (and mermen) come in many different colors. Your child may have an idea of how this mermaid should look. If the beeswax is hard to mold, consider dipping it in warm water for a few minutes, or let the heat from your hands and breath soften it. Younger children find this very helpful when working with beeswax. Start by making the mermaid’s tail first, then create the mermaid’s upper body and arms. Finally, add on her head, making sure to let the wax from the body join the wax of the head. Your mermaid probably looks funny at this point. Mermaids are known for their gorgeous hair, right?

Use a shock of wool roving of any color you like and arrange it on your mermaid’s head to look like her luxurious locks. (You might want to do this next part out of the sight of younger children.) Now carefully take a few sewing straight pins and pin the wool hair to the mermaid’s head by aiming the pin down through her head and into her upper body. If you are careful, you can arrange the pins so that they look like hair decorations or a crown. Since children may be handling the mermaid, make sure the pins don’t stick out from her body to poke someone. Fortunately, if a pin’s tip emerges, you can just back it out and try again. The beeswax easily “heals”  if you rub out the hole. Perhaps the children would like to give the mermaid a name now.

IMG_2373

Assemble the Mermaid Aquarium

Now that your lovely mermaid is done, you can begin to assemble her underwater home. Fill the glass jar about a third of the way full with beach glass, pebbles, or glass gems. Your child may already have such treasures in his or her special collection, and may wish to contribute to the mermaid’s home. Consider adding seashells you have gathered from the shore (after you rinse them well). Real seashells will help your mermaid friend feel at home. Even the youngest children can easily add these special items to your vase.

Beeswax Mermaid

Be Thankful

Talk about where these treasures from the sea came from. Thank Mama Ocean for being the home to such amazing shelled creatures, and for wearing down the pebbles until they are smooth as silk. Sing a mermaid song.

Your aquarium is beginning to look inviting, isn‘t it?

Mermaid Aquarium in progress

The Tricky Part: Beeswax Floats

Now comes the only challenging part. Your beeswax mermaid at first wants to float on top of the water, but we know she will be more at home under the water. Take a small length of fishing line or thread and gently tie your mermaid to your plastic aquarium plant, or to a heavy seashell. We tried doing both, and found we were happiest with how she looked when anchored to the heavy shell. If you tie your mermaid to the plant, now is the time to plant the base of the plant into your pebbles or gems so that the plant looks like it’s growing there at the base of the aquarium. If you opt to tie your mermaid to a heavy shell, place your plant first, then add the shell and mermaid to the aquarium last. You probably won’t be able to see the fishing line or thread.

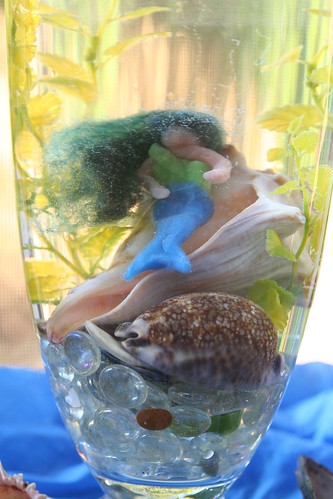
In thes photo above, it looks like our mermaid is swimming. In the next photo, she is resting atop a seashell. Feel free to move the objects around until you achieve a scene that you like.

IMG_2397

Enjoy Your Mermaid Visitor

Now place your mermaid aquarium on your summer nature table or at a child’s bedside. Arrange other beach treasures around her on an ocean-like silk. It will help her feel at home! If you tell a few mermaid stories, your child may become enchanted by the mermaid guest and may whisper secrets to her during the long twilight of summer evenings.
Perhaps the mermaid will tell the children stories of her life in the sea, the beautiful underwater merfolk cities, her fish friends, and water magic. Perhaps, if you‘re very lucky, the children will tell you these stories, too.

Please note: Your child may wish to touch the water and play with the mermaid, so your placement of the mermaid’s aquarium home may depend on whether spills are a problem. Also, if your mermaid visits for a long time, you may need to change the water to keep it looking clear. In doing so, you may need rinse the gems, pebbles, and shells. But then, you and the children get to remake it all over again!


Wishing Tree Tutorial

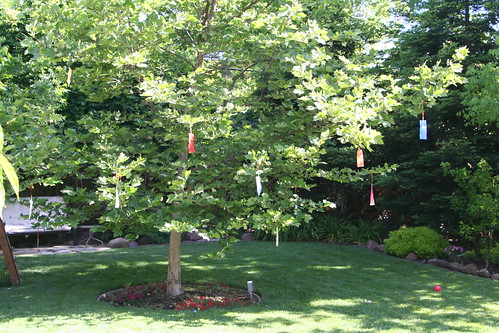
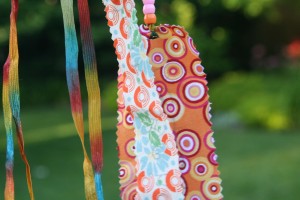
Wishing Tree

When cultivating optimism, which I posted about the other day,  it can be helpful to have a visual reminder of your intentions, hopes, and dreams. Make wishing flags to hang on a tree in your garden and sway in the breezes all summer long.

Materials
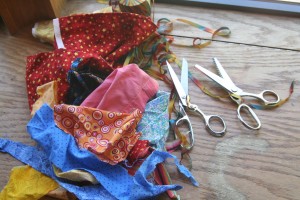
* assorted pretty fabric scraps, or watercolor paintings or pretty papers
* a permanent marker
* ribbon or yarn
* pinking shears (if using fabric)
* a hole punch (if using paper), or scissors
* beads (optional)

Tutorial
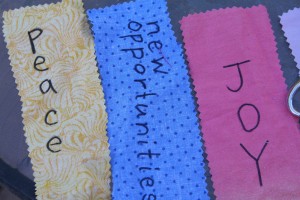
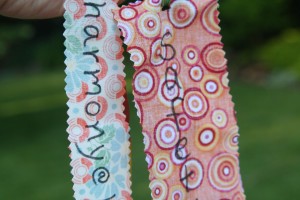
Take a moment to think of the good things you want to happen in your life. Your wishes may be as specific as you need them to be (new job for daddy, better health for grandma, college acceptance for sister, opportunity to homeschool, good teacher for brother, fun at camp, etc.). If you are doing this project with children, ask them, “What happy things will happen to us?” Chances are good that the children will have many joyful ideas to share. (Marvel for a moment at how easy optimism comes to them.) Write your ideas down in a list.

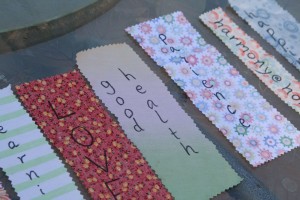
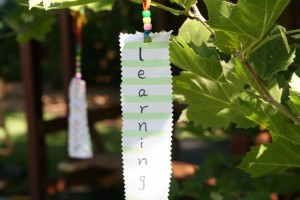
If you don’t have specific ideas or hopeful expectations, make a general list of positives, such as: joy, learning, rest, health, happiness, hope, peace, harmony, love, patience, safety, etc.  When my family and I did this project, we asked our friends and loved ones what they hoped and prayed for—we took their requests and made flags for them, too. It was a lovely way to share our goodwill with others.


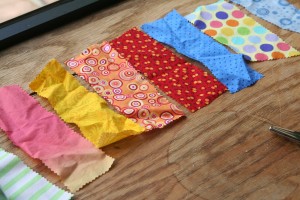
Cut your fabric into skinny rectangles (or triangles) with your pinking shears. If you are using paintings or other papers, you can use regular craft scissors. You’ll need one rectangle for each wish, and they can be measured and uniform or free form and varied, it’s up to you. If you want, you can think of them as custom-made prayer flags.

Using your permanent marker, write your wish on your rectangle. Make a hole with scissors (or a hole punch, if you’re using paper) at the top, and loop your ribbon or yarn through the hole and tie a knot. Now it will look a lot like a bookmark.

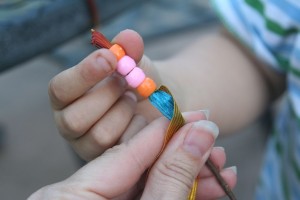
You may like to add beads to the top of your ribbon. If you do, the beads will add weight to the wish and give it a finished look. Make as many or as few of these wish flags as you like. If you’re doing this as a class or as a family, make sure that everyone contributes some wishes.

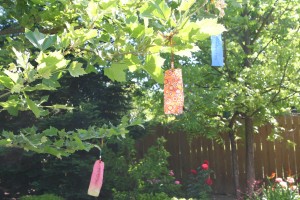
Now find a spot in your garden or playground where you will be frequently and tie your wishes to a tree. They will add color to your garden and flutter in the summer breezes. Perhaps your wishes will be carried by the wind up to heaven, or to the four corners of the world, spreading your love and optimism over the globe to people everywhere. Whenever you see them, you will be reminded of all the good that is in your future.


(This article was originally published in the Little Acorn Learning June Enrichment Guide in 2011. Check out all their many wonderful offerings at Little Acorn Learning.

Summer Solstice Celebrating and Feasting

Seagulls

Sunlight is flooding
The widths of space
The son of the birds echoes
Through the realms of the air
The blessing of plants sprouts
From the being of the earth
And human souls lift themselves
In feelings of thankfulness
To the Spirits of the World.

—Rudolf Steiner

IMG_7106

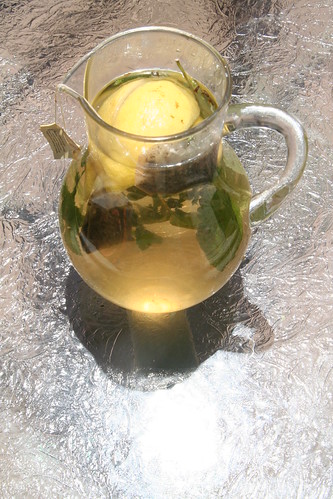
Happy Summer Solstice! Here is a little tea concoction I made and it was so yummy, we’ll definitely do this again:

  • two green tea bags
  • lemon slices, squeezed into the water
  • lemon balm leaves
  • sweetener of your choice

(Steep all day, strain, and then chill before drinking.)

We have had a marvelous day and I hope you have, too.

Forming the Giant Cookie

Summer Sun Mosaic Cookie Before Baking

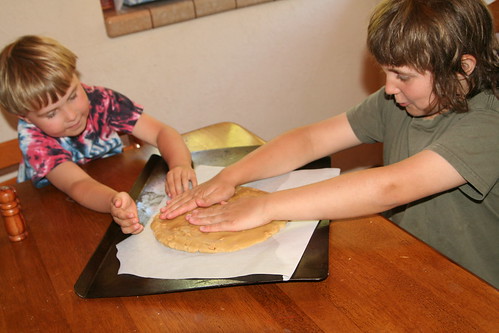
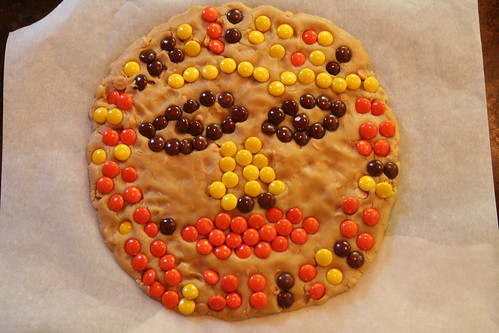
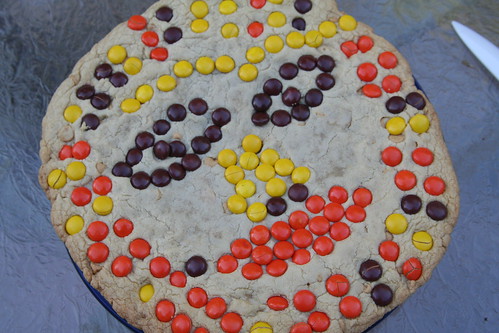
We made a giant summer sun mosaic cookie together. Here it is before baking. And here is the basic giant cookie recipe from Mel’s Kitchen Cafe. This kind of thing goes over really big with my children. Lucas made the face; Asher did the eyebrows and the sun rays around the outside. Since the boys got soooo excited about putting the Reese’s candies on top, I realize now that I didn’t need to put peanut butter chips into the dough.

IMG_7131

IMG_7141

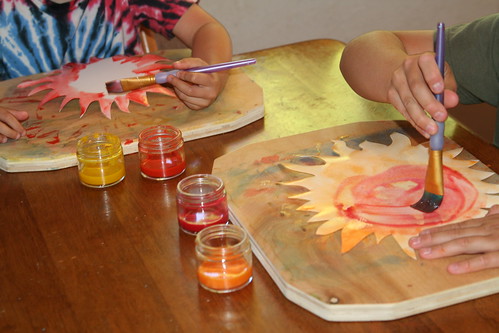
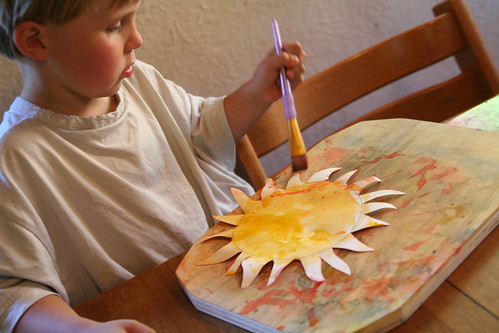
We painted suns, inspired by my co-author and friend Eileen Straiton’s project in our Midsummer Festival E-Book. I think once they’re dry we’ll hang them.

IMG_7149

IMG_7147

IMG_7148

IMG_7157

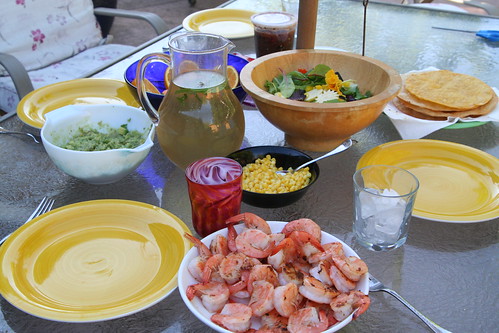
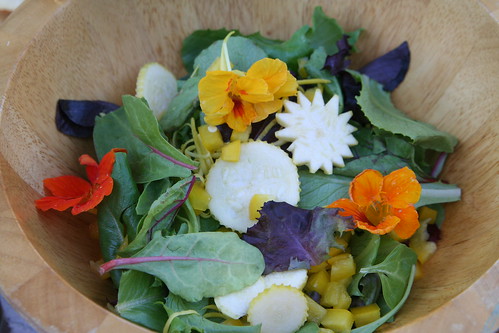
Then we had a beautiful Solstice feast of shrimp tostadas and several fresh salads. I needed lots of circles and colors and fresh veggies in this meal. We even added in some nasturtiums from our garden. We had so much gorgeous food, I wished we had guests to share it with! This is one of my favorite things: Eating amazing California food outside in summertime, when the day has been hot but the evening delta breezes pick up just in time.

IMG_7158

“Give me the splendid silent sun with all his beams full-dazzling.” —Walt Whitman

Solstice in a Sunbeam

Also, today marks six months since our little dog Solstice came to our family. He followed our boys home on December 21 and hasn’t left our side since then. We love him so much, and we’re all grateful to have him.

Here’s to unexpected blessings that follow you home and take up residence in your heart.

Here’s to abundance of joy, nourishment, learning, and opportunity.

Here’s to family traditions carefully conceived and simply crafted.

Here’s to courage, doing good, and generosity.

Blessed Be.

Midsummer Festival E-Book

Sun_Child-311x426

I am delighted to announce that my dear friend Eileen Straiton (of Little Acorn Learning) and I wrote a Midsummer Festival E-Book! It has been a marvelous journey and I loved every step we took in making it. Please spread the word!

Little Acorn Learning
Monthly and Seasonal Guides
for Childcare, School and Home

*New* Midsummer Festival Book is Available!

This wonderful Midsummer Festival E-Book will bring the magic of summer into your home and help you keep celebrating throughout the season!  It is packed full of Waldorf songs, stories, verses, crafting tutorials and much more to help you celebrate Midsummer and the Summer Solstice with the children in your home, classroom, or childcare environment.

  • Read Stories and Fairy Tales Filled with Sunshine to the Children
  • Enjoy Verses, Songs, Poems and Fingerplays that Celebrate the Coming of Summer
  • Learn about the History, Background and Symbolism of the Summer Solstice
  • Get Ideas for How to Create Your Own Meaning of this Special Festival
  • Enjoy a Solstice Feast
  • Play Solstice Games
  • Make a Midsummer Bonfire
  • Create Simple Beeswax Suns with the Children
  • Make a Solstice Wreath for the Birds
  • Design Midsummer String Art Sunbursts
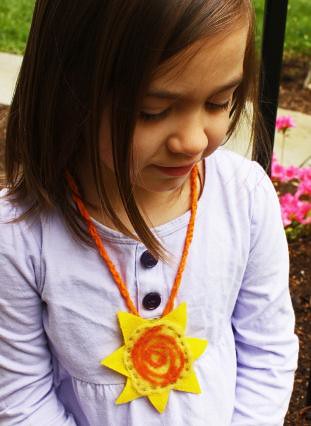
  • Read a Story of The Sun Child and Create a Sun Child Necklace
  • Craft a Shiny Garden Suncatcher
  • Use a Rock Garden Sundial to Tell Time in Your Garden
  • Make a Catch the Sun Throw Toy for Your Child
  • Create a Paper Solstice Sun
  • Read How to Create Daytime and Nightime Midsummer Magic
  • Hang Summer Solstice Flags Indoors or Outdoors this Season
  • Plant a Midsummer Indoor Herb Garden
  • Craft a Sun Mosaic Birdbath
  • Make a Sunshine Fairy out of Wool Roving and Felt
  • Sew and Stuff Herbal Dream Pillows for St. John’s Eve
  • Needle Felt a Summer Sun Wall Hanging
  • Create Sweet Pocket Sun Sprites for the Children
  • Bake Sun Bread with the Children
  • Go on a Sun Hunt
  • Make a Sun Mask
  • Design a Sunshine Banner
  • Crochet Sun Medallion Necklaces

mosaic681a08dd7f492074d30d638319d71c78eb0cd22f

In addition to our Midsummer Festival eBook, Little Acorn Learning has lots of wonderful offerings to fill your summer months with enriching, creative activities for your family, daycare, summer camp, or homeschool group, so please check out their other fine products.

Yarn Necklace for Mother’s Day Tutorial

Yarn Necklace

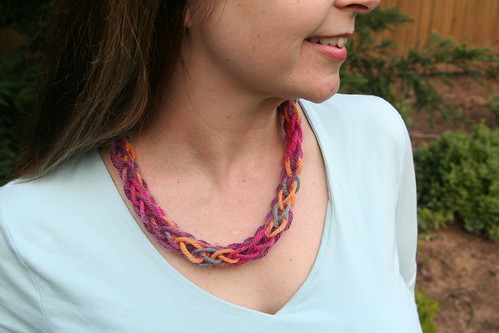
Are you hoping to make a special Mother’s Day gift for mother or grandma, or perhaps an end-of-year gift for a teacher? This yarn necklace is easily made by children who have a little finger knitting experience, in fact, my son made one for me when he was in the first grade and recently taught me how to make it. This kind of cord-making is called “finger knitting” and “finger weaving.” (Besides necklaces, you can make scarfs, braceletes, belts, or headbands in this way.)

Materials

  • wool or cotton yarn in a pretty color

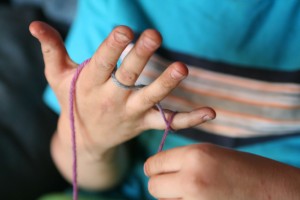
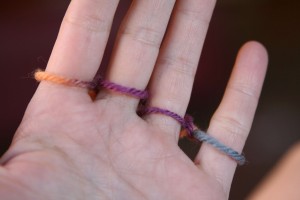
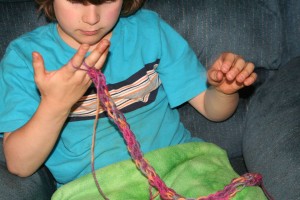
Start by placing the tail of your yarn in the crook between your thumb and forefinger so that the tail hangs down over the back of your hand. Use your thumb to pinch the tail and hold it in place. Take the ball end of your yarn under and over, under and over your four fingers, wrap it once around the pinkie finger.

Continue weaving the working yarn under and over, under and over, traveling back toward your index finger.

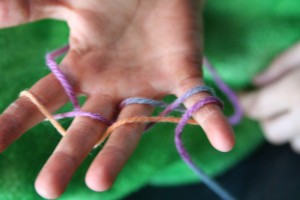
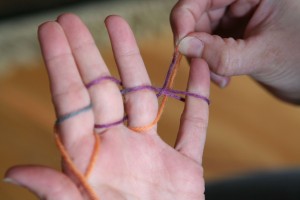
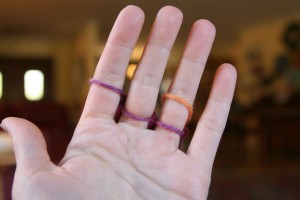
Wrap the yarn around your index finger and go under and over, under and over until you go around your pinkie again, and then weave it back toward your index finger in the same manner. Wrap the yarn one more time around your index finger and let the ball end rest across your palm. You should now have two loops (horizontal bands) of yarn on the front of each finger as you see in the photo below.

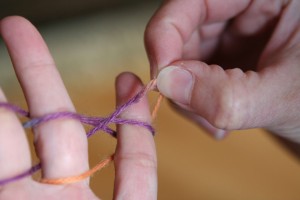
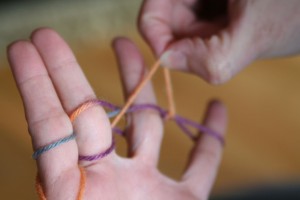
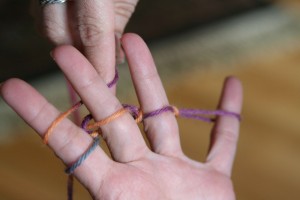
Now, beginning with your pinkie finger, grasp the lower loop with the fingers of your other hand and lift the lower loop over the upper loop …

… and completely off the pinkie finger as in the next photo below.

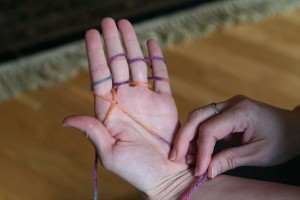
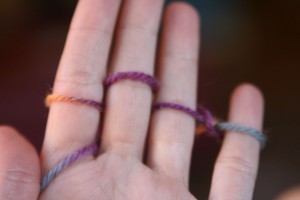
Now release the loop. Your hand should now look like this photo below, with two loops on the first three fingers and only one on the pinkie finger.

This action of moving the bottom loop over the top loop and off the finger is finger weaving. You will repeat this action with the remaining three fingers (ring finger, then middle finger, then index finger).

As before, with the ring finger, lift the bottom loop up and over the top loop, and then off the finger altogether. As you complete this procedure with each finger, you’ll see that you now have only one loop left on the finger.

When you reach the index finger, the yarn tail that your thumb has been holding in place acts as your bottom loop. Treat it as any other loop and lift it up and over the top loop and off the index finger.

The tail will now trail down between your index finger and your middle finger.

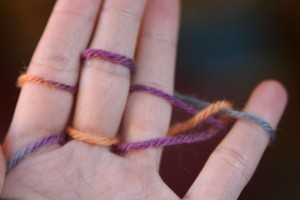
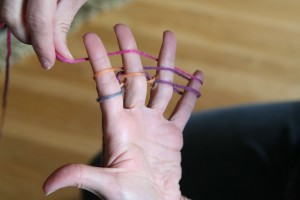
Now grasp your working yarn and wind it under and over your fingers as you did before, under and over, and around your pinkie finger so that your new loops are above the loops already on your fingers. Then continue winding the yarn under and over, under and over until you’re back to your index finger again. You should now have two loops on each finger again.

The loops are now high up on your fingers. Push the loops down to the base of your fingers. Then, as you did before and starting with your pinkie finger, pull the bottom loop up and over the top loop and let it go. Repeat for all four fingers exactly as you did before.

Push your stitches down again. Weave your yarn again, under and over, under and over, around, under and over, under and over above the loops already on your fingers, until you have two loops on each finger again.

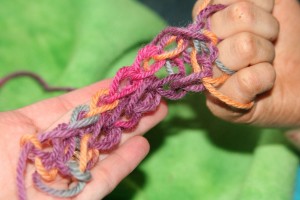
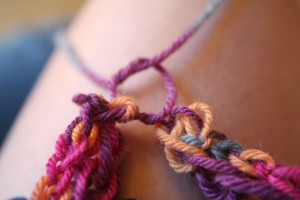
As you repeat this process of pulling bottom loops over top loops again and again, row after row, you will begin to see the woven cord coming off the back of your middle and ring fingers, as in the photo below.

The woven cord looks kind of flat at first, but when you’re done and you tug it gently a few times, it will become a round cord for your necklace.

When your cord is long enough, it’s time to cast off. (Experiment with the length by putting it around your own neck while it’s still on your fingers. If you can see the necklace when you look down, chances are good the cord is long enough and stretchy enough to easily fit over a head.)

To cast off, begin with only one row of loops and don’t weave new loops above them.

Instead, lift the loop on the pinkie finger off the finger and place it on your ring finger. Your ring finger now has two loops and your pinkie has none, as in the photo below.

Lift the bottom loop over the top loop and release. Now your ring finger has only one loop. Pick up that loop and move it off your ring finger and place it on your middle finger, which now has two loops. Lift the bottom loop up and over and release. Now move the remaining loop on the middle finger to your index finger. Lift the bottom loop over the top loop and release. Now your index finger has only one loop and your other fingers are bare. You may now remove the final loop from your hand, cut your yarn, pull the working yarn through it, and pull it tight. Now pull the tail on the other end of your cord tight.

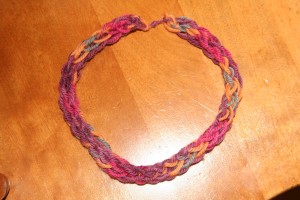
Now gently tug on your cord so that it becomes round rather than flat. Tie the two ends together, making a circle necklace.

The necklace should be stretchy enough that it can easily go over head of the lucky person you give it to. She will treasure it more than she would any chain of gold.

Happy Mother’s Day!


(This tutorial was originally published in the Little Acorn Learning May Enrichment Guide. Check out all their many wonderful offerings at Little Acorn Learning.

Earth Day Moss Garden Terrarium Tutorial

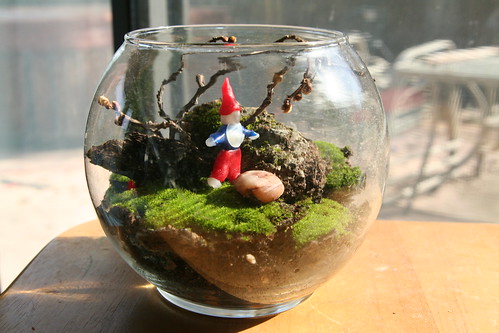
Finished Moss Terrarium

Here is a simple way to celebrate the earth, and bring a little of it inside your home. This moss garden terrarium is easy and inexpensive to make. Children of any age can help with this project and may especially enjoy finding such treasures of the earth. Noticing the small things in nature can be so rewarding, and it feels good to sink our hands in the soil.
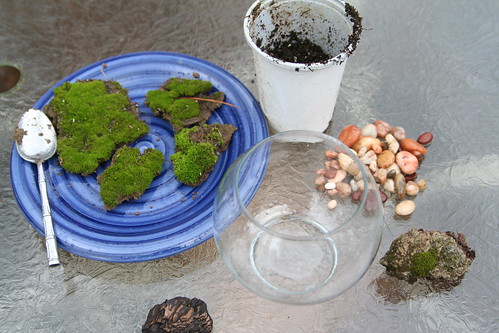
Materials for Moss Terrarium

Materials

  • a wide-mouthed glass container (goldfish bowl, candle holder, or jar; you may find something appropriate a thrift store)
  • gathered moss (gently lift from soil or rock, bringing the soil on which it grows with you)
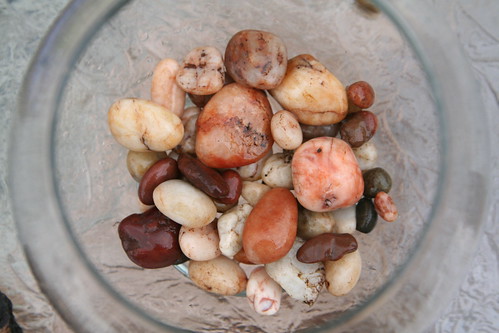
  • about ½ to 1 cup small gravel or pebbles (look for pretty pebbles in your yard)
  • about 1 cup loamy garden soil (or more if your glass container is large)
  • interesting rocks, bark, twigs, or gemstones
  • spray bottle with water

Optional Materials

  • a small plant that requires little water (perhaps a jade plant or other succulent)
  • beeswax for modeling or a small figurine
  • crystals, glass gems, small twigs

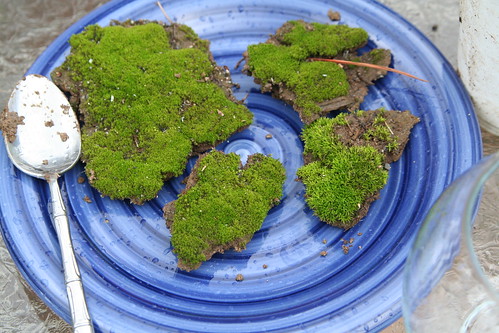
Gathered Moss


Tutorial

Begin by gathering your materials. You may be able to gather most of the materials you’ll need from your yard or nature walk. (Be sure not to remove items from protected nature areas.) Take a soup spoon or small shovel and a gathering basket along on your walk. Look along creeks and in shady, moist areas.
When you find mosses, stop and consider them a moment. Moss is a delightful, soft plant. It gets it’s nutrients from the air, rather than the soil, and requires shade and only a little water. It makes a perfect plant for a terrarium that gets only indirect sunlight in your home.

Feathery soft, your green so bright,

preferring deep shade to the light,

quietly sitting, waiting, spreading,

it’s hard to tell which way you’re heading.

I will touch your velvet softness.

Moss, I love your gentle mossness.


You make a lovely velvet bed

for a Fairy Queen to rest her head,

who sleeps in afternoons for rest

and dreams of forests nightly blessed.

We creatures great and creatures small

find you the tenderest plant of all.


Thank the earth for growing such lovely mosses and gently dig up some patches. Don’t take more than you need to fill your terrarium container, and you’ll likely need to take only an inch of soil or less.

Garden Stones in the Bowl

Now place your gravel or pebbles into your glass terrarium. These are at the bottom for drainage of water away from the soil. Add your garden soil to the container. It will probably cover your pebbles completely. You may wish to grade your soil so that some areas are higher than others. This will add interest to your finished terrarium.

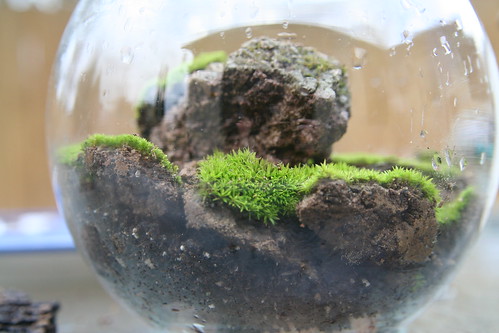
Side View

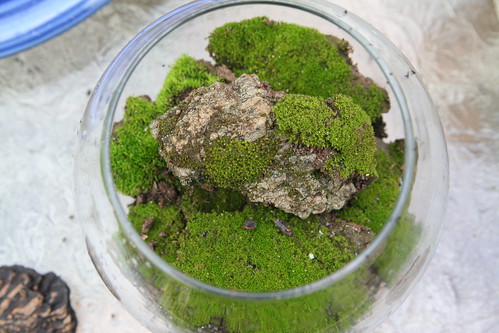
Arrange your mosses (in patches) in your terrarium. Try to keep your clumps of moss mostly intact to make a contiguous, soft carpet. Alternatively, you could place moss in only part of your terrarium, and decorate the other areas with a plant, pretty pebbles, or glass gems.

Mosses In

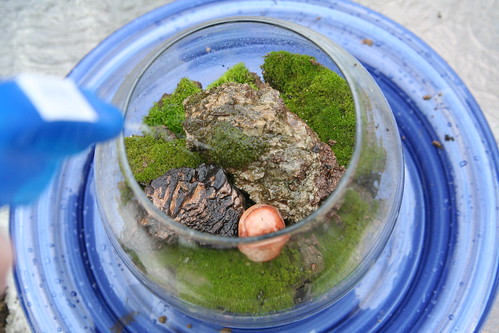
Add your decorative rocks, bark, or crystals. I happened to find a small chuck of old concrete that had more moss growing on it, so I added it to my terrarium. What will you add? Crystals? Twigs? Polished stones? A ceramic figurine of a deer or a rabbit? A butterfly? A gnome or a Fairy Queen in repose? Perhaps you’ll change your terrarium decorations with the holidays.

Spray to Keep Moist

Spray your moss garden with some water. Your mosses may need spraying once or twice a day to stay green and living. Avoid exposing them to direct sunlight.

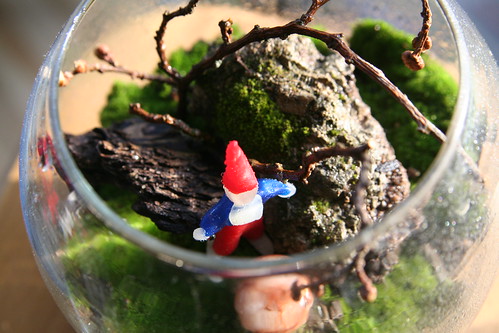
Beeswax Gnome

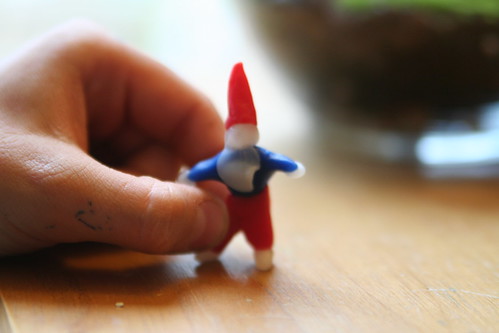
I turned to our modeling beeswax to fashion a tiny gnome. I think he’ll make an excellent caregiver for my moss garden terrarium. Gnomes are kind custodians of the earth.

Finished Moss Terrarium

Be a good caregiver of your moss garden terrarium, spray it gently every day, and be careful not to saturate it with too much water. (Once again, the direct sunlight you see in this photo is too hot and bright for your moss. Be sure not to keep your terrarium in such a sunny location.)

Now add your terrarium to your nature table, your dinner table for an Earth Day celebration, or anywhere in your home that needs a small reminder of the earth’s beauty.

  • About Sara

    Thanks for visiting! I’m Sara, editor and writer, wife to Ian, and mother of two precious boys. I am living each day to the fullest and with as much grace, creativity, and patience as I can muster. This is where I write about living, loving, and engaging fully in family life and the world around me. I let my hair down here. I learn new skills here. I strive to be a better human being here. And I tell the truth.

    Our children attend Waldorf school and we are enriching our home and family life with plenty of Waldorf-inspired festivals, crafts, and stories.

    © 2003–2018 Please do not use my photographs or text without my permission.

    “Love doesn’t just sit there like a stone; it has to be made, like bread, remade all the time, made new.” —Ursula K. LeGuinn

  • Buy Our Festivals E-Books


  • Archives

  • Tags

  • Categories

  •  

  • Meta