Easter Gifts: Story Eggs

We have been reading Eggs for the Hunting, by Reg Down, which we got from A Toy Garden. I was inspired by Reg’s drawings in the book and I wondered if I could emulate them on some wooden eggs (also from A Toy Garden) to make my own story eggs. I had seen story eggs made by Mama West Wind who writes at Chocolate Eyes, and they were so beautiful I had to try to make some myself. (You can find a full tutorial by Chris Willow how to do this here at Rhythm of the Home.)

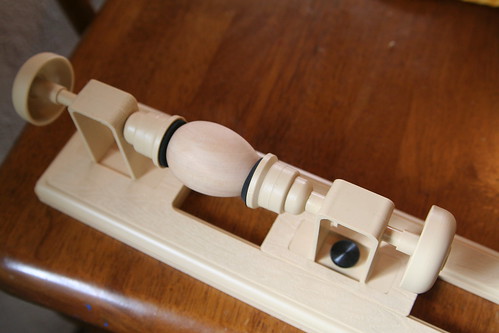
Egg Lathe

This seemed the perfect time to try the wood-burner for the first time. Plus, I had this nifty, super-dandy lathe thingy that Ian bought me for Christmas to try out, so a little project was born.

First Try at Wood-Burning

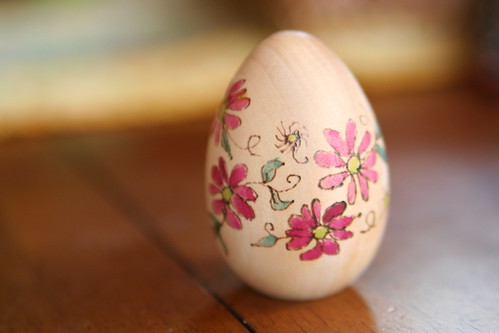
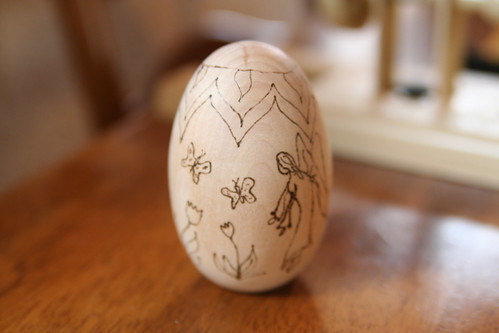
My first wood-burning attempt. I dig it! I used the pointiest tip and was pleased with the results.

Wood-Burned Egg

I painted the flowers with some watercolor paints. I liked being able to see the wooden egg, so I left the natural wood.

Attempt

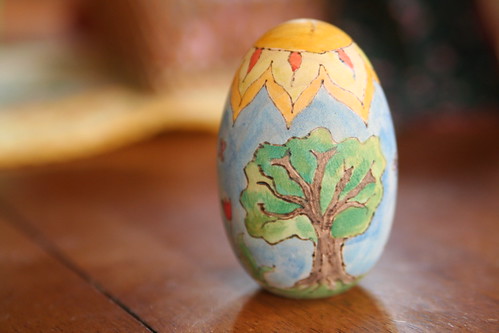
Emboldened by my first success, I tried one of Reg’s designs on this large wooden egg.  This was trickier. It felt important not to mess it up. I just worked slowly and took lots of deep breaths while using the wood-burner.

Wood-Burned Egg

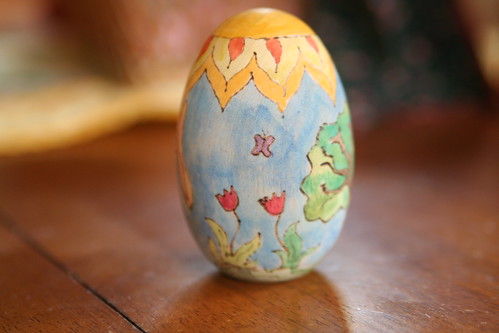
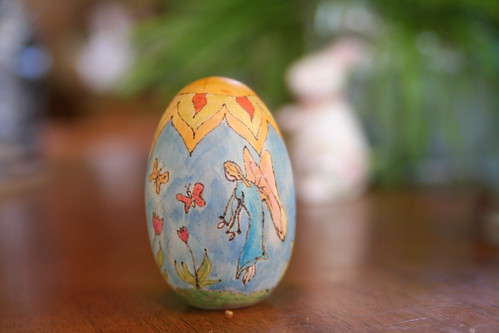
Then I painted it with Stockmar watercolors. The illustration I was emulating is in black and white, so the colors here are my interpretation.

Wood-Burned Egg

I finished it with a nice coat of beeswax furniture polish.

Tiptoes Lightly Egg, Inspired by "Eggs for the Hunting" by Reg Down

My Tiptoes Lightly isn’t perfect, but I think she’s a fine first attempt. I hope to make more of these story eggs before Easter comes. My kids haven’t seen this egg yet and I’d love to have two finished for their Easter baskets.

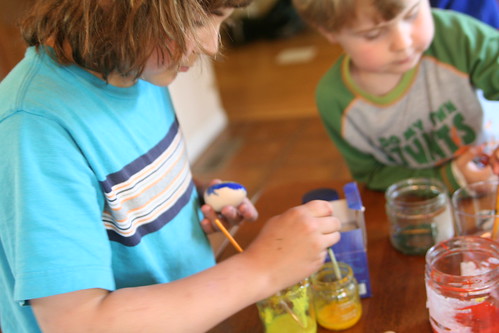
Painting Wooden Eggs

Since we had some smaller wooden eggs, too, I let the boys paint them.

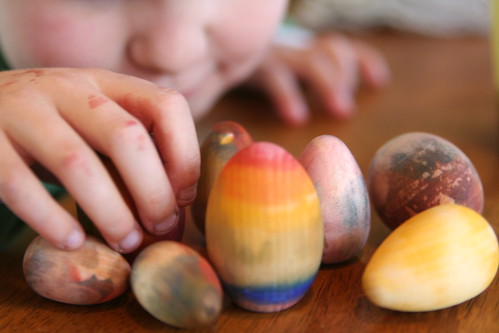
Our Wooden Eggs

What fun things are you doing to enjoy Easter?

Creating Your Easter Nature Table Tutorial

On Our Table

Easter is a holiday that fills me with hope and appreciation for the new life being born and blooming all around me. It is the premier Christian holiday, which recalls the suffering and dying of Jesus Christ on the cross, and his resurrection. It is celebrated the world over by Christians everywhere.

Easter is also a springtime celebration in nature religions, and is considered by scholars to be about three thousand years old. Closely associated with the spring equinox, the goddess Ostara (or Eostar or Eostre) was worshipped by Germanic peoples long before the religion of Jesus swept Europe. The symbols in Christian Easter celebrations are very similar to those symbols of the fertile spring goddesses, who can be found in many ancient cultures. For me, this synchronicity of symbolism among multiple faiths resonates. To me, it highlights the similarities among people everywhere and our universal admiration for the earth and its cycles.

Whatever your religious (or nonreligious) take on this springtime festival, you can create a nature table that calls to mind the bounty of the earth and celebrates abundance, new beginnings, and growth.

Spring Nature Table in Daylight

My spring maiden graces this spring nature table. Her companions are rabbits and lambs, both symbols of spring’s bounty in the birth of new animals. Rabbits are prolific breeders, so they have long served as a symbol of fertility and abundance, as well as the bringers of colored eggs at Easter. A beautiful meadow, painted by my son in second grade, serves as a backdrop. A green crystal frog at the far end holds a tea light for a nighttime glow. A needle-felted bird sits on a nest in a branch (not pictured).

Spring Nature Table Left Side in Daylight

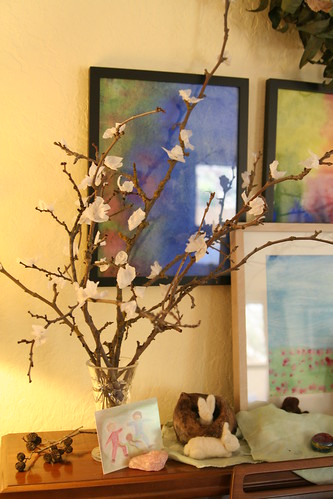
I love blooming branches, but as I don’t wish to cut any off my trees, I crafted these blooms by hot-gluing white tissue paper blossoms onto bare branches we gathered from the ground. The card showing dancing children is a drawing by my god-daughter. It reminds me of how happy we are to be outdoors again in spring.

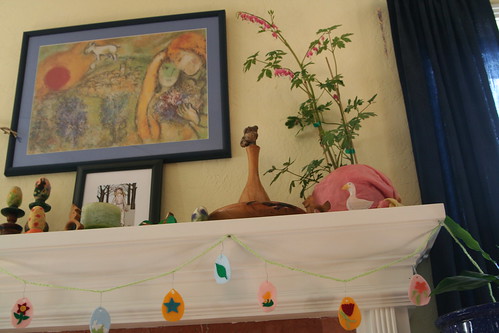
Easter Nature Table (Mantel) with Felt Egg Ornaments

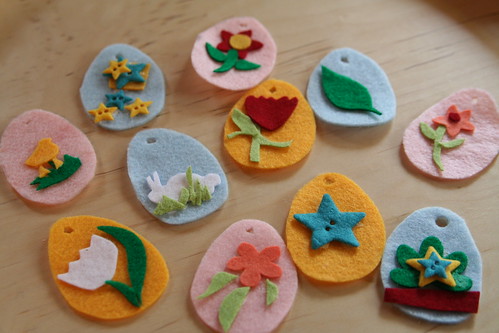
Here is a nature table created on our fireplace mantle. We displayed our many needle-felted eggs on upside-down cups and the tops of candle sticks. I framed a print of Persephone, the Greek goddess of the spring and added it. A plant of bleeding hearts provides a living symbol of life, flowers, and freshness. From a long, finger-knitted yarn rope (made by Lucas) and felt egg decorations we made, we created a simple garland. The felt eggs aren’t fancy: They are two-dimensional and made with “craft” acrylic felt and white glue.

Easter Felt Ornaments

Simple and charming. I use these year after year.

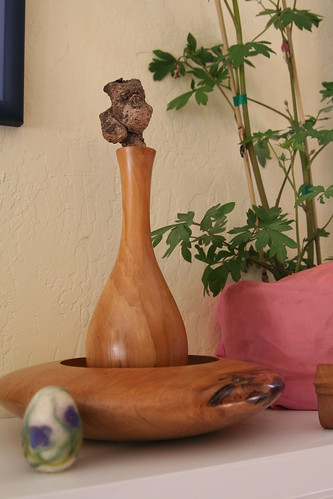
Easter Nature Table (Mantel)

A friend of mine found a gnarled piece of wood one day and picked it up. It has the shape of a pregnant woman, with bulbous belly and breasts. My friend gave it to me when I was pregnant and I have kept it as a special object of love and fertility ever since. Perhaps you have some totem that represents the time when you were carrying your babies inside your body, or the time you were waiting eagerly for their arrival in your family. The spring nature table is a perfect place to put such honored objects.

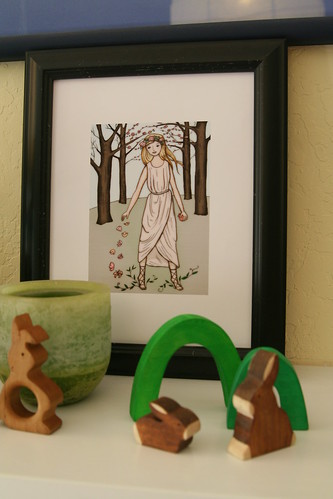
Easter Nature Table (Mantel) with Persephone

We added some small wooden toys, too: frolicking rabbits and stately geese. These are for curious little hands to touch and enjoy.

For your own nature table, decorate and display Easter eggs of any kind. Blow eggs and hang them from branches to make an Easter tree. Or gather them together in an attractive bowl. Balance colored eggs atop tall candle holders so they may be seen from a distance.

Materials

You most likely won’t have to buy much to create your Easter nature table. Here are some items you probably already have:

  • pretty cloth in a spring color
  • flowers or grasses from your garden
  • fruits or seeds
  • decorated eggs (blown eggs will last longer)
  • candles or figurines
  • watercolor paintings (used as backgrounds or cut into Easter shapes: bunnies, eggs, birds, chicks, flowers)
  • any items that symbolize for you fertility, renewal, awakening, abundance, birth, and beauty
  • religious items that speak to your family’s traditions or faith
  • boxes or bowls

Tutorial

First, clean your nature table. Give the wood a nice polish, if appropriate.  Enlist the aid of your children. Be sure to listen to their suggestions about what to add. Now is a great time to sing springtime songs and recite a poem or two. Lay down your cloth on the table and set up any background cloth, picture, or painting you wish to include. This works well for a table that is backed by a wall, but it’s not necessary. I find it’s nice to have several levels if I have space. This can be achieved by using boxes or upside-down bowls underneath your cloth to make hills. Items place on high spots will draw people’s focus. Now arrange your special items however you like. Candlestick holders without candles are a great way to display beautifully decorated Easter eggs. Leave space for additions such as picked flowers that your little ones might contribute throughout the season.

If you have included fresh flowers or fruits or real eggs on your nature table, be sure to check them often and remove and replace them when they wilt or get too old. Your nature table will inspire you if it looks fresh—which is the whole nature of springtime. When it starts to feel old or boring to you, either rearrange it or choose new symbols to display. Keeping your nature table neat and seasonal is a fun, rhythmic way of helping children celebrate festivals and mark the passage of time.

Easter Bunny Was Here

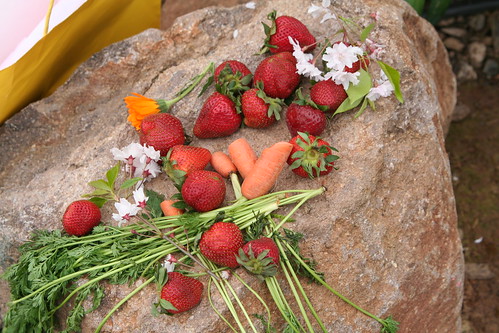
Finally, I wanted to share our family’s Easter tradition. We create an altar outside the night before Easter on a large rock in our backyard. We leave out carrots for the Easter bunny, who personifies for us an Earth spirit, Ostara, or goddess of the spring. In the morning, early on Easter Sunday, we return to our outdoor altar to find the carrots nibbled and fruits and flowers left in their place for us. A basket of small gifts is found there for each of our sons and colored eggs are hidden throughout our yard. As the sun rises over the trees, we greet the new day, hunt for eggs in the dewy grass, and give thanks for the bounty of spring.

* Portions of this article were originally published in the Little Acorn Learning April Enrichment Guide.

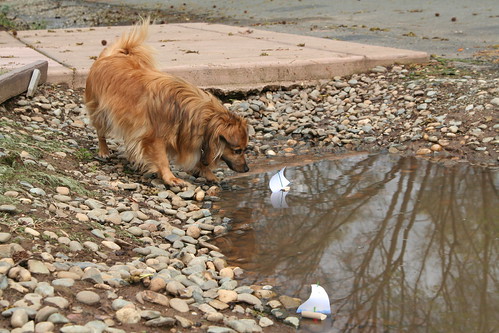
Perfect Play

Rainclouds

Sailboats

Asher

Sailboats

Lucas's Boat

Sailboats and Curious Dog

Sailboats

Raining

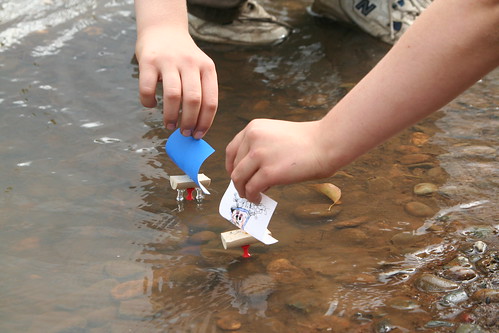
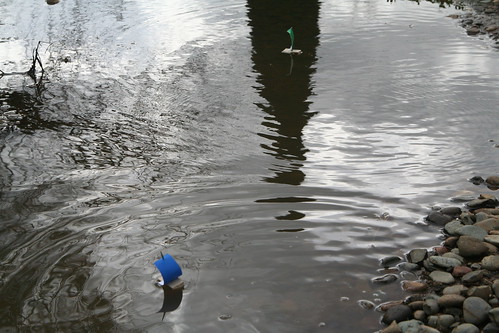
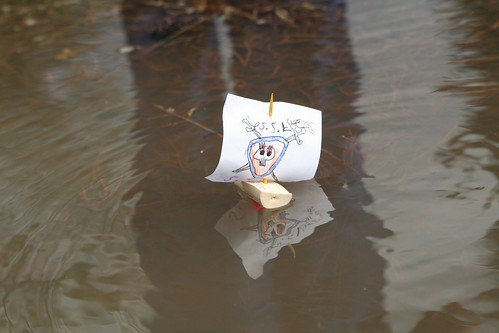
No words are needed, I think.

Dyeing Easter Wool Tutorial

Wool

Last year, while we were dyeing Easter eggs, we also dyed some plain white wool batting. I am so pleased with the results. In the photo above are a wool colors from both natural and artificial dyes. I’ve saved this wool all year and now I’m making goodies for my boys’ Easter baskets out of it. I doubt that they’ll appreciate the cyclical nature of this, but I do. And don’t forget, this is science! So by all means, get the kids involved.

Materials

  • natural dye ingredients (such as turmeric, boiled yellow onion skins, boiled red cabbage, boiled beets, etc.)
  • or food dyes from the supermarket
  • or Easter egg kit dyes (capsules or powders)
  • white wool batting or roving (or get fancy and dye silk cloths to make your own play silks?)
  • distilled white vinegar
  • mugs or drinking glassware
  • spoons

Tutorial

Really, this is totally simple. While you’re dyeing your eggs, add in a good handful or two of wool. We found this was easy to do with the natural dyes as we had a big bowl full of each color, rather than a mere mug full of color.

Onion Dye Bath with Eggs and Wool

Onion skins turn wool a pale, golden yellow.

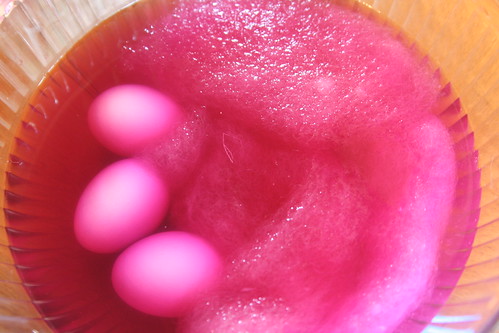
Cabbage Dye Bath with Eggs and Wool

This is the red cabbage dye. It will turn both eggs and wool bluish.

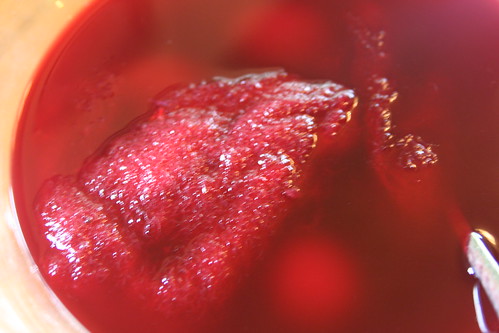
Beet Dye Bath with Eggs and Wool

This is beets. It turns the wool a warm light brown. The eggs and wool at first are a beautiful mauve color, but I think they then oxidize and end up brown.

Dyeing

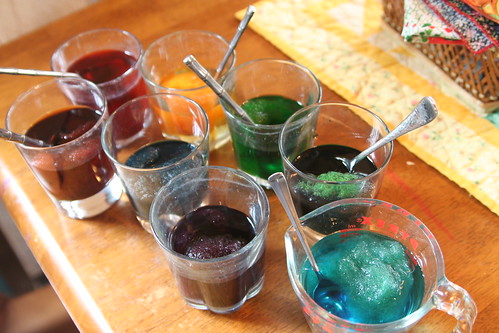
If you are using kit dye or food coloring to dye eggs, you probably have your dyes in mugs or glasses. (Right? That’s the way we always do it.) So you can just keep the dyes for a day or so after dyeing eggs and dye wool in the mugs. You can do handful after handful if you like. We used about a 1/4 cup of distilled white vinegar in each cup, added the dye, and then added water.

Our yellow dye bath was completely exhausted by the wool. None of the color was left when we pulled the wool out. It makes me wonder if the other colors might have done that if we had left the wool in longer.

I suggest keeping your wool in the dye for about 24 hours. When your wool is the color you like, squeeze out the extra dye into the cup, then rinse it in cool running water until the water runs clear.  Set it on a wire rack or pin it to a clothesline outside to dry.

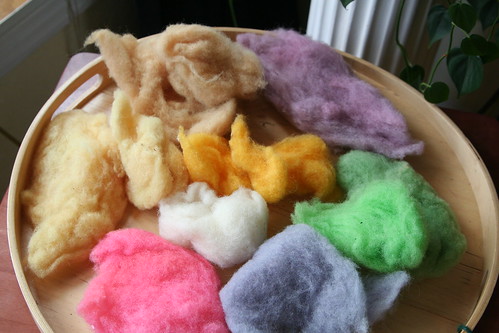
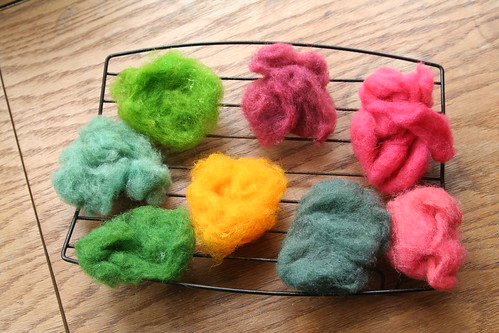
Dyed Wool

Here are the wool colors we got. I’ll name the colors of food dye baths starting with 12 o’clock: purple, dark red, pinkish brown, blue, yellow, dark green, blue green, and yellow green. It seems to me like the blue should be darker and brighter. It may be that my sons sneacked extra green drops into the blue? In any case, I consider this experiment to be a success because it means any frugal crafter or artist can get a wide range of beautiful, bright colors without breaking the bank, using standard McCormick brand food dyes. I love buying new colors of wool to use in projects, but this is a simple way to get many colors cheaply!

Wool batting doesn’t spin into yarn all that well because the fibers tend to be short. It works very well for needle-felting or wet-felting, however. Wool roving, however, is great to spin or felt.

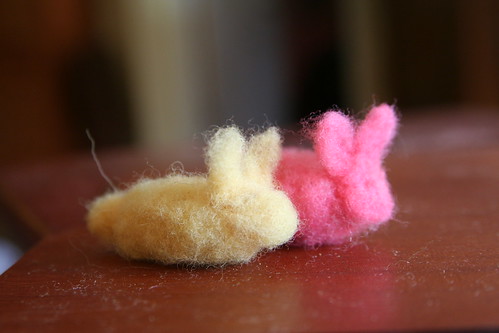
Simple Bunnies

I’m thinking that a rainbow of simple wee bunnies made from wool we dyed ourselves might be just the thing for Easter baskets this year. What would you make with Easter wool?

St. Patrick’s Day Fun

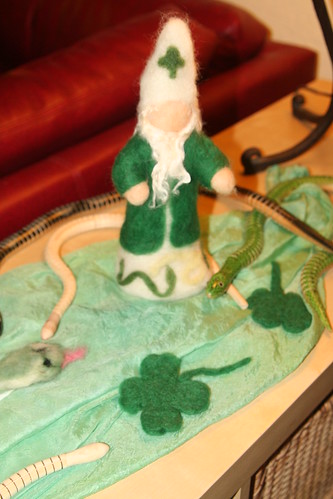
Needle-Felted St. Patrick and Snakes

It was a big time, of course. St. Patrick’s Day was fun for all of us, I think. We crafted. We decorated.

St. Patrick, Snakes, and Leprechauns

Leprechaun Party All Set

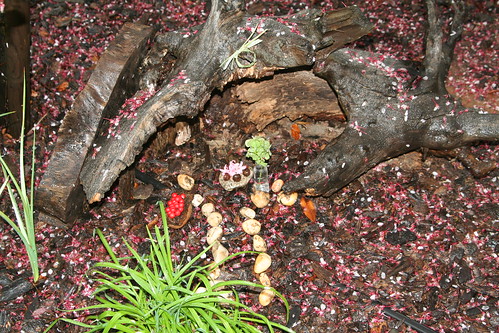
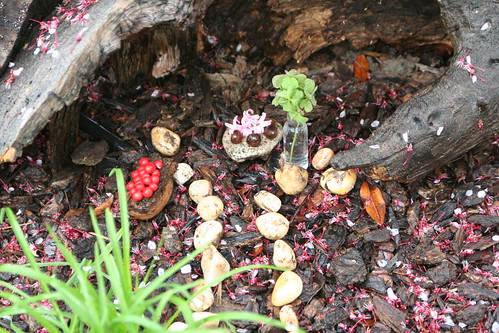
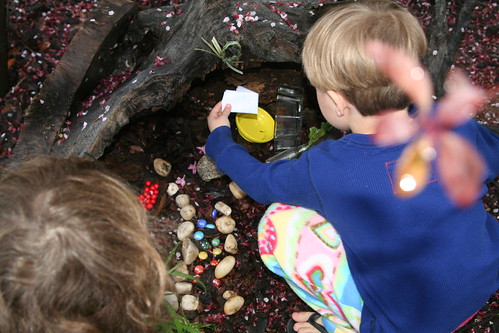
In between epic puddle splashing and a during jolly good time in the heavy rain, we set up a Leprechaun party complete with shamrocks in a vase of water, table with acorn cap cups, hyacinth flowers and bird berries.

Leprechaun Party All Set

The path we lined with white stones was very inviting to the wee folk.

Mama-Made Leprechauns for My Boys

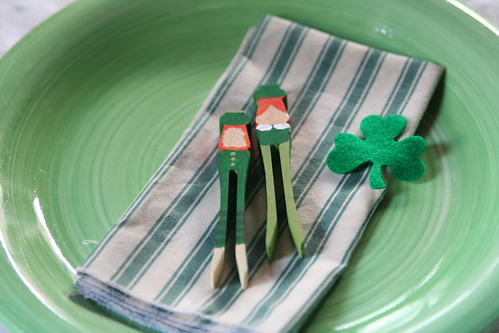
I had made some secret presents: wooden clothespin Leprechauns. A boy and girl for each of my sons.

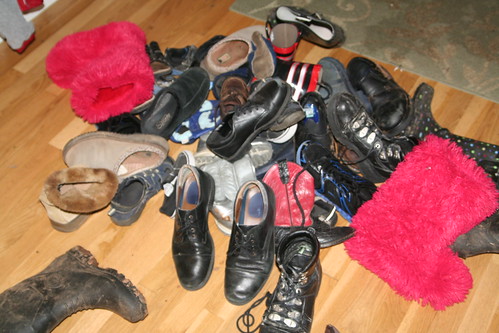
Leprechaun Trick: Huge Pile of Shoes!

Even though we made that lovely party space and put out brownie treats for them, the Leprechauns couldn’t help themselves. They pulled a small trick on us anyway and piled all of our shoes in the entry, blocking the front door. It’s in their nature, you know. They’re tricky!

Gifts from the Leprechauns

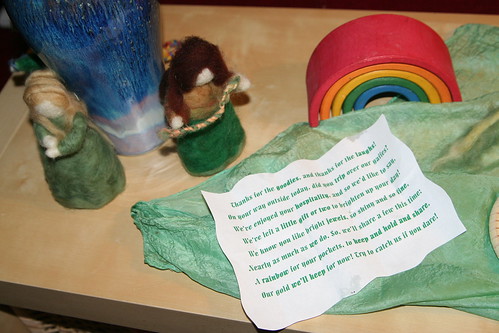
They did, however, leave the boys some treasures. A set of rainbow gems for each and a note.

St. Patrick's Day: Note from Leprechauns

“Thanks for the goodies, and thanks for the laughs!

On your way outside today, did you trip over our gaffes?

We’ve enjoyed your hospitality, and so we’d like to say,

We’ve left a little gift or two to brighten up your day!

We know you like bright jewels, so shiny and so fine,

Nearly as much as we do. So, we’ll share a few this time:

A rainbow for your pockets, to keep and hold and share.

Our gold we’ll keep for now! Try to catch us if you dare!”


Apparently, Leprechauns think they are very clever.

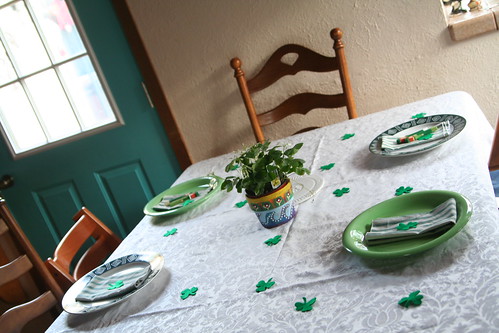
St. Patrick's Day Table

St. Patrick's Day Table

I didn’t snap any photos of our green shamrock pancakes or piles of golden eggs. I was too busy tucking in with and enjoying my fellas. It turns out that clothespin Leprechauns are great for homemade zip-lines. Then we readied our home for a  fun party with our friends. We enjoyed a yummy lamb stew, kale salad, and soda bread (from a mix). Today, Asher is talking about his Leprechaun friends.

Hope you had a festive holiday, too!

St. Patrick’s Day Kid Crafting

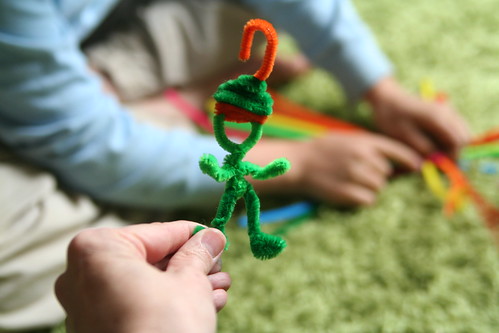
Chenille Stem Leprechaun

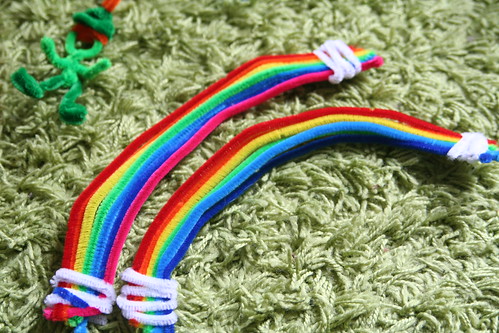
Here’s some more simple, impromptu St. Patrick’s Day kid crafting. We made pipe cleaner (they’re called “chenille stems” nowadays) leprechauns, shamrocks, and rainbows yesterday.

Chenille Stem Rainbows

Tonight we’ll be soaking the rainbows in a Borax solution to grow crystals on them. This is an idea I first saw on Pinterest, then traced it to here. It’s originally from Sweet and Simple Things, and this is where I first saw the shamrock shapes, too. Holiday science!

Impromptu Weaving

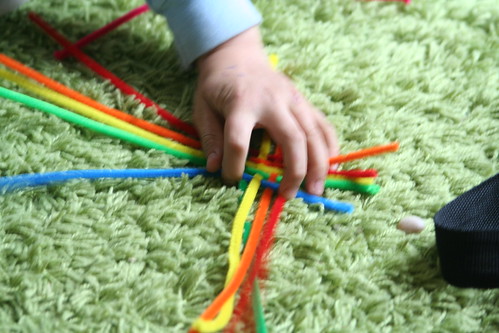
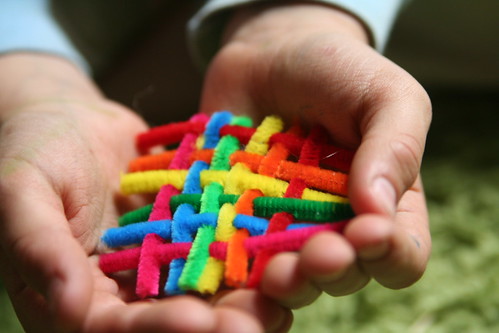
Lucas decided to weave his pipe cleaners to make little woven rainbow diamond shapes.

Solstice and Lucas

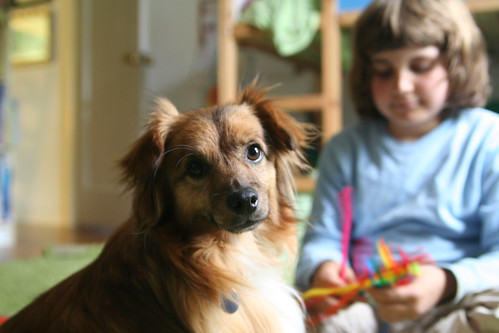
Solstice helped by looking handsome and providing moral support for our creative impulses.

Rainbow Weaving with Chenile Stems

Here’s Lucas’s invention. He bent in all the ends to keep it from unraveling.

St. Patrick's Day Mobile

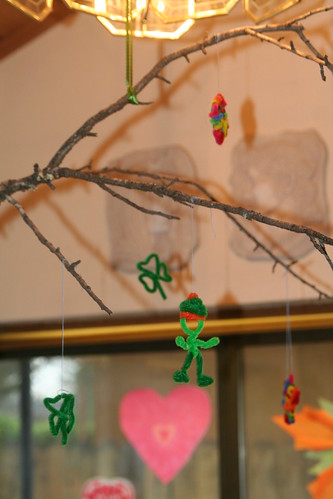
We hung our little creations with sewing thread on a twig with several branches. If our crystalized rainbows are successful, we’ll hang those here, too. I think it will be festive for our little party we’re having tomorrow.

And since it’s still raining around here, here’s a sweet Irish blessing I love.

May the blessing of the rain be on you—
the soft sweet rain.
May it fall upon your spirit
so that all the little flowers may spring up,
and shed their sweetness on the air.
May the blessing of the great rains be on you,
may they beat upon your spirit
and wash it fair and clean,
and leave there many a shining pool
where the blue of heaven shines,
and sometimes a star.


St. Patrick’s Day Paper Ornaments Tutorial

St. Patrick's Day Paper Ornaments

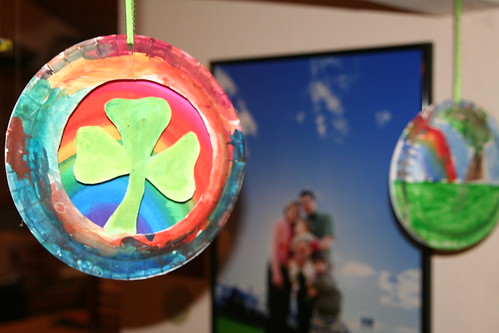
We are sick. Well, Lucas and I are, and we spent the day at home. This afternoon we rallied a bit and managed some impromptu crafts for St. Patrick’s Day. So, these kid-friendly St. Patrick’s Day paper ornaments were born. I offer these in the spirit of using what you have on hand for some low-key fun.

Materials

  • 2 paper plates
  • watercolor paints and brushes
  • watercolor paper (optional)
  • scissors
  • ribbon or yarn
  • compass and hole punch (optional)

Tutorial

St. Patrick's Day Paper Ornaments

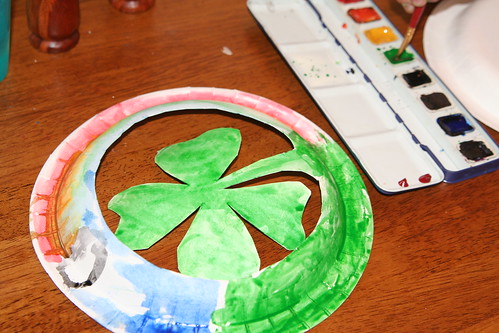
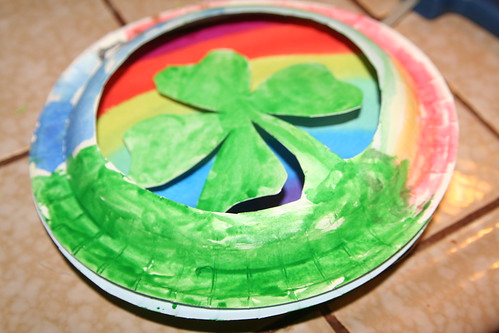
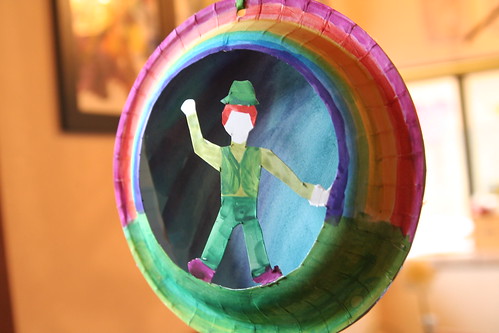
Insert your scissors into a paper plate and cut along the outer ring and cut out a shamrock shape from the center of the plate, leaving the bottom of the shamrock’s stem attached to the outer circle. I cut out a three-leaf shamrock and a four-leaf. If you get ambitious, you can cut out the figure of a standing leprechaun, leaving both feet and one hand attached to the outer circle. This is harder to do, but give it a try. You can choose to draw your design on the plate first, or just eyeball it, start cutting, and see what happens.

St. Patrick's Day Paper Ornaments

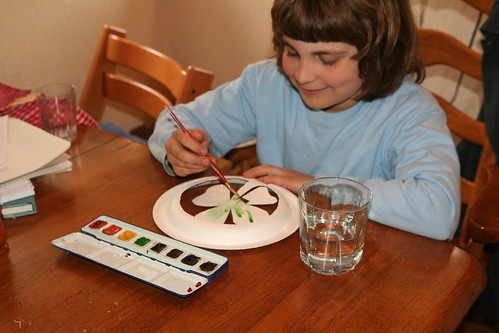
Now get your kids to paint your design. Painting is such a great activity when you need to rest or cultivate calm in your home.

St. Patrick's Day Paper Ornaments

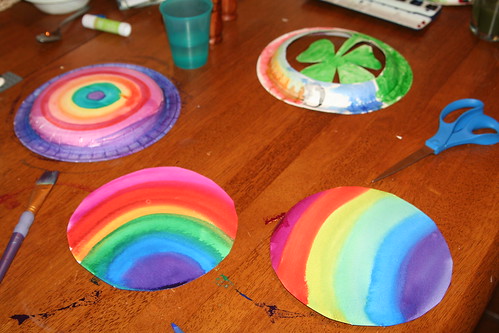
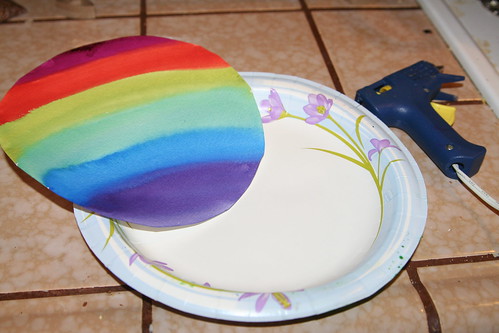
If you have the type of paper plates with a coating on them to make them less absorbent, then you will probably also want to paint a circular background on watercolor paper. Do you know where your compass is? If you have one, it makes this step a lot easier. Draw a circle that will fit inside your paper plate. I painted rainbows on some circles to use as backgrounds. I love rainbows.

Lucas Painting

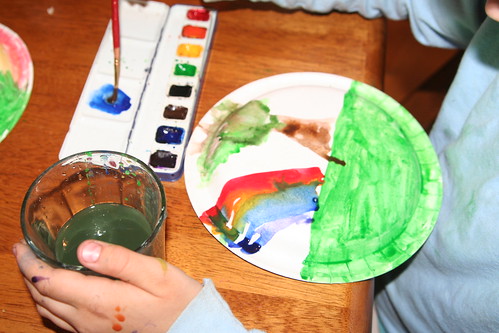
Your children should also paint the back of a second paper plate. Be sure to wait until all the watercolor painting is completely dry before you assemble your ornament.

St. Patrick's Day Paper Ornaments

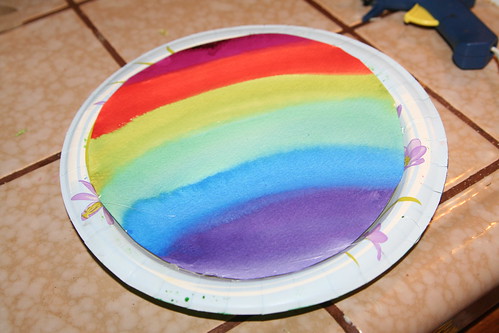
With hot glue, glue your circle background into your bottom plate. It will cover any design on the plate and compensate for that water-resistant coating.

St. Patrick's Day Paper Ornaments

Like so. The design that is still visible around the edges won’t be visible in a minute.

St. Patrick's Day Paper Ornaments

Now stack your front cut-out design on top of the bottom paper plate. Using hot glue, seal the outer edges together. Press them firmly to make them stick nicely. You might have to apply glue in six or seven spots around the circle.

St. Patrick's Day Paper Ornaments

Finally, punch a hole in the top, thread a piece of ribbon or yarn through the hole, and hang your ornament.


St. Patrick’s Day Leprechaun Mobile Tutorial

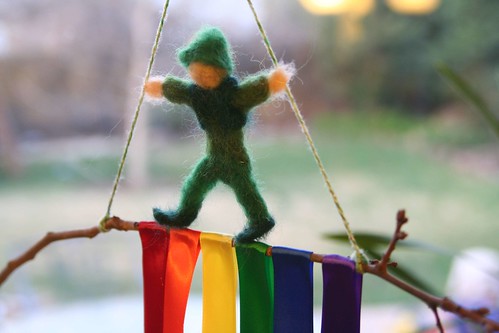
Leprechaun Mobile

I have a deep and abiding love for mobiles. Holiday decorations that hang can be very festive without taking up too much space or cluttering your nature table. Here’s a St. Patrick’s Day leprechaun mobile that is easy to make and quite whimsical.

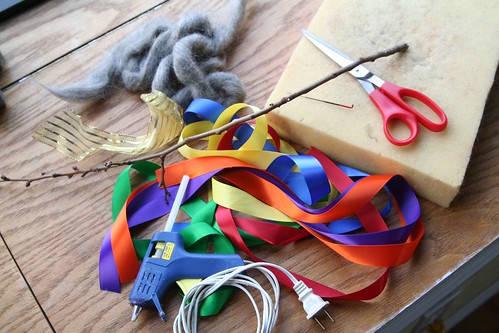
Materials

Materials

  • foam base and needle-felting needle
  • wool roving in gray or black, green(s), and skin colors
  • low-temperature glue gun and glue sticks
  • one twig approximately 18 inches long; ideally it will have a 6-inch straight section in the middle
  • gold ribbon, gold foil, or gold tissue paper
  • 1-inch ribbons in rainbow colors, approximately one yard of each color
  • yarn or string, approximately 2 yards
  • needle, thread, and scissors

Money-Saving Alternatives

  • Narrower ribbon in rainbow colors costs less. Although I used 1-inch ribbon, you could use several strips of the same color ribbon to create a 1-inch band of color for each color of the rainbow.
  • Instead of 1 yard of each color, you could use only a half yard. Your ribbons would be a single layer, not double as in the photos below.
  • Check your gift wrap stores. You may have some gold tissue paper or ribbon left over from a package.

Tutorial

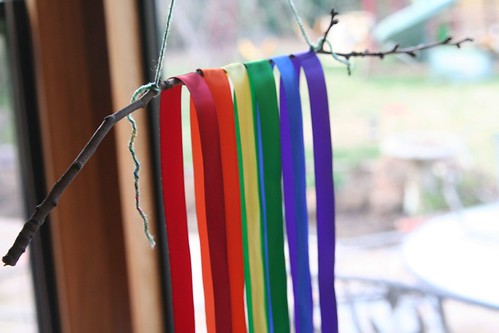
To begin, tie two pieces of yarn or string (each about a yard long) to your twig, approximately 8 inches apart. Hang the twig from the two strings more or less horizontally (adjust the position of the two ties on the twig as needed). Then tie a knot in the two strings about 8 inches up from the twig. This will make a triangle of string above your twig. Tie your twig to something so that it hangs freely at shoulder level so that you can work on it comfortably.

Rainbow Ribbons

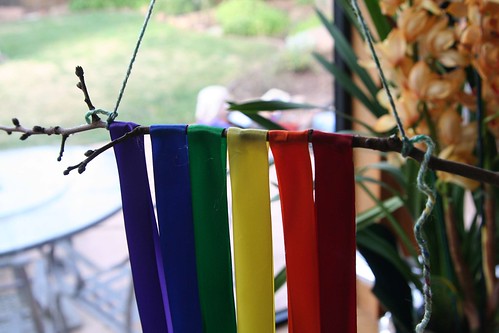
Lay your ribbons over the twig in rainbow order. Their two ends should be even at the bottom. Make sure you like the position of each ribbon before you affix any glue. (You can use clothes pins to hold them in place while you decide on their optimal positions.)

IMG_6426

With your glue gun, put a dab of glue on the inside of one layer of a ribbon and pinch the other layer over the top of the warm glue to fix the ribbon to itself. Repeat this for each color. See the photo above.

Pot

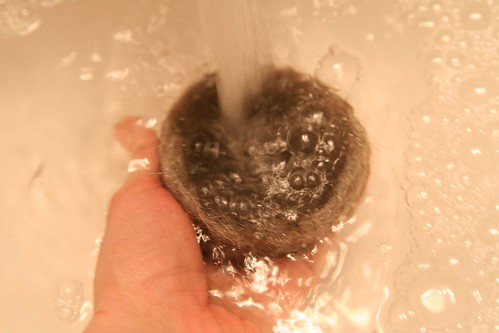
Now, take your gray or black wool roving, felting needle, and foam pad and needle-felt a pot. This will be your pot of gold. Mine was about 2 and ½ inches in diameter. If you wish to have a sleeker look for your wool pot, you can first shape it with your felting needle, then wet-felt the pot in hot water with soap. Gently rub your pot inside and out with soap until the fibers mat firmly together. Rinse it in both hot and cold water.) Shape it carefully into a pot and let it dry. You may still want to apply your needle again to perfect the pot’s shape.

Wet-Felting the Pot

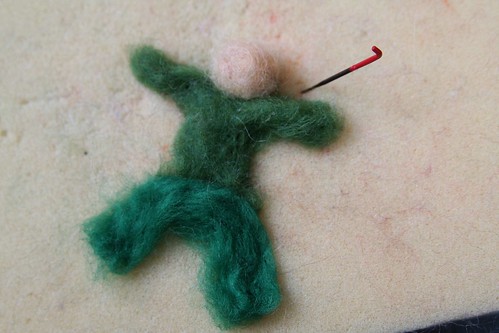
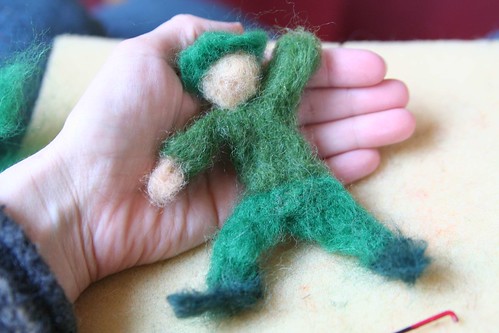
With your green and skin-colored wool roving, needle-felt a leprechaun. No wire skeleton is needed for this project and since this figure will not be played with, you can attach head, hands, legs, shoes, and hat by simply needling the fibers together. Start with a torso and arms. Add legs. Add a ball of skin-colored wool for a head.

Needle-Felted Leprechaun in Progress

Needle-Felted Leprechaun in Progress

Your leprechaun can be as traditional or as unique as you like. Mine was a kind of Waldorf-inspired figure dressed in several greens, with a jaunty hat and dark green vest.

Leprechaun on Top

Stand your leprechaun on top of your horizontal twig. With needle and thread, sew your leprechaun’s hands to the yarn or string hanger. (Feel free to adjust the knot above the leprechaun‘s head as needed to make it possible for the hands to hold both strings.) Finish off the two yarn/string knots on the twig by tying them securely and cutting off the excess.

Gold Suspended

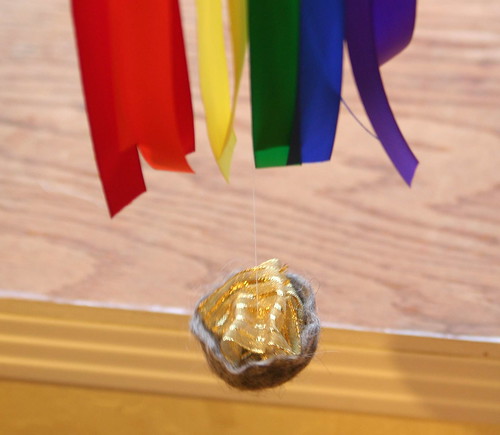
When your pot is dry, crumple your gold ribbon, foil, or tissue paper into a mound of gold and place it into your pot. You might want it to heap above the edge of your pot. With a long thread, sew up from the bottom center of your wool pot, through your gold, and back down a couple of times. On the way up again, extend your long thread all the way up to your rainbow-covered twig and tie your thread securely to the center of the twig. You’ll probably want to tie it in between the yellow and green ribbons. Cut of the excess thread tail. Your pot of gold should hang a couple of inches below your twig, at the end of your rainbow.

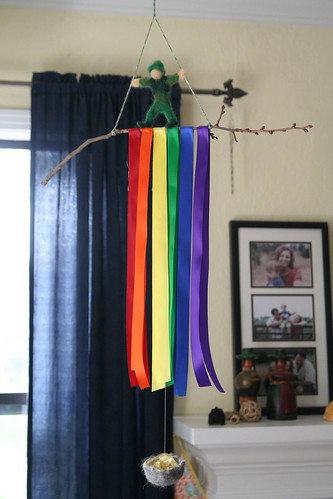
Finished Mobile

Find a nice spot in your home to hang your St. Patrick’s Day mobile with leprechaun and pot of gold, perhaps in front of a window, where fresh spring breezes will make your rainbow ribbons flutter.

* This article was originally published in the Little Acorn Learning March Enrichment Guide.

Shamrock Window Transparency Tutorial

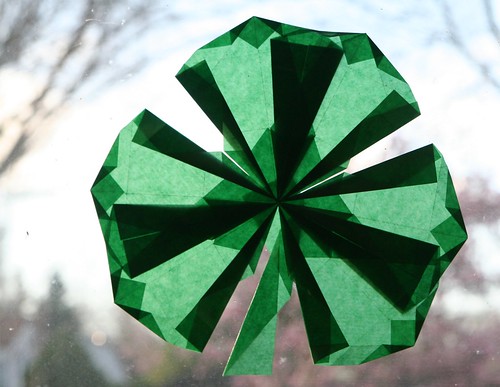
Finished Window Shamrock

Are you excited about Saint Patrick’s Day? I am because we can do anything we want to celebrate. I’m a big fan of “minor” holidays for this reason. We can be creative and silly and spontaneous, and even do something different every year, if we want.

I thought I would share this with you. I made up this shamrock window transparency, building on what I’ve learned from Magical Window Stars by Frédérique Guéret. Although there is a beautiful clover leaf design in the book, this is not it. This design that I’ve created uses the square kite paper that is most commonly available. The basic point I teach below is Guéret’s invention, but the configuration and the assembly of the shamrock was my idea. I hope you like it. In any case, I fully recommend this book if you love window stars like I do.

Materials

  • 7 sheets of square kite paper in dark green
  • scissors
  • glue stick
  • tape
  • ruler or straight edge for making crisp folds

Tutorial
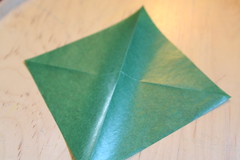
IMG_2205
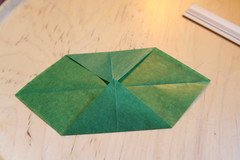
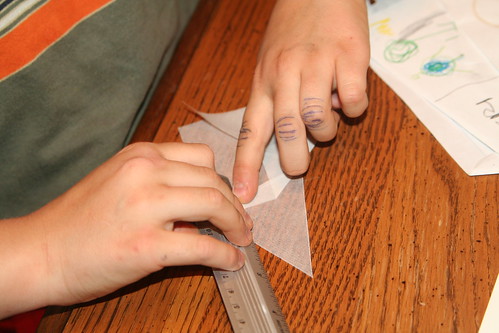
Fold your square into diagonals.

IMG_2207
Now fold opposing corners to the center line (photo above). The top is now a horizontal fold that is parallel to your horizontal crease.
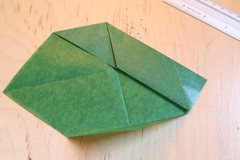
IMG_2208
Unfold the bottom corner; the crease you made will be used later. From the top, folded edge, fold the right side down to meet the center horizontal line (photo above).
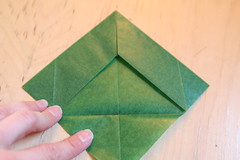
IMG_2211
Do the same to the other side. Now you have a point at the top again (photo above).
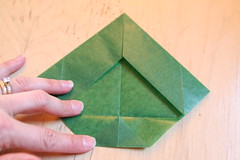
IMG_2212
Fold the bottom corner up to the horizontal crease line (photo above).
IMG_2214
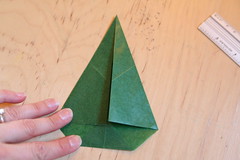
Now fold both sides in to the center vertical crease. This step looks like an airplane or maybe a sailboat. Do your best to keep the top point crisp.
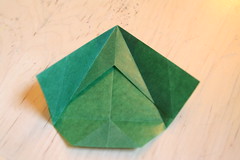
IMG_2215
Open those sides out again.

IMG_2216
Now fold the bottom sides up so that the flat bottom edge aligns with the center vertical crease (photo above). Unfold those bottom sides again.
IMG_2218
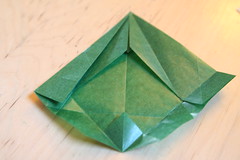
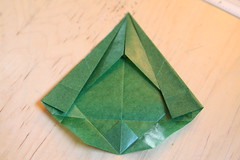
Now fold the left top side in again, allowing the corner to touch the horizontal crease you made in the previous step. Your top point is becoming more acute.
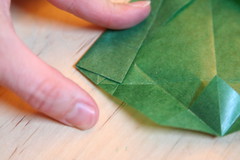
IMG_2219
Above is a detail of this step. See where the left edge folds in and meets the crease? The corner touches the horizontal crease.
IMG_2220
Now do the same with the right side.

IMG_2221
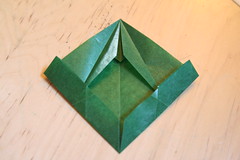
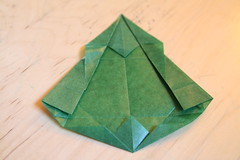
Open out the innermost flaps of the top point, allowing their “wings” to extend beyond the edges of the sides.
IMG_2223
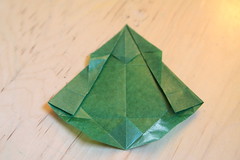
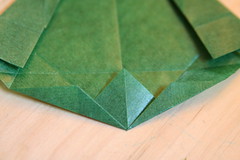
From the bottom center, you have two diagonal creases. Fold the very bottom edge on both sides up, aligning the bottom edge with the diagonal creases.
IMG_2224
This photo above is a detail of that final fold. Congratulations! You’ve make one point. Now— sorry about this part—you repeat that process five more times, so that you have six of these points. Two points will make one lobe of your shamrock.
IMG_2153
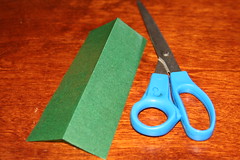
Once you have six of those points, you can make the stem. Take another square of kite paper and fold and cut it in half. Now fold and cut piece in half again and cut along the fold. You should now have a skinny, rectangular strip that is one-quarter the width of the original square.

IMG_2154
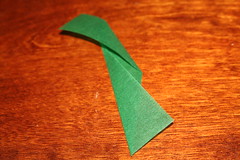
This long strip is the stem of your shamrock. Fold the bottom of the strip like the photo above.
IMG_2155
And fold the top of the strip in the opposite direction, like so. This makes it kind of curve. You now have all the pieces you need and you can assemble the shamrock window transparency.
IMG_2156
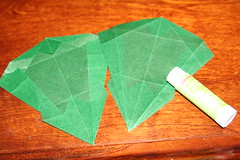
For each lobe of the three-lobed shamrock, you’ll need two points. The sharpest point—what I was calling the top in the photos above— goes in the center. The front side of each piece is the side with the points. If you run your fingers across the front, they will catch on the little triangles created in the folding process. The back side is smooth; your fingers won’t catch on any part. Turn one of the two points over so that the back side is up, as in the picture above. Run your glue stick along the right edge (where the glue end of the glue stick is in the photo above).
IMG_2159
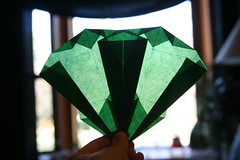
Align the points at the bottom as close together as you can, hold your two points up to the light, and align the darkest edges side by side, as you see in this photo above. They make a very dark upside-down triangle in the middle. The broad (formerly bottom) end of your two points will be overlapping. You now have one lobe of your shamrock done. Do the same thing two more times to make two more lobes of your shamrock.
IMG_2161
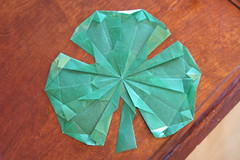
If it helps, hold up each lobe to the light before gluing them together. You should see a medium green triangle in the center when all three points are aligned. Now put all the center points together on top of your stem. Glue them to the stem with your glue stick so that the points of the center are just barely touching and the three lobes are almost touching halfway up, just beyond the edge of that inner triangle. The stem should extend down in the gap between the left and right lobes of the shamrock.
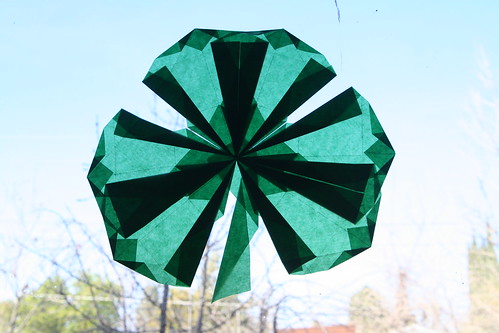
Finished Shamrock Window Transparency
Now you can hang your shamrock in the window. Make three or four loops of tape and put at least one on the back of each lobe to stick it to your window. Perhaps your window shamrock with bring you good luck!

The Dear Little Shamrock

There’s a dear little plant that grows in Ireland.
‘Twas Saint Patrick himself sure that set it.
And the sun on his labor with pleasure did smile.
And a tear from his eyes oft-times wet it.
It grows thro’ the bog, thro’ the brake, and the mireland,
And it’s called the dear little Shamrock of Ireland.

That dear little plant still grows in our land,
Fresh and fair as the daughters of Erin,
Whose smiles can bewitch, and whose eyes can command,
In each climate they ever appear in:
For they shine thro’ the bog, thro’ the brake, and the mireland,
Just like their own dear little Shamrock of Ireland.

That dear little plant that springs from our soil,
When its three little leaves are extended,
Denotes from the stalk we together should toil,
And ourselves by ourselves be befriended.
And still thro’ the bog, thro’ the brake, and the mireland,
From one root should branch, like the Shamrock of Ireland.

—Andrew Cherry
More Window Stars

Or, What I Did on My Vacation

IMG_1860

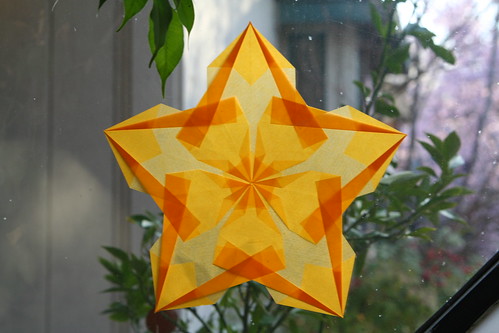
OK, I admit I’m completely obsessed with window stars lately. I think I mentioned that here a little while ago. Anyway, we had some time off last week and I took all my kite paper and window star books along with me to the mountains. I was determined to challenge myself to make some of the more complex stars. While I was there, in between working, eating, and playing outside, I made eight new stars.

IMG_1402

I also accidentally wrecked one, but shed only a few tears about that.

IMG_1857

The more you make them, the easier it becomes. I guess I got into a kind of flow.

IMG_1593

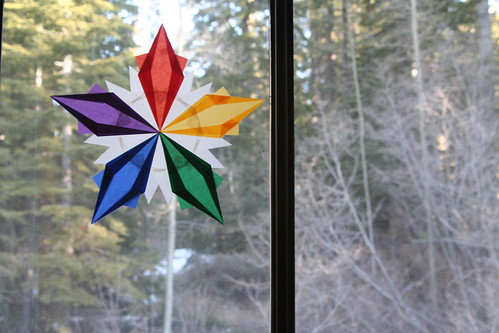
Lucas helped me make this beautiful multicolored star. He did most of the white center. I’m hoping he’ll want to make some more with me. I think stars like these may be our birthday gifts for everyone this year.

IMG_1597

I love the way the light shines through them and I confess I’m crazy about the colors.

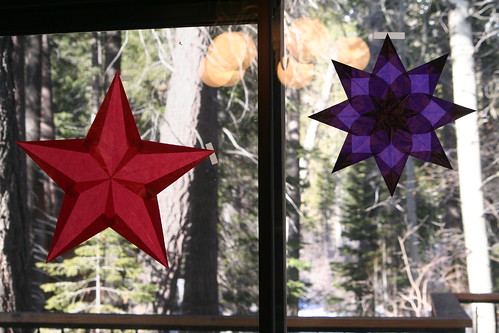
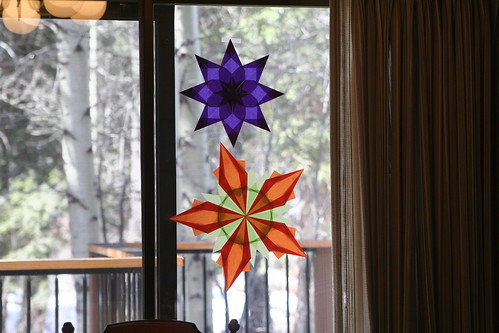
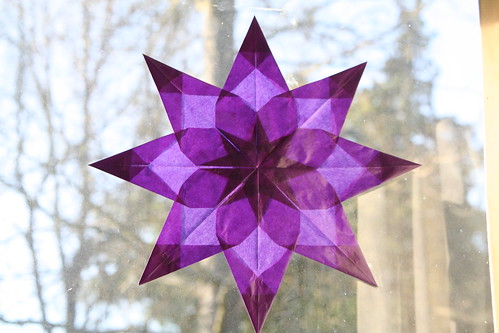
Purple Eight-Point Window Star

Window Stars in Boys' Room

My boys wanted one for their room in their favorite colors, blue and green. Now that we’re home again, the stars have all found spots on our windows here, sharing space with the Valentine window transparencies I made last month, which are still up because I adore them.

New Window Star

I’ve also been experimenting and will share my results very soon, if it all works out the way I think it will.
 

  • About Sara

    Thanks for visiting! I’m Sara, editor and writer, wife to Ian, and mother of two precious boys. I am living each day to the fullest and with as much grace, creativity, and patience as I can muster. This is where I write about living, loving, and engaging fully in family life and the world around me. I let my hair down here. I learn new skills here. I strive to be a better human being here. And I tell the truth.
    Our children attend Waldorf school and we are enriching our home and family life with plenty of Waldorf-inspired festivals, crafts, and stories.

    © 2003–2018 Please do not use my photographs or text without my permission.

    “Love doesn’t just sit there like a stone; it has to be made, like bread, remade all the time, made new.” —Ursula K. LeGuinn

  • Buy Our Festivals E-Books


  • Archives

  • Tags

  • Categories

  •  

  • Meta