Kind Saint Nicholas

IMG_3321

Yesterday was the feast of Saint Nicholas and we marked the holiday in our usual small ways. The boys polished their shoes and put them out near our door. We also left out some hay for the saint’s donkey to eat. (Lucas left a note for Nicholas, asking for oranges, a taser gun, and a katana; the kid can dream big!)

Polishing boots for St. Nicholas Day Eve of St. Nicholas Day

IMG_3320

I updated our nature table a bit, with Saint Nicholas surrounded by some little children. Together we read Christine Natale’s Saint Nicholas stories. My favorites are the ones when Nicholas is a boy because he shows generosity in ways that children can—by sharing what he has, by cheering people and giving comfort to those who are sad, and by being kind and generous to those who are different, disadvantaged, or disabled.

In the morning, we all found some treats and treasures in our shoes. Nicholas must have come in the night! Lucas and Asher got oranges, fancy chocolates with honey caramel inside, a bag full of magnetic hematite stones (gold for Lucas and rainbow iridescent for Asher), and they each got a beautiful heart-shaped agate worry stone. (We parents also received worry stones, too, and I think we need them more than the boys do. They are delightful for hands to find in pockets.) Simple. Sweet. My kids think it’s out of this world to be allowed a chocolate first thing in the morning!

Saint Nicholas also visited all the children at school. He and Rupert brought oranges, cookies, and crystals to Asher’s Kindergarten class, and he brought chocolates and pretty stones to Lucas’s fifth-grade class. I wish I had a photo, but I wasn’t there.

My kids chose some toys they no longer want to keep and we are donating them to others. We have a pile of donations outside at our curb, just waiting for the United Cerebral Palsy donation van to come and pick them up. It always feels good to give away things that no longer serve us to those who need them more than we do.

I think Saint Nicholas must be pleased with us. I am.

Finished, Released, and Relieved

Winter Mosaic 10x3

This is a teaser photo mosaic that shows just a little of what my friend and I have been up to lately. For the last two months, Eileen Straiton (of Little Acorn Learning) and I have been diligently working on our latest e-book. We had so many fantastic ideas and so enjoyed inspiring each other that we kept crafting and writing right up until our self-imposed deadline. Furthermore, we created so much content that we decided to release it as TWO e-books instead of one.

Wooden Advent Wreath

One book is our Advent and Saint Nicholas Festival E-Book, which offers poems, stories, songs, crafts, and myriad special ways that families, schools, or childcare professionals can celebrate the whole month of December with children. The advantage to doing so is that you get a more thoughtful, heartfelt approach to the holidays, with less rushing commercialism and more time in each other’s company while making and giving of yourselves. A measured, calm approach to the winter holidays gives children time to dream, live into the stories of their faith and the season, and count the days of Advent. Children can savor the passing of time with peaceful, delicious anticipation and gentle, useful activity, rather than experience the holiday as a single, frenzied, blowout day that is over all too soon. A peaceful Advent full of simple pleasures and togetherness is what they’ll remember later, not the package-ripping and specific, expensive gifts.

Solstice Spheres

The other e-book we created is the Winter Festivals E-Book, and it’s full of ways to celebrate the festivals of Santa Lucia, Hanukkah, Solstice, Yule, and Christmas. Maybe now it makes sense that we have two offerings instead of one? See, the season of winter festivals is packed with beautiful symbols; messages of peace, hope, rebirth, brotherhood, generosity, and love; and so many inspiring and edifying traditions that it was tough to contemplate leaving out anything. And cold and dark days give us the opportunity to dive into the rich and various traditions that inform the winter festivals. This e-book also offers songs, ancient poems and carols, recipies, rhymes for circle time, caregiver meditations, crafts and natural decorations you can make, and a whole bunch of ideas for enjoying the many festivals of light.

We would be honored and delighted if you’d check out these e-books and spread the word a little. We have poured our hearts and souls into them.

It is our aim to provide nourishing opportunities for families and groups of children at school/daycare environments. Our content is firmly based in Waldorf instructional methods and theories of child development. We value the whole person—head, heart, and hands—both the child and the adult alike. We strive to be original, to use natural, affordable materials, and to create beautiful artwork and handwork without it being so complex that readers are intimidated. We strive to inspire and encourage frequent artistic expression and to share the joy and satisfaction of creating handmade gifts. We are Waldorf moms (and Eileen is a professional childcare provider) and we offer this work with love.

Here are a few “making of” shots from the last two months. I’d like to say thank you to my little helpers and models, Lucas and Asher, for being willing to go along with Mommy’s visions, and to Ian who tolerated my clutter of tools and supplies, my having four different holidays’ décor spread throughout our home at once for photo shoots, and my “Just a minute, I’m writing” excuses. I’m grateful for the opportunity to do this work.

IMG_1931

Reborn Solstice Sun Watercolor pants

IMG_2447

IMG_2364

Thanksgiving Leaf Mobile

IMG_7639

Do you ever wish you had a physical expression of all the many things your family is thankful for? Here is a simple project that can be just that. Hang this Thanksgiving Leaf Mobile over your dining room table or in your family room to decorate for the Thanksgiving holiday and remind your whole family of the bounty of blessings that you all share together.

Materials

  • white circular paper coffee filters
  • washable marker pens and spray bottle with water, or watercolor paints
  • green floral wire
  • two or three strands of raffia
  • two sticks
  • sewing machine or needle and thread
  • scissors
  • leaves to use as patterns (optional)
  • pen (I used a silver pen, but any type will do)

Create Your Gratitude Leaves

IMG_7527

Begin by coloring your paper coffee filters with washable markers. I suggest you use mostly autumn colors. You don’t have to color anything fancy and you don’t have to worry about white spaces in between the strokes of the marker pen.

Now lay your colored coffee filters on a clean dry surface and spray them gently with water from your spray bottle. Because you are using coffee filters, the water will wick throughout the paper, spreading out your ink. The colors of the marker pens will blend together, making a beautiful wash. (Alternatively paint your coffee filters with watercolors.)

IMG_7523

Let the filters dry. Once dry, they won’t adhere to the work surface.

IMG_7531

Now, fold each coffee filter circle in half and cut out a leaf shape, using real leaves as patterns, if you wish. You may want your leaves to be all the same type, varying only in size. Or, you might like to have many types of leaves. Cut out a bunch of paper leaves (I made 31).

With your family’s help, write what you all feel thankful for on the leaves. Write the name of each family member and pet on leaves. Write down the material things you enjoy, such as a house, a car, and food to eat. Also write abstract concepts such as safety, peace, harmony, education, freedom, friendship, and health. You may be surprised by what your children are grateful for, when they give you their ideas.

IMG_7539

I bet that once you start counting your blessings, you’ll have no trouble creating many gratitude leaves.

Create Your Thanksgiving Leaf Mobile

 IMG_7536

Your leaves are ready now. It’s time to sew them into a long string or banner that will hang vertically from your mobile. The simplest and fastest way to do this is by using a sewing machine set on a long stitch or very wide zigzag stitch. (You don’t want a short stitch because many needle holes very close together may actually cut your leaf into halves as you sew it.)

You want a fairly long “tail” of thread on your first leaf, as this thread will tie the whole sewn string of leaves to your mobile. While you’re sewing, allow the machine to continue sewing even off of the leaf. This results in a string of interlocked thread that provides some spacing in between your gratitude leaves and allows for additional motion in your mobile. Consider feeding the leaves into the sewing machine in a variety of orientations. If you do this, you’ll create a windswept look instead of a static look that would result in leaves pointing all the same direction.

IMG_7533

See how the leaves come off the back of the sewing machine, with some space in between them? Sew several strings of leaves. Four or five strands works very nicely. Remember not to trim your threads yet! (You can also create these leaf strands by doing a running stitch by hand with a narrow needle and thread.)

IMG_7540

Next, construct your stick hanger. Cross your two sticks in the centers and use the floral wire to bind them together. Wrap the wire around both twigs in all directions until they feel securely bound together. This is also the time to make a wire loop that will serve as a hanger for your mobile.

IMG_7542

You can get fancy here if you want by adding some real or artificial fall leaves and berries to the top by poking them into the wire. Just keep in mind that the most beautiful part of your mobile should be your gratitude leaves. Whether you choose to add decorative items or not, disguise the wire by wrapping some raffia strands around the joint.

IMG_7631

Find a place to hang your crossed sticks at about shoulder level so you can work on the mobile with both hands, or get a helper to hold it for you. Now tie your leaf strands to the ends of each stick by their extra long top threads. If you have enough, also tie a strand to the center of the mobile. Last of all, clip any extra thread from the tops and bottoms of your leaf strands.

IMG_7638

Hang your mobile somewhere prominent in your home, perhaps where some airflow may move it or where autumn sunshine might make it shine. When you look at it, you’ll see how very blessed and grateful you and your loved ones are. Blessed be!

Almond Shortbread Calderas Cookies

Almond shortbread calderas cookies. I kind of made them up.

Halloween was a big deal for us this year. Big projects, big fun. Today I’ve been so tired that I just felt like trying to put our home back together again, creating some order out of the costuming chaos, and getting back to normal (chaos). More about Halloween later, but …

I meant to make these groovy witch finger cookies on Halloween, but there wasn’t time to do it. I wondered if I could use a similar recipe to create something fun for Dia de los Muertos. Honestly I didn’t know if these would work.

1 cup butter softened (which to me means microwaved for 35–40 seconds after being in the fridge; is that what it really means?)
3/4 cup confectioner’s sugar
1 teaspoon vanilla extract
1 teaspoon almond extract
2 cups whole wheat flour
flowery sprinkles or stars (optional)

Butter sugar almond cookies. I have no idea how these will turn out when they are baked.

Cream together butter and sugar, add vanilla and almond flavorings, and then add in flour, a half cup at a time. Roll about a tablespoon of dough into a ball. With the end of a big spoon, chopstick, or other poky object, poke two eye holes. With a knife, draw a mouth line. With the tines of a fork, make a quick stroke up from the mouth line to make upper teeth, and another stroke down to make lower teeth. With a narrow skewer or similar object, make a little triangle nose hole. Now with your thumb and forefinger pinch the jaw of your face a little to make it narrower than the cranium. Place the skull on a greased cookie sheet. The most important feature of your caldera is the eye holes, so if they’ve become too squished while making the other features, use the same eye-hole making object to poke the eye holes again to make them nice and round and dominate the skull shape. Do this a bunch of times till you use up all the dough. Asher (5 years old) enjoyed making skulls too, and his are pretty great.

Now, if you want your calderas skulls to be flowery, push some flower sprinkles or stars, or whatever into the skulls. Personally, I think a few flowers go a long way toward creating the Dia de los Muertos look. I didn’t put flowers on all of my cookies and the plain ones look pretty cool too.

upload

Here they are baked—simultaneously cheerful and spooky—and ready to eat. They got a bit bigger in the baking, but kept their basic shape beautifully. By the way, I used whole wheat flour because that’s what I had. Because of the whole wheat flour, I upped the sugar to 3/4 cup. Your skulls will look whiter if you use all purpose flour, and you might not need as much sugar.

How’s that for a recipe post created late on the night of the holiday for which it is appropriate? OK, night-night. I hope you’ve had a lovely day and that you were were able to take a moment to remember those you love who have passed out of this world. Remember them fondly.

Felt Halloween Banner Tutorial

upload

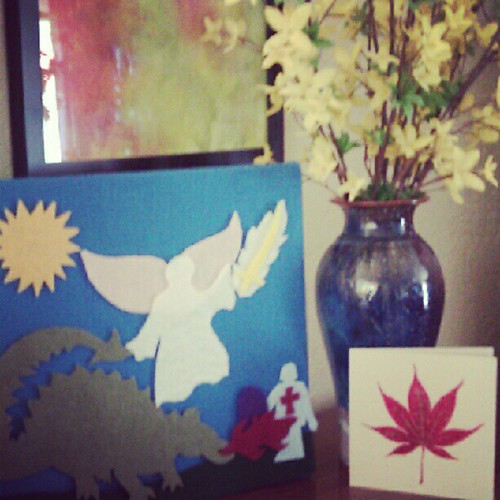
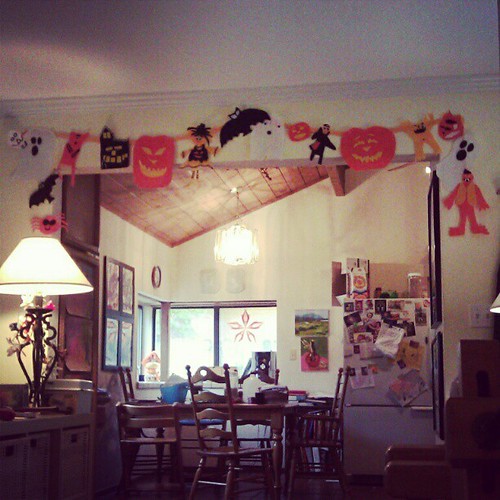
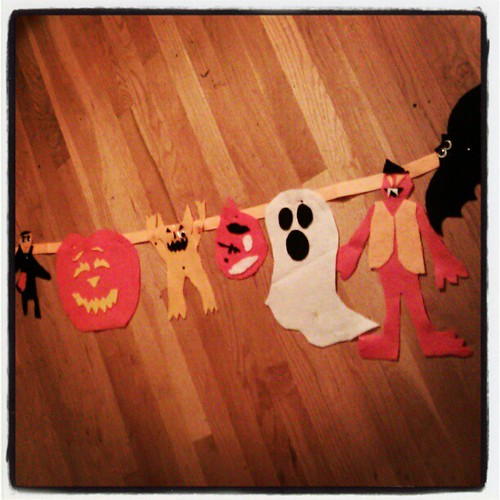
This is a post about turning something we made a couple of years ago into something new. We made these terrific homemade felt Halloween decorations in 2009. I love them, and every year since then, we’ve hung them up on the walls of our home and in windows for the holiday. This year, we made a few more and turned them into a banner. (I love banners because the decorations don’t have to sit on flat surfaces of our home. We have plenty of things sitting on tabletops and shelves as it is.)

I admit it’s kinda wacky to break out the crafting stuff at 7 p.m. on a school night, but that’s what we did. Daddy was out and I wanted something fun to do with my kids, rather than just wrangle them into bed. So I pulled out the felt and we got to work!

upload upload

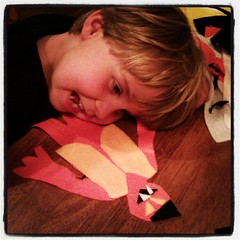
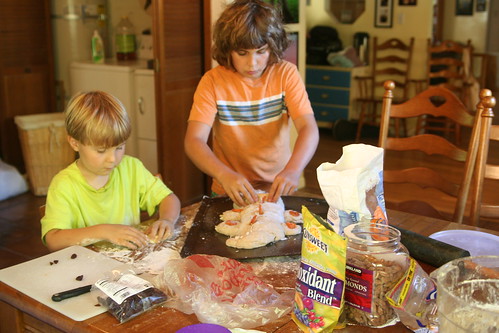
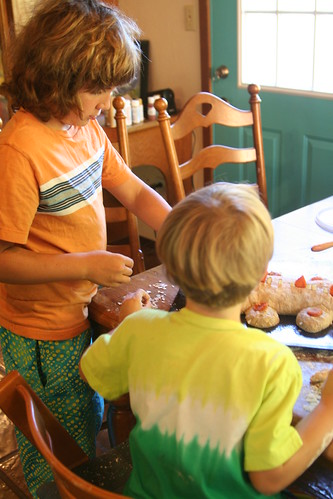
Asher (5) designed a monster by drawing it on paper. He had a bit of trouble cutting the felt with our crummy scissors, so I cut out the pieces for him. He had total artistic control. I just executed it for him.

upload

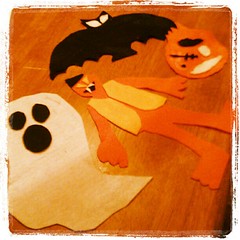
This is what we made in one 40-minute session. Lucas (10) was engrossed (ha!) in making a zombie head. It’s missing an eye and its skull is showing through. “It’s got to hang upside-down, Mom!” OK!

So, anyway, here’s how to do this fun craft, if you’re so inclined.

Materials

  • felt in Halloween colors (orange, gold, yellow, white, black)
  • scissors
  • white glue
  • bias binding tape (1 inch wide, about 3 yards)
  • straight pins and push pins/thumb tack
  • needle and thread (optional)
  • googly eyes and fabric paint (optional)

Tutorial

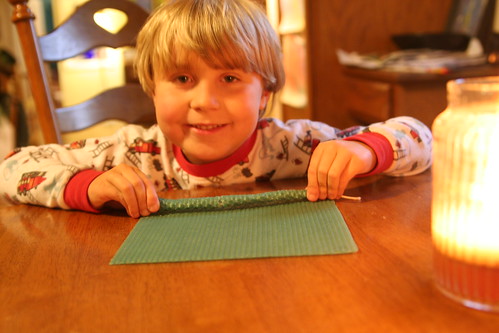
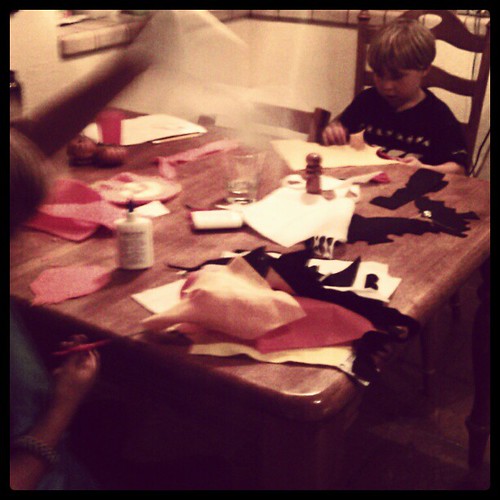
Your project starts out looking something like this: kitchen table, kids, piles of felt bits. Working with felt for this project is a whole lot like making things out of construction paper, so if you can channel your inner grade school student, you’ll be fine.

upload

Ask yourself and your kids, what means Halloween to you? What kind of creatures would you like to make? Older children might like just a touch of creepiness in their creations. Younger children might prefer to stick with jolly jack-o’-lanterns and friendly ghosts. Here are some ideas to get you thinking: ghosts, jack-‘o-lanterns, witches, spiders, bats, monsters, dracula, skulls, skeletons, coffins, gravestones, haunted mansions, creepy hands, zombies, owls, scary dogs, etc. Just be sure to gear your creations to the ages of the children in your household. (Nobody wants to feel afraid at home.) Remember, googly eyes make anything—ANYTHING—cute. A felt Dracula with a smile—also cute.

Felt has got to be the most forgiving fabric in the world. You can cut it and layer it and you never have to seam anything or make it perfect. It sticks to itself beautifully, so you can place a piece, see how you like it there, and then move it elsewhere if you don’t, until you have a design you’re happy with. Furthermore, the synthetic felt is cheap at $0.20–$0.29 per sheet, which means you don’t have to worry about turning it over to kids with scissors.

So, decide what you’re making. Draw the creature first, or just start cutting. It’s your choice. Cut out the main shape of your creature first. Then cut other, smaller pieces for eyes, mouth, clothing, hair, teeth, etc. out of a contrasting color. Arrange them on top of the main shape until you’re satisfied, then apply some white glue to the topmost piece and lay it onto the felt creature. Add googly eyes or fabric paint for details if you wish. Let it dry. That’s it. Repeat for as many creatures as you’d like to make.

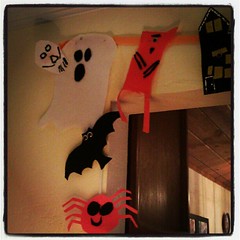
You can now hang your creatures in windows or on walls, or even suspend them from trees if you like. But if you want to make a banner, lay out your bias binding tape on the floor. Place your Halloween creatures along the tape in a pleasing way. Maybe your kids have an opinion about which ghoulish guy goes next to what creepy critter?

You can either sew each creation in place, or if you’re in a hurry like me—or if you might want to use these critters again in a different way another year—just pin them to the bias binding tape using straight pins! If you pin from the back, you won’t see the head of the pin on the front of the banner, and chances are you won’t see the pin shaft at all.

upload

Now find the center of the banner and the center of the wall where you want to hang it. Using a push pin/thumb tack, hang the center of the banner. Stretch out one side at a time, make sure the bias binding tape is flat against the wall without any twists, and then tack the ends. If you only pinned rather than sewed your creatures onto the bias binding tape, you can even adjust their positions at this point.

upload upload

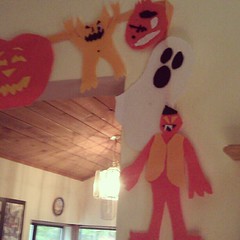
You can also make corners by pinning or sewing critters to each other.

Happy crafting!

[Shared on Natural Suburbia’s Creative Friday, 10/26/2012]


Lately

upload

I’m not going to get anything done today until I write a bit. I am all pent up and my feelings on all subjects are all over the place. They’re mixed up because I haven’t been writing, which is my process for sorting things out, for determining what matters, what to hang on to and work on, and what to let go of. I’ll try not to make this too complainy because there’s really tons of good stuff.

Lately:

I am very busy with work; I have three projects going full speed ahead. Well, the truth is two of the three projects are taking up so much time that the third is languishing and I hope to get back to it ASAP. I don’t know when that will happen and it’s worrying me. I hope it goes without saying that I’m very glad to have the work. I am. Really.

Pretty computer. So new, there is no dust!

My computer died last Wednesday. My main, desktop, do-everything-on-it computer. I will spare you the emotional trauma of this and just say that I have a new one now. It’s a great new machine and my old data is fine. “Hard drive is robust like ox,” said my tech support queen. This is a VERY HAPPY thing. I am still tweaking and finding workarounds to this happy thing, however, as the happy thing is far from optimized at this moment and I don’t have time to optimize it … yet. Nevertheless, all of this will be better soon. In the meantime, I’ve struggled to keep those three projects moving forward.

I just fell in love all over again. #violin #waldorf #home #son

The boys are doing great. Lucas is adapting gradually to the greater expectations of fifth grade. (I have a whole post on this topic brewing in my head.) Lucas is really enjoying both soccer skills practice and his twice weekly karate class. Asher is zany and clownish and enjoying the hell out of life, it seems. Both boys are healthy and happy. Managing them is like herding cats, or monkeys, um—good-natured, sometimes-disdainful-or-obstinate, constantly forgetful catmonkeys who are generally too busy singing or shouting or bickering or spilling or bouncing through the house to listen to you. Or me.

I’ve gone over to my sister-in-law Kellie’s house a couple of times to help out a little with baby Jack, her newborn son. He is beautiful in every way—utterly perfect—and is finally seeming to get a handle on this breastfeeding thing. Some babies are stubborn like that. Holding a teeny baby has got to be one of the best joys of life. I only have to hold him a moment before he has cast a dreamy spell on me and I find that everything else fades away. Still, I did that so-familiar thing of holding baby and editing one-handed. It brought back so many memories and feelings from when my babies were small. Anita Martin, the charming and talented photographer who took Matt and Kellie’s wedding photos has taken some gorgeous shots of them with new baby Jack. They are truly spectacular. Our love goes out to Matt, Kellie, and Jack during this difficult and wonderful newborn time.

Harvest Faire  and the Walk Now for Autism Speaks events both happened last weekend. (I’m planning to write more about this.) It was community service weekend, to be sure. Consequently, it felt rather like no weekend at all. Today, Friday of the following week, I am running on fumes. (Return to the first paragraph under “Lately.”)

I’m also supposed to be writing a book. I hope to get back to that ASAP before my coauthor disowns me.

I love the fall. Can’t wait to hit the pumpkin patch and start work on those Halloween costumes.

I miss painting sooooo bad. It’s been too long and I now feel fear when I think about picking up a brush. Isn’t that the way of it? I’ve lost my momentum and with it some confidence. It’s a thing I have to correct at the soonest possibly opportunity. Must buy that fancy light so I can paint in my house at night. Must get back to class. Mustn’t forget what I’ve learned so far.


Pumpkin Globe Lantern Tutorial

IMG_5700

Candlelight is favorite way to illuminate October evenings, and what says October more than jaunty, glowing pumpkin faces? These pumpkin globe lanterns can be made by children of all ages with your supervision. The process is simple and the materials are inexpensive. Why not create a jack-o-lantern that you can enjoy year after year?

IMG_5662

Materials

  • tissue paper in yellow and orange
  • wax-coated strings in yellow or orange (brand names are Wikki Sticks and Bendaroos)
  • globe glass candle holder
  • mod podge and a paintbrush or foam applicator

IMG_5689

Begin by gathering your materials. The first step in the project is optional. If you want your pumpkin globe lantern to have the iconic vertical rib lines of a real pumpkin, gently squish the end of a wax string to the top edge of the globe. Guide it down the side and squish the other end to the bottom of the globe. Repeat this for as many lines as you like, placing the wax stings equidistant to each other. You might want to omit one line that would naturally appear at the pumpkin’s face. These lines will be visible when the candle is lighted in the finished pumpkin.

IMG_5690

Rip your yellow tissue paper into small pieces. You won’t need much. Now apply a small amount of mod podge to your glass and apply a small piece of yellow paper. This is your first eye. Smooth the paper with more mod podge and the applicator or paintbrush. Add a second eye, a nose, and a long mouth. The shapes of these pieces of tissue don’t matter all that much. Smooth them all down.

IMG_5692

At this point, your face might not look much like a face. You’ll use your orange tissue paper to define your pumpkin’s features next. Rip your orange tissue paper into small pieces. (Alternatively, rip some small pieces and then rip some into strips about 6 inches long.)

IMG_5693

Using your small pieces of orange tissue paper, apply them around your pumpkin’s eyes, nose, and mouth. Now is your opportunity to define your pumpkin globe lantern’s personality. Small children may prefer smiling, happy pumpkins. Older children might enjoy figuring out how to make theirs spooky. Does the pumpkin have squinty, frowning eyes or a snaggletoothed grin?

IMG_5695

When your pumpkin is mostly découpaged with tissue, turn it over and cover the bottom of the glass globe. You’ll have to let it dry in this position, setting on its top rim.

IMG_5696

If you wish to use long strips of paper, your in-progress pumpkin lantern will look like this photo above. You’ll add adjoining strips, working your way around until the whole globe is covered.

IMG_5701

Now you have to wait patiently while the mod podge dries. Examine your pumpkin for any thin spots or places uncovered by tissue. Add or patch as needed. The more layers of paper you add, the better defined the pumpkin’s features will be.

IMG_5706

Fill your pumpkin globe lantern with some rocks, gems, or sand, add a tea light or votive, and wait for nightfall to meet your pumpkin friend in all his glowing glory. It will happily share its light during chilly autumn nights.

IMG_5720

It’s nice to have a friend in the darkness.

Our Family Michaelmas Party

Getting Ready for Michaelmas #waldorf #festivals #littleacornlearning #michaelmas #stmichael #autumn #naturetable @littleacornlearning

It’s been a crazy-busy weekend and our Michaelmas celebration at home was both postponed and rolled into a little birthday party for Ian. Change is the name of the game, and we adapted well to suite our circumstances. All day on Saturday, Ian and I were at Tough Mudder in Patterson, California. (He participated; I was support crew and spectator.) The boys were with their besties and the dog was with grandma. We spent Sunday preparing our home for the party …

My Bakers

… and making Dragon Bread. Here are my sweet bakers. This year we used a maple oatmeal bread recipe and I rolled in brown sugar and dried cherries, blueberries, and plums inside the dragon’s body. The boys wanted a sweet dragon. Next year, I might try a savory bread. We use a different recipe each year.

My Bakers

They like adding bits of dried apricots, cherries, and almonds on to the bread to make it fearsome.

Dragon Bread in Progress

Here it is still in progress. Lucas did the eyes and teeth. Of course, it got puffier during the second rise. We wanted a nice big dragon bread to share with our guests.

Getting Ready for Michaelmas #waldorf #watercolors #festivals #michaelmas #stmichael #home #autumn #littleacornlearning  @littleacornlearning

It’s a good thing we already had some decorations out. We cleaned to make everything just so. Poor Ian was a bit sore from the previous day, but we got our home presentable. Lucas did some homework.

Birthday/Michaemas dinner prep.

We served “fillet of dragon” and the dragon bread. I baked a honey and vanilla yogurt birthday cake and made blackberry sauce to top it. One of the legends of St. Michael is that when he cast Lucifer out of heaven, the fallen angel landed in a blackberry bramble patch and spoiled all the berries for the year. So you should only eat blackberries before Michaelmas and not after.

Ready for Our Michaelmas Dinner Party

Here’s our pretty table, with mismatched plates and napkins, and our homemade Michael’s sword napkin rings. Grandma Syd and Papa brought a gorgeous green salad to share. Grandpa Glen and Mimi brought a wonderful potato salad with tarragon and hard-boiled eggs. It was yummy. The fillet of dragon came out perfectly. (Thanks, Ian!)

Family Gathering for Michaelmas and Birthday

Then we visited and shared stories about recent and not-so-recent trips to France and Amsterdam. We discussed the Tough Mudder event, the Michaelmas festival in Waldorf schools, the Bayeux Tapestry, and the Battle of Hastings, and art and other interesting things.

Family Gathering for Michaelmas and Birthday

It was a warm, lovely gathering and we are grateful that we were able to share our Michaelmas celebration with extended family this year. I hope Ian didn’t mind too much sharing his family birthday celebration with Michaelmas. Sometimes the only thing that makes sense is to combine occasions, ya know?

Blessings of the Michaelmas season,

Blessings of adaptability and courage in the face of change and the coming darkness,

Blessings of abundance and a grateful harvest,

Blessings of strength and inner resolve to you and yours.

Autumn Equinox

September is golden. #september #gold #garden #homestead. #leaves #light #autumn #color

Alms in Autumn
Spindle-wood, spindle-wood, will you lend me, pray,
A little flaming lantern to guide me on my way?
The fairies all have vanished from the meadow and the glen,
And I would fain go seeking till I find them once again.
Lend me now a lantern that I may bear a light
To find the hidden pathway in the darkness of the night.
Ash-tree, ash-tree, throw me, if you please,
Throw me down a slender branch of russet-gold keys.
I fear the gates of Fairyland may all be shut so fast
That nothing but your magic keys will ever take me past.
I’ll tie them to my girdle, and as I go along
My heart will find a comfort in the tinkle of their song.
Holly-bush, holly-bush, help me in my task,
A pocketful of berries is all the alms I ask:
A pocketful of berries to thread in golden strands
(I would not go a-visiting with nothing in my hands).
So fine will be the rosy chains, so gay, so glossy bright,
They’ll set the realms of Fairyland all dancing with delight.

—Rose Fyleman

Good morning, September!

Today is the first day of autumn and I’m feeling happy and energized. The temperatures here in Northern California are still warm, but not dreadfully hot. The garden is looking weary, but still hasn’t given up—flowers bloom, seeds are forming and scattering, plants are looking thirsty. I spent a little time in my “bower” this morning. I have an old futon out in my backyard underneath a cleverly bowed tree covered in wisteria vines. The foliage combined makes a shady spot to sit and read, and I love it. I drank my coffee, and listened to the tiny sounds of just a few first leaves falling and the hens’ clucks and the rattle of their food container. I’m starting today slowly, even though there are a million things to do and a million more I want to do. But I am content. Slow, gentle starts are just right sometimes.

Riotous #garden #homestead. #path #arch #wild

My garden, as I mentioned, is tired. I’m a little discouraged by it this year. We’ve had watering troubles that I’ve failed to solve. Along one of our drip lines is a long row of dead plants. I got some lovely tomatoes this year (cherries are my favorites), but little else. I’ve decided I’m not going another year without a raised bed. Our soil is just too clayey, and when the summer comes and the water is scarce, it becomes like concrete. Only the most determined vegetables produce. I had hopes for pumpkins and peppers and squash, yet I never mustered the energy to get them going. I tell myself that it’s OK because I can’t do everything. Right? And I do enough. Right?

#Morningglories #garden #sun #sunbeams #light #seethrough #suburbanlife #homestead. #purple

Still, I’ve enjoyed the hummingbirds who visit my salvia and cannas, and the many other birds who visit my birth bath for drinks and bathing. It delights me to see a bird actually bathing in it.

Firefly, the special-needs chicken

Our hens are all healthy. Most of them are laying and the four young hens we raised from chicks this year are laying now. They’ve grown into very pretty young ladies. My special-needs chicken, Firefly, (in the photo) is finally completely rehabilitated. She spends her days on the ground now, like all the other hens. For more than a year she stayed on top of the chicken coop day and night because she was so bitterly harassed by the others. I don’t know how she finally integrated into the flock, but I’m glad she has. She is still the smallest hen we have, even smaller than our youngest hens from this season. She lays eggs though, so I feel she’s finally living a normal chicken life.

So I’m wishing all of you a happy, blessed autumn. We’re heading up to Apple Hill today for a small adventure and some apples. Seems like a great way to spend the first day of autumn.

First Days of School

IMG_9386

I am delighted that school has begun. We’ve had a goooooood LOOOOOOONG stretch of summer vacation (88 days, to be precise), and we enjoyed so many wonderful adventures. But the time has come to try new things, learn more, make new friends, and engage with the world around us in a new way. The boys are both ready for it. They’ve embraced going back to school with enthusiasm.

Lucas is in fifth grade now. Suddenly that seems amazing. He is charming, capable, dynamic, and creative. He is looking forward to this year, especially studying the Greeks and the end-of-fifth-grade pentathlon. This semester he is taking woodworking for the first time, and is very excited about that. He’s waffling about staying with violin or switching to flute. He seems, well, ready to take on a lot more now. He wants to study. He wants to make his own lunch. He wants to spend his own money on school supplies. Our job is to support him in his new responsibilities. I’m grateful that we established a good chore routine this summer, as I feel schoolwork will fit in nicely.

First Karate class punches

Also this week, Lucas has started his first karate class, which is being offered through the local Parks and Recreation department. He has wanted to do martial arts for a long time, especially after an exciting and brief taste of Brazilian jiujitsu. Since we are dabbling and on a budget, this is the right solution for the time being. It helps that Lucas’s best friend is also in the class. Both Ian and I are favorably impressed with the sensei.

IMG_9445

Asher’s first day of his second year of Kindergarten was a day after Lucas’s first day of school. Asher is an “older” this year, which means he is an older Kindergartner who will be going to first grade next year. He knows the ropes, and is expected to help the younger students adjust to school. The olders get to work on making their Michael swords right away. This is a big deal for a little boy. He has looked with covetous eyes on Lucas’s wooden sword for many years. Apart from some new children, the Kindergarten is the same and he’s comfortable and happy there. His lovely teachers have welcomed him back with open arms.

Now, I do feel a tiny little bit bittersweet about the end of summer. Rather than focusing on the longed-for experiences that we didn’t have, I’m going to think about all we did to celebrate life and living together. Not only did we make it through, we made it beautiful too.


  • About Sara

    Thanks for visiting! I’m Sara, editor and writer, wife to Ian, and mother of two precious boys. I am living each day to the fullest and with as much grace, creativity, and patience as I can muster. This is where I write about living, loving, and engaging fully in family life and the world around me. I let my hair down here. I learn new skills here. I strive to be a better human being here. And I tell the truth.

    Our children attend Waldorf school and we are enriching our home and family life with plenty of Waldorf-inspired festivals, crafts, and stories.

    © 2003–2018 Please do not use my photographs or text without my permission.

    “Love doesn’t just sit there like a stone; it has to be made, like bread, remade all the time, made new.” —Ursula K. LeGuinn

  • Buy Our Festivals E-Books


  • Archives

  • Tags

  • Categories

  •  

  • Meta