Calendula and Mint Herbal Soaps Tutorial

Finished Soaps

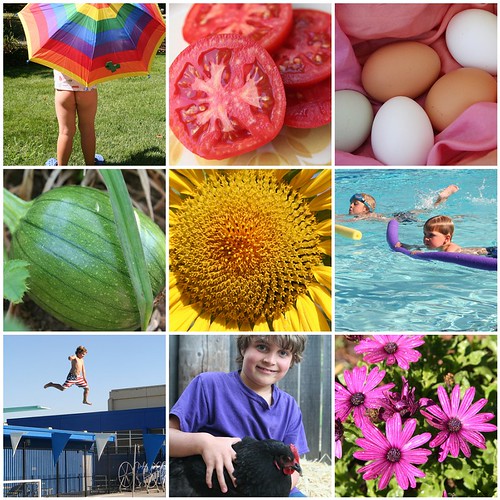
Earth’s bounty is always all around us, but it is perhaps even more apparent in the summer, when crops are ripening and plant life flourishes. Wild or cultivated herbs can be useful friends, growing perhaps right outside our kitchen doors. Herbs are commonly used as food, as decorations, as dyes, as flavorings. They also are used the world over to clean and heal.

You can easily make herbal soaps for your family to use and enjoy, right in the comfort of your own kitchen. There are two soap-making techniques. This tutorial teaches you the simpler of the two. Technically, you’re really embellishing this soap, rather than making it from scratch. Because the process is simple, even small children can help to make these beautiful, healing soaps, as long as you carefully monitor them around the stove and hot soap. (Of course you will!)

Calendula

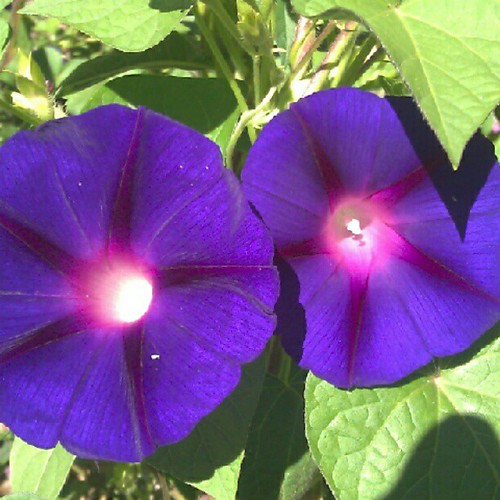
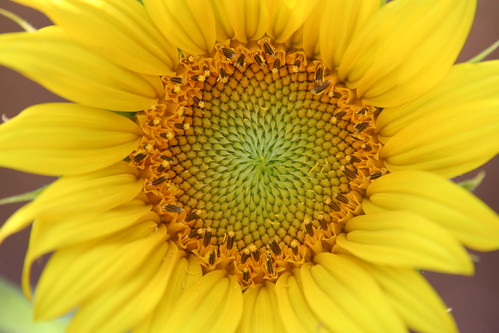
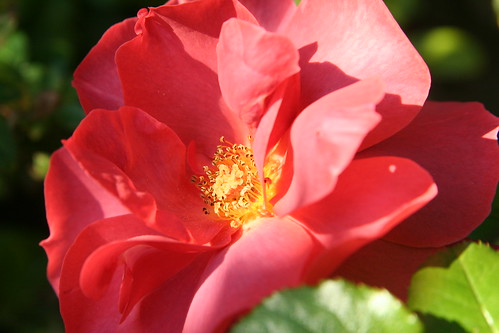
Calendula (also known as pot marigold) is a common and prolific garden annual that reseeds itself. It is known to have been used as early as Roman times as both a dye and a flavoring. Calendula is known to have antiseptic properties, which make it perfect as a soap additive. Many natural first aid preparations include calendula.

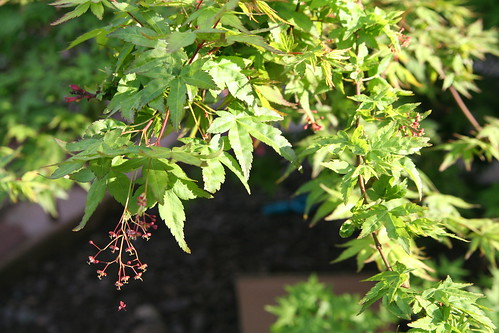
Peppermint grows in many cottage and kitchen gardens. You can use it in teas, desserts, and body care potions, such as lotions, shampoos, balms, and soap. Mint may have a calming and soothing effect for skin irritations, itching and hives. It is believed to have anesthetic and anti-inflammatory properties.

Materials for Making Herbal Soaps

  • glycerin soap base (I used a glycerin and olive oil base)
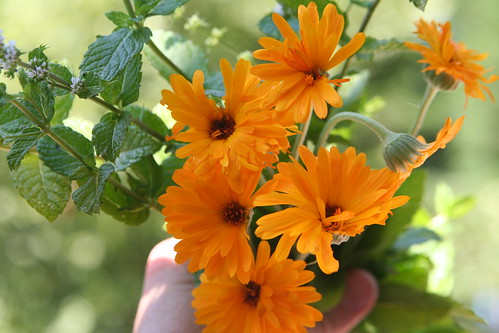
  • calendula (pot marigold) and mint herbs from the garden (I used a mix of dried calendula petals and fresh flower heads, and fresh mint leaves)
  • stovetop pan, cutting board, knife, ladle
  • soap molds (also silicone muffin pans work very well; these come in fun shapes )
  • essential oils for fragrance (optional)
  • soap colorant (optional)

A word about glycerin soaps: You can buy glycerin at the craft store, along with lots of other fun soap-making and body product supplies (dyes, fragrances, molds, etc.). Using pure glycerin soap in this project will result in soaps with a layered effect, since your herbal additives float to the top of your molds as your soap sets. There’s nothing wrong with this, and the result can be quite beautiful and rustic. Another kind of glycerin soap base that you can buy has olive oil added to it, and a property that keeps any additives in suspension, meaning you won’t get layers and your herbs will stay mixed throughout the soap. This is the look that I was going for with these two batches. You can decide what’s right for you. There is no difference in how you make the soap. Just be sure to read the packaging carefully so you get what you really want.

Making Soap

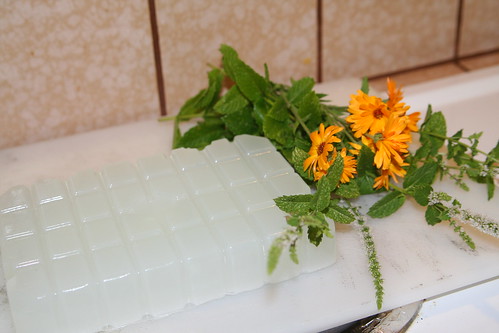
Begin by gathering your materials. You will need a clean cutting board and a table top to work on.

Glycerin Soap

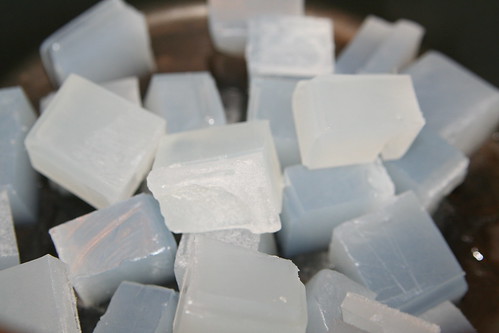
First, cut your glycerin soap base into small cubes. This makes it easier to melt at low temperatures, and you want to keep the temp quite low when you‘re making soap. You can use a double boiler or just put your glycerin cubes into your pot. (Cleanup is easy with hot water and a scrub brush!) Stir the soap often until all pieces of glycerin are melted.

Making Soap

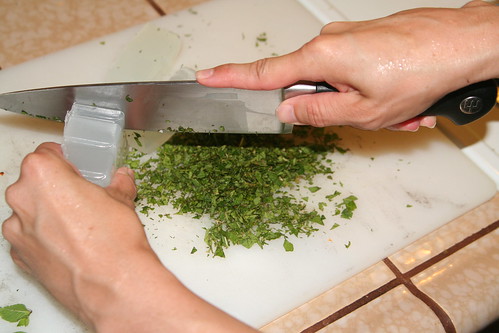
Meanwhile, chop your mint leaves into very small pieces. You may wish to set aside some of the tiniest leaves to be used as a decoration later on. Of course, this is optional.

If you have lots of soap molds or muffin pans, you might be able to make both types of soap at the same time. Since I had to reuse the molds after the first soaps were fully set, I made two batches—first calendula, then mint—cleaning up in between batches.

Calendula

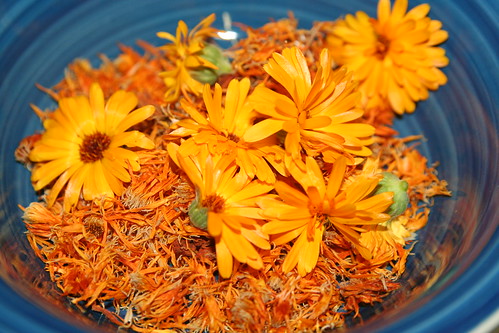
Before starting, I saved the dried petals from my calendula flowers for a week or so. For my soap, I also used a few fresh flower heads to maximize its potency as an antiseptic.

Making Soap

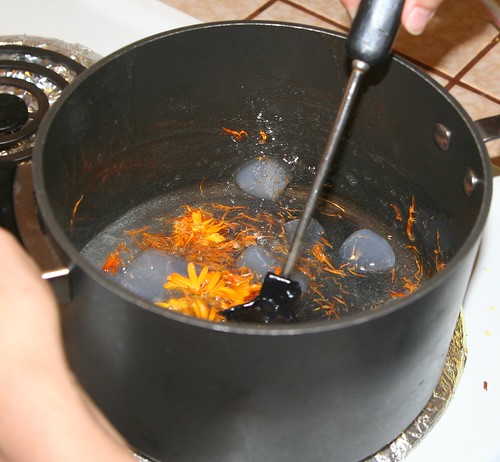
Add your petals and flower heads to your melting soap cubes. The heat will begin to cook the flowers.

Making Soap

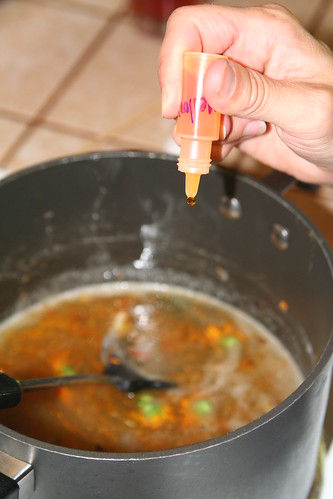
If you want your calendula soap to have a rich yellow coloring, add a few drops of soap colorant to the pot. You don’t have to do this, and if you cook the petals in the soap a while, it will begin to take on a natural yellow color. At this point, you can also add fragrance, if you wish. I added a few drops of geranium essential oil. Geranium is known to be a comforting scent, and since I envision my children washing their scrapes with my calendula soap, comfort seemed to be just the right feeling to evoke by smell.

If you used fresh flowers, you should fish out the centers now. When you’re satisfied with your soap’s color and fragrance, it’s time to pour it into molds to set. Using a ladle, gently fill each cup to the brim. Keep the mold flat. The soap will begin to cool quickly, but it may take an hour or so for the soap to become very firm to the touch. You can speed the cooling by placing the mold flat in your refrigerator.

Making Soap

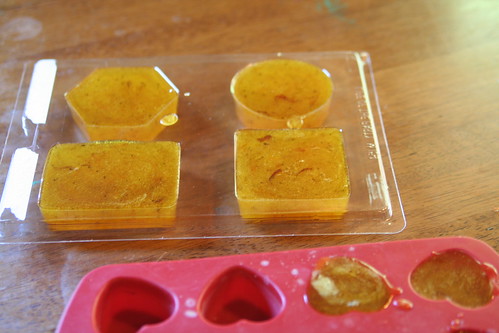
When the soap is completely firm and set, gently pop each soap out of the mold. They should separate from the mold’s sides with some gentle twisting and come out cleanly.

Making Soap

My second batch of soap was mint. You’ll repeat all the same steps as with the calendula soap. Begin by cutting soap cubes and then just add the chopped mint in with the glycerin. The longer you allow your mint soap to cook on the stove over low heat, the greener it will become. I added a few drops of eucalyptus and mint essential oils to the warm pot. The smell is calming and relieves stress.

Making Soap

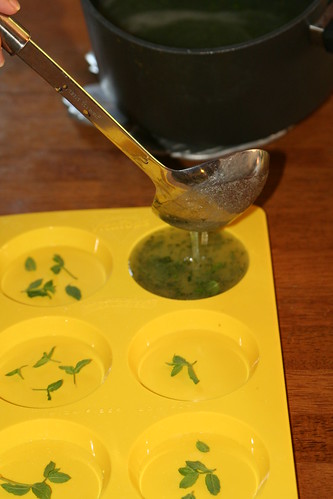
You can add your reserved tiny mint leaves into your mold if you wish. They won’t stay exactly in place when you ladle in your mint soap, but you will be able to see pretty whole leaves in your soaps after they have set.

Homemade Mint Soap

In this photo, you can see my two different pours. The greener bars were poured from soap that had been on the stove longer. The natural green from the mint leaves colored the soaps. I like them both.

Mint Soap

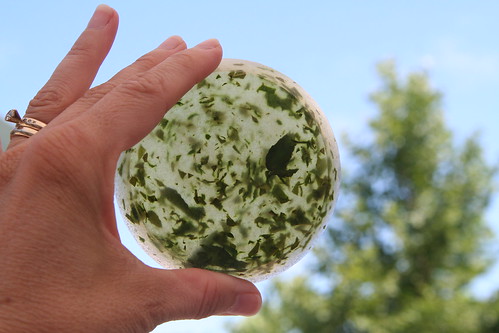
A finished mint soap, with lots of gorgeous herbal goodness visible.

IMG_3691

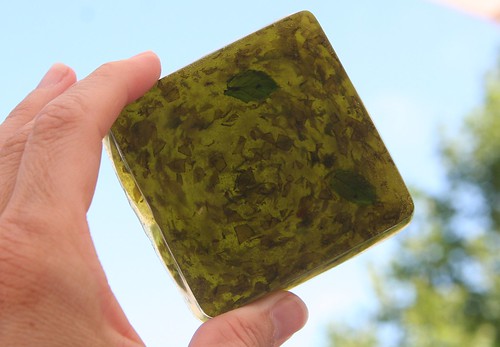
And here’s a darker one. This soap was on the heat longer and became a dark green.

Calendula Soap

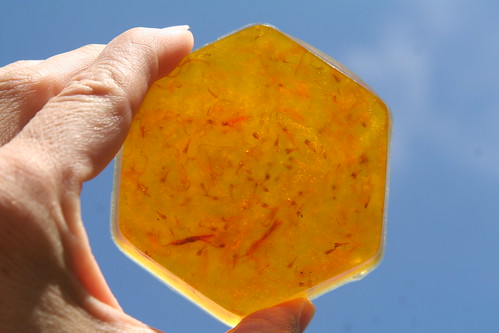
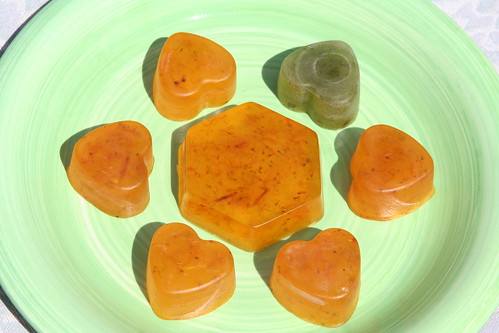
Here is the finished calendula soap, with pretty golden-orange petals showing inside.

Homemade soaps make wonderful gifts for family, friends, and teachers. Consider adding a mint and a calendula soap to your outdoor adventure box or your first aid kit. Use both types to cleanse and to heal.

Mermaid Aquarium Tutorial

Mermaid Aquarium Finished

Have you ever wished that a mermaid would visit your home and be your best friend? You might get your wish, if you set up the perfect place for her to stay: a mermaid aquarium in your home or school! This is a simple project that older children can create by themselves or with a little help from you, and which may truly enchant younger children. While you’re assembling your mermaid aquarium, dream up some stories that feature your mermaid friend. With your mermaid visitor beside your child’s bed, tell mermaid bedtime stories.

Mermaid Aquarium materials

Materials

  • beeswax (color choice is up to you; I used blue, green and flesh colors for my mermaid)
  • wool roving (any color you like works for mermaid hair)
  • fishing line or thread
  • straight sewing pins
  • a large, clear-glass vase (a gold-fish bowl or small aquarium would also work very well)
  • seashells
  • found beach glass, beach pebbles, or glass gems from the craft store
  • a plastic aquarium plant (if your container is very large, you might want two of these)
  • water

Begin by gathering your materials together. This is a nice project to do outdoors, especially since you may spill some water, so craft outside and enjoy the fresh air. If you don’t have a plastic aquarium plant or would rather use a natural material, you can wet-felt or needle-felt some seaweed out of wool. There are many kinds of seaweed, so any shape of plant will do nicely.

Mermaid out of Beeswax

Model Your Mermaid

Your first task is to fashion your mermaid out of beeswax. Mermaids (and mermen) come in many different colors. Your child may have an idea of how this mermaid should look. If the beeswax is hard to mold, consider dipping it in warm water for a few minutes, or let the heat from your hands and breath soften it. Younger children find this very helpful when working with beeswax. Start by making the mermaid’s tail first, then create the mermaid’s upper body and arms. Finally, add on her head, making sure to let the wax from the body join the wax of the head. Your mermaid probably looks funny at this point. Mermaids are known for their gorgeous hair, right?

Use a shock of wool roving of any color you like and arrange it on your mermaid’s head to look like her luxurious locks. (You might want to do this next part out of the sight of younger children.) Now carefully take a few sewing straight pins and pin the wool hair to the mermaid’s head by aiming the pin down through her head and into her upper body. If you are careful, you can arrange the pins so that they look like hair decorations or a crown. Since children may be handling the mermaid, make sure the pins don’t stick out from her body to poke someone. Fortunately, if a pin’s tip emerges, you can just back it out and try again. The beeswax easily “heals”  if you rub out the hole. Perhaps the children would like to give the mermaid a name now.

IMG_2373

Assemble the Mermaid Aquarium

Now that your lovely mermaid is done, you can begin to assemble her underwater home. Fill the glass jar about a third of the way full with beach glass, pebbles, or glass gems. Your child may already have such treasures in his or her special collection, and may wish to contribute to the mermaid’s home. Consider adding seashells you have gathered from the shore (after you rinse them well). Real seashells will help your mermaid friend feel at home. Even the youngest children can easily add these special items to your vase.

Beeswax Mermaid

Be Thankful

Talk about where these treasures from the sea came from. Thank Mama Ocean for being the home to such amazing shelled creatures, and for wearing down the pebbles until they are smooth as silk. Sing a mermaid song.

Your aquarium is beginning to look inviting, isn‘t it?

Mermaid Aquarium in progress

The Tricky Part: Beeswax Floats

Now comes the only challenging part. Your beeswax mermaid at first wants to float on top of the water, but we know she will be more at home under the water. Take a small length of fishing line or thread and gently tie your mermaid to your plastic aquarium plant, or to a heavy seashell. We tried doing both, and found we were happiest with how she looked when anchored to the heavy shell. If you tie your mermaid to the plant, now is the time to plant the base of the plant into your pebbles or gems so that the plant looks like it’s growing there at the base of the aquarium. If you opt to tie your mermaid to a heavy shell, place your plant first, then add the shell and mermaid to the aquarium last. You probably won’t be able to see the fishing line or thread.

In thes photo above, it looks like our mermaid is swimming. In the next photo, she is resting atop a seashell. Feel free to move the objects around until you achieve a scene that you like.

IMG_2397

Enjoy Your Mermaid Visitor

Now place your mermaid aquarium on your summer nature table or at a child’s bedside. Arrange other beach treasures around her on an ocean-like silk. It will help her feel at home! If you tell a few mermaid stories, your child may become enchanted by the mermaid guest and may whisper secrets to her during the long twilight of summer evenings.
Perhaps the mermaid will tell the children stories of her life in the sea, the beautiful underwater merfolk cities, her fish friends, and water magic. Perhaps, if you‘re very lucky, the children will tell you these stories, too.

Please note: Your child may wish to touch the water and play with the mermaid, so your placement of the mermaid’s aquarium home may depend on whether spills are a problem. Also, if your mermaid visits for a long time, you may need to change the water to keep it looking clear. In doing so, you may need rinse the gems, pebbles, and shells. But then, you and the children get to remake it all over again!


Letting Go: A Life Skill

Butterfly Garden Habitat

“We need in love to practice only this: letting each other go. For holding on comes easily–we do not need to learn it.” —Rainer Maria Rilke

Sometimes letting go isn’t easy, especially if what you need to let go of is something you treasure. In many ways, parenting is one long process of letting go; every day we parents and caregivers are challenged to give a little more space, a little more trust, and a little more independence to these growing beings in our care.

Letting go of hurts, mistakes, expectations, and even our loved ones is, at times, part of life, and finding healthy ways to do so without struggle or stubborn holding on is a valuable life skill. Letting go can make way for new ideas, new opportunities, and new knowledge. It‘s also an excellent reminder to live in the present moment, and not in the past.

It‘s a good idea to find opportunities for your children to practice this skill of letting go. Here are two simple ideas that are perfect for children in the summertime.

Rescued Ladybugs

Buy a container of ladybugs at your local nursery. Watch them, hold them, admire them, perhaps compare their colors and count their spots. Wait until evening, when the beetles are less likely to fly away, and then release them in your garden. Gently sprinkle them onto your roses and other plants that attract aphids. The ladybugs will be your garden protectors, and your children will be doing the right thing by letting them go free.

Order a butterfly garden and live painted lady caterpillars from a company such as Insect Lore. When your caterpillars arrive, watch them eat, grow, and transform into chrysalides. Then carefully place them into your mesh butterfly garden. After approximately seven to ten days, your painted lady butterflies will emerge. You can keep them for a while; they will eat sugar water or fruit juice in captivity. After a few days or a week pass, release the butterflies into the wild. Keep your eyes open because they move surprisingly fast! Whenever you see butterflies fluttering among the summer flowers, you’ll fondly remember the ones you set free.

Fly away, butterfly! Fly up so high. Fly away, butterfly, fly up in the sky!

This Moment: Swallowtail

Swallowtail in my Garden

Inspired by SouleMama {this moment} – A Friday ritual. A single photo – no words – capturing a moment from the week. A simple, special, extraordinary moment. A moment I want to pause, savor and remember.

Midsummer

IMAG0236

Happy Midsummer! It’s been a perfectly lovely weekend for our family. It looked like this:

Asher's June 22 Writing

(Asher’s writing, 5 and a 1/2)

IMAG0240

598738_3435623614111_264728551_n

303516_3434018493984_380201588_n

Morning Glories for Joyce

Asher Caught a Pullet

Remodeled Chicken Run

We had friends over for two spectacular meals—friends whom I adore and crave constantly.

Lucas went to a fantastic birthday party. He gave his friend a copy of Fellowship of the Ring, a thoughtful gift, as Lucas and Asher are thoroughly enjoying the Tolkien trilogy. Ian is reading The Two Towers to them now.

Ian got a spiffy new phone f0r work. The Star Walk app is awesome!

Friends from school rode their bikes over to play here with us on Saturday. They get along so beautifully with my kids.

I painted a tiny bit.

We did some shopping for home improvement stuff.

Ian shortened the chicken run a tad, as the first step to solving one part of our drainage problems. He built a new wall with tree stakes we already had laying about!

We worked on our drip system, fixing problems and adding drippers. The weather was so cool, we had to take advantage of the opportunity to work in the yard.

Lucas played in a piano recital, which was altogether wonderful. So many talented kids!

We grown-ups have been watching the Lord of the Rings films. All the boys’ talk of orcs and elves and dwarves made me want to see them again.

Our Midsummer days have been happy and full of food, friendship, love, useful work, and celebration! I hope yours have been, too!

Wishing Tree Tutorial

Wishing Tree

When cultivating optimism, which I posted about the other day,  it can be helpful to have a visual reminder of your intentions, hopes, and dreams. Make wishing flags to hang on a tree in your garden and sway in the breezes all summer long.

Materials
* assorted pretty fabric scraps, or watercolor paintings or pretty papers
* a permanent marker
* ribbon or yarn
* pinking shears (if using fabric)
* a hole punch (if using paper), or scissors
* beads (optional)

Tutorial
Take a moment to think of the good things you want to happen in your life. Your wishes may be as specific as you need them to be (new job for daddy, better health for grandma, college acceptance for sister, opportunity to homeschool, good teacher for brother, fun at camp, etc.). If you are doing this project with children, ask them, “What happy things will happen to us?” Chances are good that the children will have many joyful ideas to share. (Marvel for a moment at how easy optimism comes to them.) Write your ideas down in a list.

If you don’t have specific ideas or hopeful expectations, make a general list of positives, such as: joy, learning, rest, health, happiness, hope, peace, harmony, love, patience, safety, etc.  When my family and I did this project, we asked our friends and loved ones what they hoped and prayed for—we took their requests and made flags for them, too. It was a lovely way to share our goodwill with others.


Cut your fabric into skinny rectangles (or triangles) with your pinking shears. If you are using paintings or other papers, you can use regular craft scissors. You’ll need one rectangle for each wish, and they can be measured and uniform or free form and varied, it’s up to you. If you want, you can think of them as custom-made prayer flags.

Using your permanent marker, write your wish on your rectangle. Make a hole with scissors (or a hole punch, if you’re using paper) at the top, and loop your ribbon or yarn through the hole and tie a knot. Now it will look a lot like a bookmark.

You may like to add beads to the top of your ribbon. If you do, the beads will add weight to the wish and give it a finished look. Make as many or as few of these wish flags as you like. If you’re doing this as a class or as a family, make sure that everyone contributes some wishes.

Now find a spot in your garden or playground where you will be frequently and tie your wishes to a tree. They will add color to your garden and flutter in the summer breezes. Perhaps your wishes will be carried by the wind up to heaven, or to the four corners of the world, spreading your love and optimism over the globe to people everywhere. Whenever you see them, you will be reminded of all the good that is in your future.


(This article was originally published in the Little Acorn Learning June Enrichment Guide in 2011. Check out all their many wonderful offerings at Little Acorn Learning.

Cultivating Optimism

Volunteer Sunflower! Gorgeous!

If you have a sanguine temperament, you probably never even think about optimism, or being optimistic—you just are upbeat most of the time. Not everyone is naturally optimistic, though. As caregivers and parents, optimism can be one of our most valuable personal resources. Finding ways to cultivate optimism in our lives is highly rewarding and will provide a fount of energy and love that we can draw from, especially when times get tough or we’re having a challenging day.

But what is optimism? Some would say it is hope, or the expectation that the future will bring good things. Some would define optimism as a tendency to think of life and the event unfolding around us in a positive light, to see opportunity in change, to see good outcomes when we imagine what is to come.

There is a well-documented connection between optimism and good health—and the converse. The mind-body connection is being validated by scientific research, and has long been understood in many cultures. The Latin word optimum means “best.” So how will you be your best self, live your best, do your best, and reap the best outcomes for your efforts?

Even if it’s not your tendency to be optimistic, you can cultivate optimism in your life for your own benefit and the benefit of those around you. Patterns of optimistic thinking can be learned. Here are some things you can do to nurture an optimistic outlook. I know because this is something I work on all the time.

Tired Little Hero

Get some exercise. Exercise has so many benefits, which we’ve all heard before. But the positive impact of exercise on your emotional and mental state is just exactly what you need to be optimistic. Not only does exercise provide you with a boost to your physical energy and emotional well-being, it’s also a way of investing today in your healthy, happy future. You want to be around to enjoy those grandchildren and great-grandchildren, to fulfill your life goals, and exercise is the ticket.

Japanese Maple in Bloom

Plant a tree. By planting a tree, you are symbolically looking to the future. You plan where it will go in your garden, imagine its height and breadth as it grows, how it will cast shade, and even perhaps that you will someday picnic under its canopy. What else will your tree bring you and your family? How else might it bring you joy? As you watch your tree grow, you have a symbol of your optimism.

Summer 2010 Mosaic

Practice “prenostalgia.” OK. My husband and I made up that word, but I think it works. By prenostalgia I mean imagining a moment in the future when you might look back and fondly remember this time in the present. I guess that’s a kind of funny way of saying be mindful of this moment, and take some steps to ensure that you can enjoy it later, too. Take up scrapbooking, for example, or journaling, or blogging. If you‘re a shutterbug like me, realize that every photo you snap is a simple act of optimism. You are investing in your future enjoyment of life, just as much as you’re enjoying the present.

Prepare a time capsule, or a hope chest, for your children. Add to your time capsule, little by little, through the years. It can contain artworks, special items of clothing, and other mementos. A hope chest traditionally is a collection of things that a grown child will need when she or he reaches adulthood. Exercise your imagination. What will your child like to have in the future?

IMG_4623

Make a handmade quilt. There’s nothing quite like a quilt as a symbol of love, warmth, and home. Stitch by stitch, you can sew in your hopes for the future, for the world, and for your beloved family members. While you work, imagine how this quilt you are making will be used, who will use it, and how it will be treasured because it came from your hands and heart.

Save some money. I look on each dollar I save for my sons’ college education as an exercise in optimism. No matter how small the amount, saving money is a way of planning for a good future. Perhaps it’s savings for your children or your own retirement; perhaps it’s for a special family vacation or for your dream home. Whatever you save for, you are acting out of hope and it feels good.

Make a microloan. Sorry to mention money twice in a row, but I think this one is great. Microloans are tiny investments in people and small businesses, especially in developing nations. There are several reputable organizations that can match micro-investors with people who need small amounts of cash (sometimes as little as $25) to get a business off the ground, thereby increasing the safety and health of their families and communities. This small investment is an act of trust and optimism, a testament to our faith in human nature and good in the world. An individual does have the power to change lives for the better, which is a way of changing the world.

Daddy Love

Find the positive. Take a moment to find the positives in every situation, especially in those that are seemingly bad or discouraging. This silver-lining thinking may require some deep soul-searching and some practice to make it a habit, but if you make a concerted effort to change your negative thoughts to positive ones, you‘ll be learning optimism.

Say it aloud. Whenever you are feeling good about the future or confidence in yourself or others, say so out loud. Not only will you be sharing compliments and your happy expectations with others, who will surely benefit from hearing it, but also you will benefit from hearing yourself being positive and hopeful. Furthermore, be aware of your inner self-talk and compliment yourself when you do something well, when you make the extra effort, when you give of yourself, when you act out of kindness. Positive affirmations can help cultivate an optimistic outlook on life.

These few simple things, practiced and perfected over time, may just alter the way you look at everything. Soon, your own eyes will sparkle with hope and excitement in just that same magical way your child’s eyes do.

This Moment: Holding

Finally, be gentle with yourself. You already are optimistic, even if you don’t realize it. Here is the proof: By spending time caring for children, you are engaged in faithful, optimistic work every day, striving toward and cultivating a bright, beautiful future world.


(This article was originally published in the Little Acorn Learning June Enrichment Guide in 2011. Check out all their many wonderful offerings at Little Acorn Learning.

Summer Solstice Celebrating and Feasting

Seagulls

Sunlight is flooding
The widths of space
The son of the birds echoes
Through the realms of the air
The blessing of plants sprouts
From the being of the earth
And human souls lift themselves
In feelings of thankfulness
To the Spirits of the World.

—Rudolf Steiner

IMG_7106

Happy Summer Solstice! Here is a little tea concoction I made and it was so yummy, we’ll definitely do this again:

  • two green tea bags
  • lemon slices, squeezed into the water
  • lemon balm leaves
  • sweetener of your choice

(Steep all day, strain, and then chill before drinking.)

We have had a marvelous day and I hope you have, too.

Forming the Giant Cookie

Summer Sun Mosaic Cookie Before Baking

We made a giant summer sun mosaic cookie together. Here it is before baking. And here is the basic giant cookie recipe from Mel’s Kitchen Cafe. This kind of thing goes over really big with my children. Lucas made the face; Asher did the eyebrows and the sun rays around the outside. Since the boys got soooo excited about putting the Reese’s candies on top, I realize now that I didn’t need to put peanut butter chips into the dough.

IMG_7131

IMG_7141

We painted suns, inspired by my co-author and friend Eileen Straiton’s project in our Midsummer Festival E-Book. I think once they’re dry we’ll hang them.

IMG_7149

IMG_7147

IMG_7148

IMG_7157

Then we had a beautiful Solstice feast of shrimp tostadas and several fresh salads. I needed lots of circles and colors and fresh veggies in this meal. We even added in some nasturtiums from our garden. We had so much gorgeous food, I wished we had guests to share it with! This is one of my favorite things: Eating amazing California food outside in summertime, when the day has been hot but the evening delta breezes pick up just in time.

IMG_7158

“Give me the splendid silent sun with all his beams full-dazzling.” —Walt Whitman

Solstice in a Sunbeam

Also, today marks six months since our little dog Solstice came to our family. He followed our boys home on December 21 and hasn’t left our side since then. We love him so much, and we’re all grateful to have him.

Here’s to unexpected blessings that follow you home and take up residence in your heart.

Here’s to abundance of joy, nourishment, learning, and opportunity.

Here’s to family traditions carefully conceived and simply crafted.

Here’s to courage, doing good, and generosity.

Blessed Be.

Hello, Summer

IMG_6756

Summer vacation is off to a good start! The school year ended at our Waldorf school with a beautiful ceremony for the graduating seniors and the symbolic moving of classrooms for the other grades. Lucas’s fourth grade packed up and moved to the fifth-grade classroom. On the last day, all the students lined up and shook the hands of all the teachers, who wished them a happy summer. It was a day full of celebration and a great exhalation. It felt like coming to the end of a favorite book—a little bittersweet. This year has been a marvelous journey for our whole family and we are so blessed to be where we are, who we are, and with these loving people around us.

IMG_6793

A lot of heavy, heartbreaking things have been and are going on these days among our friends. This has lead me to need to circle the proverbial wagons a bit. I am looking for ways to take care of us, myself included, in the hopes that our hearts will mend. And frankly Band-Aid solutions are totally acceptable, such as an extra glass of wine for parents, or the impulse-buy ice-cream maker, or babysitting extra kids just so we can squeeze and giggle with a beautiful baby for a while.

IMG_6859

Never underestimate the power of Baby Therapy.

I am also counting mercies, big and small:

• my son is loving swim team this summer
• my dog doesn’t chew on my kids’ toys
• my husband feeds us so well
• we have friends in the activities we’ve enrolled in
• my flowers bloom whether I feel happy or sad, and my hydrangeas are out of this world
• my new painting class starts this Thursday
• my little son is enjoying Clay Camp, even though he was afraid to try it at first
• we have received a dinner invitation for Friday
• I’ve had some time to visit some friends going through difficult times
• most of my cotton summer skirts still fit
• I’ve had time off from work this week to help us find a new rhythm
• my boys don’t have any cavities
• I got my Mother’s Day card from Lucas on the last day of school

IMAG0171

IMG_6893

And so we enter another summertime. Here we are again, bumping into each other—with love, (im)patience, and familiarity—trying to figure out once again how to spend long summer days together, while adapting to all the growth and changes we’ve all undergone since the last time. We’ll get the hang of it soon. Hello, summer!

Garden Love

Foxgloves

I am thoroughly enjoying my garden this year. Everywhere I turn I see successes in the form of bright flowers. Not everything I’ve planted has done well, but so much has and I am finding that going even a few days without some time working in the garden is too long. (It helps when the weather is so completely perfect like it is now.)

Of course, there are spots of ugliness that I have plans to change, but I’ll give a little tour of the good stuff. My foxgloves (above) are off the hook this year. In fact, since this photo was taken, more tall spires have bloomed out and they’re bending down to the ground. I’ve got to stake them up with something.

Sun Rose (Helianthemum nummularium 'Ben Nevis')

These sunny fellows are called Sun Roses (Helianthemum nummularium, according to the Interwebz). It’s a low-growing ground cover with orange flowers that drift up above.

Salmon-Colored Azalea

April is the month for Azaleas and mine are doing great. I’ve actually been feeding them this year. I’ve turned over a new leaf and vowed to support the plants I already have with loving attention and fertilizer.

Black-eyed Susan (Rudbekia) Vine

This vine is new this spring. It’s a form of rudbekia called Black-eyed Susan vine. I’ve had it for about three weeks and it’s still blooming like this. My hope is that it will grow up onto my fence near my patio. My concern is that my soil isn’t all that great in that spot. It was such an arresting flower that I decided to take the chance. I think I paid $12 for this. It stands about 4 feet tall.

Nemisia

My nemesia from last year is blooming beautifully.

IMG_4008

I think this rose is called “Peace” but I’m not sure. I think it’s heavenly.

Clematis

My clematis vine survived the winter and bloomed like crazy all through April. Then it had a few quiet days before a new batch of flowers opened up. These are about six inches across. I bought a pretty trellis for them to climb and need to paint it and get it into its permanent spot soon for the vine to grow on.

Like a Candy Cane

Peppermint candy rose—it was called something like that, but I forget. This rose was new last year and it seems very happy.

Mandavilla Vine

I bought a Mandevilla vine at Costco. My mother says she has killed several of these over the years. I figured I’d give it a try. It’s flowers look like ballerinas.

"Hot Cocoa" Rose

And this baby is Ian’s favorite rose “Hot Cocoa.” We like it so much we have two of them.

Let’s see … the delphinium is looking good and getting ready to bloom. I have seven new irises that I recently bought at the nearby Horton Iris Farm. One called “Obi-Wan Kenobi” is blooming and another called “Tomorrow’s Child” will bloom soon. Today I planted a scarlet dianthus and three purple verbena ground cover plants. The rock roses I put in last year are blooming and I’m looking forward to them getting bigger; they should get at least three feet tall. My evening primrose has spread and is now sporting baby-pink poppy-like flowers. I’m hoping it will spread out more in the front yard too. All the purple iris rhizomes I bought from the Waldorf school farm are doing fine but aren’t yet ready to bloom. I think I’ll have to wait until next spring for them to be well enough established to flower.

Oh—and the mint is trying to take over the world.

My next project, apart from putting in tomatoes and peppers and pumpkins from seed, is to get some rooting hormone and try my hand at propagating from cuttings.

  • About Sara

    Thanks for visiting! I’m Sara, editor and writer, wife to Ian, and mother of two precious boys. I am living each day to the fullest and with as much grace, creativity, and patience as I can muster. This is where I write about living, loving, and engaging fully in family life and the world around me. I let my hair down here. I learn new skills here. I strive to be a better human being here. And I tell the truth.

    Our children attend Waldorf school and we are enriching our home and family life with plenty of Waldorf-inspired festivals, crafts, and stories.

    © 2003–2018 Please do not use my photographs or text without my permission.

    “Love doesn’t just sit there like a stone; it has to be made, like bread, remade all the time, made new.” —Ursula K. LeGuinn

  • Buy Our Festivals E-Books


  • Archives

  • Tags

  • Categories

  •  

  • Meta