Tutorial: Patriotic 5-Pointed Window Star

IMG_7391

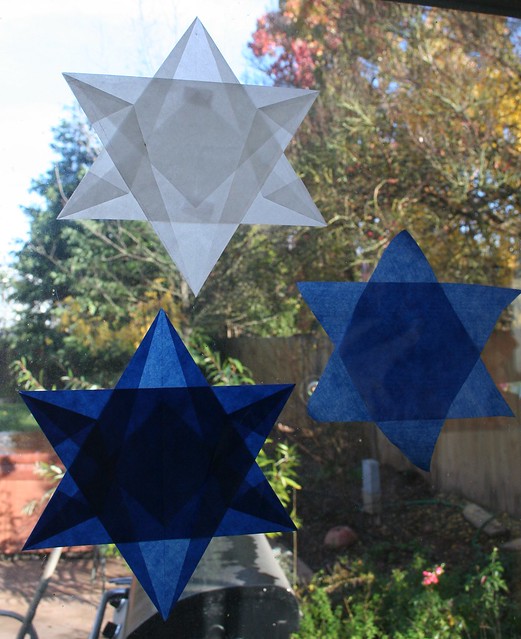
I am a freak for window stars. It’s been quite a while since I made any new ones, so I pulled out my kite papers and glue stick the other night. I wanted to make something red-white-and-blue to decorate for Independence Day, and five-pointed stars are always festive and patriotic in the U.S. Our family is almost never at home on this holiday, but crafting with this theme seemed like a fun thing to do anyway. If you are hosting a gathering for the Fourth of July (or for Bastille Day/La Fête Nationale in France on July 14), these would make lovely decorations. Make a bunch!

Incidentally, check out how many countries have flags made of red, white, and blue!

Materials

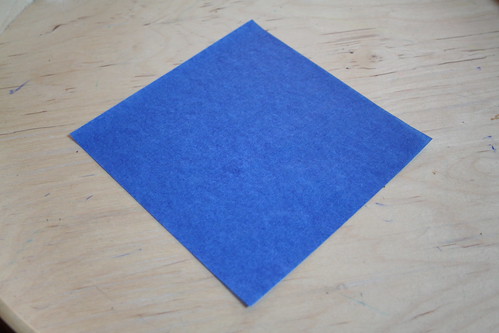
  • 5 sheets of square kite paper in red, blue, or white
  • glue stick
  • tape
  • ruler or straight edge for making crisp folds
  • large white piece of paper
  • protractor
  • pencil

Tutorial

IMG_7375

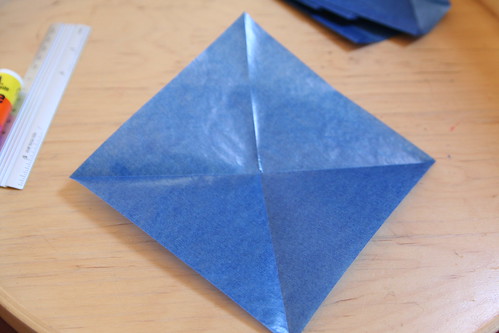
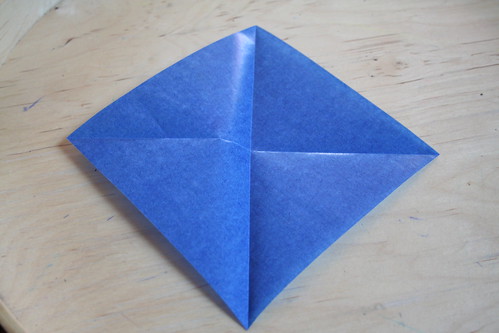
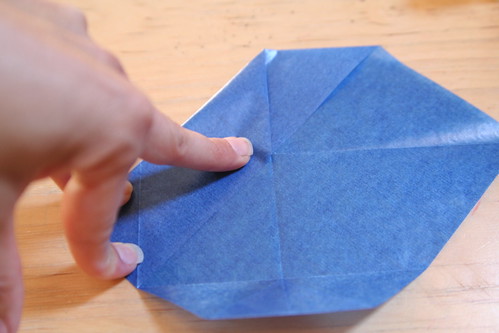
Fold your square into diagonals. Open it back up again.

IMG_7376

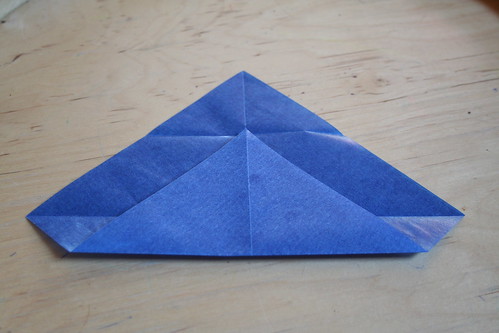
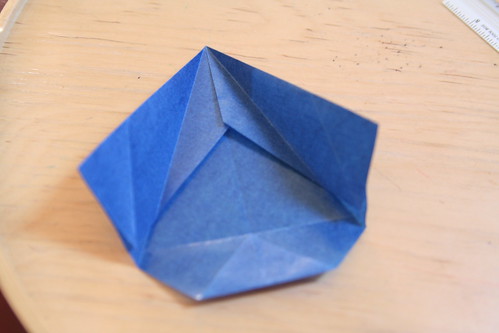
Now fold opposing corners to the center line (photo above). The top is now a horizontal fold that is parallel to your horizontal crease. Unfold the bottom corner; the crease you made will be used later.

IMG_7378

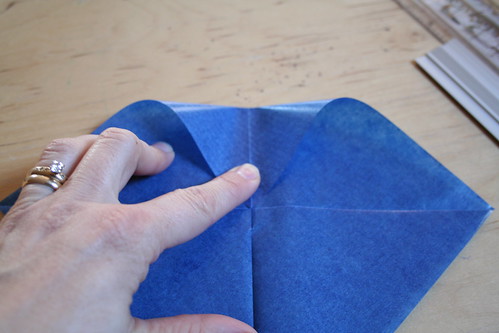
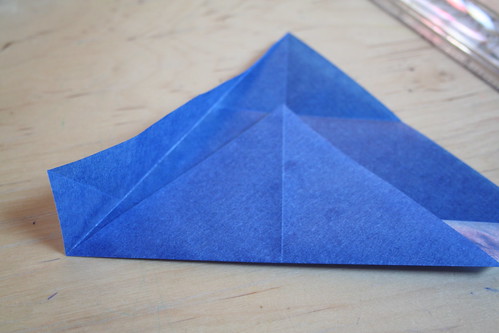
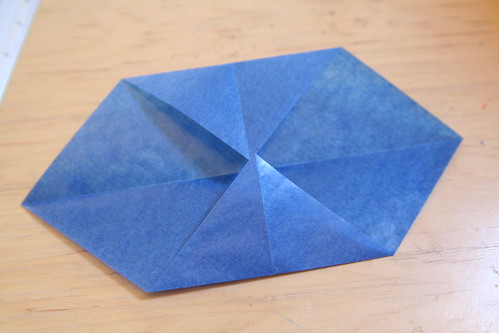
From the top, folded edge, fold the left side down to meet the center horizontal line (photo above). The top edge will now be vertical along the center line.

IMG_7379

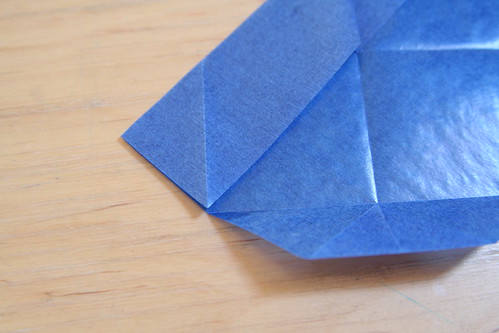
The bottom edge now meets the line of the horizontal fold you made above and then unfolded.

IMG_7380

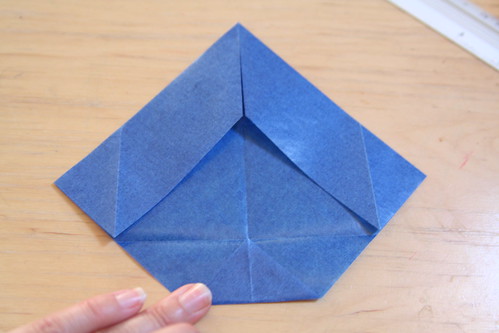
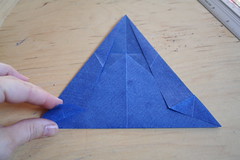
Do the same to the other side. Now you have a point at the top again.

IMG_7377

Fold the bottom corner up to the horizontal crease line.

IMG_7381

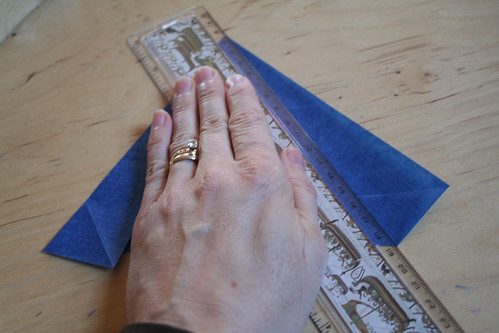
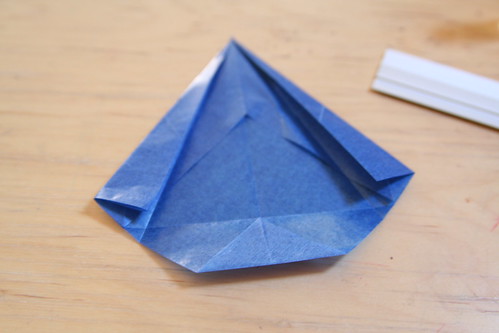
Now fold both sides in to meet the center vertical crease. This step looks like a sailboat. Do your best to keep the top point crisp.

IMG_7382

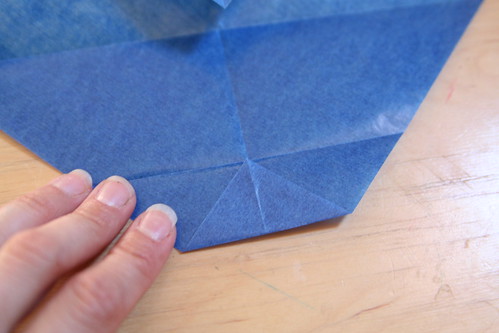
Open those sides out again.

IMG_7383

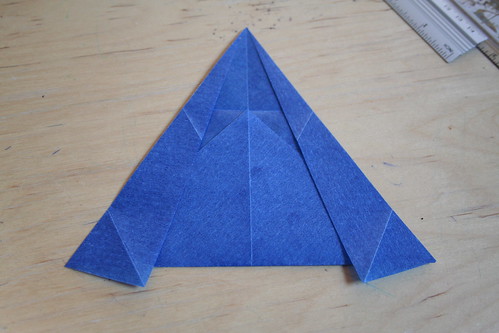
Now fold the left top side in again, allowing the corner to touch the horizontal crease you made in a previous step. Your top point is becoming more acute. Now do the same with the right side.

IMG_7384

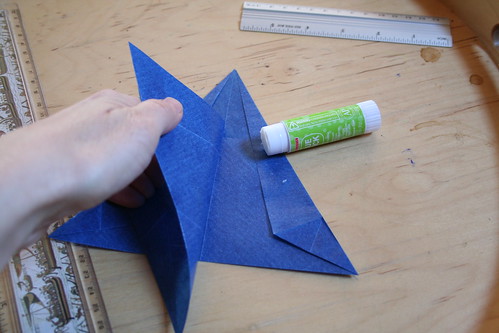
Congratulations! You’ve make one point for your five-pointed star! Use tiny dabs of glue from your glue stick to tack down the parts that want to spring up. If you do this, your assembled star will look very precise hanging in the window and you’ll be able to see the beautiful pattern of lights and darks made by the folds of the paper.

Now repeat that folding process four more times, so that you have five of these points.

IMG_7385

To assemble your star I recommend that you make a guide on a large spare piece of paper using a ruler and a protractor. Your five points need to connect at 72-degree angles. Draw nice long lines on your guide so that you can align your point and the center along the lines. My guide has lines for 10-pointed stars, so I skip one when assembling a five-pointed star.

IMG_7386

Start with the top point. Place it’s bottom center on the intersection point of all the lines on your guide. Align the center crease along the line. Now hold it firmly in place and add the next point so that its left side overlaps the first point. Align the second point’s bottom center on the intersection point and the center crease along the guide’s line. Place a dab or two of glue so that the two will stick together. Add the third point to overlap the second. Before you glue the third point, ensure that all three points are still lining up with your guide lines. Continue with the fourth and fifth points, but glue only the left side of the final point.

IMG_7387

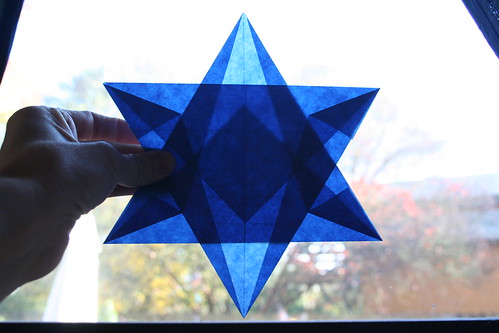
Finally, lift the top point up so that the right side of the fifth point goes underneath it, and then glue.

IMG_7388

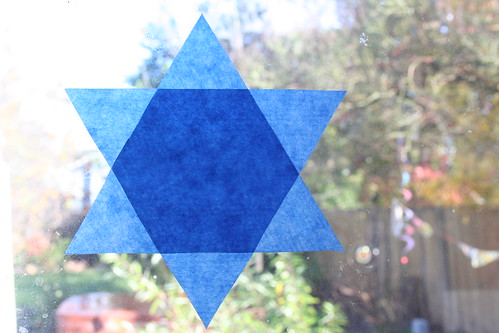
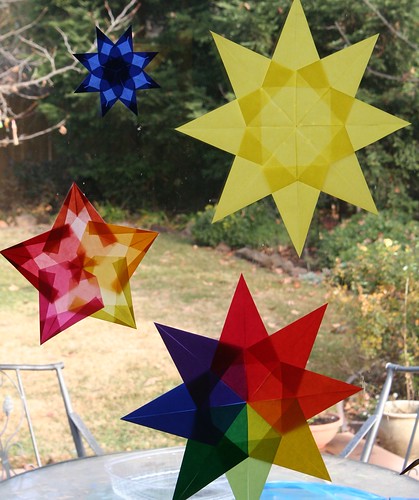
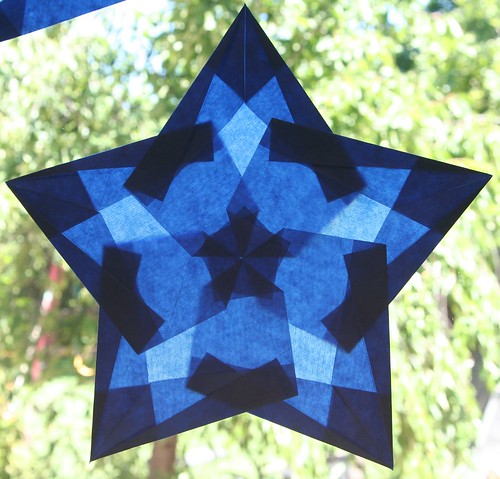
Voilà! Now hang your star in the window!

IMG_7389

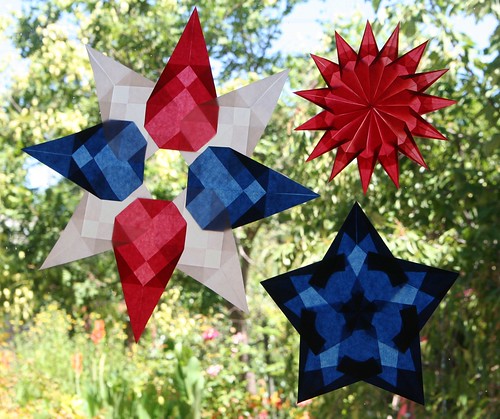
They’re pretty all together in their red-white-and-blue glory, aren’t they? I love them!  I’m thinking of making another style of window star for Fourth of July. I’ll try to do a tutorial for it, too, if I can find the time.

Star of David Window Star Tutorial

IMG_3335

Today is the first day of Hanukkah, and although I am not Jewish, I found myself wondering about Hanukkah crafts and thought I might create something to share. I am very, very fond of (read “obsessed with”) window stars and I wondered if I could come up with a way of making one in the shape of the six-sided Magen David, or Star (or Shield) of David in celebration of Hanukkah.

Well, I have done so. I’ve never seen this window Star of David anywhere in Waldorf circles, so I believe I’ve invented this folding design. Here goes, humbly submitted with love:

Materials

  • 2 sheets of 6 x 6 inch kite paper
  • glue stick
  • ruler
  • tape

Tutorial

IMG_3322

The aim here is to create two equilateral triangles without cutting your kite paper. Start by folding your first sheet diagonally, corner to corner. Open the paper into a square and fold it diagonally the other way, corner to corner. Your paper now has folds that make an X, or a cross when a corner is at the top.

IMG_3323

IMG_3331

Hold the paper with one corner at the top, in a diamond shape. Fold the top corner down to the middle, where the two diagonal folds you made meet. Crease the paper there, but do not firmly press the fold down all the way. You want a little crease mark halfway in between the top corner and the middle of the square. Unfold the sheet into a diamond shape again.

IMG_3325

Now fold the bottom corner up to the crease you just made. Firmly press the fold; this one is permanent. You now have a fold on the bottom. This bottom fold is one side of your equilateral triangle.

IMG_3326

Hold the top point and fold the left side of the kite paper toward the center fold line. The bottom left corner will be where the bottom of the triangle begins. The top of this fold will be very narrow and the bottom will be pretty wide.

IMG_3327

Now do the same thing on the other side.

IMG_3328

IMG_3329 IMG_3330

You have two little corners that extend down beyond the bottom edge of your triangle. Fold the left corner up until it meets the left edge of the triangle. Do the same on the right side.

Get out your ruler and let’s see how we did. The bottom of your triangle should be 17 cm long. The left and right sides should be 16.5 cm. That’s not a perfect equilateral triangle but it’s really close. It will do.

Repeat all of the above with your second piece of kite paper.

To assemble your Star of David window star, you want one triangle pointing up and one pointing down. They will overlap such that six points of equal size are visible. It doesn’t matter which triangle is on layered on top of the other. Be sure to align the center fold lines of both triangles.

IMG_3337

When you layer them together and hold them up to a light source, you should see a hexagram in the center, as well as other details created by your folding pattern. You want the distance from the bottom of each triangle to the tip of the point of the other triangle to be 4.5 cm. If you’ve got that measurement right, then the other four side points of the star should also be 4.5 cm from their tips to the sides of the other triangles.

IMG_3333

Use your glue stick to dab a very small amount of glue to fix the two triangles in place.

IMG_3338

Tape or glue your Star of David to the window. Voilà!              (c) Sara E. Wilson

IMG_3341

If you don’t mind cutting your kite paper, you can make a very simple Star of David that also looks beautiful with the light shining through it. This one is good for kids in older grades to make on their own because they can practice measurements and angles. Use one side of the kite paper to be a side of your equilateral triangle. With a protractor, measure a 60 degree angle, make a pencil mark near the center of the opposite side of the square. Then draw the line. Measure 15 cm. That’s your side length. Make another 60 degree angle and draw another line to intersect the first line you drew. All sides must be the same length: 15 cm. Now that you’ve got your equilateral triangle drawn, cut it out. Repeat these steps to cut a second triangle and then layer one over the other to make the six-pointed Star of David. In this version, the center hexagon is very visible. Simple and lovely. (And the truth is, even if your triangles aren’t perfect equilateral triangles, this star will still look terrific!)

There are other nifty Hanukkah crafts in the Winter Festivals E-Book, created by myself and Eileen Straiton and published by Little Acorn Learning. In it you can find poems, crafts, songs, caregiver meditations for celebrating a number of festivals of light, including Santa Lucia, Hanukkah, Solstice, Yule, and Christmas. We’d be very happy if you checked out our e-book and help us spread the word.

Happy Hanukkah! May we all enjoy the love and light of true friendship during this beautiful season.

Holy Days

Christmas Morning at Home

My Boys

These holy, family days have been so full. We are enjoying. Resting.

Asher got Face Crayons

Coloring.

Dragon from Santa!

Bananagrams

Playing with so, so many wonderful gifts.

We have had long, luxurious visits from friends, and a sweet party that we are very honored to host.

Dog and Ian

Playing

The little dog, Solstice, is a great joy to us all. We still don’t know where he is from. We haven’t had even a single nibble on the ads we placed, hoping to find his owners. In the meantime, whatever the outcome, we are enjoying him ever so much. And now I have someone new and fluffy to point my camera at.

Christmas Day Reading

We’ve been reading new books in our leisure and drinking too much delicious coffee. Nursing head colds.

Ice

Experimenting with magical ice … to see what we can make, of course.

Window Stars

Cutting snowflakes and folding window stars. (LOVE!)

After all the working>making>striving>doing>going> leading up to and including Christmas day, we are now fully and happily settled into our hibernation days, our holy, family days. There is plenty to do—very little of it is urgent. So perhaps we’ll do some laundry. Or cook. Or play more Legos or a game. Or go for another walk instead …

Nature Walk

At the River

Asher Climbs

Or climb a tree …

Asher and Solstice

Brothers

while we learn more about each other …

Heart of Stones: Found Art

and see what we can find along the way.

  • About Sara

    Thanks for visiting! I’m Sara, editor and writer, wife to Ian, and mother of two precious boys. I am living each day to the fullest and with as much grace, creativity, and patience as I can muster. This is where I write about living, loving, and engaging fully in family life and the world around me. I let my hair down here. I learn new skills here. I strive to be a better human being here. And I tell the truth.

    Our children attend Waldorf school and we are enriching our home and family life with plenty of Waldorf-inspired festivals, crafts, and stories.

    © 2003–2018 Please do not use my photographs or text without my permission.

    “Love doesn’t just sit there like a stone; it has to be made, like bread, remade all the time, made new.” —Ursula K. LeGuinn

  • Buy Our Festivals E-Books


  • Archives

  • Tags

  • Categories

  •  

  • Meta