Hello, Summer

IMG_6756

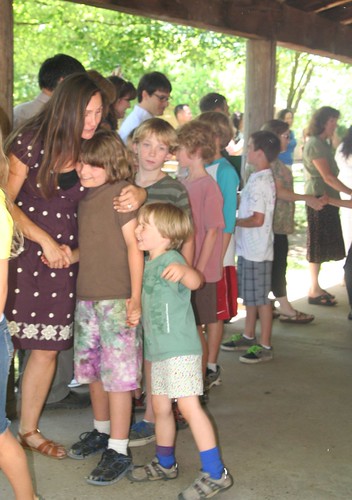
Summer vacation is off to a good start! The school year ended at our Waldorf school with a beautiful ceremony for the graduating seniors and the symbolic moving of classrooms for the other grades. Lucas’s fourth grade packed up and moved to the fifth-grade classroom. On the last day, all the students lined up and shook the hands of all the teachers, who wished them a happy summer. It was a day full of celebration and a great exhalation. It felt like coming to the end of a favorite book—a little bittersweet. This year has been a marvelous journey for our whole family and we are so blessed to be where we are, who we are, and with these loving people around us.

IMG_6793

A lot of heavy, heartbreaking things have been and are going on these days among our friends. This has lead me to need to circle the proverbial wagons a bit. I am looking for ways to take care of us, myself included, in the hopes that our hearts will mend. And frankly Band-Aid solutions are totally acceptable, such as an extra glass of wine for parents, or the impulse-buy ice-cream maker, or babysitting extra kids just so we can squeeze and giggle with a beautiful baby for a while.

IMG_6859

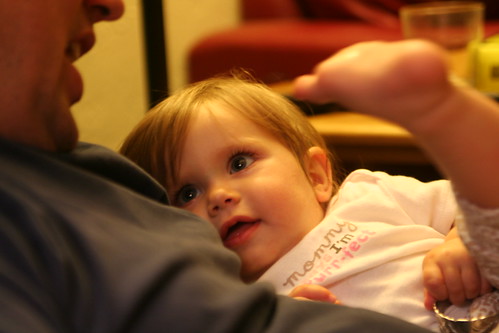
Never underestimate the power of Baby Therapy.

I am also counting mercies, big and small:

• my son is loving swim team this summer
• my dog doesn’t chew on my kids’ toys
• my husband feeds us so well
• we have friends in the activities we’ve enrolled in
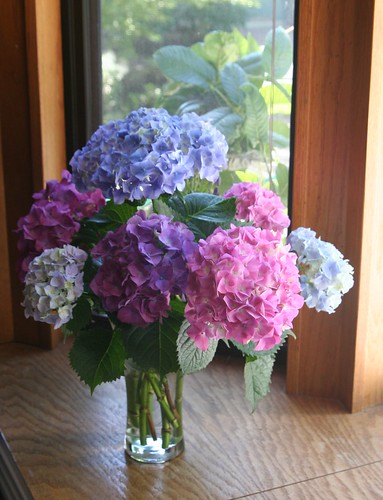
• my flowers bloom whether I feel happy or sad, and my hydrangeas are out of this world
• my new painting class starts this Thursday
• my little son is enjoying Clay Camp, even though he was afraid to try it at first
• we have received a dinner invitation for Friday
• I’ve had some time to visit some friends going through difficult times
• most of my cotton summer skirts still fit
• I’ve had time off from work this week to help us find a new rhythm
• my boys don’t have any cavities
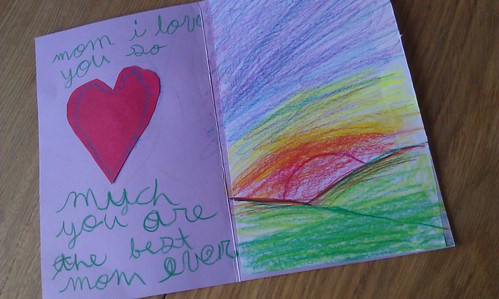
• I got my Mother’s Day card from Lucas on the last day of school

IMAG0171

IMG_6893

And so we enter another summertime. Here we are again, bumping into each other—with love, (im)patience, and familiarity—trying to figure out once again how to spend long summer days together, while adapting to all the growth and changes we’ve all undergone since the last time. We’ll get the hang of it soon. Hello, summer!

Midsummer Festival E-Book

Sun_Child-311x426

I am delighted to announce that my dear friend Eileen Straiton (of Little Acorn Learning) and I wrote a Midsummer Festival E-Book! It has been a marvelous journey and I loved every step we took in making it. Please spread the word!

Little Acorn Learning
Monthly and Seasonal Guides
for Childcare, School and Home

*New* Midsummer Festival Book is Available!

This wonderful Midsummer Festival E-Book will bring the magic of summer into your home and help you keep celebrating throughout the season!  It is packed full of Waldorf songs, stories, verses, crafting tutorials and much more to help you celebrate Midsummer and the Summer Solstice with the children in your home, classroom, or childcare environment.

  • Read Stories and Fairy Tales Filled with Sunshine to the Children
  • Enjoy Verses, Songs, Poems and Fingerplays that Celebrate the Coming of Summer
  • Learn about the History, Background and Symbolism of the Summer Solstice
  • Get Ideas for How to Create Your Own Meaning of this Special Festival
  • Enjoy a Solstice Feast
  • Play Solstice Games
  • Make a Midsummer Bonfire
  • Create Simple Beeswax Suns with the Children
  • Make a Solstice Wreath for the Birds
  • Design Midsummer String Art Sunbursts
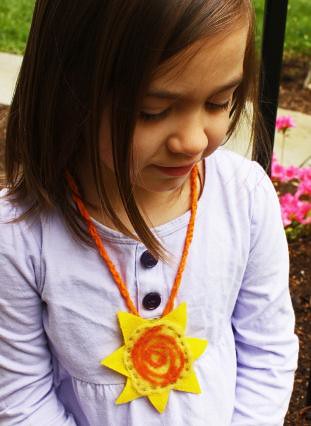
  • Read a Story of The Sun Child and Create a Sun Child Necklace
  • Craft a Shiny Garden Suncatcher
  • Use a Rock Garden Sundial to Tell Time in Your Garden
  • Make a Catch the Sun Throw Toy for Your Child
  • Create a Paper Solstice Sun
  • Read How to Create Daytime and Nightime Midsummer Magic
  • Hang Summer Solstice Flags Indoors or Outdoors this Season
  • Plant a Midsummer Indoor Herb Garden
  • Craft a Sun Mosaic Birdbath
  • Make a Sunshine Fairy out of Wool Roving and Felt
  • Sew and Stuff Herbal Dream Pillows for St. John’s Eve
  • Needle Felt a Summer Sun Wall Hanging
  • Create Sweet Pocket Sun Sprites for the Children
  • Bake Sun Bread with the Children
  • Go on a Sun Hunt
  • Make a Sun Mask
  • Design a Sunshine Banner
  • Crochet Sun Medallion Necklaces

mosaic681a08dd7f492074d30d638319d71c78eb0cd22f

In addition to our Midsummer Festival eBook, Little Acorn Learning has lots of wonderful offerings to fill your summer months with enriching, creative activities for your family, daycare, summer camp, or homeschool group, so please check out their other fine products.

40

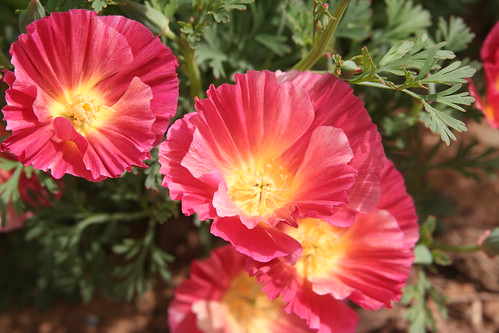
Poppies

A lot is going on right now and I’ve not had much time to write. I had a birthday this week and it got me ruminating. Here’s some of what I’ve learned in my 40 years. (Some of these say “you,” but they all mean “me.”)

1. clean something every day, even if it’s only your hands

2. read to your kids; it is food for life

3. mothering well is largely a matter of knowing what things to get excited about, and what not to

4. wine is wonderful

5. smiling makes you feel good and it’s free (sometimes I forget this one)

6. make a place for butterflies and birds in your world; you won’t be sorry

7. stuff is only stuff; it all wears out eventually

8. beware of modeling beeswax in the laundry

9. tell your story, but don’t get so caught up in telling it that you forget to live the next chapter

10. children are resilient; however, test this only with careful discrimination

11. make your own meaning, don’t swallow anyone else’s

12. read poetry; read everything

13. when you fuck up, breathe, and then start over

14. being married to your best friend is ideal

15. try new things every day

16. exercise is good for me even if I don’t like it

17. fashion is stupid—occasionally fun, but stupid

18. it feels good to help people

19. somehow, time can both fly and drag—at the same time

20. words can indeed hurt

21. onions and Brussels sprouts are actually delicious

22. sing more, dance more

23. be your own beautiful freaky self out loud; if you don’t you’re cheating everyone

24. avoid the pink aisle and boys need dolls

25. sometimes the best course of action is to set it on fire

26. vote

27. gardening is cheaper than therapy

28. feminism benefits everyone

29. art is important, and more important to make than to consume

30. boys are actually sweeter than they want you to think they are

31. love and kindness is all the religion I need

32. equality for only some is no equality at all

33. find your cause; better yet, find a dozen of them and get to work

34. miracles are everywhere and often go by the names of “humanity” and “nature,” “life” and “science”; as such, they are no less miraculous

35. making it often feels better than buying it

36. I cannot “do all the things”; nor should I try to

37. a whole lot of things that bother me today won’t matter a bit tomorrow, so I should just chill

38. I am still learning

39. friendship is as necessary to me as air

40. my ultimate career goal is still philanthropist

The Theft of Thor’s Hammer: Fourth Grade Play

Thor

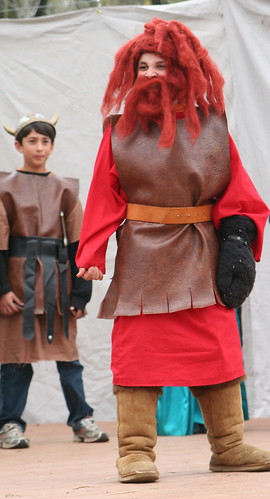
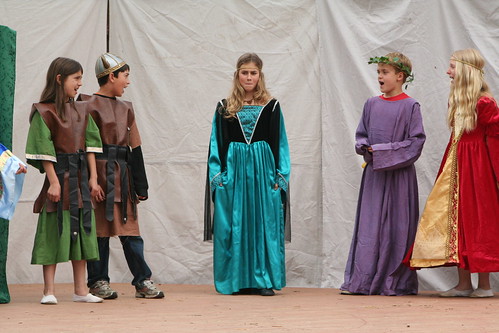
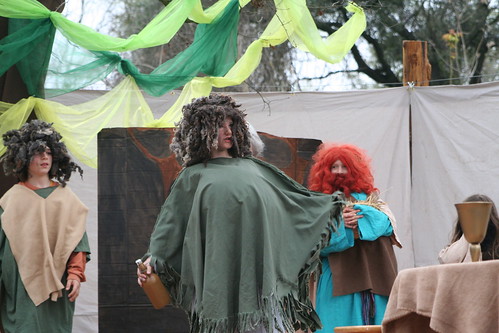
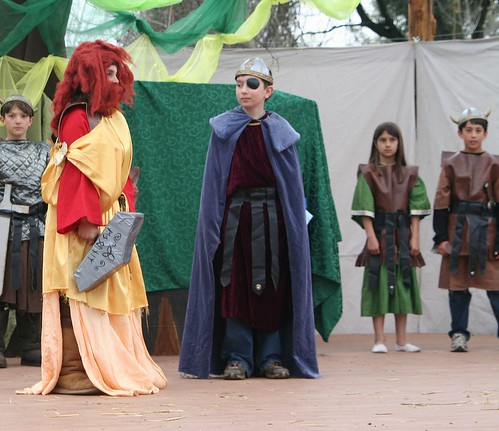
Last month, my son’s fourth grade class put on their spring play, The Theft of Thor’s Hammer. It was a funny story and the children performed beautifully in two performances. I only have photos from the performance in which Lucas played Thor. Doesn’t he look mighty? I was so proud to see him try for a big part—the part he really wanted—and get it. He’s never put himself out there like that before. And boy did he! I think this part required quite a lot of courage. You’ll see why in a minute.

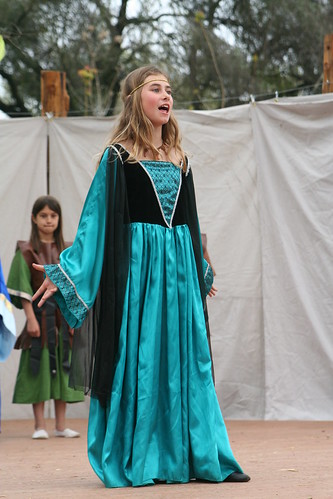
Freya

Here’s Freya, the goddess associated with love, beauty, fertility, gold (and sorcery, war, and death—don’t mess with Freya).

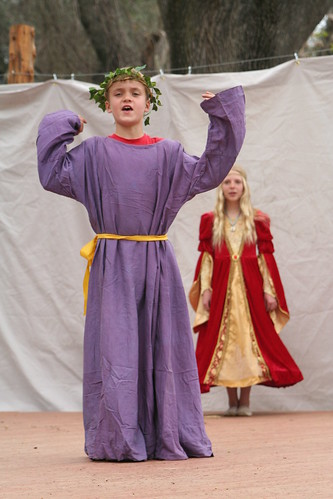
Frey, with Sif in the Background

And here’s glorious Frey, with Thor’s wife Sif, an earth goddess whose hair is “like golden sheaves of wheat,” in the background.

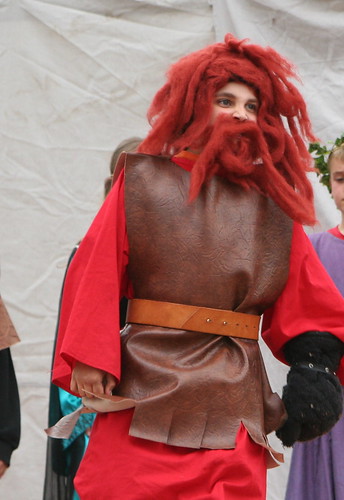
Angry Thor

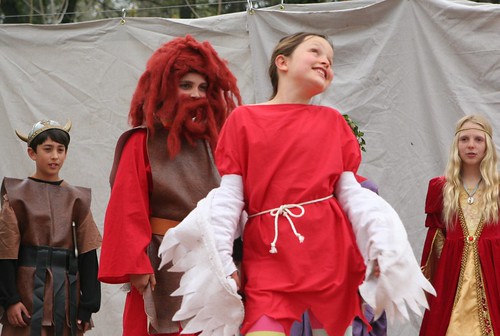
See Thor’s grumbly, angry face? That’s ACTING. I love it. I also love the wool roving used for his hair and beard.

Loki

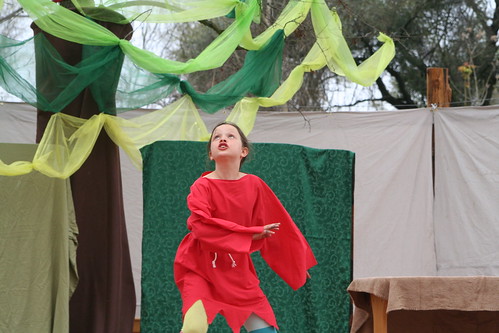
This darling child played Loki with such athleticism and feeling. Truly it was a joy to watch Loki’s antics.

Loki

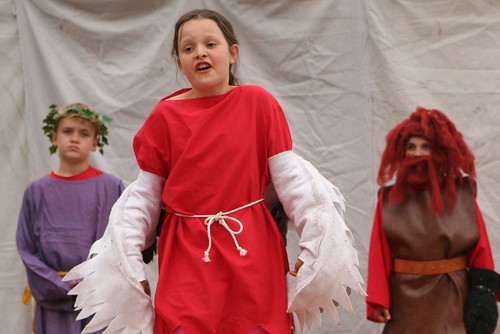
Loki borrows Freya’s falcon feather cloak.

Loki and Thrym

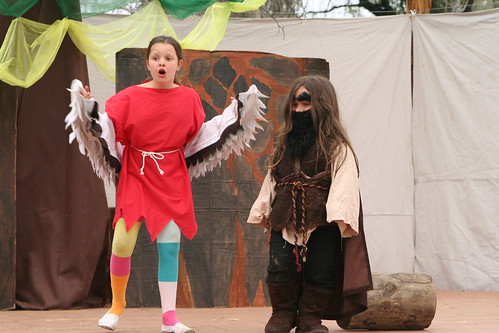
In the play, the giant Thrym steals Thor’s hammer, Mjolnir. The Asir gods are imperiled if Thor doesn’t get it back. Thrym says he’ll return the hammer to Thor if Freya will consent to become his wife.

Freya Is Angry: The Gods Suggest She Marry Thrym the Giant

Several of the of Norse gods say this isn’t a bad plan. Freya, on the other hand, is highly insulted. She will not consent! (Go Freya!)

Thrym

Thrym insists and waits eagerly for his bride.

Loki Confronts Thor

Loki suggests that Thor disguise himself as Freya to go get the hammer. This is not Thor’s favorite idea, but after his fury subsides, he reluctantly agrees.

Thor Dressed as Freya

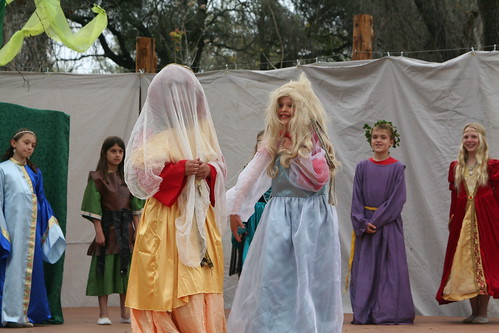
Thor and Loki are dressed as Freya and her maid. The veil hides Thor’s manly visage.

Giants

Giants' Song

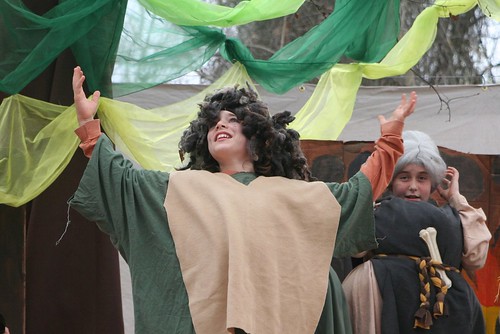
At Thrym’s home, the giants bumble about and sing a song. Thor-as-Freya is invited to a wedding feast, where he puts away a lot of food before unveiling his true god-self and bonking Thrym with the hammer. Mustn’t fight giants on an empty stomach, after all.

Mjolnir, Thor's Hammer, Is Back

With Mjolnir back in Thor’s possession, the world of the Asir gods is saved. Odin and the others are grateful.

Yarn Necklace for Mother’s Day Tutorial

Yarn Necklace

Are you hoping to make a special Mother’s Day gift for mother or grandma, or perhaps an end-of-year gift for a teacher? This yarn necklace is easily made by children who have a little finger knitting experience, in fact, my son made one for me when he was in the first grade and recently taught me how to make it. This kind of cord-making is called “finger knitting” and “finger weaving.” (Besides necklaces, you can make scarfs, braceletes, belts, or headbands in this way.)

Materials

  • wool or cotton yarn in a pretty color

Start by placing the tail of your yarn in the crook between your thumb and forefinger so that the tail hangs down over the back of your hand. Use your thumb to pinch the tail and hold it in place. Take the ball end of your yarn under and over, under and over your four fingers, wrap it once around the pinkie finger.
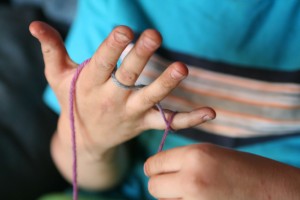
Continue weaving the working yarn under and over, under and over, traveling back toward your index finger.
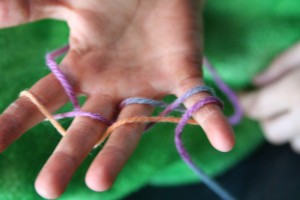
Wrap the yarn around your index finger and go under and over, under and over until you go around your pinkie again, and then weave it back toward your index finger in the same manner. Wrap the yarn one more time around your index finger and let the ball end rest across your palm. You should now have two loops (horizontal bands) of yarn on the front of each finger as you see in the photo below.
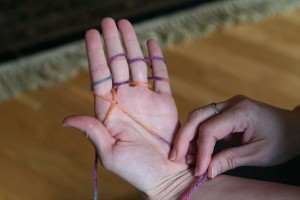
Now, beginning with your pinkie finger, grasp the lower loop with the fingers of your other hand and lift the lower loop over the upper loop …
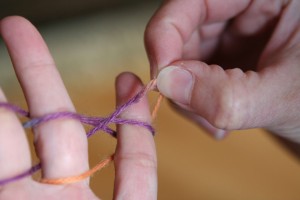
… and completely off the pinkie finger as in the next photo below.
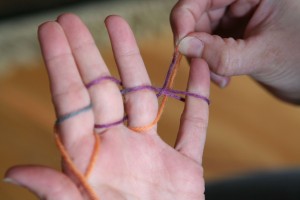
Now release the loop. Your hand should now look like this photo below, with two loops on the first three fingers and only one on the pinkie finger.
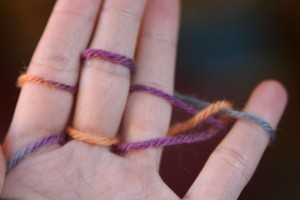
This action of moving the bottom loop over the top loop and off the finger is finger weaving. You will repeat this action with the remaining three fingers (ring finger, then middle finger, then index finger).
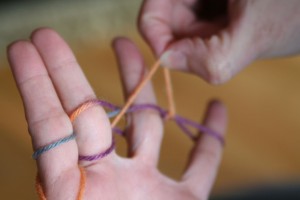
As before, with the ring finger, lift the bottom loop up and over the top loop, and then off the finger altogether. As you complete this procedure with each finger, you’ll see that you now have only one loop left on the finger.
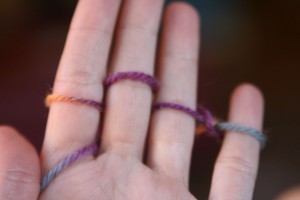
When you reach the index finger, the yarn tail that your thumb has been holding in place acts as your bottom loop. Treat it as any other loop and lift it up and over the top loop and off the index finger.
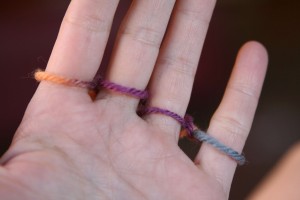
The tail will now trail down between your index finger and your middle finger.
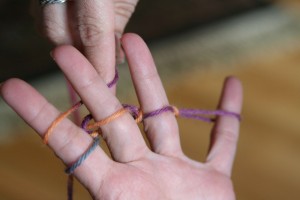
Now grasp your working yarn and wind it under and over your fingers as you did before, under and over, and around your pinkie finger so that your new loops are above the loops already on your fingers. Then continue winding the yarn under and over, under and over until you’re back to your index finger again. You should now have two loops on each finger again.
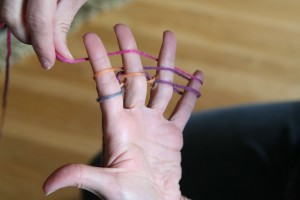
The loops are now high up on your fingers. Push the loops down to the base of your fingers. Then, as you did before and starting with your pinkie finger, pull the bottom loop up and over the top loop and let it go. Repeat for all four fingers exactly as you did before.

Push your stitches down again. Weave your yarn again, under and over, under and over, around, under and over, under and over above the loops already on your fingers, until you have two loops on each finger again.

As you repeat this process of pulling bottom loops over top loops again and again, row after row, you will begin to see the woven cord coming off the back of your middle and ring fingers, as in the photo below.
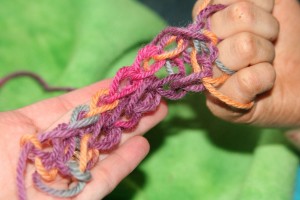
The woven cord looks kind of flat at first, but when you’re done and you tug it gently a few times, it will become a round cord for your necklace.
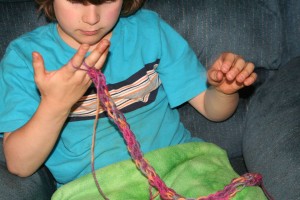
When your cord is long enough, it’s time to cast off. (Experiment with the length by putting it around your own neck while it’s still on your fingers. If you can see the necklace when you look down, chances are good the cord is long enough and stretchy enough to easily fit over a head.)

To cast off, begin with only one row of loops and don’t weave new loops above them.

Instead, lift the loop on the pinkie finger off the finger and place it on your ring finger. Your ring finger now has two loops and your pinkie has none, as in the photo below.
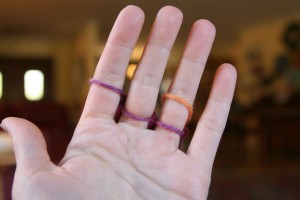
Lift the bottom loop over the top loop and release. Now your ring finger has only one loop. Pick up that loop and move it off your ring finger and place it on your middle finger, which now has two loops. Lift the bottom loop up and over and release. Now move the remaining loop on the middle finger to your index finger. Lift the bottom loop over the top loop and release. Now your index finger has only one loop and your other fingers are bare. You may now remove the final loop from your hand, cut your yarn, pull the working yarn through it, and pull it tight. Now pull the tail on the other end of your cord tight.

Now gently tug on your cord so that it becomes round rather than flat. Tie the two ends together, making a circle necklace.
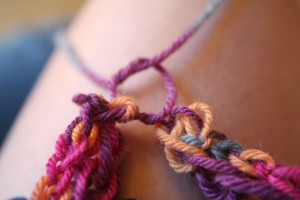
The necklace should be stretchy enough that it can easily go over head of the lucky person you give it to. She will treasure it more than she would any chain of gold.
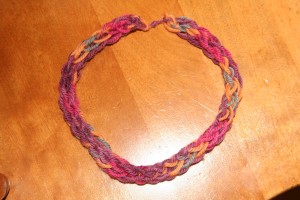
Happy Mother’s Day!


(This tutorial was originally published in the Little Acorn Learning May Enrichment Guide. Check out all their many wonderful offerings at Little Acorn Learning.
Garden Love

Foxgloves

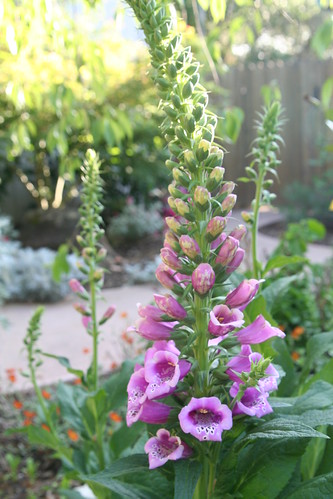
I am thoroughly enjoying my garden this year. Everywhere I turn I see successes in the form of bright flowers. Not everything I’ve planted has done well, but so much has and I am finding that going even a few days without some time working in the garden is too long. (It helps when the weather is so completely perfect like it is now.)

Of course, there are spots of ugliness that I have plans to change, but I’ll give a little tour of the good stuff. My foxgloves (above) are off the hook this year. In fact, since this photo was taken, more tall spires have bloomed out and they’re bending down to the ground. I’ve got to stake them up with something.

Sun Rose (Helianthemum nummularium 'Ben Nevis')

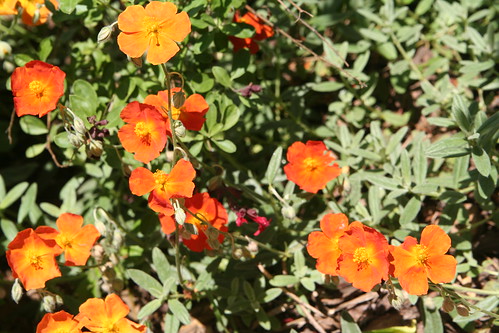
These sunny fellows are called Sun Roses (Helianthemum nummularium, according to the Interwebz). It’s a low-growing ground cover with orange flowers that drift up above.

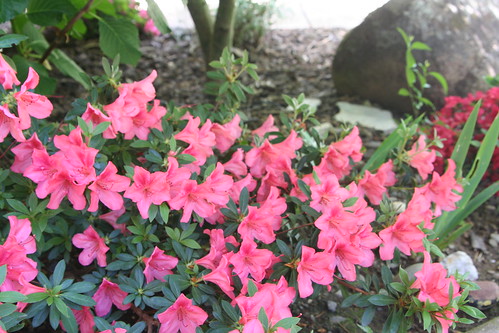
Salmon-Colored Azalea

April is the month for Azaleas and mine are doing great. I’ve actually been feeding them this year. I’ve turned over a new leaf and vowed to support the plants I already have with loving attention and fertilizer.

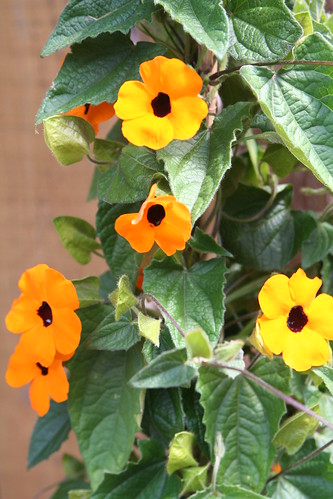
Black-eyed Susan (Rudbekia) Vine

This vine is new this spring. It’s a form of rudbekia called Black-eyed Susan vine. I’ve had it for about three weeks and it’s still blooming like this. My hope is that it will grow up onto my fence near my patio. My concern is that my soil isn’t all that great in that spot. It was such an arresting flower that I decided to take the chance. I think I paid $12 for this. It stands about 4 feet tall.

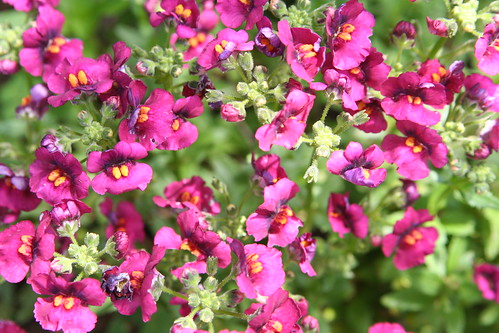
Nemisia

My nemesia from last year is blooming beautifully.

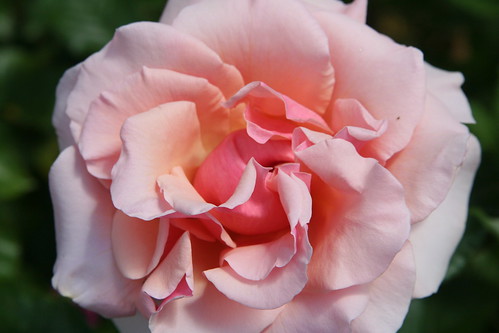
IMG_4008

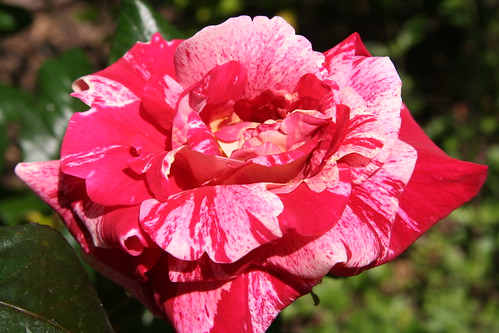
I think this rose is called “Peace” but I’m not sure. I think it’s heavenly.

Clematis

My clematis vine survived the winter and bloomed like crazy all through April. Then it had a few quiet days before a new batch of flowers opened up. These are about six inches across. I bought a pretty trellis for them to climb and need to paint it and get it into its permanent spot soon for the vine to grow on.

Like a Candy Cane

Peppermint candy rose—it was called something like that, but I forget. This rose was new last year and it seems very happy.

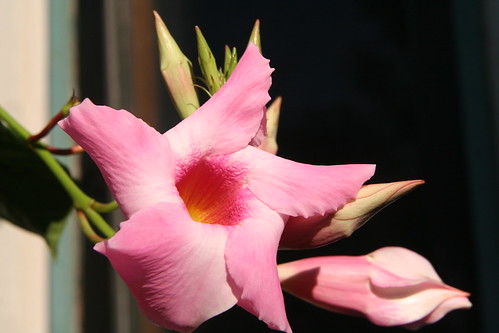
Mandavilla Vine

I bought a Mandevilla vine at Costco. My mother says she has killed several of these over the years. I figured I’d give it a try. It’s flowers look like ballerinas.

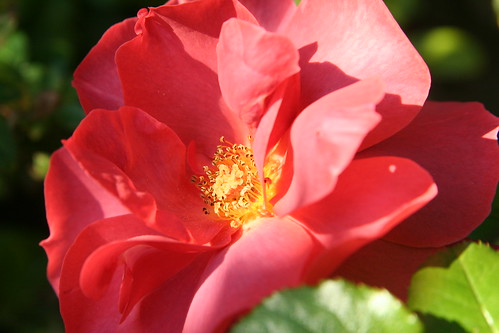
"Hot Cocoa" Rose

And this baby is Ian’s favorite rose “Hot Cocoa.” We like it so much we have two of them.

Let’s see … the delphinium is looking good and getting ready to bloom. I have seven new irises that I recently bought at the nearby Horton Iris Farm. One called “Obi-Wan Kenobi” is blooming and another called “Tomorrow’s Child” will bloom soon. Today I planted a scarlet dianthus and three purple verbena ground cover plants. The rock roses I put in last year are blooming and I’m looking forward to them getting bigger; they should get at least three feet tall. My evening primrose has spread and is now sporting baby-pink poppy-like flowers. I’m hoping it will spread out more in the front yard too. All the purple iris rhizomes I bought from the Waldorf school farm are doing fine but aren’t yet ready to bloom. I think I’ll have to wait until next spring for them to be well enough established to flower.

Oh—and the mint is trying to take over the world.

My next project, apart from putting in tomatoes and peppers and pumpkins from seed, is to get some rooting hormone and try my hand at propagating from cuttings.

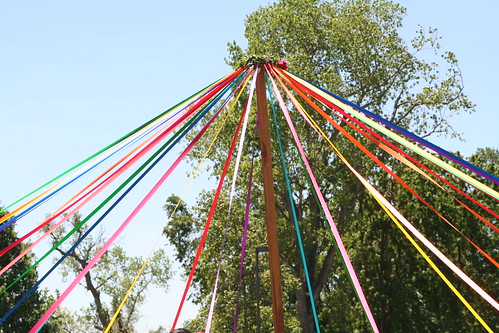
May Day 2012

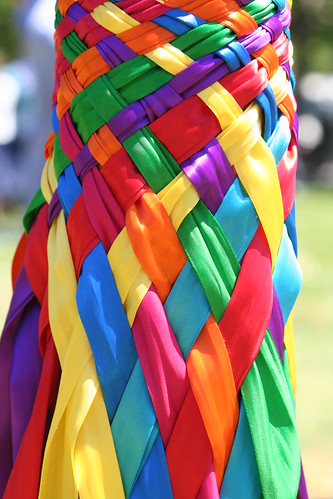
Woven Ribbons

Good Morning, Mistress and Master,

I wish you a happy day;

Please to smell my garland

‘Cause it’s the First of May.


A branch of May I have brought you,

And at your door I stand;

It is but a sprout, but it’s well budded out,

The work of Nature’s hand.

—from A Child’s Seasonal Treasury

Maypole Ribbons

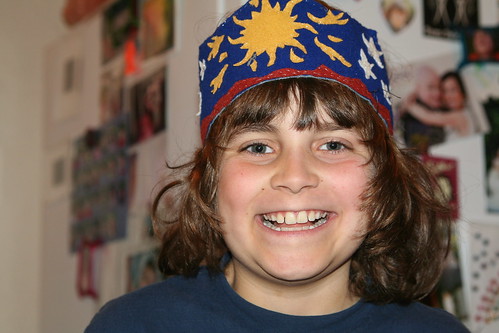
Happy May Day! Today is one of my favorite days of the year because May Day celebrations are so beautiful and full of flowers and because it is my older son’s birthday. This year feels extra special because Lucas is turning 10. A decade of our lives has been spent loving and raising this beautiful boy.

Beltane Birthday Boy: 10

He is magnificent and I love him so!

Painting Is Wonderful

Magnolias Oil Painting

It’s been a little while since I posted about my experience of learning to paint with oils. I’m finishing my third set of studio classes now.

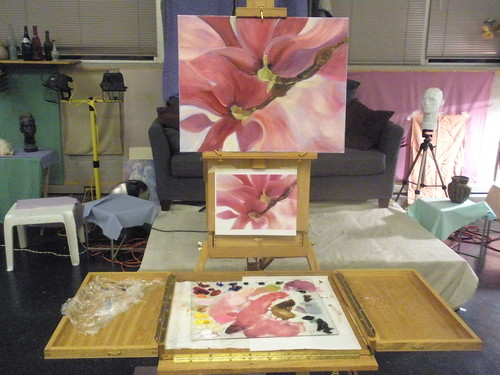
This is my biggest painting yet—a 16 by 20 canvas. I used my photograph of my neighbor’s magnolia blossoms as a reference. I am very pleased with how this came out. I tried to paint quickly and with emotion. I allowed the underpainting to show through for the first time in the hopes that it would lend a dreamy kind of atmosphere. I see a couple of things about this that I would like to fix, but I think it’s basically done. I think I’ll even sign this one.

Magnolia Painting in Studio

I’m really enjoying my teacher, Randy Blasquez, and my classmates. I’ve now been coming to class long enough that I’m getting to know other painters and see and learn from their processes, too. Everyone is different. Everyone struggles with different aspects of painting. Each subject we attempt has its own challenges. I love tackling new things, and I feel I’m learning with each painting I do.

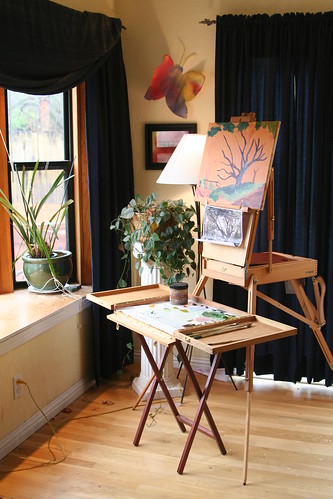
Painting at Home

I’ve done a very little bit of work at home, which was very fun. My new easel, whom I named Anaïs, and my new “French Mistress,” whom I named Genevieve, are working out really well. Genevieve is a wood palette box that holds my glass palette and keeps paint from getting everywhere. These gizmos are beautiful and functional. I waited about six months before investing in these items. I think I had to prove to myself that this painting this wasn’t a fly-by-night whim.

Damaged Painting

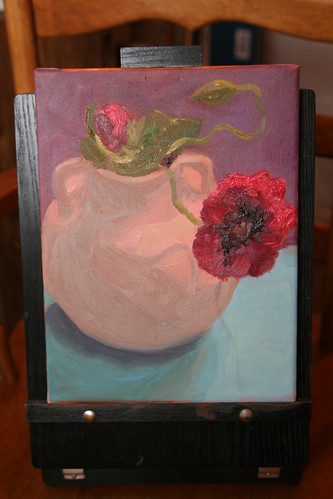
This is a shot of my slightly damaged painting I did in class back in February. Some “helper” seems to have dragged a little finger from the dark center of the poppy down into the pot and the blue of the tablecloth. I’ve managed to take out most of the line with some very careful scrubbing, but I still have to repaint part of the poppy. I like this painting, too. I like the shadows especially. While working on this painting I was consciously trying to use more paint. That probably sounds funny, but I have a tendency to be conservative—oils are pricey. I wanted this painting to have more flow and texture.

Last Friday I got to go to a plein air workshop. It was my first experience painting landscapes outside. I’ll write about that another time. For now, I’ll say it was amazing and fun—and full of new challenges.


Happy Earth Day!

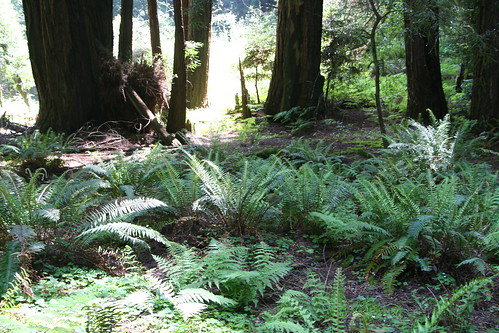
Forest Floor and Ferns

“We must protect the forests for our children, grandchildren and children yet to be born. We must protect the forests for those who can’t speak for themselves such as the birds, animals, fish and trees.”

~ Qwatsinas (Hereditary Chief Edward Moody), Nuxalk Nation


Mother Earth, Mother Earth.

Take our seed and give it birth.

Father Sun, Gleam and glow,

Until the root begins to grow.

Sister Rain, Sister Rain.

Shed thy tear to swell the grain.

Brother Wind, breathe and blow,

Then the blade all green will grow.

Earth and Sun and Wind and Rain,

Turn to gold the living grain.

—Eileen Hutchins

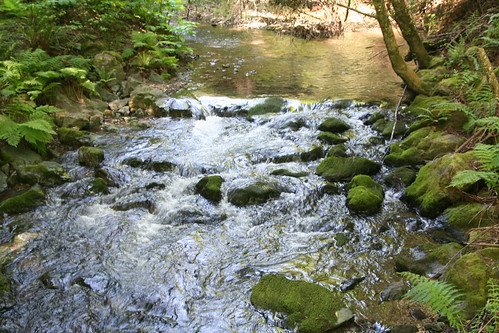
Mossy

Happy Earth Day everyone!

I hope this little list will inspire you to do something good for Mother Earth and all her children. Start small, start anywhere, just start.

1. Release ladybugs in your garden.

2. Start an herb garden and maintain it organically.

3. Go for a bike ride and picnic in a green space.

4. Write a poem. What does the earth mean to you? Show it to teachers, at church, or send it in to the local newspaper.

5. Make a birdbath so our feathered friends have a source of clean water.

6. Participate in a community cleanup; or just walk through your neighborhood with a trash bag and pick up (safe) trash you see along the walk.

7. Make natural soap or shampoo without chemicals. It’s good for your body and good for our waters.

8. Buy something you need at a garage sale or a thrift store, instead of buying a new item at a department store.

9. Symbolically adopt an animal at your local zoo or favorite wildlife conservation organization.

10. Teach your children well. Teach them about stewardship and never be afraid to express your love of nature. Let them see your love of the earth in action.


Blessed be.

Earth Day Moss Garden Terrarium Tutorial

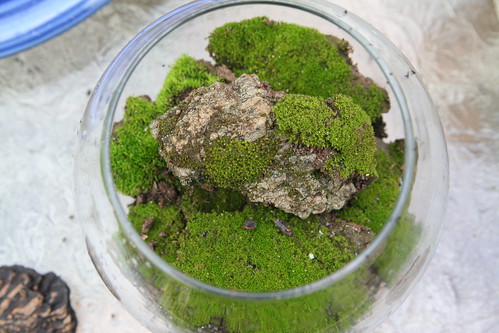
Finished Moss Terrarium

Here is a simple way to celebrate the earth, and bring a little of it inside your home. This moss garden terrarium is easy and inexpensive to make. Children of any age can help with this project and may especially enjoy finding such treasures of the earth. Noticing the small things in nature can be so rewarding, and it feels good to sink our hands in the soil.

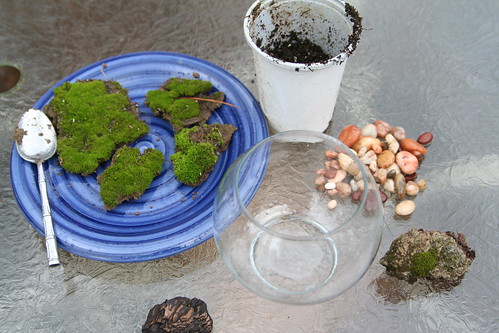
Materials for Moss Terrarium

Materials

  • a wide-mouthed glass container (goldfish bowl, candle holder, or jar; you may find something appropriate a thrift store)
  • gathered moss (gently lift from soil or rock, bringing the soil on which it grows with you)
  • about ½ to 1 cup small gravel or pebbles (look for pretty pebbles in your yard)
  • about 1 cup loamy garden soil (or more if your glass container is large)
  • interesting rocks, bark, twigs, or gemstones
  • spray bottle with water

Optional Materials

  • a small plant that requires little water (perhaps a jade plant or other succulent)
  • beeswax for modeling or a small figurine
  • crystals, glass gems, small twigs

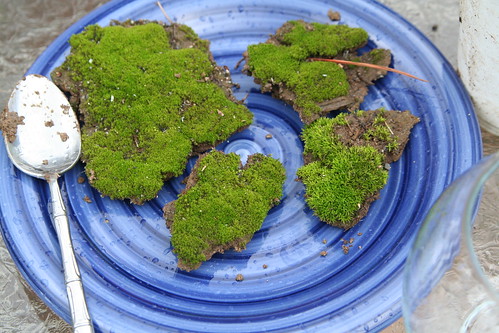
Gathered Moss


Tutorial

Begin by gathering your materials. You may be able to gather most of the materials you’ll need from your yard or nature walk. (Be sure not to remove items from protected nature areas.) Take a soup spoon or small shovel and a gathering basket along on your walk. Look along creeks and in shady, moist areas.

When you find mosses, stop and consider them a moment. Moss is a delightful, soft plant. It gets it’s nutrients from the air, rather than the soil, and requires shade and only a little water. It makes a perfect plant for a terrarium that gets only indirect sunlight in your home.

Feathery soft, your green so bright,

preferring deep shade to the light,

quietly sitting, waiting, spreading,

it’s hard to tell which way you’re heading.

I will touch your velvet softness.

Moss, I love your gentle mossness.


You make a lovely velvet bed

for a Fairy Queen to rest her head,

who sleeps in afternoons for rest

and dreams of forests nightly blessed.

We creatures great and creatures small

find you the tenderest plant of all.


Thank the earth for growing such lovely mosses and gently dig up some patches. Don’t take more than you need to fill your terrarium container, and you’ll likely need to take only an inch of soil or less.

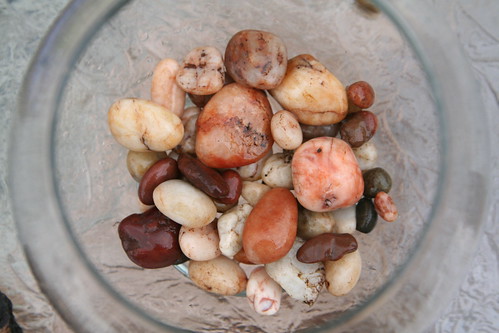
Garden Stones in the Bowl

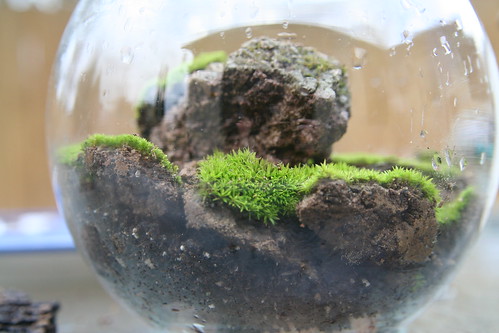
Now place your gravel or pebbles into your glass terrarium. These are at the bottom for drainage of water away from the soil. Add your garden soil to the container. It will probably cover your pebbles completely. You may wish to grade your soil so that some areas are higher than others. This will add interest to your finished terrarium.

Side View

Arrange your mosses (in patches) in your terrarium. Try to keep your clumps of moss mostly intact to make a contiguous, soft carpet. Alternatively, you could place moss in only part of your terrarium, and decorate the other areas with a plant, pretty pebbles, or glass gems.

Mosses In

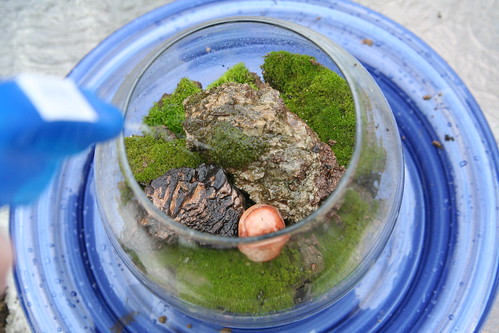
Add your decorative rocks, bark, or crystals. I happened to find a small chuck of old concrete that had more moss growing on it, so I added it to my terrarium. What will you add? Crystals? Twigs? Polished stones? A ceramic figurine of a deer or a rabbit? A butterfly? A gnome or a Fairy Queen in repose? Perhaps you’ll change your terrarium decorations with the holidays.

Spray to Keep Moist

Spray your moss garden with some water. Your mosses may need spraying once or twice a day to stay green and living. Avoid exposing them to direct sunlight.

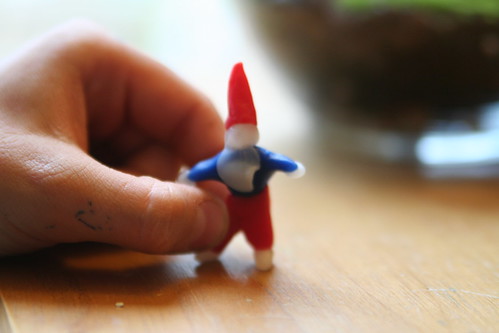
Beeswax Gnome

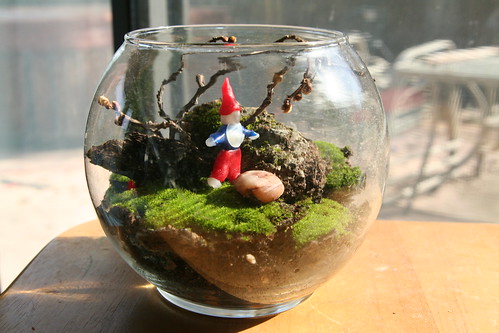
I turned to our modeling beeswax to fashion a tiny gnome. I think he’ll make an excellent caregiver for my moss garden terrarium. Gnomes are kind custodians of the earth.

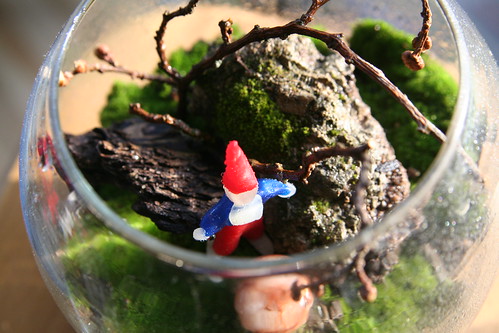
Finished Moss Terrarium

Be a good caregiver of your moss garden terrarium, spray it gently every day, and be careful not to saturate it with too much water. (Once again, the direct sunlight you see in this photo is too hot and bright for your moss. Be sure not to keep your terrarium in such a sunny location.)

Now add your terrarium to your nature table, your dinner table for an Earth Day celebration, or anywhere in your home that needs a small reminder of the earth’s beauty.

  • About Sara

    Thanks for visiting! I’m Sara, editor and writer, wife to Ian, and mother of two precious boys. I am living each day to the fullest and with as much grace, creativity, and patience as I can muster. This is where I write about living, loving, and engaging fully in family life and the world around me. I let my hair down here. I learn new skills here. I strive to be a better human being here. And I tell the truth.

    Our children attend Waldorf school and we are enriching our home and family life with plenty of Waldorf-inspired festivals, crafts, and stories.

    © 2003–2018 Please do not use my photographs or text without my permission.

    “Love doesn’t just sit there like a stone; it has to be made, like bread, remade all the time, made new.” —Ursula K. LeGuinn

  • Buy Our Festivals E-Books


  • Archives

  • Tags

  • Categories

  •  

  • Meta