Our Happy Solstice

sun ornament

IMG_20131221_115201

The Sun in Winter

Pale sun goes sailing
Through the frozen sky;
Trees raise to him their arms
As he goes by.
Haste, sun, grow brighter
As the days go past;
Wake from their sleep the buds
And leaves at last.

IMG_20131221_115650

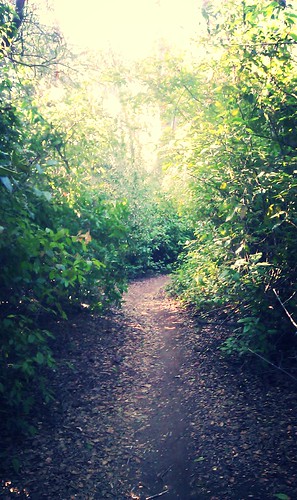
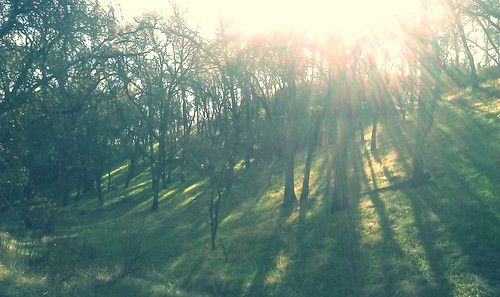
My day started with a gorgeous trail run with my friend.

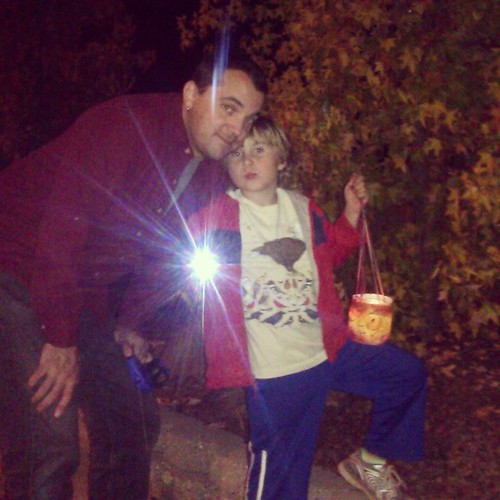
The kids played with the neighborhood boys, and just at sunset, Ian got to explain to the kids what the winter solstice is—that the earth’s axis is 23.5 degrees tilted to the plane of her orbit, and thus we have seasons of more sun and less sun, and that after this shortest day, the hours of sunlight each will get longer for the the next six months.

Solstice fruit salad. #Solstice #holiday #home

We declined a party invitation with regret, and celebrated at home on Saturday evening. It was quiet. It was cozy.

upload

Soltice dinner: fruit salad; spinach salad; avgolemono soup; honey suncake #Solstice #home #holiday Avgolemono soup

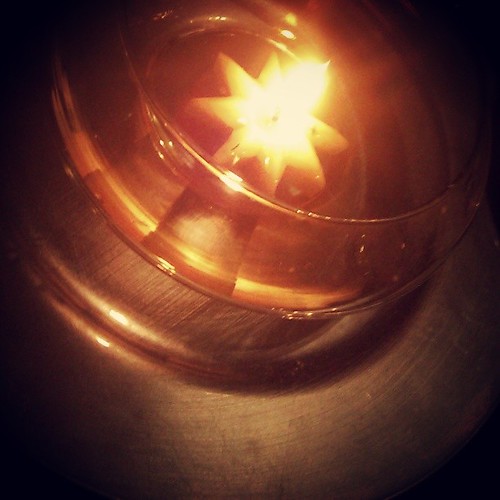
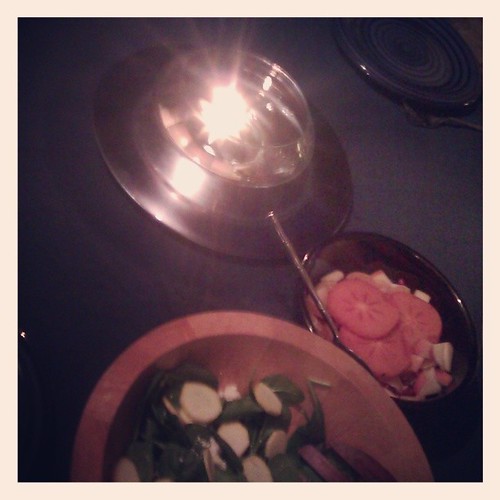
It was a little dark, just as I wanted it to be. The candlelight was lovely.

Honey suncake!!! Simple. Delicious. #Solstice #holiday #home

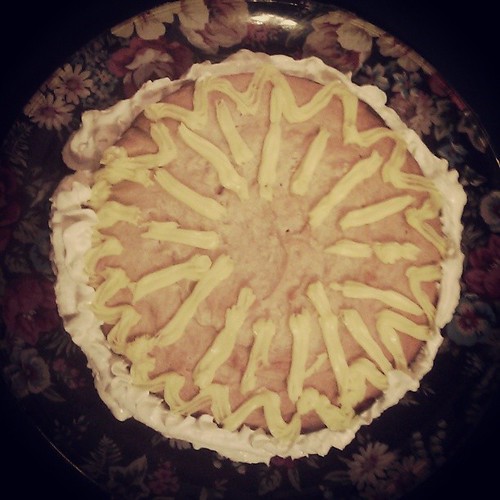
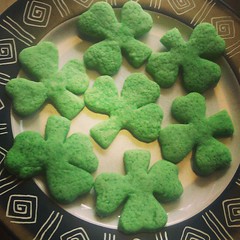
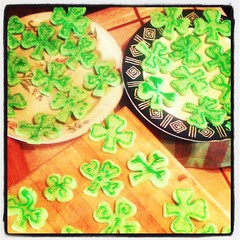
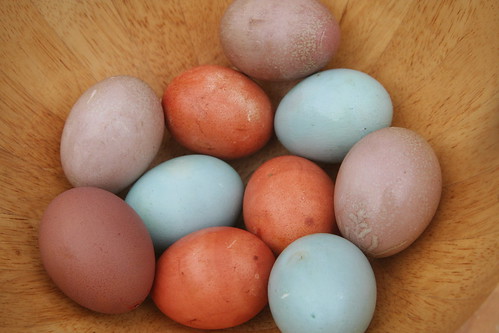
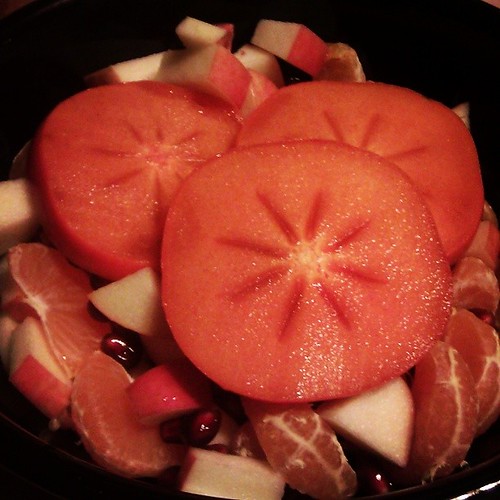
We had a meal of Greek avgolemono soup, fruit salad, green spinach salad with little yellow squash suns, and a honey suncake for dessert. Simple and delicious. I had a vision, so the kids and Ian just relaxed while I prepared it. I loved the part when I called them in to eat, and everything was glowing, perfect, and pretty. I only wish the boys had enjoyed the soup more.

Untitled

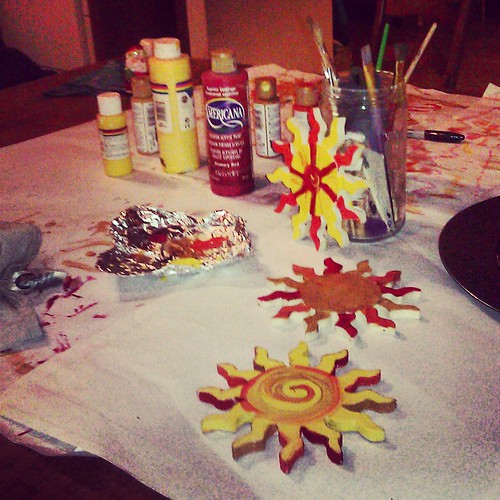
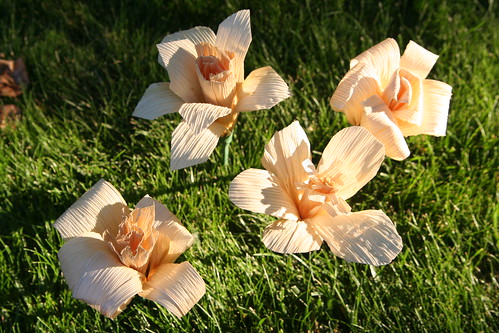
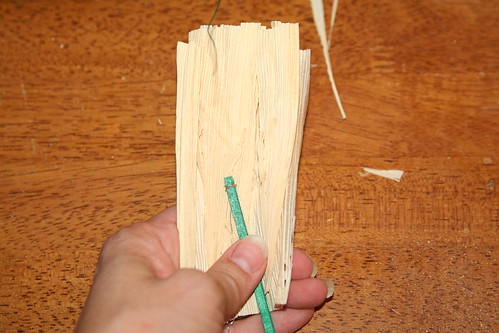
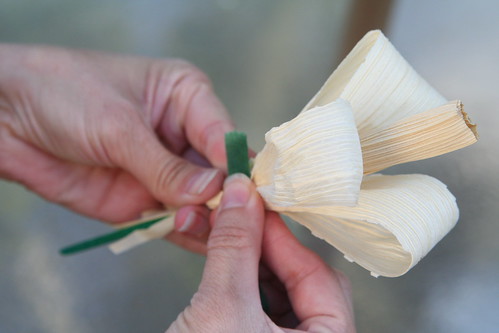
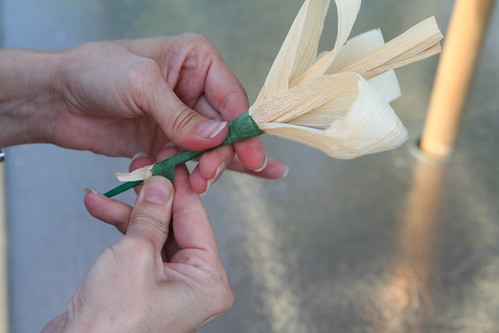
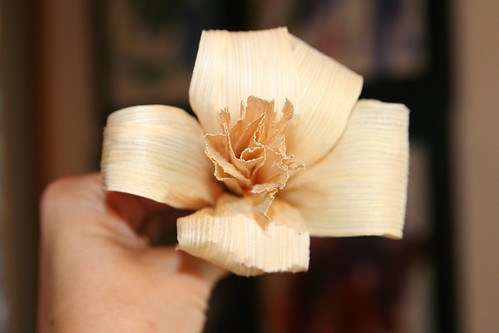
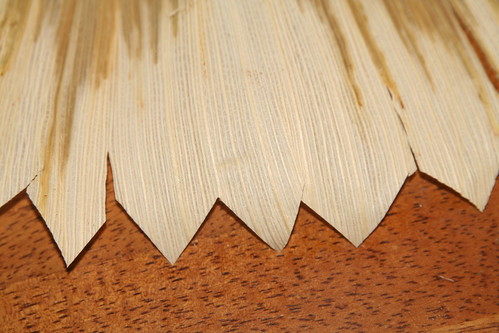
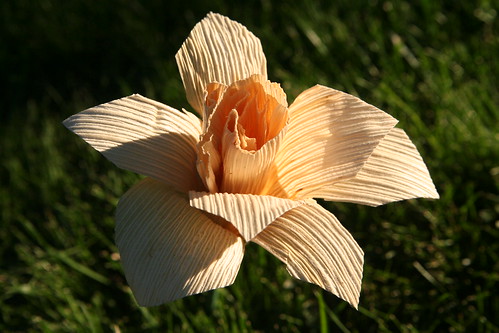
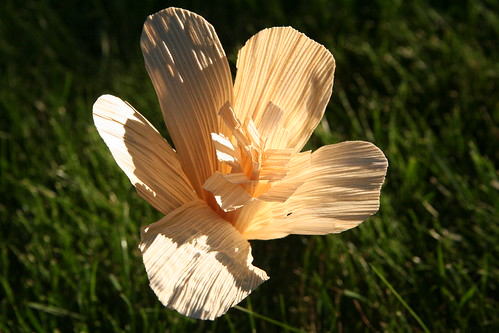
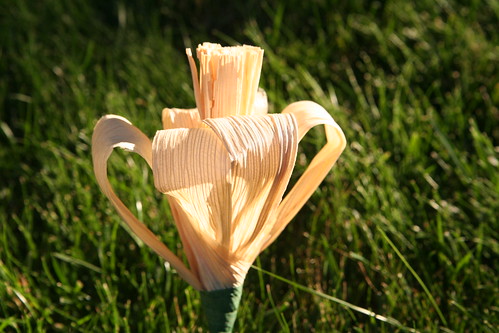
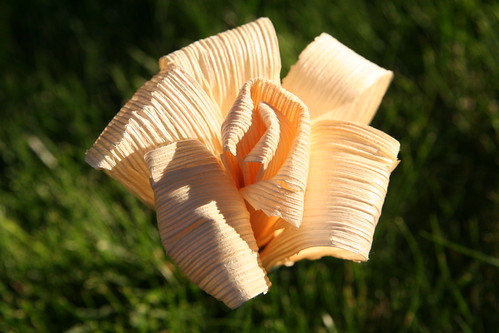
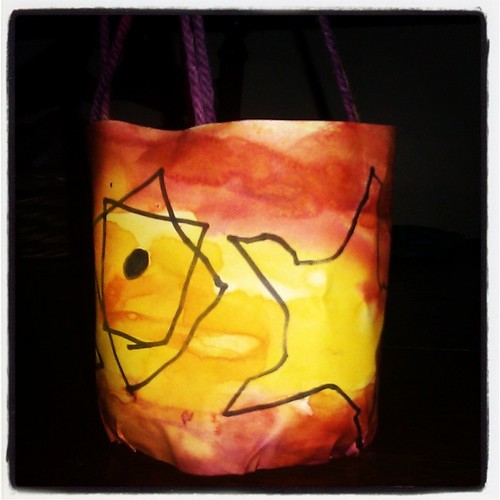
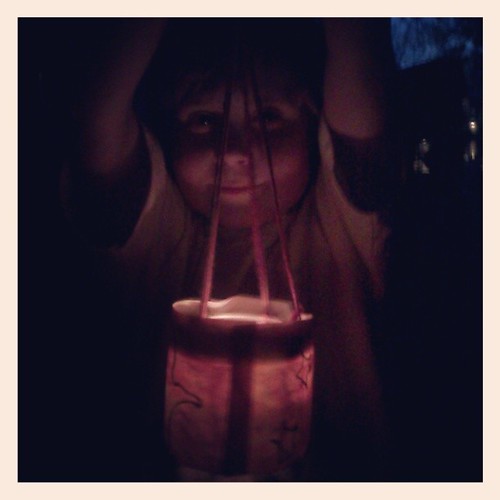
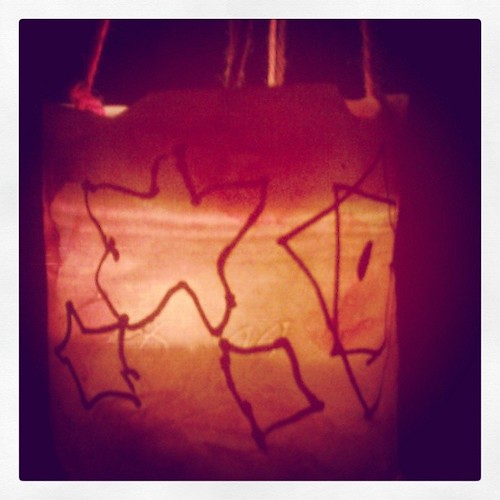
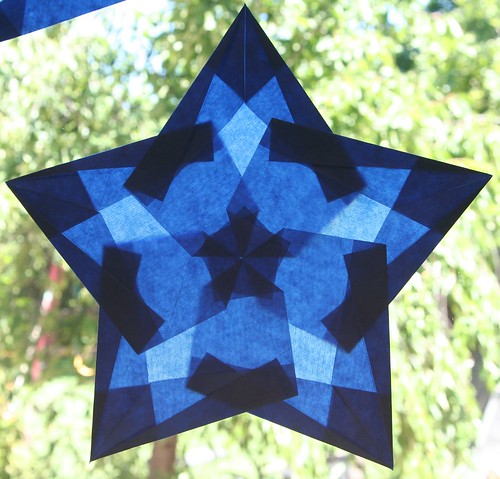
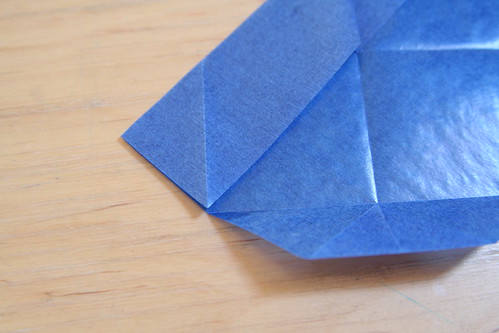
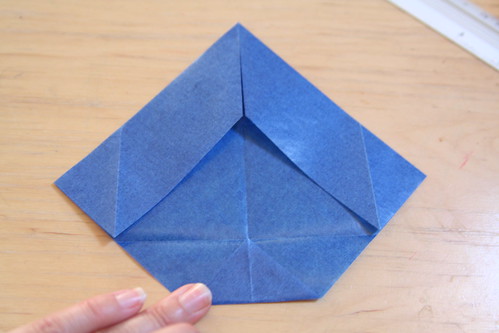
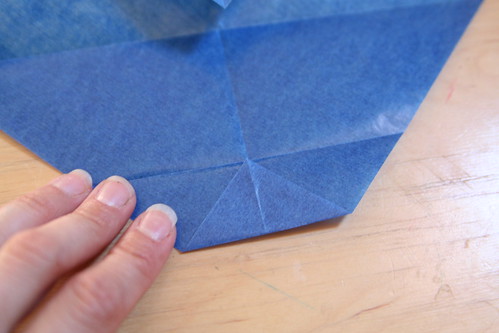
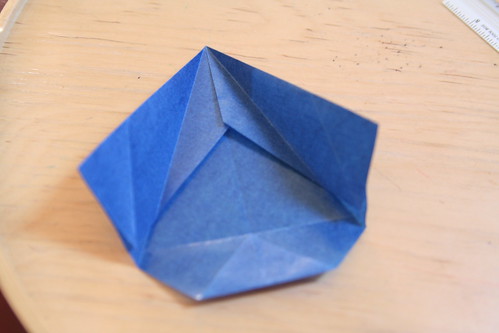
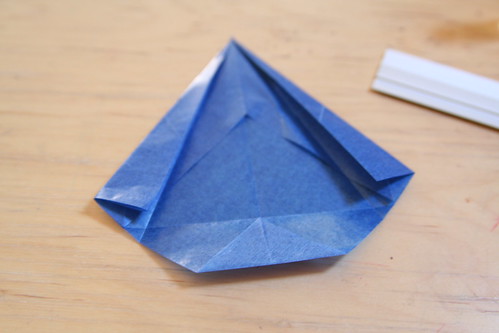
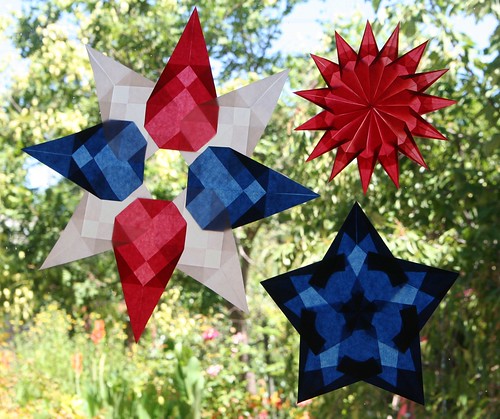
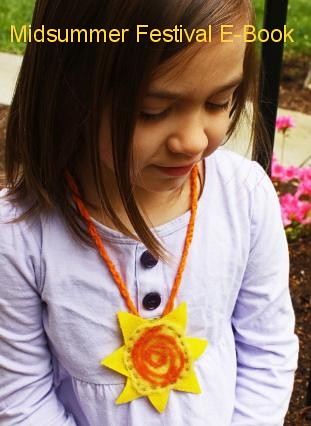
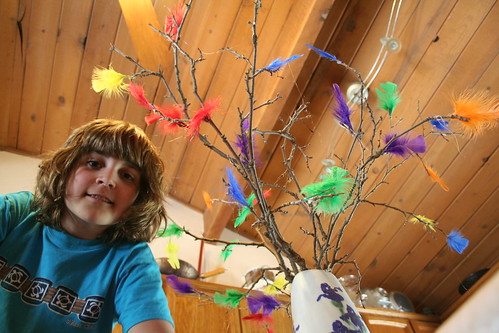
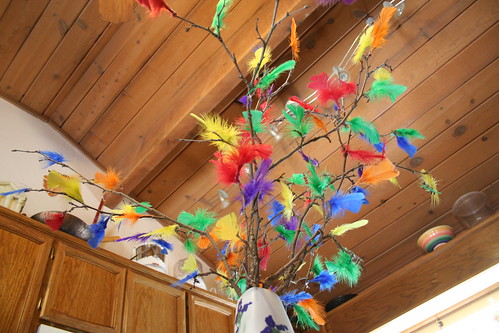
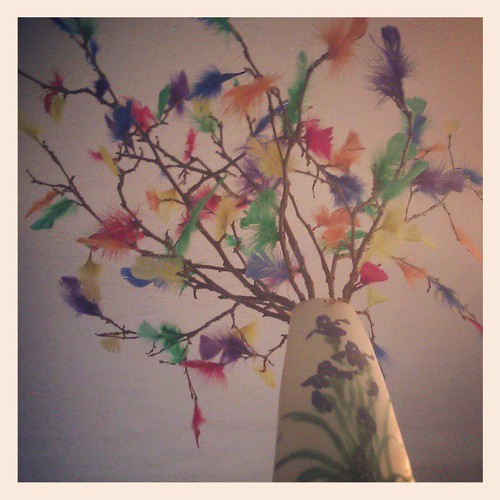
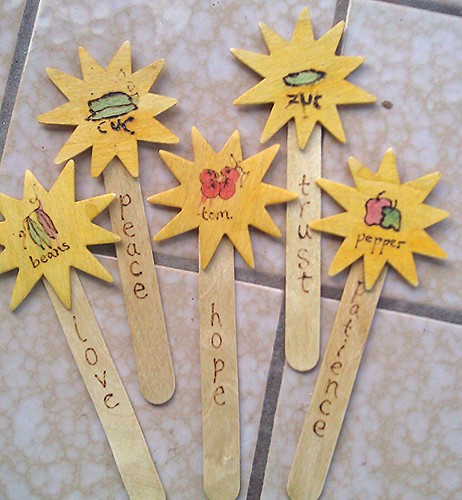
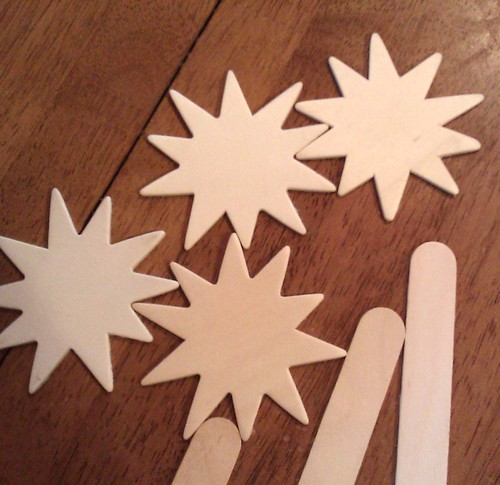
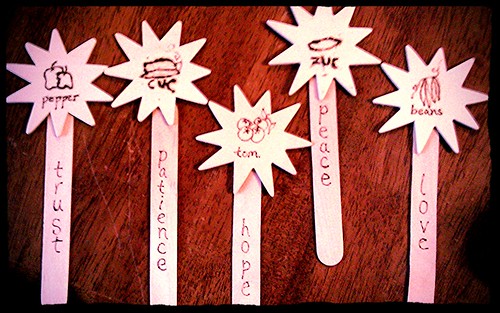
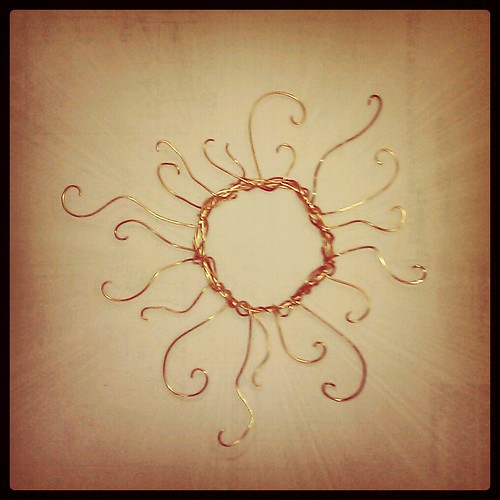
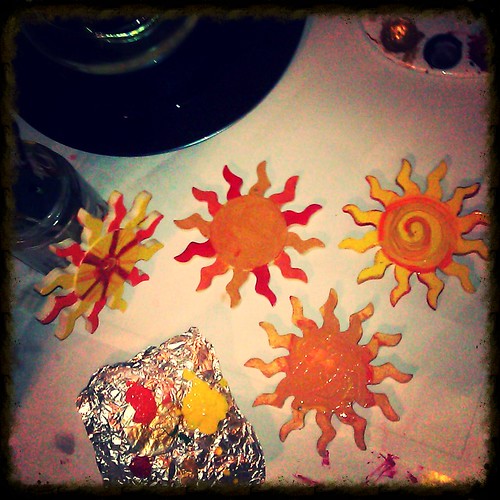
And I convinced my darling boys to do some art with me. We painted these pretty sun symbols. Now we can hang them to remind us of how grateful we are for the sun’s warmth and light. They could be Yule or Christmas ornaments, or a kind of mobile. I don’t know yet. But I love them.

IMAG8016

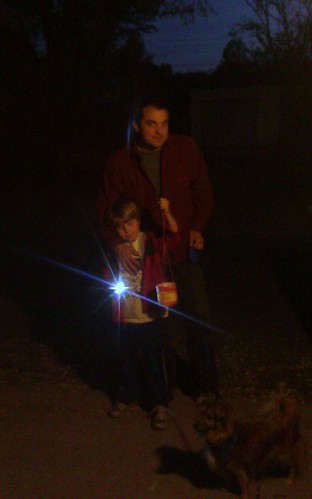
And as for our furry friend, Solstice the dog—we celebrated his second anniversary in our home. He got some new treats and a new rope toy. We adore him.

Advent and St. Nicholas E-Book on Sale

Advent & Saint Nichoals Festival E-Book

Well, here it is, Advent already. I’m not too great at marketing, but this is to let you know that my co-author Eileen and I are having a sale on our Advent and St. Nicholas Festival E-Book until December 7,2013. The sale price is $9.99—half off the regular price of $19.99.

It offers poems, stories, songs, crafts, and many special ways that families, schools, or childcare professionals can celebrate the whole month of December with children.

A measured, calm approach to the winter holidays gives children time to dream, live into the stories of their faith and the season, and count the days of Advent. Children can savor the passing of time with peaceful, delicious anticipation and gentle, useful activity, rather than experience the holiday as a single, frenzied, blowout day that is over all too soon. A peaceful Advent full of simple pleasures and togetherness is what they’ll remember later, not the package-ripping and specific, expensive gifts. We wrote this e-book with the intent of helping families create a thoughtful, heartfelt approach to the holidays, with less rushing commercialism and more togetherness time.

Advent Mosaic 10 x 3

This mosaic is a peek at what’s in our Advent and St. Nicholas Festival E-Book. Click on the title  or any of these photos to be taken to the full description of the e-book contents and place to buy it, on the Little Acorn Learning store. Many thanks for reading this far, and for spreading the word to anyone who might be interested in our offering.

Blessings of the season on you and your loved ones!

Humble Cornhusk Flowers

IMG_6489

Cornhusks are a humble but versatile natural material. These protective sheaths from ears of corn, when dried, can be used in many lovely crafts. Here is a way to turn simple, natural cornhusks into flowers fit for decorating your family’s Thanksgiving table, adorning special gifts, or as accents for fall wreaths. If the children in your life need something special to do on Thanksgiving day, this is a fun, inexpensive, and rewarding activity.

Materials

• package of cornhusks from the Mexican food aisle of your grocery store
• 4-inch floral picks with thin wire at one end (floral wire on a spool can be used instead)
• green floral tape
• food dyes (optional)

Cornhusks come out of the package as wrapped triangles that are broad at one end and fairly narrow at the other. For these flowers, you’ll be splitting a large triangular cornhusk into strips of about 1 inch wide at the wide end. These strips will naturally taper to a point at the other end. It’s really not important to be precise in splitting the strips. These will end up being your flower’s petals. Make about five or six strips and then set them aside.

IMG_6475

Take a cornhusk triangle and cut the bottom narrow half off so that you have in your hand the widest part. Lay a floral pick in the center with the wire pointing down and laying beside the wooden stem.

IMG_6474

Now roll the cornhusk into a tight tube around this floral pick. The top will look something like the above photo.

IMG_6476

Pull the free end of the wire up, letting it split the cornhusk in one spot, then wrap it tightly around the rolled husk with the pick inside. This is the finished center of your flower.

IMG_6609

Now it’s time to add your petals. Many petal styles look great. One style is to take a strip of cornhusk (about 1 inch wide at its wide end) and fold it very gently over onto itself, making a loop. Hold both ends and place them next to your flower’s center. With one hand holding the flower’s center and the first petal, repeat the folding over of the next petal with your free hand. Add it to the flower. Repeat this until you have three to six petals ringing your flower’s center. Hold all the petals to the flower center with one hand.

IMG_6615

IMG_6622

Gently stretch the floral tape slightly, and then place the tape’s end on top of your petals where they join the flower’s center (where the base of the flower is). Begin wrapping the tape around and around your flower’s stem by spinning the flower while keeping the tape gently stretched so it sticks nicely to the previous layer of tape. Work the floral tape all the way down the flower’s base and onto the wooden floral pick stem to its very end. You now have one complete flower, something like this one below.

Cornhusk Flower

Cornhusk flowers can be made with many variations.

IMG_6478

Another way of making flower petals is to unfold a whole cornhusk and cut dags into it every inch or so. Cut the narrow end of the cornhusk off and then wrap these dagged petals around your flower’s center.

IMG_6493

You can then gently pull the petals away from the center and curl them slightly with a finger or a pencil after you have them secured with floral tape. This can result in a lovely lily shape.

IMG_6491

You can also round the ends of your petals like so. In the photo above, you can see that I split the flower’s center into narrow strips and bent them to achieve a different look for the flower’s stamens.

IMG_6490

Some flowers have centers that extend beyond the petals. In some flowers, the opposite is true, and you can trim them to be shorter than the surrounding petals.

IMG_6492

Another possibility is to roll a folded cornhusk to make a center like in the photo above. This one looks more like a rose.

Finally, if you’d rather your cornhusk flowers have colors instead of being natural color, that’s easy to achieve by soaking the cornhusks in a bath of water with food dye. Before you begin making flowers, you’ll have to let your dyed cornhusks dry completely, but that should take only a day or so. Food dyes will achieve pastel colors. If you want vibrant colors, you can dye the cornhusks with fabric dyes. Imagine the possibilities!

Cornhusk Flowers

Cornhusk Flowers

Here’s my humble cornhusk flower bouquet and table decoration. Will these flowers grace your Thanksgiving table?

Martinmas

Crafting for Martinmas

We did a little bit of crafting after I got home from work yesterday. Lucas went off to school for play practice, but Asher and I made a spur-of-the-moment lantern for Martinmas. We started with a long strip of plain paper, a sharpie, some star cookie cutters, watercolor paints, a wide mouth jar and ring, a glue gun, some yarn, and a candle.

upload

Asher drew stars on his paper first with the sharpie, then he painted the paper. We dried it quickly with a hair dryer.

upload

Then with the glue gun, I glued the paper around the outside of the jar. I tied four long pieces of yarn to the jar ring, then screwed on the ring to the top of the jar. I gathered up the yarn hangers into a single knot, then finger-knitted the tail to make a little handle.

Glimmer, Lantern, glimmer!

The whole project took about 25 minutes.

upload

Then Asher, Daddy, Solstice, and I went out for a little walk in the night. The lantern worked very well, and it was fun to be out after dark.

Our tiny lantern walk

IMAG6975

Although I have a whole collection of lantern songs, I didn’t practice them beforehand, and I couldn’t remember them very well. The last time we did this little ritual Asher was in preschool, and his sweet teacher led us and the other families through our neighborhood. Next year, in second grade, Asher will have a special Saint Martin night at school, in which the encounter between Martin, the young Roman soldier, and the nearly naked beggar, is reenacted. Martin cuts his warm cloak in two and gives half to the freezing man. Martin’s example of generosity is meant to prepare our hearts for the coming season of Christmas.

Tutorial: Patriotic 5-Pointed Window Star

IMG_7391

I am a freak for window stars. It’s been quite a while since I made any new ones, so I pulled out my kite papers and glue stick the other night. I wanted to make something red-white-and-blue to decorate for Independence Day, and five-pointed stars are always festive and patriotic in the U.S. Our family is almost never at home on this holiday, but crafting with this theme seemed like a fun thing to do anyway. If you are hosting a gathering for the Fourth of July (or for Bastille Day/La Fête Nationale in France on July 14), these would make lovely decorations. Make a bunch!

Incidentally, check out how many countries have flags made of red, white, and blue!

Materials

  • 5 sheets of square kite paper in red, blue, or white
  • glue stick
  • tape
  • ruler or straight edge for making crisp folds
  • large white piece of paper
  • protractor
  • pencil

Tutorial

IMG_7375

Fold your square into diagonals. Open it back up again.

IMG_7376

Now fold opposing corners to the center line (photo above). The top is now a horizontal fold that is parallel to your horizontal crease. Unfold the bottom corner; the crease you made will be used later.

IMG_7378

From the top, folded edge, fold the left side down to meet the center horizontal line (photo above). The top edge will now be vertical along the center line.

IMG_7379

The bottom edge now meets the line of the horizontal fold you made above and then unfolded.

IMG_7380

Do the same to the other side. Now you have a point at the top again.

IMG_7377

Fold the bottom corner up to the horizontal crease line.

IMG_7381

Now fold both sides in to meet the center vertical crease. This step looks like a sailboat. Do your best to keep the top point crisp.

IMG_7382

Open those sides out again.

IMG_7383

Now fold the left top side in again, allowing the corner to touch the horizontal crease you made in a previous step. Your top point is becoming more acute. Now do the same with the right side.

IMG_7384

Congratulations! You’ve make one point for your five-pointed star! Use tiny dabs of glue from your glue stick to tack down the parts that want to spring up. If you do this, your assembled star will look very precise hanging in the window and you’ll be able to see the beautiful pattern of lights and darks made by the folds of the paper.

Now repeat that folding process four more times, so that you have five of these points.

IMG_7385

To assemble your star I recommend that you make a guide on a large spare piece of paper using a ruler and a protractor. Your five points need to connect at 72-degree angles. Draw nice long lines on your guide so that you can align your point and the center along the lines. My guide has lines for 10-pointed stars, so I skip one when assembling a five-pointed star.

IMG_7386

Start with the top point. Place it’s bottom center on the intersection point of all the lines on your guide. Align the center crease along the line. Now hold it firmly in place and add the next point so that its left side overlaps the first point. Align the second point’s bottom center on the intersection point and the center crease along the guide’s line. Place a dab or two of glue so that the two will stick together. Add the third point to overlap the second. Before you glue the third point, ensure that all three points are still lining up with your guide lines. Continue with the fourth and fifth points, but glue only the left side of the final point.

IMG_7387

Finally, lift the top point up so that the right side of the fifth point goes underneath it, and then glue.

IMG_7388

Voilà! Now hang your star in the window!

IMG_7389

They’re pretty all together in their red-white-and-blue glory, aren’t they? I love them!  I’m thinking of making another style of window star for Fourth of July. I’ll try to do a tutorial for it, too, if I can find the time.

Tutorial: Make an Herbal Dream Pillow for St. John’s Day

herbal pillow

This article is excerpted from our Midsummer Festival E-Book.

Herbs harvested at Midsummer and during the Feast of Saint John (June 24, 2013) are said to be especially magical. Certain herbs, such as mugwort, laurel, sage, or marigold petals, are believed to give prophetic dreams if placed under a pillow at night! Will it work, do you think? Wouldn’t it be fun to find out?

It’s best to use dried herbs for your dream pillow. You’ll need two squares of muslin, two squares of yellow cotton fabric (about 5” by 5”), sewing machine, needle and thread, dried herbs, and a hot iron.

Cut your muslin squares to be about ½ inch smaller than your yellow squares. Sew around the muslin squares, leaving a 2 inch gap. Cut the corners off, but don’t cut into the stitching (this makes the pillow easier to turn inside out). Now turn your pillow inside out and iron it flat. Spoon in your dried herbs. Use a needle and thread to stitch up the hole. Now make the yellow pillow case. Put your “right” or pretty sides together. Sew around the three sides and the corners of the fourth side using a ¼ inch seam. Cut off the inside-out corners as before. Turn the pillow right side out. Use a pencil to make the corners look nice. Iron the yellow pillow case flat. Insert the inner muslin pillow into the yellow case. Turn in ¼ inch seam at the opening and iron it. Now sew up the fourth side, using a top stitch.

Now place your herbal dream pillow under your head before bedtime. Perhaps you’ll dream of the future! Or perhaps you’ll have amazing, fanciful dream that you can write down in a dream journal or draw a picture of in the morning.

Midsummer Festival E-Book

For more fun midsummer crafts, herb lore, Waldorf verses, handwork, and ways to celebrate Midsummer and St. John’s Day, please check out the Midsummer Festival E-Book by yours truly, Sara Wilson of Love in the Suburbs, and the fabulously talented Eileen Straiton of Little Acorn Learning. Click the link or the cover photo above to go directly to the page to find out more.

Easter Surprise: Påsk Ris

IMG_4981

A mazillion years ago, when Ian lived in Sweden and I was visiting at Easter time, we saw everywhere in Upsala bare branches decorated with colorful feathers. We wondered, is this sympathetic magic? If the Swedish people decorate bare branches with feathers, are they invoking the coming of springtime? Of course, at Easter time, the ice and snow still holds sway, and warm days are still several months away. (As I type this it’s currently 27 degrees F there.)

“The Easter tree, or “påsk ris”, can be seen all over the country this time of year. Outside shop entrances, in peoples’ living rooms, outdoors in the neighbours’ gardens.”

I’ve had these bare branches in a vase in my home for a couple of months now. They held hearts on Valentine’s Day and they’ve lingered through the month of March. I’m pretty sure they’ve poked everyone in the eye at least once. I’m also sure that my Ian has wished I would take them away.

But, NO! I had a secret plan, you see. I wanted us to make him a påsk ris as a surprise. Because once, a mazillion years ago after we came home from Europe, I made one of these to decorate our very first apartment together at Easter time, and it was sweet and lovely and back then life was uncomplicated …

So anyway, Lucas, Asher and I made a påsk ris to surprise Daddy.

Materials

  • colorful craft feathers
  • branches
  • glue gun

Tutorial

IMG_4967

Get out your low temperature glue gun and your patience and start gluing feathers on. That’s it. It takes a good long while and maybe an extra pair of hands to hold the feather in the warm glue until it sets.

IMG_4972

But you can get funny photos while you’re doing it.

IMG_4978

And then you can surprise people you live with and people who visit, and they’ll say, “What the heck is that?”

upload

And then you can explain that the symbolism of the Easter tree is not about bringing on the spring, or sweeping out winter, or even about Easter witches—which is a Swedish thing! Really.

“But, apparently the Easter tree has a completely different origin and symbolism. It comes from the 1600’s. Swedish people in the 1600’s used to take twigs and sticks and beat each other with them on Good Friday to commemorate the suffering of Jesus. In the 1800’s and 1900’s, they started to be decorated and became a symbolic decoration for Easter.” —from Watching the Swedes

Leprechauns!

Welcome Leprechauns! We've set a pretty table, so you can have some fun. We've even set out special treats, so please, do come!

The Leprechaun

In a shady nook one moonlight night,
A leprechaun I spied
In scarlet coat and cap of green,
A cruiskeen by his side.
‘Twas tick, tack, tick, his hammer went,
Upon a weeny shoe,
And I laughed to think of a purse of gold,
But the fairy was laughing too.

With tiptoe step and beating heart,
Quite softly I drew nigh.
There was mischief in his merry face,
A twinkle in his eye;
He hammered and sang with a tiny voice,
And sipped the mountain dew;
Oh! I laughed to think he was caught at last,
But the fairy was laughing too.

As quick as thought I grasped the elf,
“Your fairy purse,” I cried,
“My purse?” said he, ” ’tis in her hand,
That lady by your side.”
I turned to look, the elf was off,
And what was I to do?
Oh! I laughed to think what a fool I’d been,
And the fairy was laughing too.

—Robert Dwyer Joyce

Sugar Shamrocks. We have icing, but I don't think they need it. upload

Shamrocks

‘Twas a fine sunny day at harvest time when young Seamus O’Donnell, walking along the road, heard a tapping sound.  Peering over the hedge, he saw a tiny man in a little leather apron, mending a little shoe.

“Well, well, well!” said Seamus to himself.  “I truly never expected to meet a leprechaun.  Now that I have, I must not let this chance slip away.  For everyone knows that leprechauns keep a pot of gold hidden nearby.  All I have to do is to find it, and I am set for the rest of my life.”

Greeting the leprechaun politely, Seamus asked about his health.  However, after a few minutes of idle conversation, Seamus became impatient.  He grabbed the leprechaun and demanded to know where the gold was hidden.

“All right!  All right!” cried the little man.  “It is near here.  I’ll show you.”

Together they set off across the fields as Seamus was careful never to take his eyes off the little man who was guiding him.  At last they came to a field of golden ragwort.

The leprechaun pointed to a large plant.

“The gold is under here,” he said.  “All you have to do is to dig down and find it.”

Now Seamus didn’t have anything with him to use for digging, but he was not entirely stupid. He pulled of his red neckerchief and tied it to the plant so that he would recognize it again.

“Promise me,” he said to the leprechaun, “that you will not untie that scarf.”

The little man promised faithfully.

Seamus dropped the leprechaun and ran home as fast as he could to fetch a shovel.  Within five minutes, he was back at the field.  But what a sight met his eyes!  Every single ragwort plant in the whole field — and there were hundreds of them — had a red neckerchief tied around it.

Slowly, young Seamus walked home with his shovel.  He didn’t have his gold.  He didn’t have the leprechaun.

And now, he didn’t even have his neckerchief.

(Traditional Irish Legend)

Leprechaun party is all ready for the Wee Folk. We have shamrock cookies, milk, and honey for them. Asher brought some pretty flowers to make it beautiful, and we have a wee banner that says "Welcome."

Today was a busy, busy day, but we still took a little time for leprechaun fun. We made some yummy Sugar Shamrocks, then set out some treats. Our leprechaun party is now all ready for the Wee Folk. We have shamrock cookies, milk, and honey for them. Asher brought some pretty flowers to make it beautiful, and we made a wee banner that says “Welcome.” We’ll see what happens during the night.

Wood-burned Garden Markers Tutorial

IMAG2978

Are you poring over seed and flower catalogs, itching to get your fingers dirty by planting your garden? Are you still stuck inside, or unable to plant because of cold temperatures? Here’s a little project to help you while away the time until you can get out there and start growing: Make wood-burned garden markers. We made these as a Christmas gift for grandparents and they were a hit. They are simple, inexpensive, and sweet.

Materials

  • wide craft sticks (tongue depressor size)
  • wood sun shapes
  • wood glue
  • watercolor paints or craft acrylics
  • wood-burner tool and tip
  • wood varnish

IMAG2949

Tutorial

These materials can all be found at a craft store such as Michael’s. We liked the sun shapes; we thought garden markers with sun shapes would be most appropriate for making garden plants grow big and strong and bountiful.

Start by deciding what plants you want markers for. Summer veggies or herbs are great. Practice drawing the fruits on paper a time or two, so you know how you want your wood-burned markers to look. Keep your drawings very simple because the wood-burner tool is more difficult to draw with than a pencil. We decided it was OK to abbreviate some of the longer vegetable names.

IMAG2950

My 10-year-old son did a couple of these, so I know a careful, older child can successfully use a wood-burner. Just stay nearby and encourage safe habits. The wood-burner gets very hot! (Be sure to protect your work surface, especially if it’s wood!) While using a wood-burner, you have to draw slowly, allowing the tool to make a mark on your pale wood. Be patient and go slow.

We decided that the marker stakes should also have words of inspiration for gardeners. We wrote “trust,” “patience,” “hope,” “peace,” and “love.” These are some of the qualities people need to make a garden grow, of course. Other virtues might be “caring,” “tenderness,” “gratitude,” “faith,” “prosperity,” “sufficiency,” “serenity,” and “tenacity.” Or maybe “sweetness,” “juiciness,” or “plenty.”

Glue your sun shapes to the craft sticks. Now you can choose to paint them with your watercolors or other paint, or you can leave them plain. We wanted ours to be colorful. If you’re using watercolors, be careful and put only a little moisture in your paint to color the vegetables. Too much water can make it run (like on our tomatoes). After you paint your veggies, paint the rest of the sun gold.

When all parts of your garden markers are dry, give them a good coat of varnish. This will protect the wood a bit from the elements. Now you just need to plant!


Spring Festivals E-Book Is Here

My friend Eileen Straiton of Little Acorn Learning and I are very happy to announce that our Spring Festivals E-Book is now available!

Spring Festivals mosaic 3x10

This is a teaser mosaic of photos from our e-book. It covers St. Patrick’s Day, Spring Equinox, Ostara, and Easter, and is packed with Waldorf songs, stories, verses, crafting tutorials, caregiver meditations, fingerplays, and stories to inspire you and help you create fun and meaningful festival celebrations with children in your home or classroom.

four leaf clover hunt

Part One: Saint Patrick’s Day
Leprechaun Poems and Finger Plays
Irish Blessings
The Four-Leaved Clover
Four-Leaf Clover Hunt
Caregiver Meditation: Luck
Saint Patrick’s Day Kid Craft
Make a Leprechaun House
Simple Shamrock Crown
Irish Stew
St. Patrick’s Day Leprechaun Mobile
Shamrock Window Transparency
The Sunbeam’s Visit
Rainbow Playdough
Jolly Leprechaun Ring
St. Patrick’s Day Paper Ornaments
Clover Suncatcher
The Golden Purse and the Seeing Eyes
To Catch a Leprechaun
Rainbow Science
Dip a Rainbow

Third Grade Cherry Blossom Poetry Festival

Part Two: Spring Equinox, Ostara
To Spring
Seeds and Grateful Spring
Spring Poems
The Story of the Two Seeds
Spring Equinox Wreath
Recycled Bird Feeder
The Feisty Fairy Story
Make a Fairy Pouch with Your Child
Build a Fairy House
Five Little Fairies Finger Play
Homemade Fairy Wings
Spring Bird Puppets
Spring Cleaning in the Home or Classroom
Natural Vinegar Cleaning Solution
Cherry Blossom Festival and Writing Haiku Poetry
Cherry Blossom Branches
Paint Cherry Blossoms
Loveliest of Trees, the Cherry
Pressed Flower Frame for Spring
Flower Pot Compost
Spring Zucchini Bread
Watercolor Flower Wreath
Simple Tissue Butterflies

Natural Dyes

Part Three: Easter
The Easter Flower and Easter Week
Lent and Sacrifice
Easter Hymns
Five Little Easter Rabbits and other Rhymes
Creating Your Easter Nature Table
Easter from Calendar of the Soul
Caregiver Meditation: Awakening
Little Felted Chicks
Stewart’s A, B, C’s
Flood-Tide of Flowers
Easter Dish Garden
Eggheads
Dyeing Eggs with Natural Dyes
Dyeing Easter Wool
Easter Egg Rolling
Easter Glove Bunny
Paper Easter Bunnies Banner
Felt Easter Ornaments
Decoupage Easter Eggs
Needle-Felted Easter Egg

This volume is the fourth in our series of Festival E-Books designed to help you find a way into the natural and religious festivals that occur around the time of the Solstices and Equinoxes. We have endeavored to provide inspiration and celebration ideas that will help you create fulfilling and joyful holidays in your home or classroom.

Some of the craft projects in this e-book are geared for adults or older children (but everyone can enjoy them). We have written simple instructions and provided step-by-step photographs to assist you. Other projects are simple enough that even the youngest child can assist, for creating art is a fundamental human desire and an important part of learning and expressing ourselves.

Circle-time rhymes, fingerplays, and games are also an important part of learning about our bodies, our world, and our friends. Some of the classic poetry we included may speak especially to the adult caregiver or teacher, for we believe it is through maintaining a sense of wonder and a love of beauty that permits our souls to shine forth in our daily actions.

This volume contains both a nature-based religious perspective, honoring the Goddess of Spring, and a Christian perspective on the holy days of Lent and Easter, celebrating Christ’s resurrection. There is, in our opinion, significant overlap of symbols and traditions, and we feel they can coexist in the context of the spring festivals in peace.

We hope you enjoy our e-book. It can be purchased on the Little Acorn Learning website here, and if you look around on Little Acorn Learning you will find many more delightful products there.

My personal thanks go to my coauthor Eileen, for her can-do attitude, unflagging faith, endless creativity. I’d also like to say thank you to my husband and my children for their assistance, participation, and great tolerance of the many messes my creative projects produce in our home during book production.

  • About Sara

    Thanks for visiting! I’m Sara, editor and writer, wife to Ian, and mother of two precious boys. I am living each day to the fullest and with as much grace, creativity, and patience as I can muster. This is where I write about living, loving, and engaging fully in family life and the world around me. I let my hair down here. I learn new skills here. I strive to be a better human being here. And I tell the truth.

    Our children attend Waldorf school and we are enriching our home and family life with plenty of Waldorf-inspired festivals, crafts, and stories.

    © 2003–2018 Please do not use my photographs or text without my permission.

    “Love doesn’t just sit there like a stone; it has to be made, like bread, remade all the time, made new.” —Ursula K. LeGuinn

  • Buy Our Festivals E-Books


  • Archives

  • Tags

  • Categories

  •  

  • Meta