Autumn Equinox and Michaelmas Festival E-Book

E-Book Cover

I’ve been a bit quiet in this space lately. We’ve been adjusting to a new school year and working through some projects. I am delighted to announce that my dear friend Eileen Straiton (of Little Acorn Learning) and I have finished another big e-book. This one is our Autumn Equinox & Michaelmas Festival E-Book and I’d be honored if you’d check it out and spread the word a little. It was a pleasure to work with Eileen on this and I’m really proud of it. We have such a great rapport and similar values, and I think this comfort and compatibility reflects in our e-book. So here’s to healthy, joyful, creative collaboration!

Here is a little teaser: a mosaic of just some of the images from the projects and activities we offer in our e-book.

Taste of the Contents of Our Autumn Equinox & Michaelmas Festival E-Book

133 PAGES of verses, fingerplays, poems, song, crafts, meditations, book recommendations, circle times, recipes, and much more to guide you in celebrating the Autumn Equinox and Michaelmas
in your home or school!

  • Needle Felt a Beautiful Apple Mother Doll
  • Go on an Apple Picking Field Trip and Learn
    About Different Varieties of Apples
  • Design a Breathtaking Early Autumn Nature Table
  • Read Books with the Children Celebrating
    Autumn and Michaelmas
  • Make Your Own Apple Stamps
  • Enjoy Homemade Applesauce Together
  • Crochet an Apple for Your Nature Table or Play Kitchen
  • Create a Beautiful Autumn Candle Holder Centerpiece
  • Make an Archangel Michael Mobile
  • Harvest Natural Dye Materials from Outdoors and
    Make Capes of Light Playsilks
  • Hold a Michaelmas Family Feast
  • Create Dragons out of Nature Items
  • Bake Dragon Bread with the Children
  • Make a Dragon Tree Block Checker Set
  • Sculpt Dragons out of Modeling Material
  • Cut Out Paper Flying Dragons to Display on Your Wall
  • Make a Michaelmas Felt Play Set
  • Paint an Autumn Leaf Stencil Painting with Watercolors
  • Crochet Beautiful Autumn Leaves for Your Nature Table
  • Paint Your Own Interpretation of Michael and the Dragon
  • Look Inward and Face Your Own Dragons with our Caregiver Meditation
  • Share Verses and Songs About Autumn and Michaelmas
  • Meditate on Quotes from Steiner and Other Inspirational Individuals
  • Enjoy Pinecone Weaving
  • Share Circle Time Together
  • Make Michael Sword Napkin Holders
  • Sculpt Michaelmas Worry Beads
  • Craft an Autumn Equinox Wreath
  • And more!

So, if you’re wondering how to make this time of year feel magical, this e-book may be just what you need. Thanks for peeking!

Only $24.99

Authors:
~ Eileen Straiton,
Little Acorn Learning

~ Sara Wilson, Love in the Suburbs

With Guest Contribution from Jennifer Tan, Syrendell

Calendula and Mint Herbal Soaps Tutorial

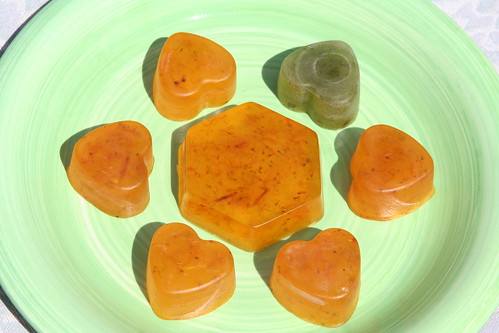
Finished Soaps

Earth’s bounty is always all around us, but it is perhaps even more apparent in the summer, when crops are ripening and plant life flourishes. Wild or cultivated herbs can be useful friends, growing perhaps right outside our kitchen doors. Herbs are commonly used as food, as decorations, as dyes, as flavorings. They also are used the world over to clean and heal.

You can easily make herbal soaps for your family to use and enjoy, right in the comfort of your own kitchen. There are two soap-making techniques. This tutorial teaches you the simpler of the two. Technically, you’re really embellishing this soap, rather than making it from scratch. Because the process is simple, even small children can help to make these beautiful, healing soaps, as long as you carefully monitor them around the stove and hot soap. (Of course you will!)

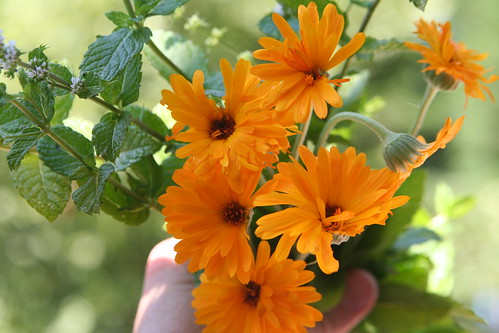
Calendula

Calendula (also known as pot marigold) is a common and prolific garden annual that reseeds itself. It is known to have been used as early as Roman times as both a dye and a flavoring. Calendula is known to have antiseptic properties, which make it perfect as a soap additive. Many natural first aid preparations include calendula.

Peppermint grows in many cottage and kitchen gardens. You can use it in teas, desserts, and body care potions, such as lotions, shampoos, balms, and soap. Mint may have a calming and soothing effect for skin irritations, itching and hives. It is believed to have anesthetic and anti-inflammatory properties.

Materials for Making Herbal Soaps

  • glycerin soap base (I used a glycerin and olive oil base)
  • calendula (pot marigold) and mint herbs from the garden (I used a mix of dried calendula petals and fresh flower heads, and fresh mint leaves)
  • stovetop pan, cutting board, knife, ladle
  • soap molds (also silicone muffin pans work very well; these come in fun shapes )
  • essential oils for fragrance (optional)
  • soap colorant (optional)

A word about glycerin soaps: You can buy glycerin at the craft store, along with lots of other fun soap-making and body product supplies (dyes, fragrances, molds, etc.). Using pure glycerin soap in this project will result in soaps with a layered effect, since your herbal additives float to the top of your molds as your soap sets. There’s nothing wrong with this, and the result can be quite beautiful and rustic. Another kind of glycerin soap base that you can buy has olive oil added to it, and a property that keeps any additives in suspension, meaning you won’t get layers and your herbs will stay mixed throughout the soap. This is the look that I was going for with these two batches. You can decide what’s right for you. There is no difference in how you make the soap. Just be sure to read the packaging carefully so you get what you really want.

Making Soap

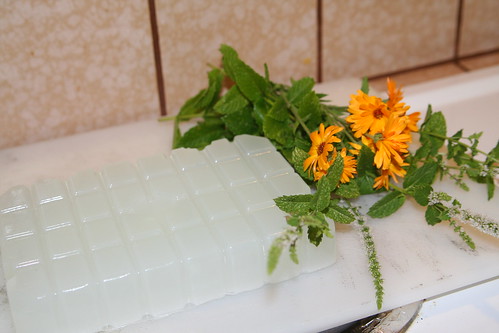
Begin by gathering your materials. You will need a clean cutting board and a table top to work on.

Glycerin Soap

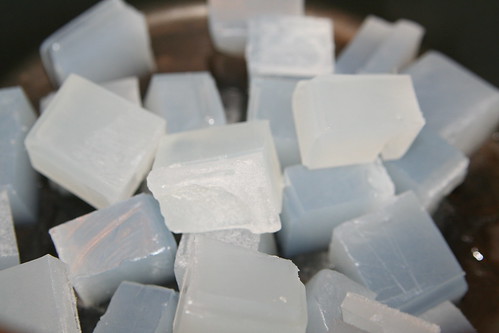
First, cut your glycerin soap base into small cubes. This makes it easier to melt at low temperatures, and you want to keep the temp quite low when you‘re making soap. You can use a double boiler or just put your glycerin cubes into your pot. (Cleanup is easy with hot water and a scrub brush!) Stir the soap often until all pieces of glycerin are melted.

Making Soap

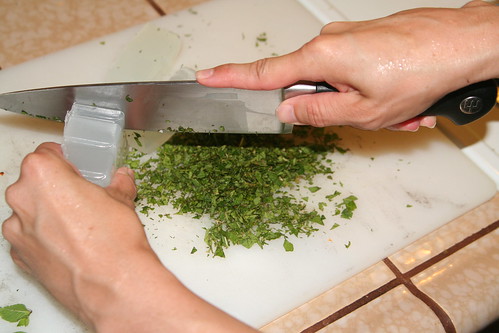
Meanwhile, chop your mint leaves into very small pieces. You may wish to set aside some of the tiniest leaves to be used as a decoration later on. Of course, this is optional.

If you have lots of soap molds or muffin pans, you might be able to make both types of soap at the same time. Since I had to reuse the molds after the first soaps were fully set, I made two batches—first calendula, then mint—cleaning up in between batches.

Calendula

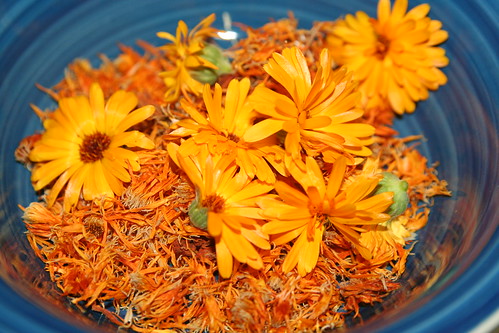
Before starting, I saved the dried petals from my calendula flowers for a week or so. For my soap, I also used a few fresh flower heads to maximize its potency as an antiseptic.

Making Soap

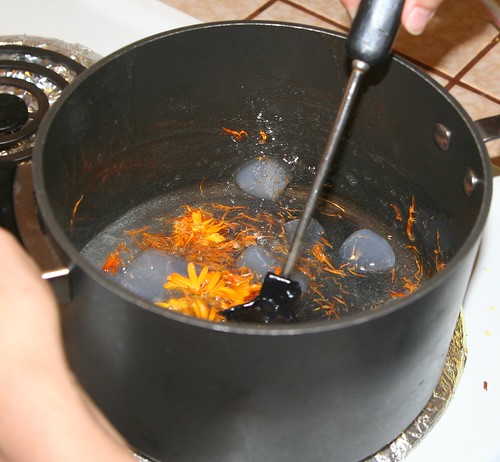
Add your petals and flower heads to your melting soap cubes. The heat will begin to cook the flowers.

Making Soap

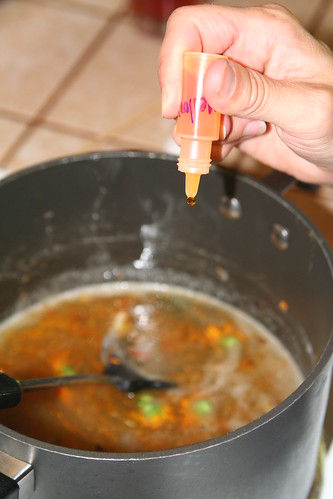
If you want your calendula soap to have a rich yellow coloring, add a few drops of soap colorant to the pot. You don’t have to do this, and if you cook the petals in the soap a while, it will begin to take on a natural yellow color. At this point, you can also add fragrance, if you wish. I added a few drops of geranium essential oil. Geranium is known to be a comforting scent, and since I envision my children washing their scrapes with my calendula soap, comfort seemed to be just the right feeling to evoke by smell.

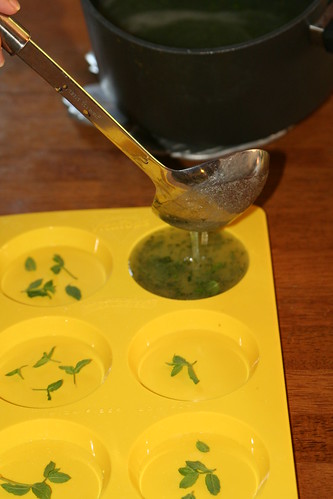
If you used fresh flowers, you should fish out the centers now. When you’re satisfied with your soap’s color and fragrance, it’s time to pour it into molds to set. Using a ladle, gently fill each cup to the brim. Keep the mold flat. The soap will begin to cool quickly, but it may take an hour or so for the soap to become very firm to the touch. You can speed the cooling by placing the mold flat in your refrigerator.

Making Soap

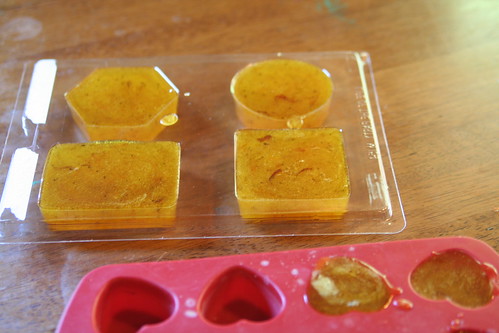
When the soap is completely firm and set, gently pop each soap out of the mold. They should separate from the mold’s sides with some gentle twisting and come out cleanly.

Making Soap

My second batch of soap was mint. You’ll repeat all the same steps as with the calendula soap. Begin by cutting soap cubes and then just add the chopped mint in with the glycerin. The longer you allow your mint soap to cook on the stove over low heat, the greener it will become. I added a few drops of eucalyptus and mint essential oils to the warm pot. The smell is calming and relieves stress.

Making Soap

You can add your reserved tiny mint leaves into your mold if you wish. They won’t stay exactly in place when you ladle in your mint soap, but you will be able to see pretty whole leaves in your soaps after they have set.

Homemade Mint Soap

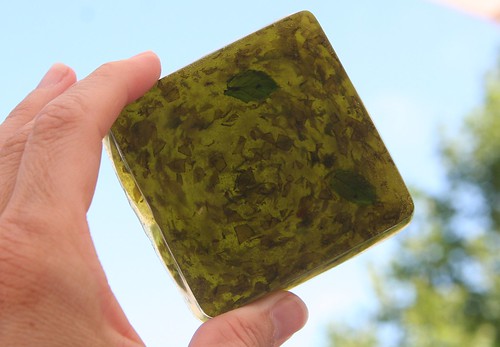
In this photo, you can see my two different pours. The greener bars were poured from soap that had been on the stove longer. The natural green from the mint leaves colored the soaps. I like them both.

Mint Soap

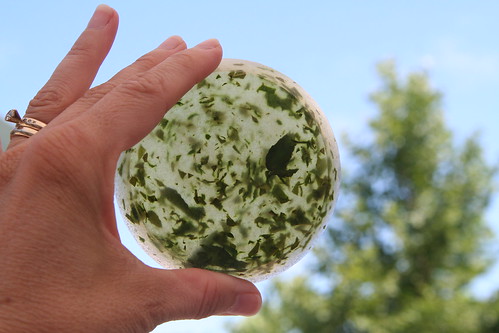
A finished mint soap, with lots of gorgeous herbal goodness visible.

IMG_3691

And here’s a darker one. This soap was on the heat longer and became a dark green.

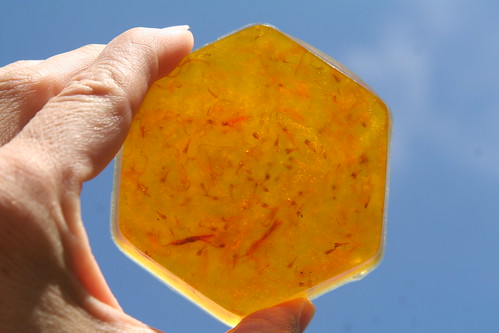
Calendula Soap

Here is the finished calendula soap, with pretty golden-orange petals showing inside.

Homemade soaps make wonderful gifts for family, friends, and teachers. Consider adding a mint and a calendula soap to your outdoor adventure box or your first aid kit. Use both types to cleanse and to heal.

Tutorial: Create a Mermaid Crown and Wrist Ribbons

Mermaid Crown

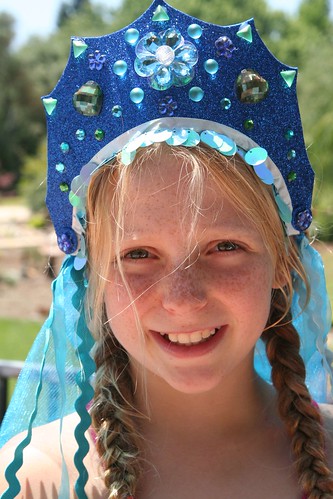
Who wouldn’t want to be as graceful as a beautiful mermaid or noble merman, living in an underwater wonderland? This play costume—a mermaid crown and wrist ribbons—is something you can create in stages, or do only the part you like best. Mermen might prefer just the crown, without the veil. The wrist ribbons encourage so much imaginative play for boys and girls alike. They can be water flowing while your merfolk swim. They can be magical water powers made visible.

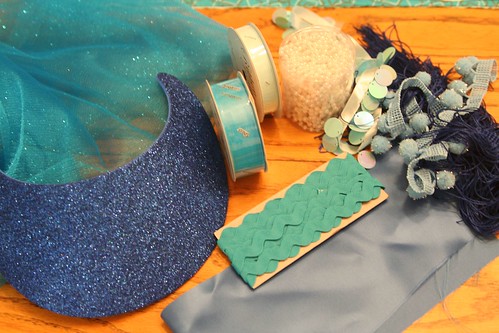
Materials for Mermaid Crown

  • a craft-foam visor
  • jewels, beads, and/or small seashells (Tip: look for packages of jewels and rhinestones for decorating flip flop sandals! Craft stores have inexpensive kits.)
  • low temperature glue gun and glue sticks
  • ½ yard of veil fabric (tulle, netting, etc.)
  • scissors, sewing pins, hand-sewing needle and thread
  • sewing machine
  • notions and ribbons

Materials for Mermaid Wrist Ribbons

  • ¼ yard satin or acetate fabric
  • ½ inch wide elastic
  • notions and ribbons

Materials

Make Your Mermaid Crown

Begin by gathering your materials. You will need a clean, flat surface to work on. First, remove the elastic or plastic coil that is the back of your foam visor. You will put it back on later.

Now decide how you want your headdress to look. Will it have points like a queen’s crown? Will it be scalloped like a seashell? Turn your craft-foam visor over and sketch the shape you want. When you’re happy with what you see, cut your foam with scissors.
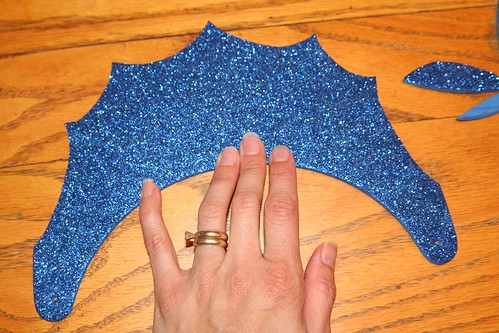
Cut the Visor into a Crown Shape

Now play with your notions and jewels, beads, and/or shells, placing them on the visor here and there, until you have an idea how you want them to be arranged. Take some time with this part because once you glue the items to your visor, it will be hard to remove them if you change your mind about their placement.
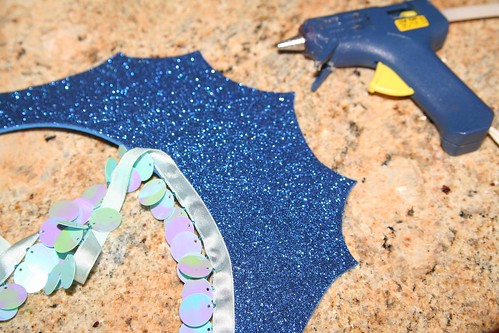
Adding Fringe

With your low-temp glue gun, glue on any trim (such as in this photo) and your decorations.
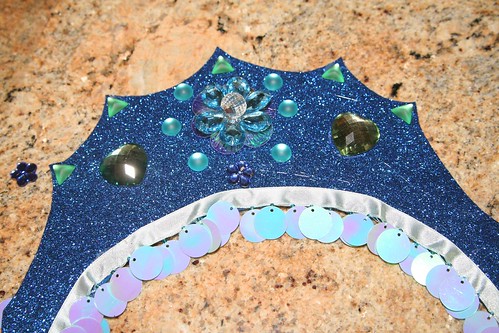
Gluing on Gems
It’s a good idea to measure to find the visor’s center. Try to arrange your biggest, most impressive or most special decorative item in the very center.

Using your glue gun and the smallest drops of glue, begin by gluing the special center item. Other smaller jewels or seashells can then be glued on. If your design is symmetrical, do the same item on both sides before moving on to a different jewel. You’ll have to pull off the strings of glue that may result from gluing on the jewels.

Have you decided to make a veil for your mermaid crown? (If you’re making this for a boy to play a merman, you may wish to skip this part.) Take your veil material (tulle, netting, etc.) and fold it in half so that it has two layers. You might measure your child to decide how long you want the veil to be. I decided I wanted the top layer of the veil to be shorter than the bottom layer. (Depending on the fabric you chose, you may wish to hem the bottom edges of your veil.) Pin the layers in place and then sew a seam about 1 inch from the top fold. This creates a tube through which you can pull the visor’s back elastic or plastic coil.
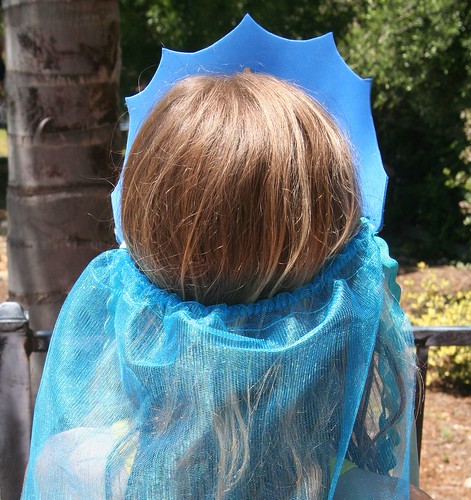
Mermaid Crown Back

Measure the visor on the head of your child, and shorten the elastic or plastic coil accordingly, so that it fits. (The coil on my visor is visible in the photo above.) You might wish to glue this part onto the visor so that it’s permanently attached. This spot, where the crown attaches to the back can be decorated with another jewel if you wish (see below at the child’s temple).
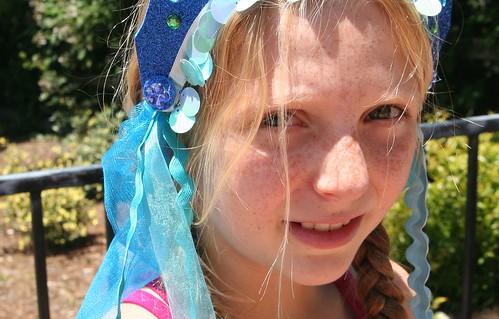
Mermaid Crown Detail

If you have ribbons or notions for decoration or long mermaid locks, fold them in half and with a needle and thread, sew them on to the corner of your veil, where the elastic attaches to the visor, so that they are firmly attached and can trail either in front of the shoulder or behind like hair. Keep in mind the age of the child who will wear this costume. The more decorations you add, the harder it will be for the child to put the crown on herself. (I ended up not using several items that are in the photo at the beginning of the tutorial.)

Congratulations! You’ve made a beautiful headdress for a lucky mermaid, or a handsome crown for a merman.

Sew Your Mermaid Wrist Ribbons

Wrist ribbons are a huge part of dress-up play in our home. You might be surprised at how well your child takes to these simple accessories. There is a bit of sewing involved, but it’s pretty easy.

The first step is to measure your child’s wrist using the elastic. You want the elastic band to be snug enough not to fall off the wrist, but not too snug as to feel tight. You also want to have about a 1 inch overlap, so that you can sew the elastic securely closed.

Now that you know how long it needs to be, cut two pieces of elastic that length. Lay out your covering fabric (satin or acetate). You could be very careful and measure this, but you don’t really need to do so. The object is to cut two strips of fabric so that they are twice as long as your elastic pieces and about 2 ½ inches wide. Turn in ¼ inch on both sides of your fabric strip and the ends and iron it flat. Sew the flat rectangle’s ends together to make a ring. Now fold your wide ring in half to make a long skinny ring with the right side of the fabric out. Make sure the width of your skinny ring will accommodate your elastic, but don’t actually put the elastic into the ring yet.
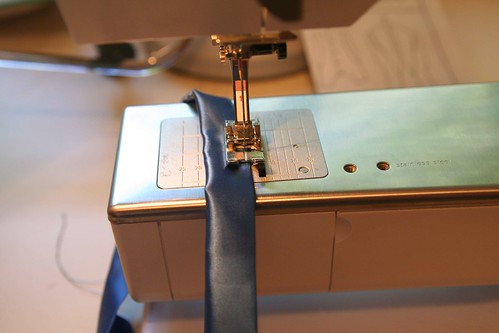
Sewing the Wristband

Top sew along the very edge of the long skinny ring to make a skinny tube. Don’t sew the ring completely closed. Leave an opening of a few inches so that you can insert your elastic.
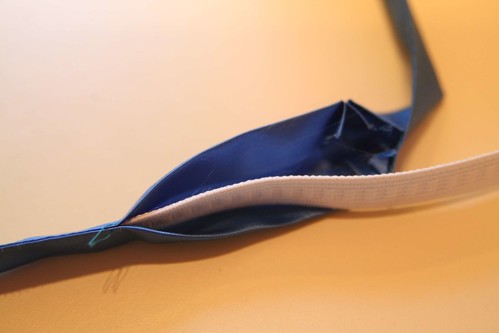
Insert the Elastic

With a safety pin on one end of the elastic, insert your elastic into your skinny tube of fabric. Bunch up the tube and join the ends of your elastic together with the appropriate overlap. Sew the elastic ring securely with a good zigzag stitch. You don’t want the elastic ring to pull apart when the child is putting the band around his or her wrist. At this point you have what looks like a hair scrunchie with a small opening in the side.

Gather up your ribbons that will be trailing and, with a few stitches, tack them all together at one end. I used the same notions as on the mermaid headdress, but you can use any ribbon. Consider painting some white satin ribbon with watercolors to create a watery effect.

Painted Ribbon

Now, insert the tacked end of your trailing ribbons into the hole of your ring and pin them in place.
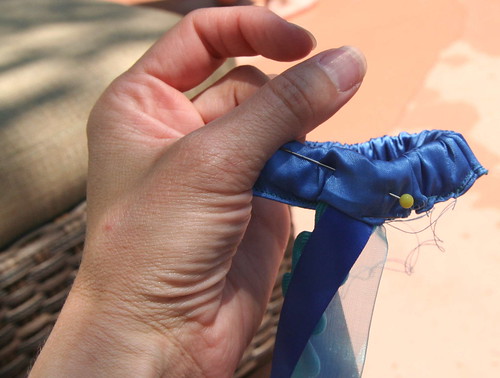
Wrist Ribbon Detail

By hand, with needle and thread, sew the ribbons in place to the elastic and sew the satin ring closed around them. I simply whip-stitched the opening closed and sewed the ribbons in firmly.
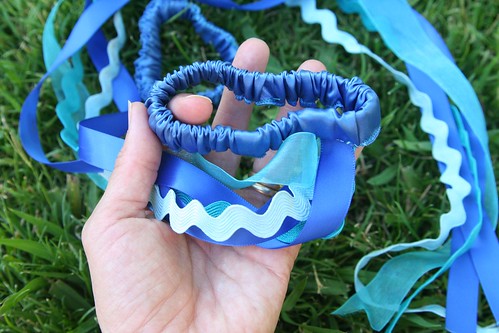
Finished Wrist Ribbons

Repeat all the steps so that you have two wrist ribbons.
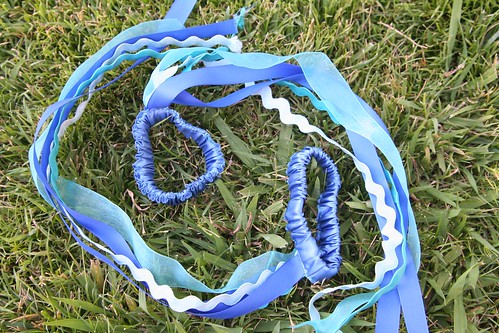
Finished Wrist Ribbons

If the ends of your ribbons want to fray, you can sometimes use a match and carefully melt the fibers at the ribbon ends to seal them. I suggest you first test this out on a ribbon scrap before you try to melt the ends of your finished wrist ribbons. You don’t want to harm your creation.

Now all you need to complete your mermaid or merman costume is a play silk tied around the child’s waist for a tail!
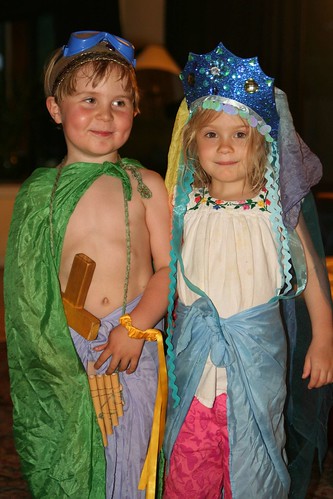
Merboy and Mermaid

You might be surprised at how your child uses these costume pieces. Perhaps the headdress or crown and the wrist ribbons you make will be used all together, or in different ways at different times. In this final photo, you can see that my son and his friend felt like using some of them at that moment, and found plenty of extra accessories (sword, goggles, pan pipes, cape) to transform themselves into a happy merfolk couple!

Happy sewing!
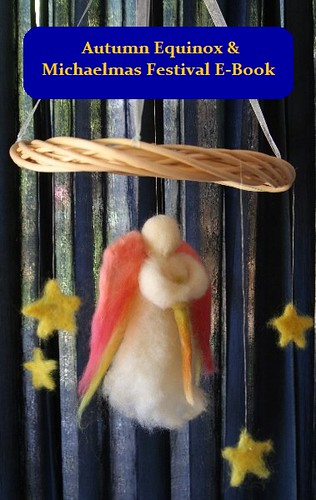
Family Clay Camp

Family Clay Camp

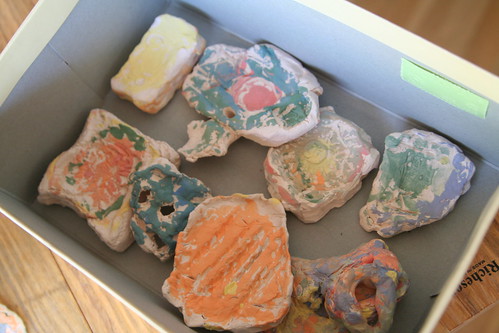
Right at the beginning of summer vacation, my boys and I participated in Family Clay Camp, which was offered through our local Parks and Rec. Michelle Leuth was our wonderful teacher. Lucas and I had taken a clay/pottery class from her a few years ago. Now that Asher is 5, he can start doing some of these fun activities, too!

We had a blast. Camp was four days, for two hours each day. Some friends from the boys’ school were also enrolled, so that made it extra fun. We had unlimited clay to play with for three days. On the fourth day, we painted everything. Then our pieces dried and were fired, and we picked them up a couple weeks later.

IMG_7426

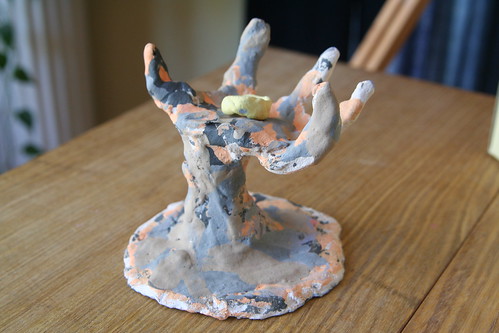
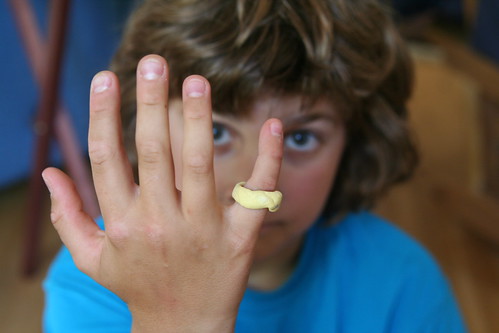
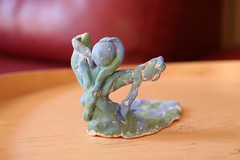
This is Lucas’s piece de resistance: A hand reaches up out of the ooze to clasp a golden ring. The ring is separate from the hand.

IMG_7446

(It’s been a good, long season of reading The Lord of the Rings books in our home and these stories have clearly  fired up my children’s imaginations.)

IMG_7429

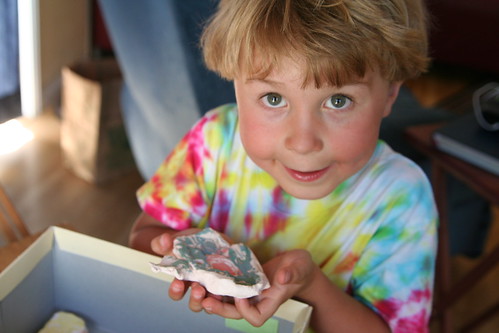
Asher thoroughly enjoyed this class, and got really into the feel of the clay and the fact that it took impressions. He spent a lot of time pressing textures of all kinds into his clay objects.

IMG_7427

This is Asher’s “design collection”—a series of clay objects with many textures. They are right in keeping with Asher’s appreciation for treasures.

IMG_7431

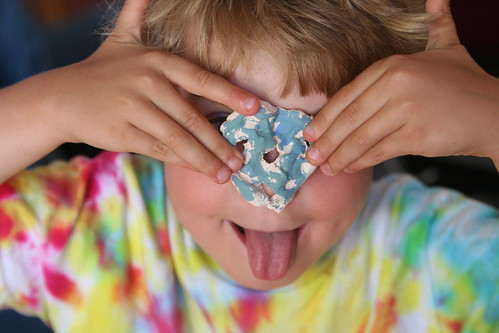
This is a small mask he made. I noticed that Asher had little interest in painting his creations—for him it was all about the forming of the objects.

IMG_7436 IMG_7433

This is a kind of creature sculpture that Lucas made for his father as a Father’s Day present. The back view is on the left, front view is on the right. Asher made a lovely, lumpy candle-holder for his daddy for Father’s Day.

IMG_7439

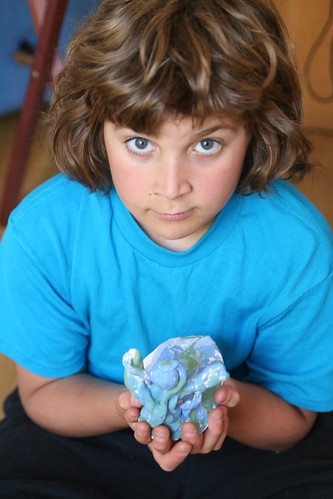
The expressive artist holding his sculpture.

IMG_7451

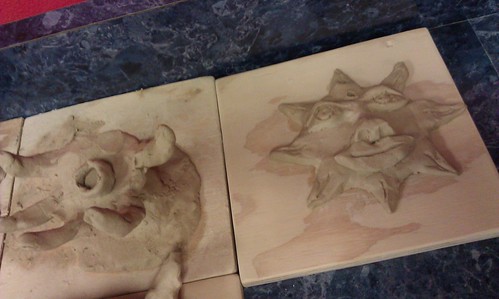
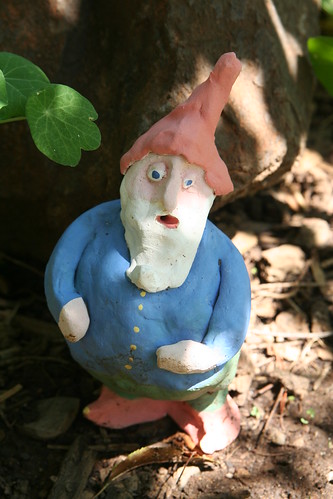
I made this little gnome, using the coil method. I started at his feet and worked up, taking care to avoid having any air spaces inside the figure without a means for the air to escape during the firing process. My gnome now stands in my garden and I am rather fond of him. I also made a sunshine face and a pinch-pot style bowl. It catches my earrings on my bedside table at night.

I like making art with my boys!

Fourth Grade Trip to Malakoff Diggins

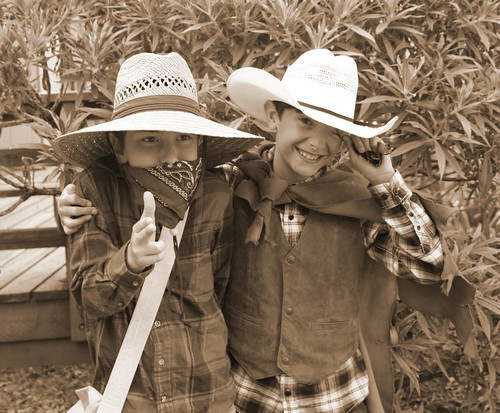
L at farm sepia

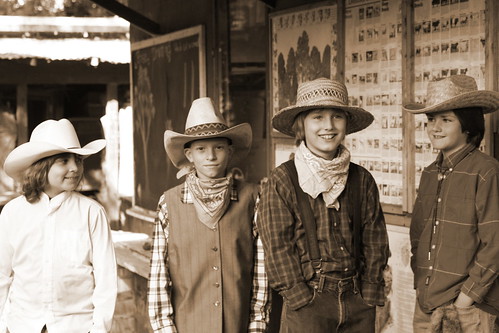
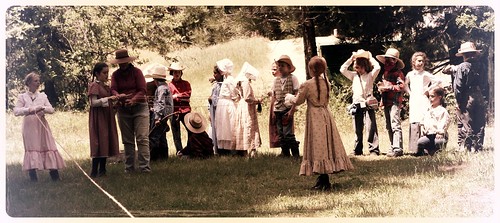
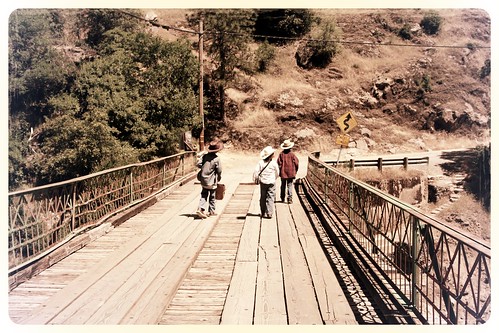
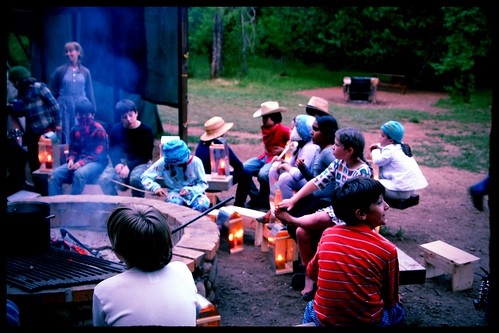
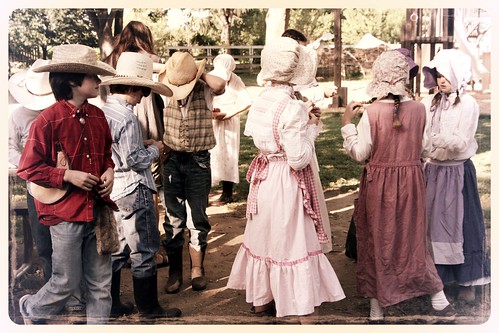
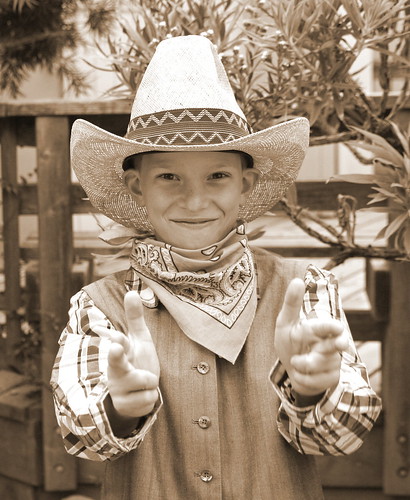
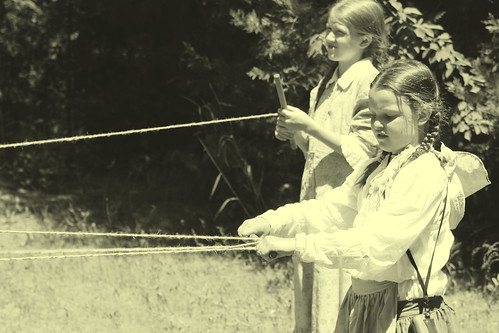
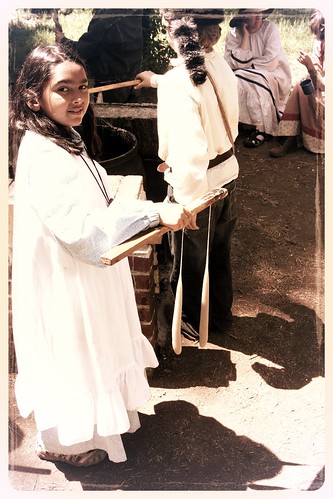
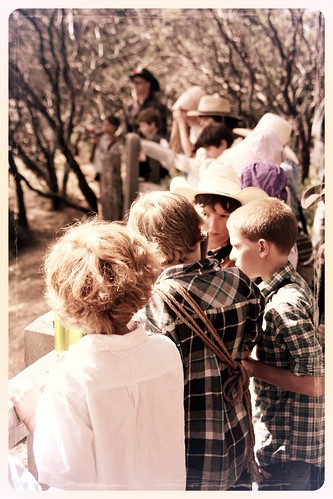
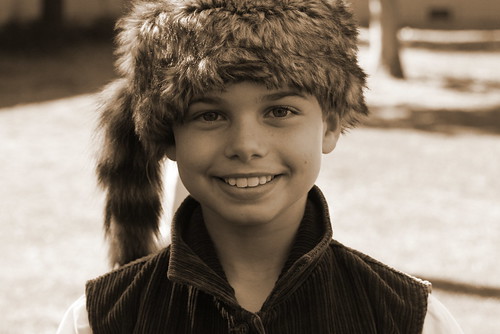
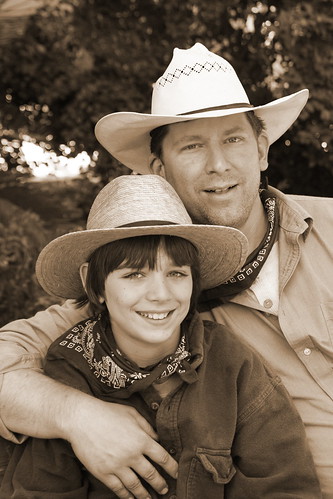
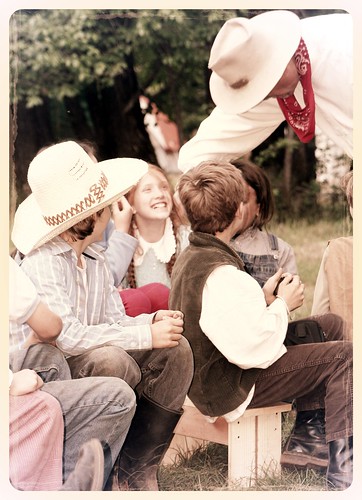
In May, before the end of the school year, Lucas and Ian got to go on the fourth-grade class trip to Malakoff Diggins, a California State Historic Park that was once a hydraulic mining operation in the Sierra Nevada mountains. Twenty-eight students, one class teacher, one Spanish teacher, and about ten parent volunteers/chaperones went for two and a half days. They dressed in Gold Rush period clothing, cooked their meals over an open fire, hiked, made rope, made candles, built their own benches for sitting around the campfire, learned about gold mining, danced, listened to a storyteller entertainer, and forged their own iron hooks. They had a marvelous time and came back filthy and tired, but very satisfied.

IMG_6003

Boys at farm

IMG_5887

IMG_5641

IMG_5859

IMG_5983

The class made wonderful wood, tin, and plexiglass lanterns in school, so they would have a way to see at night. I’m told that the food was wonderful the whole time.

IMG_5716

IMG_6170

IMG_6175

M gunslinger sepia

IMG_5961

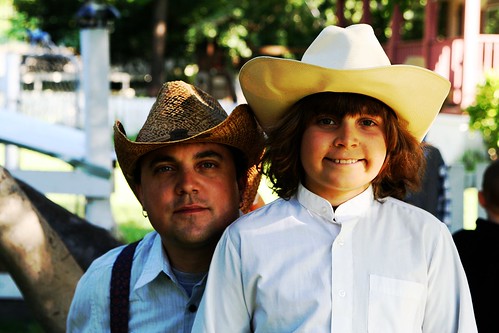
These are the cabins Ian stayed in when he was a boy, going camping with his mother and sister. Malakoff Diggins is very special to him and he jumped at the chance to chaperone. I’m so glad he got to do it, both for his sake and for Lucas’s sake. For Lucas, it was fun having his dad there to share in the adventure.

IMG_6198

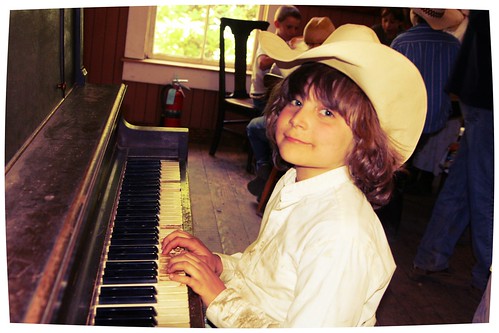
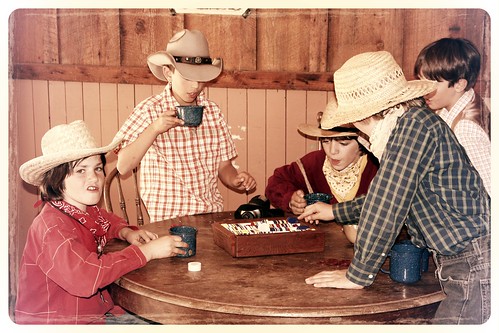
There was an old, old piano in the saloon. Lucas and some other students got to play it. They also played cards and ordered root beer from Ian, the barkeep. To get their second root beer, they had to tell Ian a joke, a fact, or a riddle.

IMG_6187

IMG_6171

I and S gunslingers sepia

Girls making rope

IMG_6129

IMG_5959

IMG_6126

IMG_6059

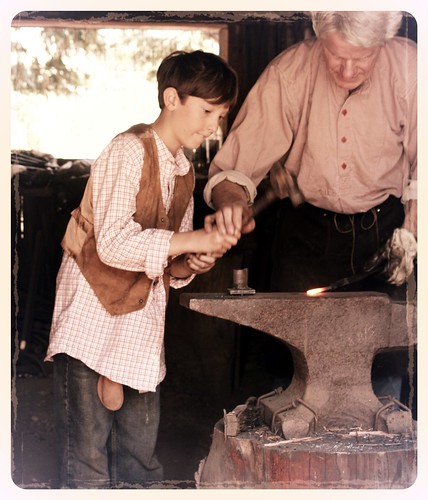
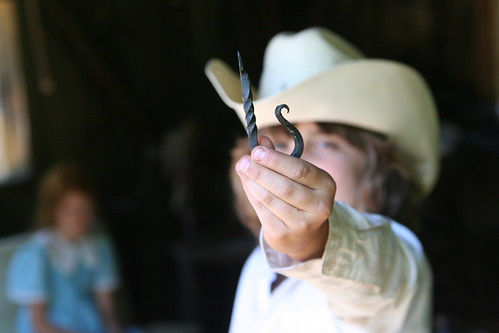
The blacksmith was amazing, according to Ian. He was a volunteer who, in his time of working with children at Malakoff Diggins, had helped over 10,000 kids make iron hooks like this one. He had his system down pat, with every child getting the opportunity to both work the bellows and hammer the iron hooks into shape. Isn’t Lucas’s hook terrific?

L trapper sepia

R and E sepia

The parents in attendance brought a wagon load of essential skills along to help: camping, cooking, nursing, building, child herding, and much more.

IMG_6249

IMG_6271

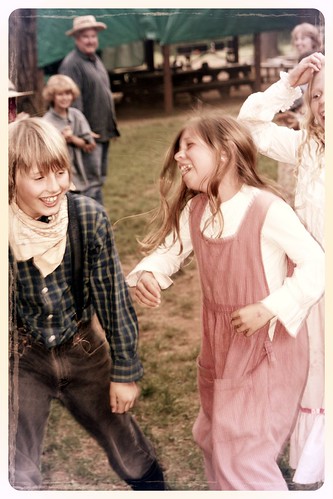
Everyone even tried square dancing and country dancing.

IMG_5942

IMG_5996

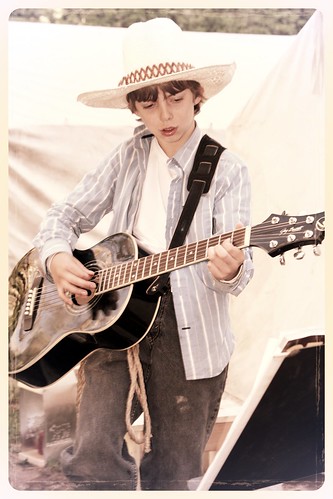
A few brave kids brought their guitars and played music around the campfire. I’m so impressed by this! These kids are so comfortable with each other, as they’ve been together since first grade (and some since preschool).

Lucas tired

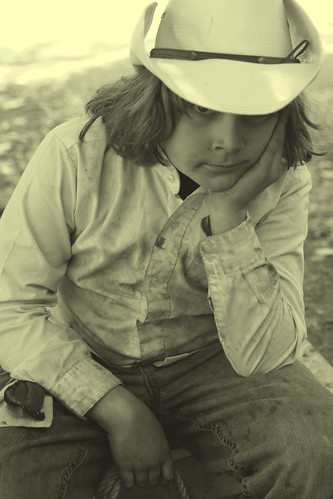
This is how Lucas looked when he returned home after two and a half days—filthy and soooo tired.

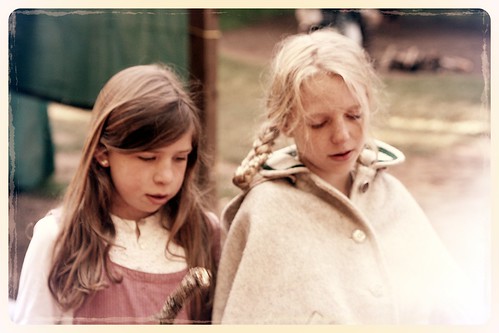
These photos are just some of my favorite shots. I took a bunch of “before” shots on the morning they all left town, when the kids were clean, fresh-faced, and eager. Ian took all the wonderful photographs of the kids at Malakoff Diggins, for which I am so grateful. I had a TON of fun editing the photos when they returned, adding filters and making them look old-timey—something altogether new to me. Anyway, aren’t they the most beautiful children in the Wild West?

I am so grateful that my son got to experience this! Although every child in California studies California history in fourth grade, few get to immerse themselves in a Gold Rush era town for a few days, living and working like people used to do. These children, because of their Waldorf background, took to this stuff so easily. Make our own rope? Of course! My heartfelt thanks goes to the teachers and brave parents to took them. And thank you to Malakoff Diggins for having such a terrific program.

Wishing Tree Tutorial

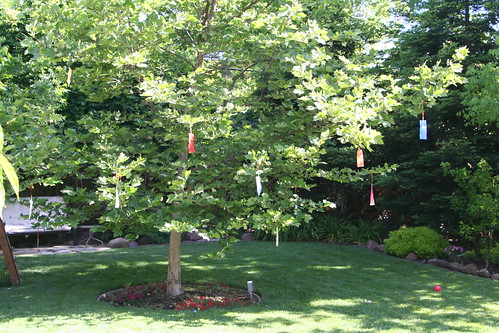
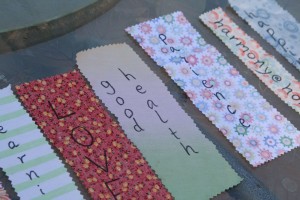
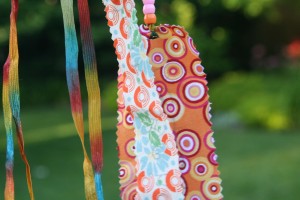
Wishing Tree

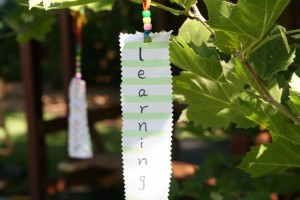
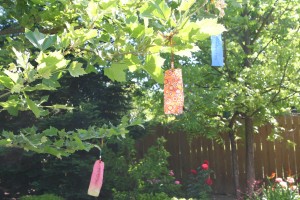
When cultivating optimism, which I posted about the other day,  it can be helpful to have a visual reminder of your intentions, hopes, and dreams. Make wishing flags to hang on a tree in your garden and sway in the breezes all summer long.

Materials
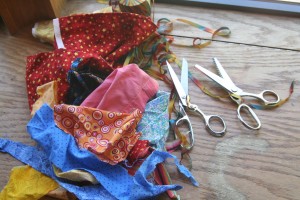
* assorted pretty fabric scraps, or watercolor paintings or pretty papers
* a permanent marker
* ribbon or yarn
* pinking shears (if using fabric)
* a hole punch (if using paper), or scissors
* beads (optional)

Tutorial
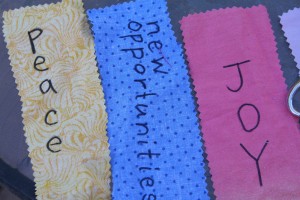
Take a moment to think of the good things you want to happen in your life. Your wishes may be as specific as you need them to be (new job for daddy, better health for grandma, college acceptance for sister, opportunity to homeschool, good teacher for brother, fun at camp, etc.). If you are doing this project with children, ask them, “What happy things will happen to us?” Chances are good that the children will have many joyful ideas to share. (Marvel for a moment at how easy optimism comes to them.) Write your ideas down in a list.

If you don’t have specific ideas or hopeful expectations, make a general list of positives, such as: joy, learning, rest, health, happiness, hope, peace, harmony, love, patience, safety, etc.  When my family and I did this project, we asked our friends and loved ones what they hoped and prayed for—we took their requests and made flags for them, too. It was a lovely way to share our goodwill with others.


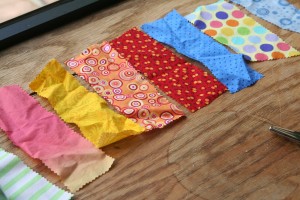
Cut your fabric into skinny rectangles (or triangles) with your pinking shears. If you are using paintings or other papers, you can use regular craft scissors. You’ll need one rectangle for each wish, and they can be measured and uniform or free form and varied, it’s up to you. If you want, you can think of them as custom-made prayer flags.

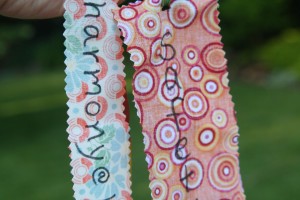
Using your permanent marker, write your wish on your rectangle. Make a hole with scissors (or a hole punch, if you’re using paper) at the top, and loop your ribbon or yarn through the hole and tie a knot. Now it will look a lot like a bookmark.

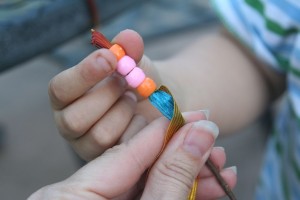
You may like to add beads to the top of your ribbon. If you do, the beads will add weight to the wish and give it a finished look. Make as many or as few of these wish flags as you like. If you’re doing this as a class or as a family, make sure that everyone contributes some wishes.

Now find a spot in your garden or playground where you will be frequently and tie your wishes to a tree. They will add color to your garden and flutter in the summer breezes. Perhaps your wishes will be carried by the wind up to heaven, or to the four corners of the world, spreading your love and optimism over the globe to people everywhere. Whenever you see them, you will be reminded of all the good that is in your future.


(This article was originally published in the Little Acorn Learning June Enrichment Guide in 2011. Check out all their many wonderful offerings at Little Acorn Learning.

Midsummer Festival E-Book

Sun_Child-311x426

I am delighted to announce that my dear friend Eileen Straiton (of Little Acorn Learning) and I wrote a Midsummer Festival E-Book! It has been a marvelous journey and I loved every step we took in making it. Please spread the word!

Little Acorn Learning
Monthly and Seasonal Guides
for Childcare, School and Home

*New* Midsummer Festival Book is Available!

This wonderful Midsummer Festival E-Book will bring the magic of summer into your home and help you keep celebrating throughout the season!  It is packed full of Waldorf songs, stories, verses, crafting tutorials and much more to help you celebrate Midsummer and the Summer Solstice with the children in your home, classroom, or childcare environment.

  • Read Stories and Fairy Tales Filled with Sunshine to the Children
  • Enjoy Verses, Songs, Poems and Fingerplays that Celebrate the Coming of Summer
  • Learn about the History, Background and Symbolism of the Summer Solstice
  • Get Ideas for How to Create Your Own Meaning of this Special Festival
  • Enjoy a Solstice Feast
  • Play Solstice Games
  • Make a Midsummer Bonfire
  • Create Simple Beeswax Suns with the Children
  • Make a Solstice Wreath for the Birds
  • Design Midsummer String Art Sunbursts
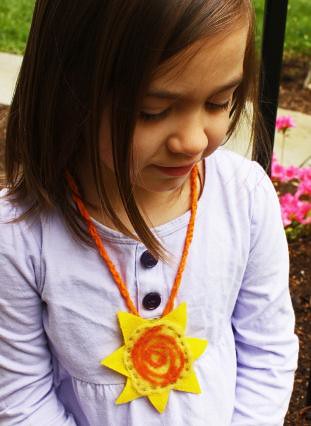
  • Read a Story of The Sun Child and Create a Sun Child Necklace
  • Craft a Shiny Garden Suncatcher
  • Use a Rock Garden Sundial to Tell Time in Your Garden
  • Make a Catch the Sun Throw Toy for Your Child
  • Create a Paper Solstice Sun
  • Read How to Create Daytime and Nightime Midsummer Magic
  • Hang Summer Solstice Flags Indoors or Outdoors this Season
  • Plant a Midsummer Indoor Herb Garden
  • Craft a Sun Mosaic Birdbath
  • Make a Sunshine Fairy out of Wool Roving and Felt
  • Sew and Stuff Herbal Dream Pillows for St. John’s Eve
  • Needle Felt a Summer Sun Wall Hanging
  • Create Sweet Pocket Sun Sprites for the Children
  • Bake Sun Bread with the Children
  • Go on a Sun Hunt
  • Make a Sun Mask
  • Design a Sunshine Banner
  • Crochet Sun Medallion Necklaces

mosaic681a08dd7f492074d30d638319d71c78eb0cd22f

In addition to our Midsummer Festival eBook, Little Acorn Learning has lots of wonderful offerings to fill your summer months with enriching, creative activities for your family, daycare, summer camp, or homeschool group, so please check out their other fine products.

Yarn Necklace for Mother’s Day Tutorial

Yarn Necklace

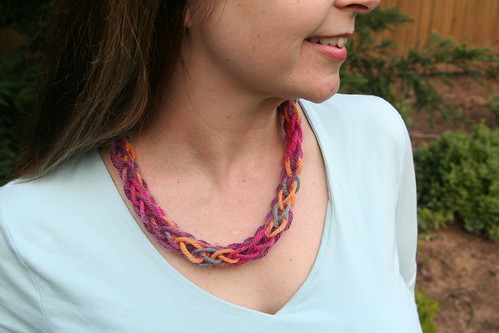
Are you hoping to make a special Mother’s Day gift for mother or grandma, or perhaps an end-of-year gift for a teacher? This yarn necklace is easily made by children who have a little finger knitting experience, in fact, my son made one for me when he was in the first grade and recently taught me how to make it. This kind of cord-making is called “finger knitting” and “finger weaving.” (Besides necklaces, you can make scarfs, braceletes, belts, or headbands in this way.)

Materials

  • wool or cotton yarn in a pretty color

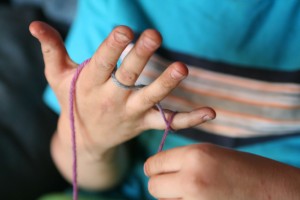
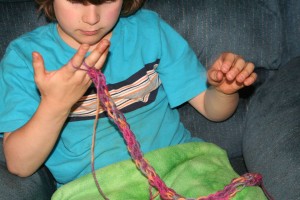
Start by placing the tail of your yarn in the crook between your thumb and forefinger so that the tail hangs down over the back of your hand. Use your thumb to pinch the tail and hold it in place. Take the ball end of your yarn under and over, under and over your four fingers, wrap it once around the pinkie finger.

Continue weaving the working yarn under and over, under and over, traveling back toward your index finger.

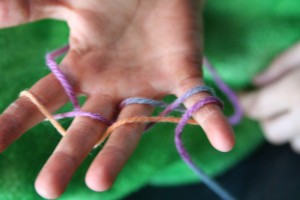
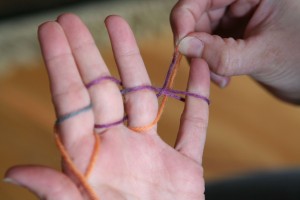
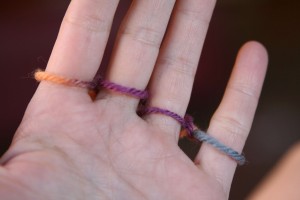
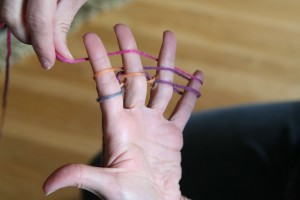
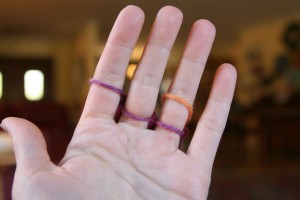
Wrap the yarn around your index finger and go under and over, under and over until you go around your pinkie again, and then weave it back toward your index finger in the same manner. Wrap the yarn one more time around your index finger and let the ball end rest across your palm. You should now have two loops (horizontal bands) of yarn on the front of each finger as you see in the photo below.

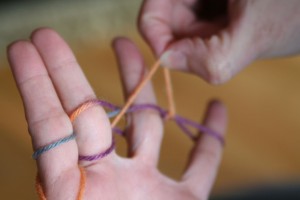
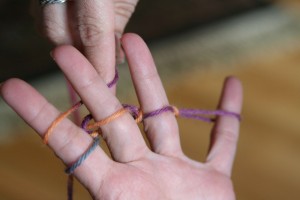
Now, beginning with your pinkie finger, grasp the lower loop with the fingers of your other hand and lift the lower loop over the upper loop …

… and completely off the pinkie finger as in the next photo below.

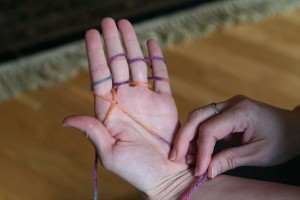
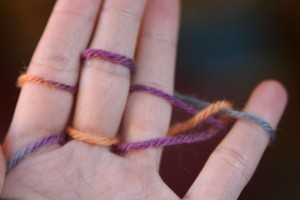
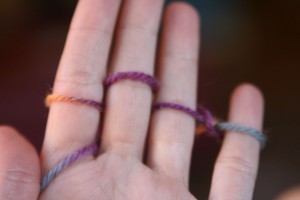
Now release the loop. Your hand should now look like this photo below, with two loops on the first three fingers and only one on the pinkie finger.

This action of moving the bottom loop over the top loop and off the finger is finger weaving. You will repeat this action with the remaining three fingers (ring finger, then middle finger, then index finger).

As before, with the ring finger, lift the bottom loop up and over the top loop, and then off the finger altogether. As you complete this procedure with each finger, you’ll see that you now have only one loop left on the finger.

When you reach the index finger, the yarn tail that your thumb has been holding in place acts as your bottom loop. Treat it as any other loop and lift it up and over the top loop and off the index finger.

The tail will now trail down between your index finger and your middle finger.

Now grasp your working yarn and wind it under and over your fingers as you did before, under and over, and around your pinkie finger so that your new loops are above the loops already on your fingers. Then continue winding the yarn under and over, under and over until you’re back to your index finger again. You should now have two loops on each finger again.

The loops are now high up on your fingers. Push the loops down to the base of your fingers. Then, as you did before and starting with your pinkie finger, pull the bottom loop up and over the top loop and let it go. Repeat for all four fingers exactly as you did before.

Push your stitches down again. Weave your yarn again, under and over, under and over, around, under and over, under and over above the loops already on your fingers, until you have two loops on each finger again.

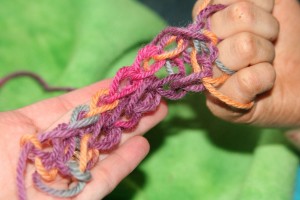
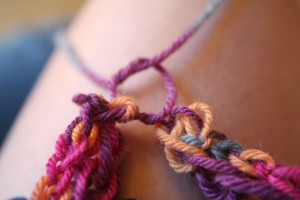
As you repeat this process of pulling bottom loops over top loops again and again, row after row, you will begin to see the woven cord coming off the back of your middle and ring fingers, as in the photo below.

The woven cord looks kind of flat at first, but when you’re done and you tug it gently a few times, it will become a round cord for your necklace.

When your cord is long enough, it’s time to cast off. (Experiment with the length by putting it around your own neck while it’s still on your fingers. If you can see the necklace when you look down, chances are good the cord is long enough and stretchy enough to easily fit over a head.)

To cast off, begin with only one row of loops and don’t weave new loops above them.

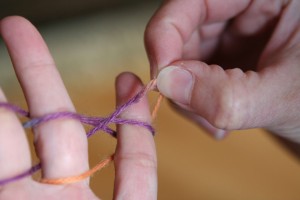
Instead, lift the loop on the pinkie finger off the finger and place it on your ring finger. Your ring finger now has two loops and your pinkie has none, as in the photo below.

Lift the bottom loop over the top loop and release. Now your ring finger has only one loop. Pick up that loop and move it off your ring finger and place it on your middle finger, which now has two loops. Lift the bottom loop up and over and release. Now move the remaining loop on the middle finger to your index finger. Lift the bottom loop over the top loop and release. Now your index finger has only one loop and your other fingers are bare. You may now remove the final loop from your hand, cut your yarn, pull the working yarn through it, and pull it tight. Now pull the tail on the other end of your cord tight.

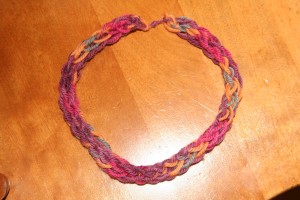
Now gently tug on your cord so that it becomes round rather than flat. Tie the two ends together, making a circle necklace.

The necklace should be stretchy enough that it can easily go over head of the lucky person you give it to. She will treasure it more than she would any chain of gold.

Happy Mother’s Day!


(This tutorial was originally published in the Little Acorn Learning May Enrichment Guide. Check out all their many wonderful offerings at Little Acorn Learning.

St. Patrick’s Day Fun

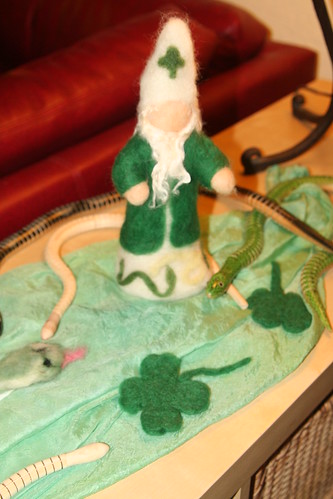
Needle-Felted St. Patrick and Snakes

It was a big time, of course. St. Patrick’s Day was fun for all of us, I think. We crafted. We decorated.

St. Patrick, Snakes, and Leprechauns

Leprechaun Party All Set

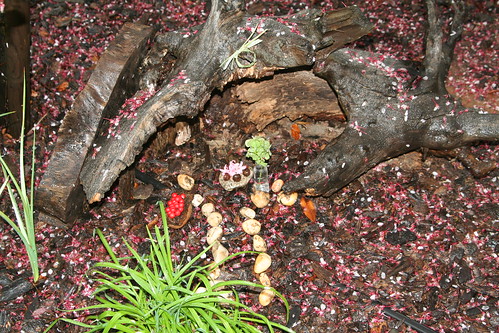
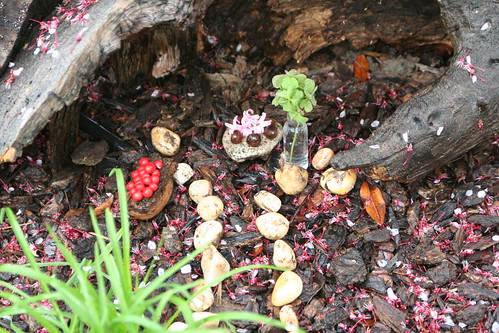
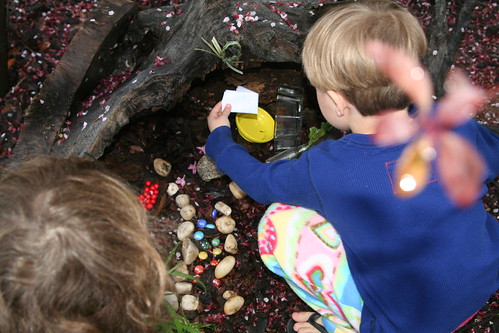
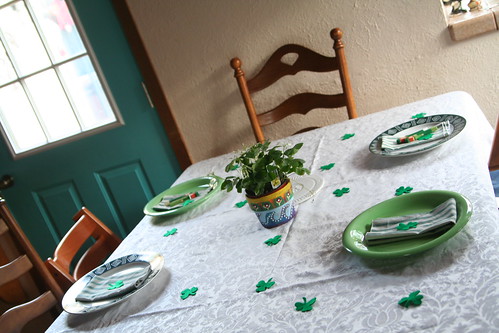
In between epic puddle splashing and a during jolly good time in the heavy rain, we set up a Leprechaun party complete with shamrocks in a vase of water, table with acorn cap cups, hyacinth flowers and bird berries.

Leprechaun Party All Set

The path we lined with white stones was very inviting to the wee folk.

Mama-Made Leprechauns for My Boys

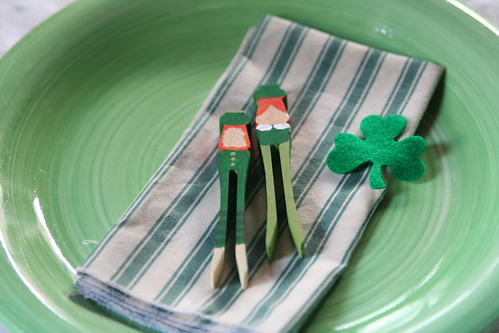
I had made some secret presents: wooden clothespin Leprechauns. A boy and girl for each of my sons.

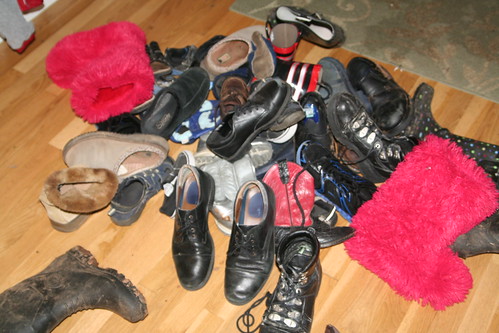
Leprechaun Trick: Huge Pile of Shoes!

Even though we made that lovely party space and put out brownie treats for them, the Leprechauns couldn’t help themselves. They pulled a small trick on us anyway and piled all of our shoes in the entry, blocking the front door. It’s in their nature, you know. They’re tricky!

Gifts from the Leprechauns

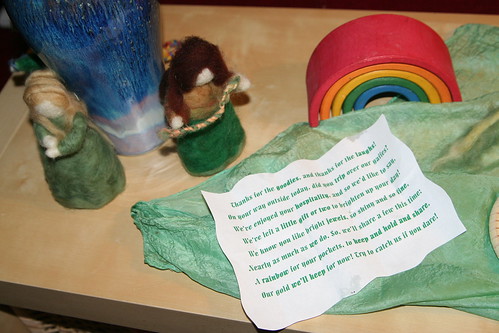
They did, however, leave the boys some treasures. A set of rainbow gems for each and a note.

St. Patrick's Day: Note from Leprechauns

“Thanks for the goodies, and thanks for the laughs!

On your way outside today, did you trip over our gaffes?

We’ve enjoyed your hospitality, and so we’d like to say,

We’ve left a little gift or two to brighten up your day!

We know you like bright jewels, so shiny and so fine,

Nearly as much as we do. So, we’ll share a few this time:

A rainbow for your pockets, to keep and hold and share.

Our gold we’ll keep for now! Try to catch us if you dare!”


Apparently, Leprechauns think they are very clever.

St. Patrick's Day Table

St. Patrick's Day Table

I didn’t snap any photos of our green shamrock pancakes or piles of golden eggs. I was too busy tucking in with and enjoying my fellas. It turns out that clothespin Leprechauns are great for homemade zip-lines. Then we readied our home for a  fun party with our friends. We enjoyed a yummy lamb stew, kale salad, and soda bread (from a mix). Today, Asher is talking about his Leprechaun friends.

Hope you had a festive holiday, too!

St. Patrick’s Day Kid Crafting

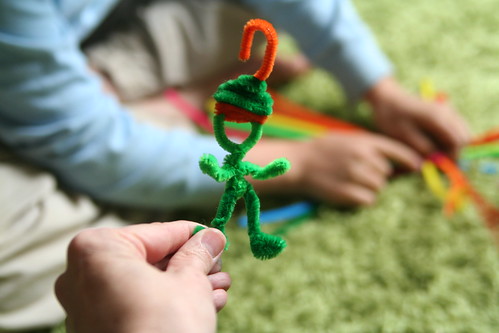
Chenille Stem Leprechaun

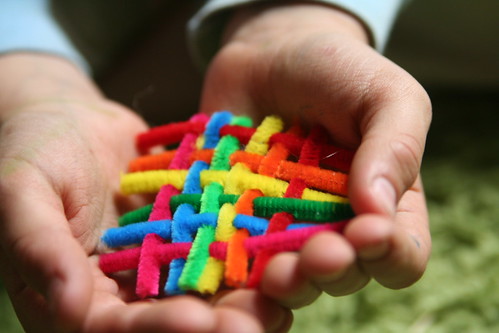
Here’s some more simple, impromptu St. Patrick’s Day kid crafting. We made pipe cleaner (they’re called “chenille stems” nowadays) leprechauns, shamrocks, and rainbows yesterday.

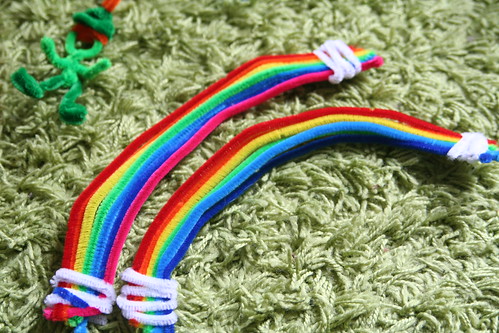
Chenille Stem Rainbows

Tonight we’ll be soaking the rainbows in a Borax solution to grow crystals on them. This is an idea I first saw on Pinterest, then traced it to here. It’s originally from Sweet and Simple Things, and this is where I first saw the shamrock shapes, too. Holiday science!

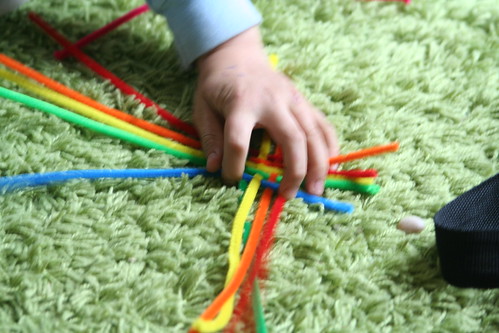
Impromptu Weaving

Lucas decided to weave his pipe cleaners to make little woven rainbow diamond shapes.

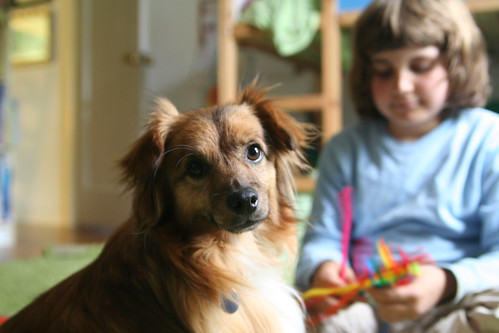
Solstice and Lucas

Solstice helped by looking handsome and providing moral support for our creative impulses.

Rainbow Weaving with Chenile Stems

Here’s Lucas’s invention. He bent in all the ends to keep it from unraveling.

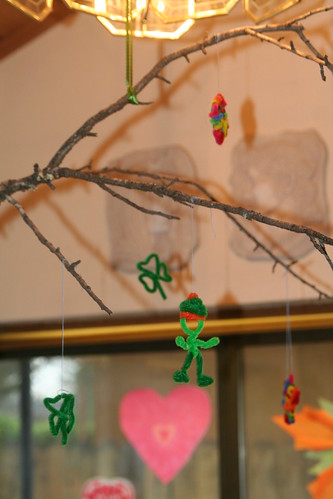
St. Patrick's Day Mobile

We hung our little creations with sewing thread on a twig with several branches. If our crystalized rainbows are successful, we’ll hang those here, too. I think it will be festive for our little party we’re having tomorrow.

And since it’s still raining around here, here’s a sweet Irish blessing I love.

May the blessing of the rain be on you—
the soft sweet rain.
May it fall upon your spirit
so that all the little flowers may spring up,
and shed their sweetness on the air.
May the blessing of the great rains be on you,
may they beat upon your spirit
and wash it fair and clean,
and leave there many a shining pool
where the blue of heaven shines,
and sometimes a star.


  • About Sara

    Thanks for visiting! I’m Sara, editor and writer, wife to Ian, and mother of two precious boys. I am living each day to the fullest and with as much grace, creativity, and patience as I can muster. This is where I write about living, loving, and engaging fully in family life and the world around me. I let my hair down here. I learn new skills here. I strive to be a better human being here. And I tell the truth.
    Our children attend Waldorf school and we are enriching our home and family life with plenty of Waldorf-inspired festivals, crafts, and stories.

    © 2003–2018 Please do not use my photographs or text without my permission.

    “Love doesn’t just sit there like a stone; it has to be made, like bread, remade all the time, made new.” —Ursula K. LeGuinn

  • Buy Our Festivals E-Books


  • Archives

  • Tags

  • Categories

  •  

  • Meta