St. Patrick’s Day Leprechaun Mobile Tutorial

Leprechaun Mobile

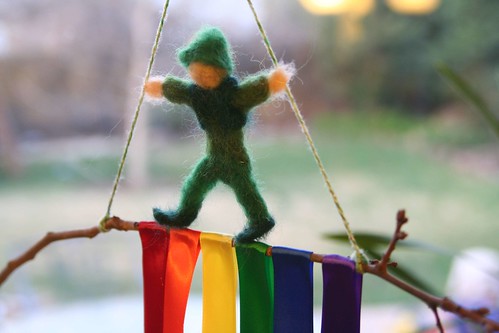
I have a deep and abiding love for mobiles. Holiday decorations that hang can be very festive without taking up too much space or cluttering your nature table. Here’s a St. Patrick’s Day leprechaun mobile that is easy to make and quite whimsical.

Materials

Materials

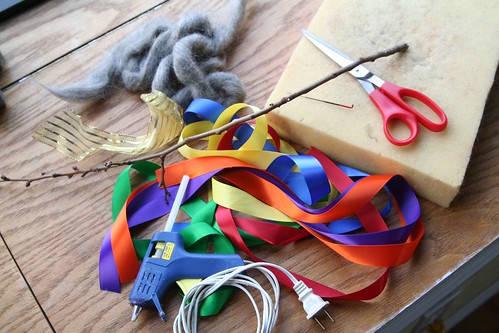
  • foam base and needle-felting needle
  • wool roving in gray or black, green(s), and skin colors
  • low-temperature glue gun and glue sticks
  • one twig approximately 18 inches long; ideally it will have a 6-inch straight section in the middle
  • gold ribbon, gold foil, or gold tissue paper
  • 1-inch ribbons in rainbow colors, approximately one yard of each color
  • yarn or string, approximately 2 yards
  • needle, thread, and scissors

Money-Saving Alternatives

  • Narrower ribbon in rainbow colors costs less. Although I used 1-inch ribbon, you could use several strips of the same color ribbon to create a 1-inch band of color for each color of the rainbow.
  • Instead of 1 yard of each color, you could use only a half yard. Your ribbons would be a single layer, not double as in the photos below.
  • Check your gift wrap stores. You may have some gold tissue paper or ribbon left over from a package.

Tutorial

To begin, tie two pieces of yarn or string (each about a yard long) to your twig, approximately 8 inches apart. Hang the twig from the two strings more or less horizontally (adjust the position of the two ties on the twig as needed). Then tie a knot in the two strings about 8 inches up from the twig. This will make a triangle of string above your twig. Tie your twig to something so that it hangs freely at shoulder level so that you can work on it comfortably.

Rainbow Ribbons

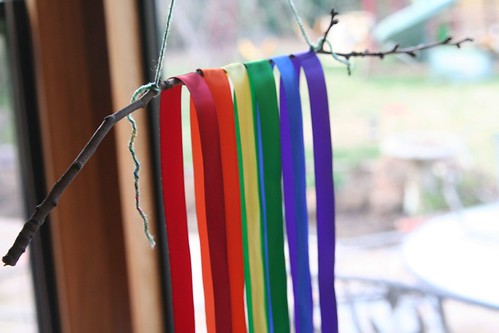
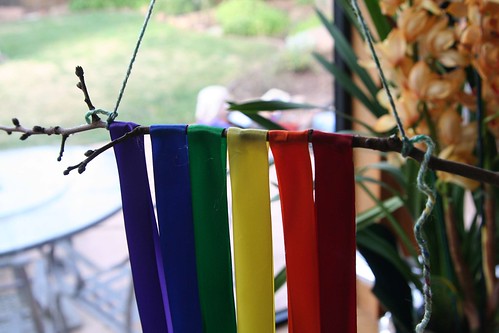
Lay your ribbons over the twig in rainbow order. Their two ends should be even at the bottom. Make sure you like the position of each ribbon before you affix any glue. (You can use clothes pins to hold them in place while you decide on their optimal positions.)

IMG_6426

With your glue gun, put a dab of glue on the inside of one layer of a ribbon and pinch the other layer over the top of the warm glue to fix the ribbon to itself. Repeat this for each color. See the photo above.

Pot

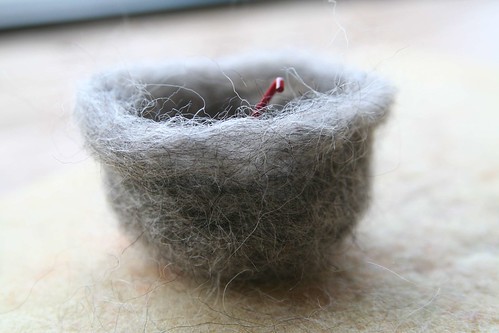
Now, take your gray or black wool roving, felting needle, and foam pad and needle-felt a pot. This will be your pot of gold. Mine was about 2 and ½ inches in diameter. If you wish to have a sleeker look for your wool pot, you can first shape it with your felting needle, then wet-felt the pot in hot water with soap. Gently rub your pot inside and out with soap until the fibers mat firmly together. Rinse it in both hot and cold water.) Shape it carefully into a pot and let it dry. You may still want to apply your needle again to perfect the pot’s shape.

Wet-Felting the Pot

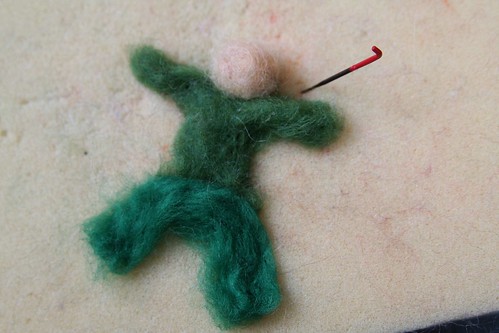
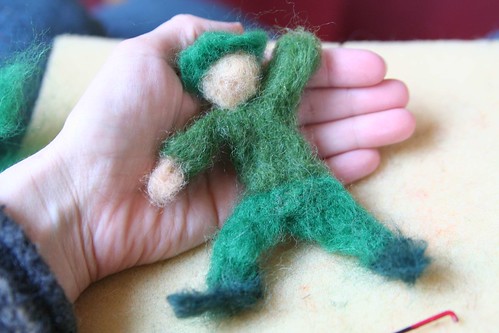
With your green and skin-colored wool roving, needle-felt a leprechaun. No wire skeleton is needed for this project and since this figure will not be played with, you can attach head, hands, legs, shoes, and hat by simply needling the fibers together. Start with a torso and arms. Add legs. Add a ball of skin-colored wool for a head.

Needle-Felted Leprechaun in Progress

Needle-Felted Leprechaun in Progress

Your leprechaun can be as traditional or as unique as you like. Mine was a kind of Waldorf-inspired figure dressed in several greens, with a jaunty hat and dark green vest.

Leprechaun on Top

Stand your leprechaun on top of your horizontal twig. With needle and thread, sew your leprechaun’s hands to the yarn or string hanger. (Feel free to adjust the knot above the leprechaun‘s head as needed to make it possible for the hands to hold both strings.) Finish off the two yarn/string knots on the twig by tying them securely and cutting off the excess.

Gold Suspended

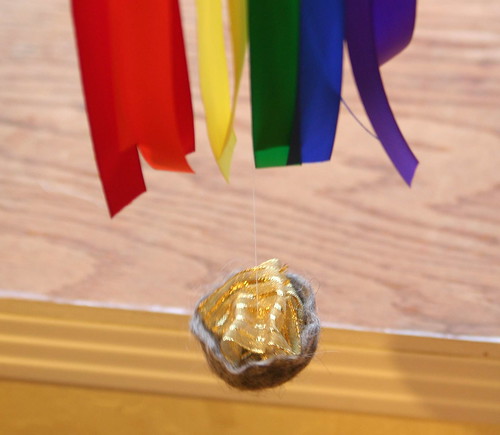
When your pot is dry, crumple your gold ribbon, foil, or tissue paper into a mound of gold and place it into your pot. You might want it to heap above the edge of your pot. With a long thread, sew up from the bottom center of your wool pot, through your gold, and back down a couple of times. On the way up again, extend your long thread all the way up to your rainbow-covered twig and tie your thread securely to the center of the twig. You’ll probably want to tie it in between the yellow and green ribbons. Cut of the excess thread tail. Your pot of gold should hang a couple of inches below your twig, at the end of your rainbow.

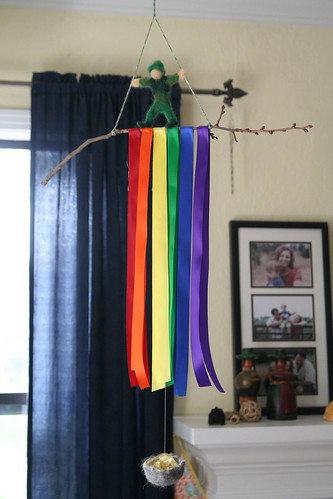
Finished Mobile

Find a nice spot in your home to hang your St. Patrick’s Day mobile with leprechaun and pot of gold, perhaps in front of a window, where fresh spring breezes will make your rainbow ribbons flutter.

* This article was originally published in the Little Acorn Learning March Enrichment Guide.
Glorious Saturday

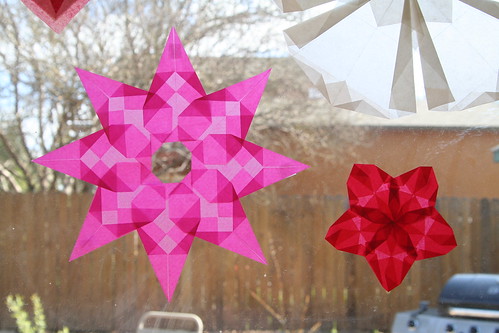
Pink Open-Center Star and Red Flower

Oh, Saturday. How I love you! I swoon with love for you!

Any day that starts with an extra hour of delicious morning sleep is tops. Why does morning sleep feel better than any other sleep?

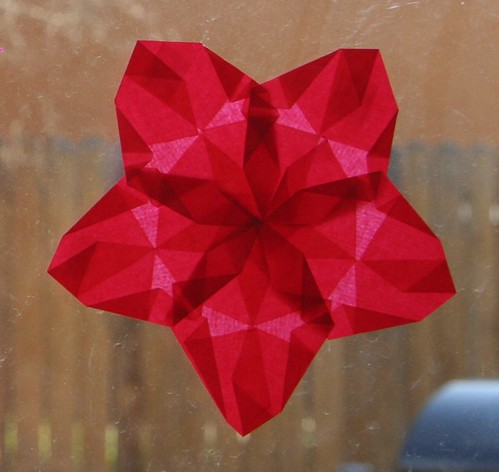
My day started with coffee and some new window stars. Both of these are first attempts at new patterns.  The red flower was tough because I had to trim my small 6 1/4 inch square kite paper into teeny-tiny rectangles with a particular height-to-width proportion. Like, with MATH.

Pink Open-Center Star and Red Flower

It would have been easier with bigger paper, as the instructions call for. But I’m happy with the result. See the little red star in the middle?

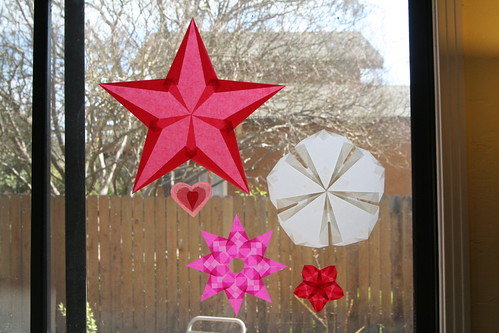
Grouped Window Stars

The pink one with the open center is kind of a showstopper, I think.

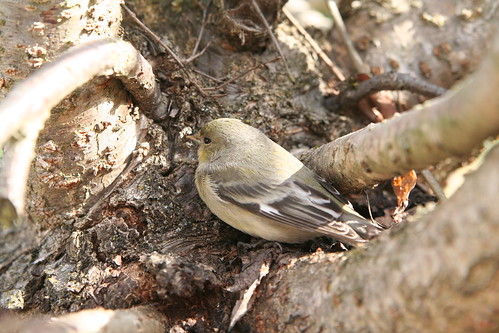
Stunned Goldfinch(?)

This little darling accidentally flew into our window today. She stunned herself pretty badly, and allowed Ian to pick her up and place her into this tree. At first her eyes were closed and her eyelids were kind of twitchy. Later on, she was like this, eyes open but not ready to fly away. Then, she was gone. I hope she’s OK now. She might be a goldfinch, but I’m not sure.

New Chicks

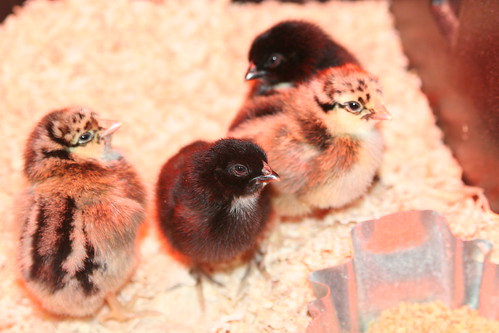
We have four two-day-old chicks in our home again. Here they are at one day old. We got two Black Sex-Link chicks (who are certain to be female because the male chicks look different at hatching) and two Silver Laced Wyandotts. At first I was sure I’d play it safe and get four Black Sex-Link chicks to guarantee we were getting females, but then the Silver Laced Wyandotts wooed me with their gorgeous adult plumage and I succumbed to temptation. Let’s all hope together that they’ll turn out to be hens, OK?

Lucas and New Peep (Silver Laced Wyandott)

The chicks are much more sturdy on their pins now. Lucas is enjoying them a lot. We are debating about their names. Ian wants to name them after sci-fi space princesses. Lucas is in favor of Norse goddess names, although he also likes the idea of calling them Bear, Raven, Duck, and Chipmunk because, well,  that’s funny. Asher seems to want to keep with the theme of nature oriented names like our other hens. He has thoughtfully suggested Moon, Star, Rain, and Tornado.

Japanese Maple Buds

My garden is coming alive again in small ways.

Forsythia

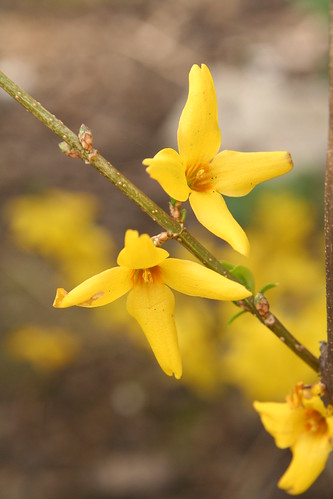
This new forsythia was allegedly a flowering quince when I bought it and planted it late last spring. I’m not sad because it’s gorgeous.

First Chess Lesson

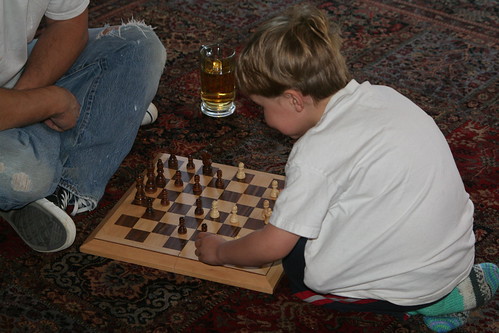
Asher received his first lessons in chess today. My heart skipped a beat when I saw this. Is he really old enough to start learning chess?

Practicing

Lucas practiced piano and cleaned his room today. We also went to the library and got him his own library card.

And although I don’t yet have a photo, I spent some time today painting my kitchen door turquoise. I’ve been wanting to paint this door for twelve years now. Ridiculous, but true. And why turquoise? Well, why ever not?

We had yummy French onion soup and steak and asparagus for dinner. We read leprechaun stories at bedtime.

Life is good. I love Saturdays.

Shamrock Window Transparency Tutorial

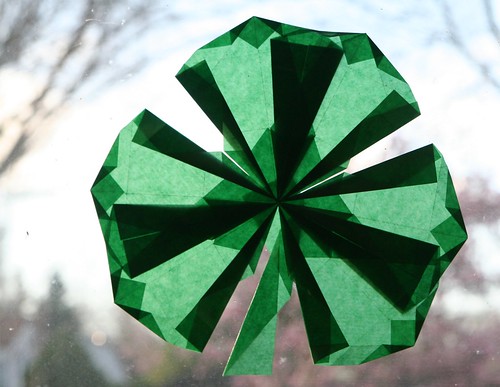
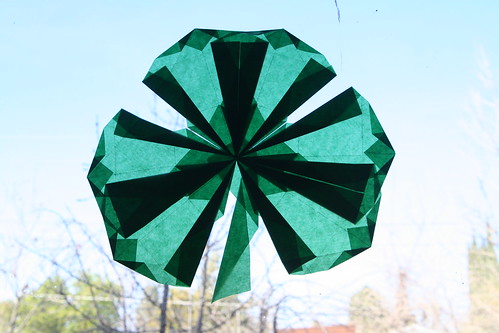
Finished Window Shamrock

Are you excited about Saint Patrick’s Day? I am because we can do anything we want to celebrate. I’m a big fan of “minor” holidays for this reason. We can be creative and silly and spontaneous, and even do something different every year, if we want.

I thought I would share this with you. I made up this shamrock window transparency, building on what I’ve learned from Magical Window Stars by Frédérique Guéret. Although there is a beautiful clover leaf design in the book, this is not it. This design that I’ve created uses the square kite paper that is most commonly available. The basic point I teach below is Guéret’s invention, but the configuration and the assembly of the shamrock was my idea. I hope you like it. In any case, I fully recommend this book if you love window stars like I do.

Materials

  • 7 sheets of square kite paper in dark green
  • scissors
  • glue stick
  • tape
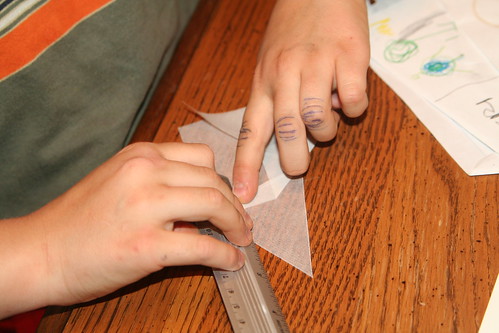
  • ruler or straight edge for making crisp folds

Tutorial

IMG_2205
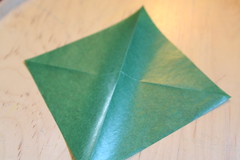
Fold your square into diagonals.

IMG_2207
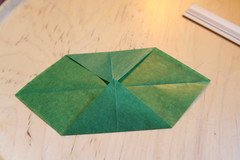
Now fold opposing corners to the center line (photo above). The top is now a horizontal fold that is parallel to your horizontal crease.

IMG_2208
Unfold the bottom corner; the crease you made will be used later. From the top, folded edge, fold the right side down to meet the center horizontal line (photo above).

IMG_2211
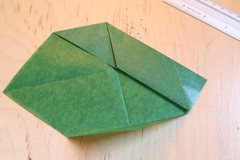
Do the same to the other side. Now you have a point at the top again (photo above).

IMG_2212
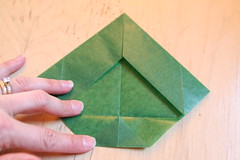
Fold the bottom corner up to the horizontal crease line (photo above).

IMG_2214
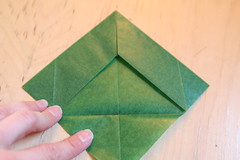
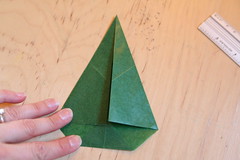
Now fold both sides in to the center vertical crease. This step looks like an airplane or maybe a sailboat. Do your best to keep the top point crisp.

IMG_2215
Open those sides out again.

IMG_2216
Now fold the bottom sides up so that the flat bottom edge aligns with the center vertical crease (photo above). Unfold those bottom sides again.

IMG_2218
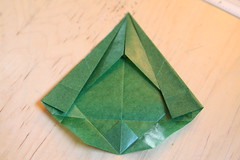
Now fold the left top side in again, allowing the corner to touch the horizontal crease you made in the previous step. Your top point is becoming more acute.

IMG_2219
Above is a detail of this step. See where the left edge folds in and meets the crease? The corner touches the horizontal crease.

IMG_2220
Now do the same with the right side.

IMG_2221
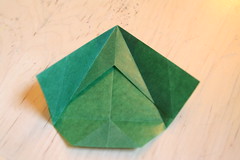
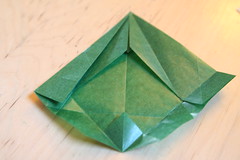
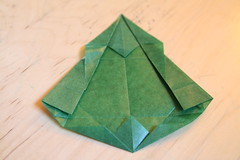
Open out the innermost flaps of the top point, allowing their “wings” to extend beyond the edges of the sides.

IMG_2223
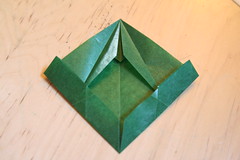
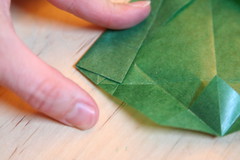
From the bottom center, you have two diagonal creases. Fold the very bottom edge on both sides up, aligning the bottom edge with the diagonal creases.

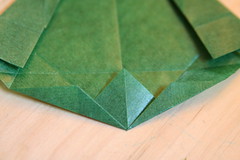
IMG_2224
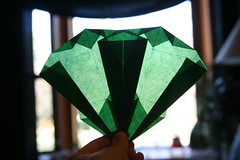
This photo above is a detail of that final fold. Congratulations! You’ve make one point. Now— sorry about this part—you repeat that process five more times, so that you have six of these points. Two points will make one lobe of your shamrock.

IMG_2153
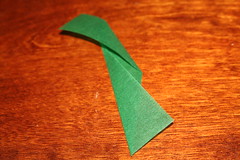
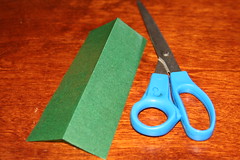
Once you have six of those points, you can make the stem. Take another square of kite paper and fold and cut it in half. Now fold and cut piece in half again and cut along the fold. You should now have a skinny, rectangular strip that is one-quarter the width of the original square.

IMG_2154
This long strip is the stem of your shamrock. Fold the bottom of the strip like the photo above.

IMG_2155
And fold the top of the strip in the opposite direction, like so. This makes it kind of curve. You now have all the pieces you need and you can assemble the shamrock window transparency.

IMG_2156
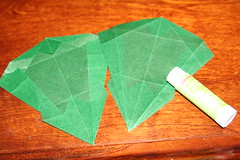
For each lobe of the three-lobed shamrock, you’ll need two points. The sharpest point—what I was calling the top in the photos above— goes in the center. The front side of each piece is the side with the points. If you run your fingers across the front, they will catch on the little triangles created in the folding process. The back side is smooth; your fingers won’t catch on any part. Turn one of the two points over so that the back side is up, as in the picture above. Run your glue stick along the right edge (where the glue end of the glue stick is in the photo above).

IMG_2159
Align the points at the bottom as close together as you can, hold your two points up to the light, and align the darkest edges side by side, as you see in this photo above. They make a very dark upside-down triangle in the middle. The broad (formerly bottom) end of your two points will be overlapping. You now have one lobe of your shamrock done. Do the same thing two more times to make two more lobes of your shamrock.

IMG_2161
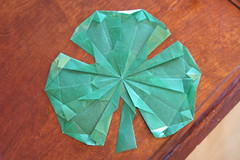
If it helps, hold up each lobe to the light before gluing them together. You should see a medium green triangle in the center when all three points are aligned. Now put all the center points together on top of your stem. Glue them to the stem with your glue stick so that the points of the center are just barely touching and the three lobes are almost touching halfway up, just beyond the edge of that inner triangle. The stem should extend down in the gap between the left and right lobes of the shamrock.

Finished Shamrock Window Transparency
Now you can hang your shamrock in the window. Make three or four loops of tape and put at least one on the back of each lobe to stick it to your window. Perhaps your window shamrock with bring you good luck!

The Dear Little Shamrock

There’s a dear little plant that grows in Ireland.
‘Twas Saint Patrick himself sure that set it.
And the sun on his labor with pleasure did smile.
And a tear from his eyes oft-times wet it.
It grows thro’ the bog, thro’ the brake, and the mireland,
And it’s called the dear little Shamrock of Ireland.

That dear little plant still grows in our land,
Fresh and fair as the daughters of Erin,
Whose smiles can bewitch, and whose eyes can command,
In each climate they ever appear in:
For they shine thro’ the bog, thro’ the brake, and the mireland,
Just like their own dear little Shamrock of Ireland.

That dear little plant that springs from our soil,
When its three little leaves are extended,
Denotes from the stalk we together should toil,
And ourselves by ourselves be befriended.
And still thro’ the bog, thro’ the brake, and the mireland,
From one root should branch, like the Shamrock of Ireland.

—Andrew Cherry

More Window Stars

Or, What I Did on My Vacation

IMG_1860

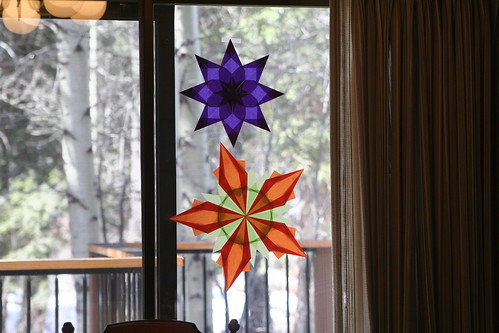
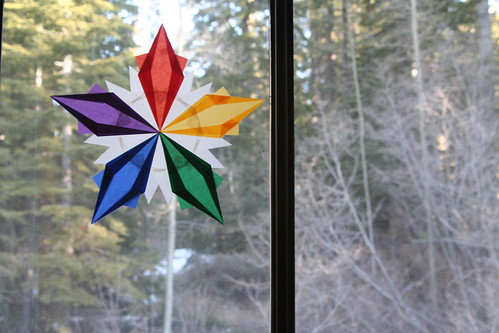
OK, I admit I’m completely obsessed with window stars lately. I think I mentioned that here a little while ago. Anyway, we had some time off last week and I took all my kite paper and window star books along with me to the mountains. I was determined to challenge myself to make some of the more complex stars. While I was there, in between working, eating, and playing outside, I made eight new stars.

IMG_1402

I also accidentally wrecked one, but shed only a few tears about that.

IMG_1857

The more you make them, the easier it becomes. I guess I got into a kind of flow.

IMG_1593

Lucas helped me make this beautiful multicolored star. He did most of the white center. I’m hoping he’ll want to make some more with me. I think stars like these may be our birthday gifts for everyone this year.

IMG_1597

I love the way the light shines through them and I confess I’m crazy about the colors.

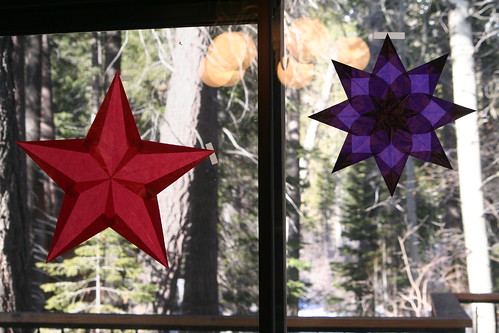
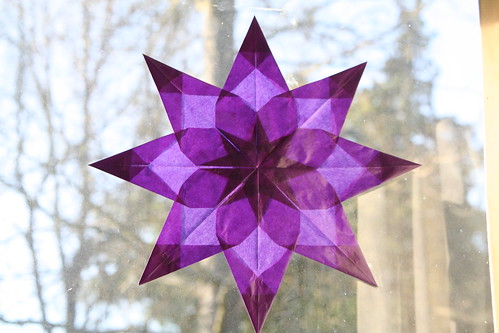
Purple Eight-Point Window Star

Window Stars in Boys' Room

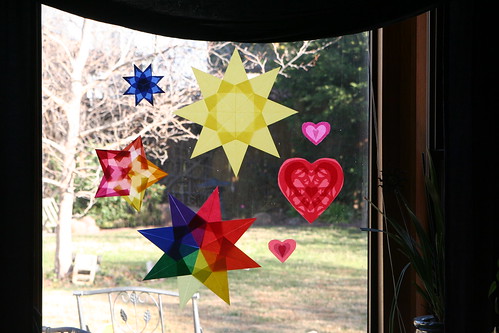
My boys wanted one for their room in their favorite colors, blue and green. Now that we’re home again, the stars have all found spots on our windows here, sharing space with the Valentine window transparencies I made last month, which are still up because I adore them.

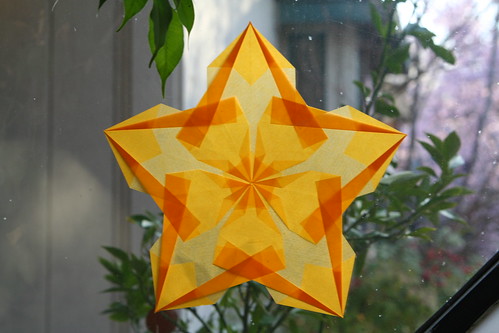
New Window Star

I’ve also been experimenting and will share my results very soon, if it all works out the way I think it will.


Highlights

I’ve spent a good deal of the last few days working on boring work and business financial stuff. But here are some highlights of life lately. These are things I’m happy to have spent time and energy working on and can share.

Iris

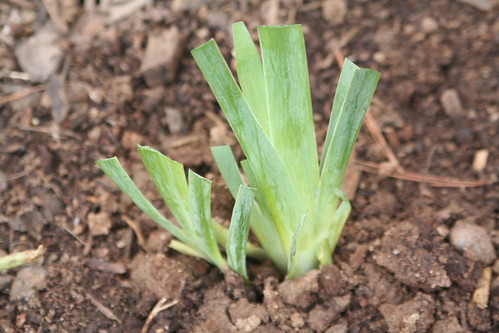
I’ve worked quite a bit in my garden (yard? yards? gardens?) to spruce it up in preparation for a fabulous spring. I’ve planted about twenty purple iris rhizomes that I bought from the Waldorf school farm. (I still have six more to plant.) I planted sixteen canna rhizomes (pale yellow and orange) and sixty-five (scarlet) crocosmia bulbs, variety “Lucifer.” I divided an agapanthus into four new plants—this is an experiment, as I’m not sure I did it correctly, having never divided these before. But I was feeling lucky, especially since I’m also pretty new to dividing my daylilies (Hemerocallis), too, and the new divisions I’ve made over the last year have all taken beautifully. I put in Iris feotisissima seeds from my parents’ garden. These seem to grow great from seed in their yard, so I’m trying them out. I also planted hollyhock seeds from my mother in law’s garden. My fingers and toes are crossed.

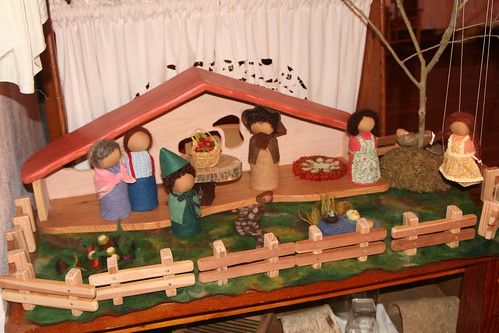
RRK Farmhouse and Family Puppet Donation

RRK Farmhouse and Family Puppet Donation

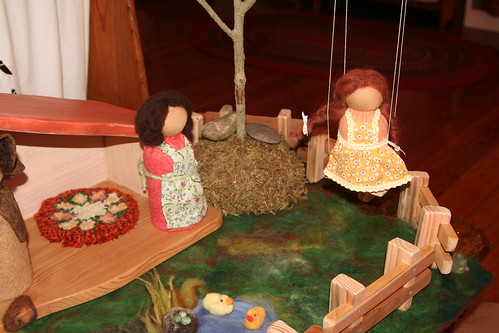
I got to participate in a Kindergarten work night to prepare the Red Rose Kindergarten parent gift to the school fundraising auction that is coming up in March. I did a very, very small job (I helped felt the grassy playmat) to help create this beautiful farmhouse and family puppet scene, which is the work of many hands and hearts. It was fun to spend a couple of hours with my son’s teachers and a few other mommies. Any opportunity to get to know these wonderful people better is good, and spending an evening stabbing wool with a needle is always fun. Anyway, see the girl on the swing? So cute!

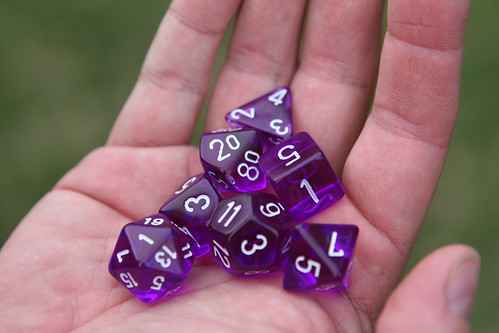
D&D Dice

There is a new obsession in my home and it involves these dice. My sons and husband have begun playing Dungeons and Dragons together. It’s really cool. Ian is creating custom adventures for my little boys, who couldn’t be more happy to sit around a table (go figure!) and engage in interactive storytelling with Daddy. Lucas and Asher are being asked in the story to work together and support each other and fight for the forces of good. There are fantastical creatures and puzzles to solve and treasure to find and a bit of fantasy battling of orcs or whatever (mediated via dice), and while I would like to think my dear sons have nothing but peace and love in their hearts, I know for certain from experience that they were going to do all that battling in their minds anyway—and quite possibly accidentally-on-purpose bash each other in the process. They are literally spending hours together at the kitchen table, and Daddy is doing funny character voices, and my sons have composed extemporaneous poetry in character (as elf and dwarf), and Asher keeps trying to help Ian tell the story because, well, his ideas are pretty great. The game may be too old for Asher, but Ian has modified it to fit him (as we would for lots of other games) and Asher’s fully engaged and loving it. Daddy is a shining Paragon of Cool in Lucas’s eyes right now and Ian is having fun, too! It all adds up to this: I wouldn’t trade a second of it.

Spreading the Love

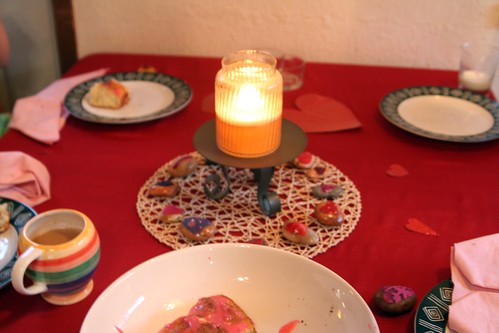
Valentine's Day Breakfast

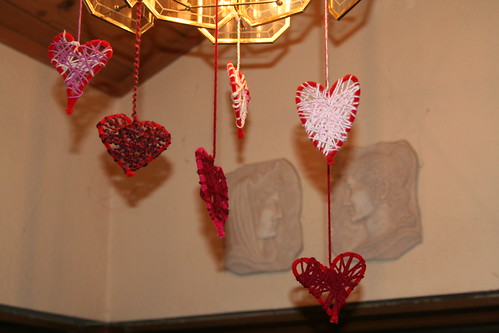
Decoration

Heart Composition Books

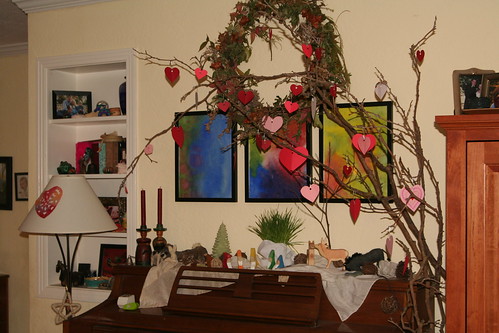
Valentine's Day Nature Table

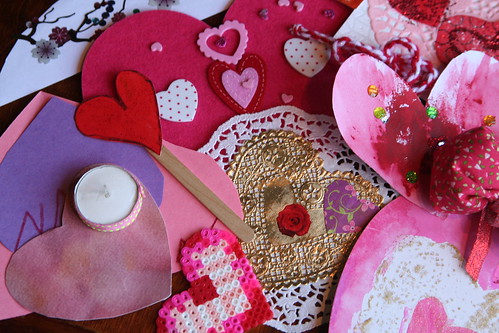
Valentines from Friends

Valentines from Friends

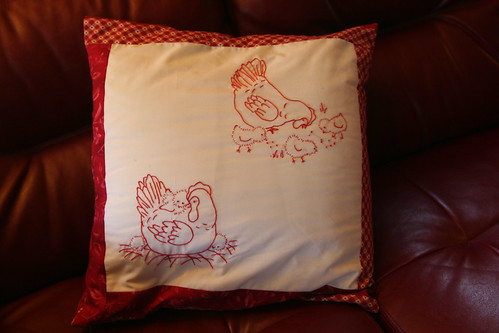
Redwork Pillow from Grandma

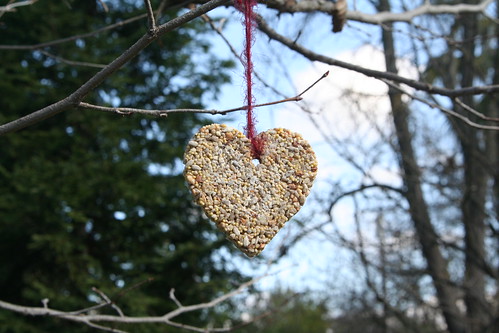
Valentine for the Birdies

Happy Valentine’s Day from our family to yours.

You can find this post also on Homespun Waldorf’s Winter Carnival
Homespun Grab Button

Valentine Window Transparencies Tutorial

Hello! [This post has been edited to remove a broken Pinterest link. 2-13-15]

10-Pointed Window Star

Anyway, I’m kind of obsessed with window stars lately. I got some new supplies for Christmas (kite paper and a new book and paper kit for making window stars). They are challenging for me and so rewarding when you get it right. I made a ten-pointed star the other day and I had to enlist Ian’s help to get the angles right when assembling the points. Then we had to buy a protractor!

Green Window Star

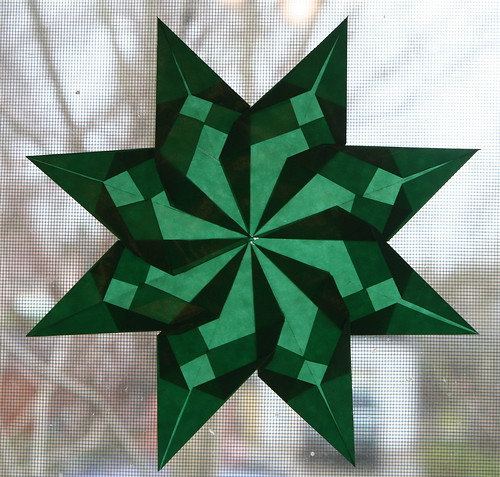
This eight-pointed star I made is new.

Rose Window, Not My Creation

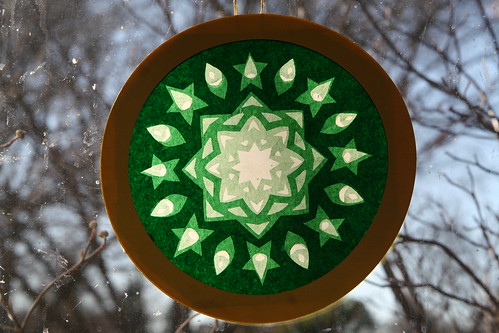
And I accidentally-on-purpose bought this rose window transparency from an 11-year-old kid on Etsy, a shop named Knitting Momma. I couldn’t help myself. It’s so pretty and I like the gnome head shapes within it. See them? (Pay no attention to my dirty windows.)

Heart Window Transparency Cropped

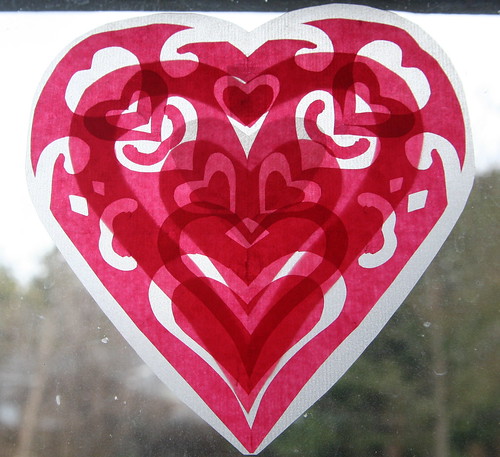
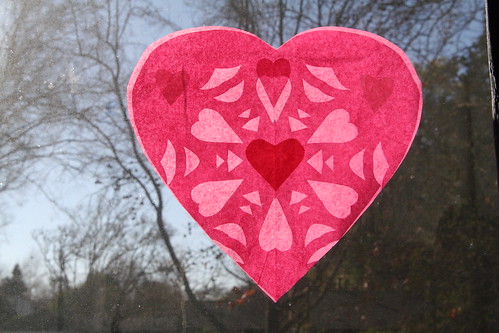
And that got me experimenting with my kite paper. I made this transparent window valentine using three pieces of square kite paper, two red and one white. I like this one a lot. The kite paper is only 6.25 by 6.25 inches, and I wondered if I could do something similar but bigger with tissue paper.

Red and Pink Heart Transparency

Now, I wouldn’t say my valentine window transparencies are perfect, but we learn in the doing, right? So here is what I did, and what I learned along the way, in case you would like to play along.

Materials

  • tissue paper or kite paper in valentine colors (red, pink, dark pink, white, purple)
  • scissors
  • iron on medium heat and ironing board
  • glue stick
  • tape

Tutorial

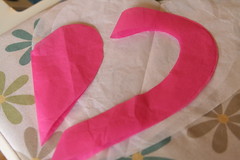
First, lay several pieces of tissue paper of different colors on top of each other. Iron them flat on your ironing board with the heat on medium. Any wrinkles should iron out nicely. Do not spray with water while ironing.

Cutting Hearts Tissue Paper Hearts
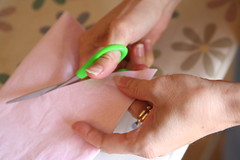
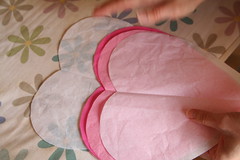
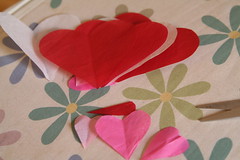
Then, with your papers still stacked, fold it once in half and then in half again. You should now have four stacks of tissue paper. Take one stack, fold it in half, and cut out a big heart shape. Iron out the center crease. Separate the hearts that you’ve just made. They are pretty much the same size, so they can be stacked up again in layers as you make your designs.

Cutting a Smaller Heart from a Bigger Heart  Assorted Sizes

Try cutting one heart into smaller hearts by cutting along the heart’s edge. You’ll end up with two usable pieces: the smaller heart and the heart-shaped edge with an open center. Do this a few times and also cut additional hearts out of the scraps from the big hearts.

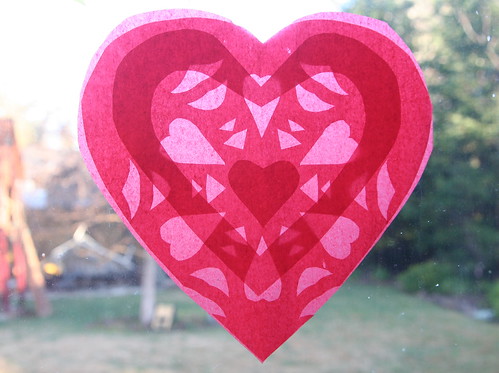
Take one large heart layer and fold it into quarters or eighths, like you would if you were going to cut a paper snowflake. Along the main fold line, cut a small half heart. When you unfold, you’ll have four or eight cut out hearts. Be careful about where you’re cutting, as it’s easy to cut beyond the border of your heart since it’s not a symmetrical shape. This heart transparency shows the four small cutouts. (While it’s folded, you can cut additional shapes such as diamonds or triangles if you wish, like you would for a snowflake.)

Pink Heart Transparency

Cut Out Designs

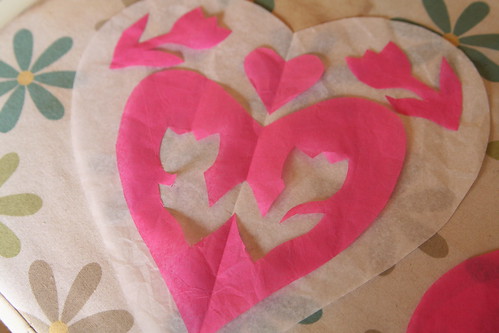
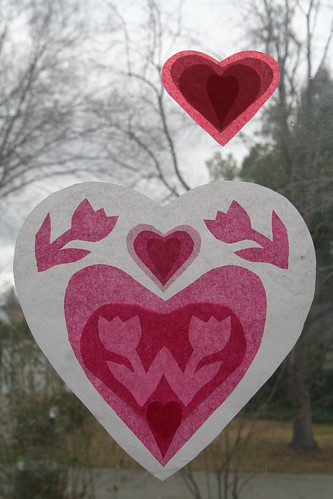
Try folding one layer in half and cutting a simple design. Here is one with tulips.

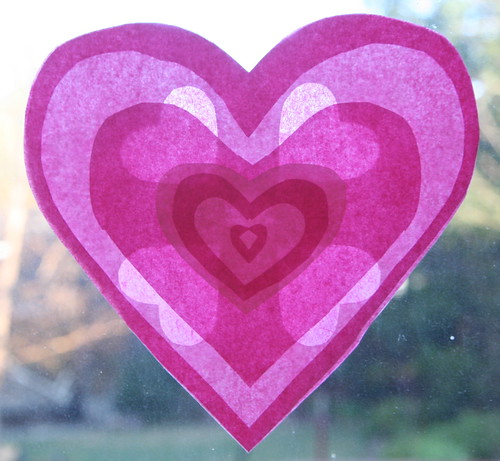
Now play with the layers you have made. Put a whole heart on the bottom and start stacking other layers. Arrange them in a pleasing way, mixing the colors as you like. Hold them up to the window or a lamp to see how the layers affect each other when the light shines through them. The more layers you have, the darker the shapes will seem. You can also put layers on the back of your heart.

Pink and Red Heart Transparency

Keep in mind that you want the valentine window transparency to look nice both when the sun shines through it during the daylight, but also when it’s dark outside, when the interior light of your home will shine on the front of the heart.

When you have the papers arranged the way you like them. Use a small amount of glue from your glue stick to stick the layers together—and be very gentle because the tissue paper rips easily. Try to keep the outer edges lined up precisely. Gently add dabs of glue until all the layers seem sandwiched together. Now iron the valentine window transparency flat again. You can use a small dab of glue stick glue to stick the transparency to the window, or use tape.

I Made These!

You most likely have small hearts leftover from making the big ones. You can make small transparencies as well. The smaller the valentine transparency, the simpler your design will probably be. Several sizes look great all together, I think.

Valentine Window Transparencies

This Magical Window Stars book is terrific. Many of the designs are very complicated, which is a thrill for me. Maybe I’ll work up to them. The book has many star designs that require rectangular papers. In the meantime, you can find a wonderful free tutorial on folding a simple window star here at GardenMama’s blog.

This Origami Suncatchers kit is the one I got for Christmas. It contains the kite paper, a book of 20 star designs, and a glue stick. I find the instructions and photos in this kit to be easy to follow.

A Toy Garden sells both square and rectangular kite paper. This shop is where I buy lots of gifts for my children. A Toy Garden also sells the Magical Window Stars book and a book about rose windows called Rose Windows and How to Make Them.

And finally, if you want to purchase window stars, I recommend peeking in the Etsy shop of Harvest Moon by Hand. Ann is the best at making window stars. Her work is stunning.

Happy Valentine’s Day to you and your loves!


Sick Day Together

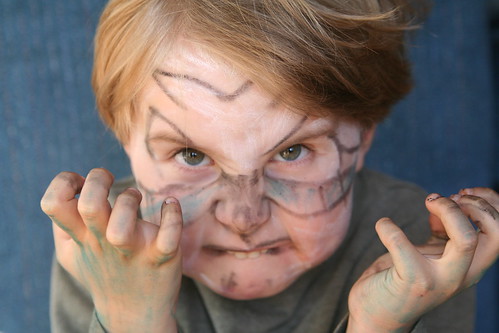
Face Paint Crayons: Dragon Boy, Very Fierce

My guys were home sick today. They’ve picked up a cold and Ian and I are trying to deny that we have a tickle of it, too. Despite it, we had a good day. The boys were surprisingly cooperative both with me and with each other. They played with some of Asher’s new birthday presents, invented a kind of D & D game with Ian’s old dice, and did some chores. Lucas read and Asher did a lot of singing, improvising a song about gnomes and magic and adventure. They both wrote and drew in their journals.

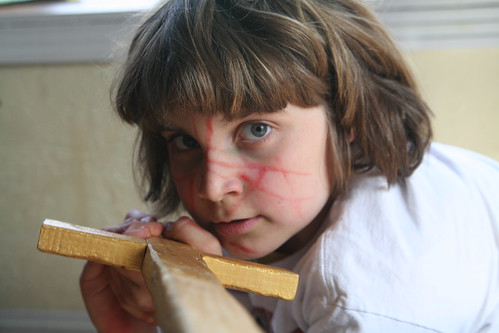
Later they enjoyed painting each other’s faces with some new face paint crayons. As you can see, they were very fierce. Asher was a mighty dragon with wicked claws.

Face Paint Crayons

Lucas was a kind of magical warrior.

Face Paint Crayons

They were thorough. And cute.

Valentines in the Making

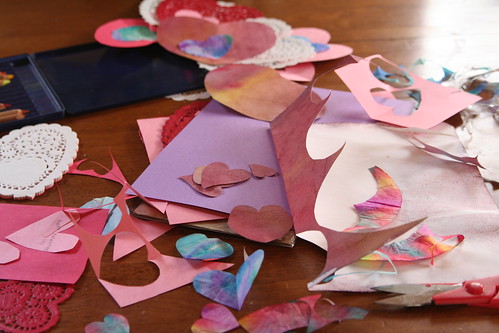
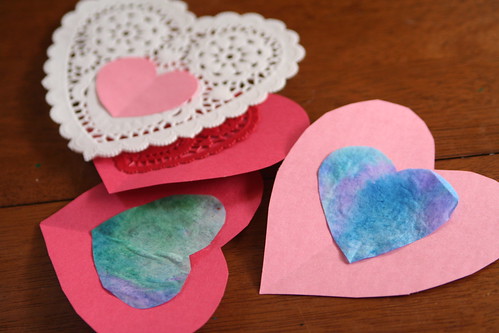
We also started the valentine making. This year, both Lucas and Asher need class sets of valentines for all their classmates. That’s 55 valentines, folks.

Valentines

Asher’s valentines are pretty simple. (Keep It Simple, Sara!) We might add glitter later if we feel like it, and I’ll have to write “Love, Asher” on each of them. Lucas is doing his own thing this year. He’s not so keen to do a project. Mostly he wants to make cards and write on them himself. So, yay! Independence! I get to help a little by cutting out hearts.

We also practiced spelling words today, even though Lucas missed his quiz. We had exciting fruit smoothies for snack, with fresh pineapple and blueberries blended in. Lucas and I worked on our Gryffindor scarf knitting project a little, too. And we watched some “Shaun the Sheep.”

I worked a bit, in between activities, but not enough. So, back to chapter 9 then.

Birthday Traditions and Gifts from the Waldorf Kindergarten

Birthday Book from Kindergarten

On Wednesday of last week, Ian, Lucas, and I got to spend some time in Asher’s Red Rose Kindergarten class. We got to participate in the morning circle time and then the teacher put a golden silk cape on him and a golden crown with a golden star on it. She then told the story of Asher’s life so far. It went something like this …

Once there was a star child playing in the starry gardens of the sky with other star children and his angel guide. One day, he looked down and saw a beautiful blue-green marble glowing down in the sky below him. He saw children playing in the woods, flying kites while beautiful waves crashing on sandy beaches, and babies snug in their mothers’ arms and thought to himself, I’d like to go there. He told his angel guide what he wanted to do, and the angel replied, “Yes, you may go down to the sparkling world. I will go and find you a mommy and a daddy, who will love you and take care of you and welcome you into their family.”
Then the angel guide came down to the earth and found a mommy and a daddy who loved each other very much. They were ready for a baby to love, who would be a brother for their son and a cherished new child in their family. And so the angel guide helped the star child slide down the rainbow bridge into the welcoming arms of his loving family, where he could learn, and play, and grow, and be himself.

{Teacher leads Asher around the circle, asking the blessing of the stars (other children, who make hand motions showing their blessing), the sun (more children blessing as he passes), and the moon (more children blessing Asher with hand motions. Then, she leads Asher to walk on a rainbow cloth and he crosses and comes to my lap.}

His family named him Asher. When he was an infant, he drank mama milk and grew to be healthy and roly-poly. He was a happy baby and he laughed all the time.

{Teacher rings a bell and places it on a gold star on the table. There are five stars on the table.} When he was one year old, he learned to crawl and visited Mama Ocean. He felt the sand in his hands and on his feet.

{Teacher rings a bell and places it on the second gold star} When he was two years old, he learned to walk and talk. He giggled a lot, especially when his big brother was silly. He went on an airplane with his family and grandparents to an island far away and met some sea turtles.

{Teacher rings a bell and places it on the third gold star} When he was three years old, he went to preschool and made many new friends. He sang and painted and played in the garden, helping to plant the seeds. He also camped in the desert and saw many colorful things.

{Teacher rings a bell and places it on the fourth gold star} When he was four years old, he enjoyed visiting the woods and the beach very much. He played with his brother and joined the Red Rose Kindergarten, where he made many, many more friends.

{Teacher rings a bell and places it on the fifth gold star} And now that he is five, he is very alive. And we are celebrating Asher’s birthday. {Teacher lights a special beeswax birthday candle that I decorated for him at the beginning of the year. All the children sing a birthday song to him.}

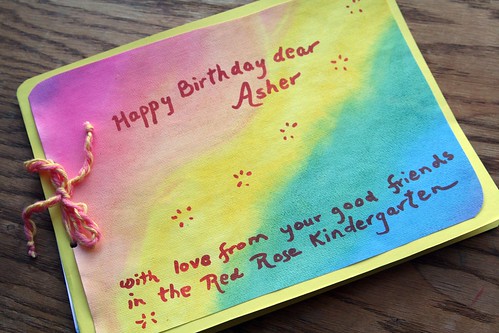
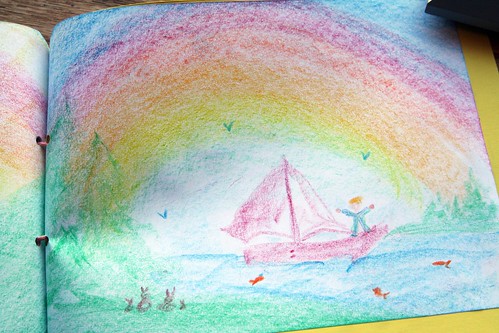
Asher was then given two gifts. One was this beautiful book full of birthday drawings from his classmates and his two teachers.

Birthday Book from Kindergarten: Mrs. L's Drawing

This is Mrs. L’s drawing in Asher’s birthday book.

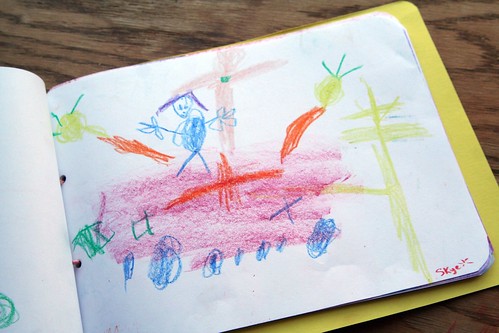
Birthday Book from Kindergarten

This is a drawing from a sweet classmate.

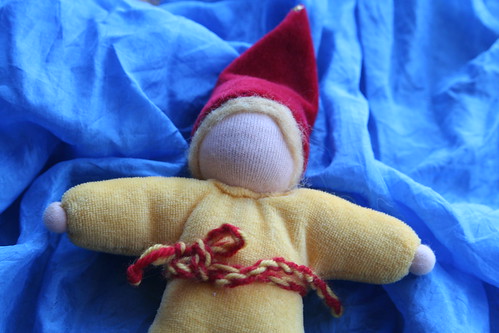
Asher opened his second gift, his very own handmade House Elf. This doll is about 8 inches tall and features a tiny star on the top of his hat.

Gift from Teachers (House Elf)

Asher has named him Miko, and played and played with him this week.

Although Ian and Lucas went to work and class, respectively, I stayed in the Kindergarten for the whole morning. I got to interact with beautiful children and see Asher play with his friends. I got to guess the names of some kids’ Little Ones (small Waldorf dolls that each child has as his or her own special friend).  During snack time we ate oatmeal and the strawberry fairy cakes I baked. We played both inside and outside, did clean-up chores (with each child accomplishing his or her assigned job), and I watched entranced as Asher sat in teacher’s lap and played the lyre, while his classmates rested on the rug. Seeing 18 children lying quietly for 10 minutes or so was nothing short of miraculous. Finally, we ended our beautiful Kindergarten day by going for a walk into the woods all the way to the great fallen oak tree, which my boys and I call the Bee Tree because there is an active beehive in a hole in the trunk of the tree. It is a good 15 feet in the air because the tree roots and branches are propping the trunk up high, like a great archway. It’s a magical place and I love it there. The children climbed the great tree’s branches and then played tag until it was time to walk back.

Asher and I left school then and went to have lunch together.

Is it any wonder that my little son feels so secure and nourished in this school environment?


Handmade Birthday Gifts for Asher

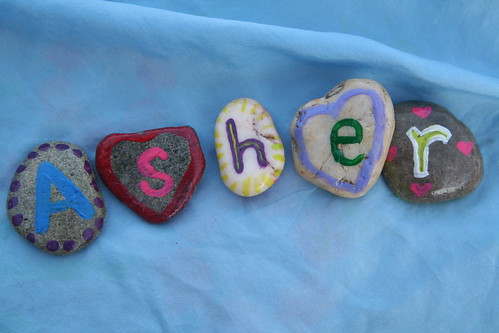
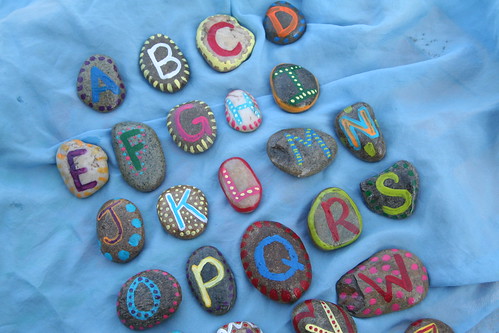
Mama-made Alphabet Stones

Today is my baby boy’s fifth birthday. I am over the moon with excitement for him. I live for this stuff, I think. Anyway, over the last several days, I’ve been scrambling to make some gifts for him.

Mama-made Alphabet Stones

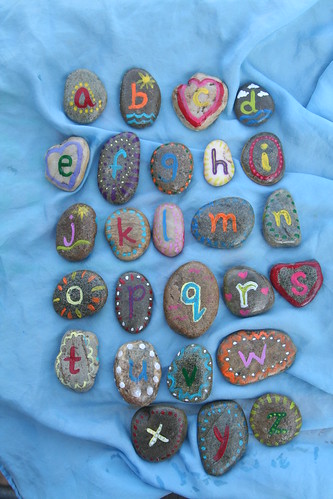
I made these alphabet stones for him using rocks from my yard and my paints. I got this idea from a photo I saw on Pinterest, which I believe is originally from this blog. I am grateful for the fun idea. Asher is five, so I don’t know how or if he will connect with these letters yet, but even if he doesn’t, they are still fun to hold and look at. I think manipulating them to make short words will be fun, and that’s all that matters at this age.

Mama-made Alphabet Stones

Each stone has its lowercase letter on the other side.
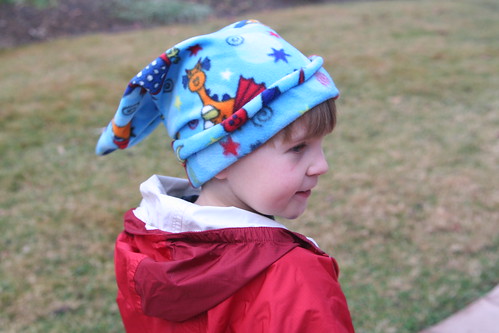
Mama-made Dragon Hat

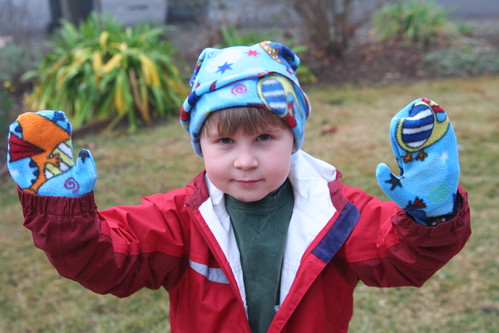
Thanks to a lot of help from my mother and her nifty, first-class serger, I made this fleece dragon hat and a matching pair of mittens. I’ve never done anything like this before and the mittens in particular were challenging for me. But a more accomplished sewist (“sewer” just doesn’t look that great even though it’s correct, does it?) would have an easy time of it, I think. I just traced Asher’s hands and made a paper pattern, adding a good 1/2 inch for the seem. I also made the wrist portion wider to ensure that he could get his hand into the mittens. Fortunately, fleece is slightly stretchy and it’s pretty dreamy to sew because it doesn’t fray, so you don’t have to be as nitpicky as with other fabrics. BUT—like I said, we serged these! And my goodness, what a dream of a machine that is! This was the very first time my mama let me touch her serger. (Machines and I don’t always see eye to eye.)
Mama-made Dragon Hat and Mittens

OK, the back of the mittens look best. Anyway, he went off to school this morning wearing them!

Crayon Holder for Asher's 5th Birthday

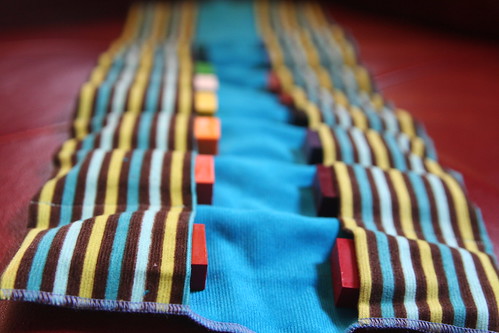
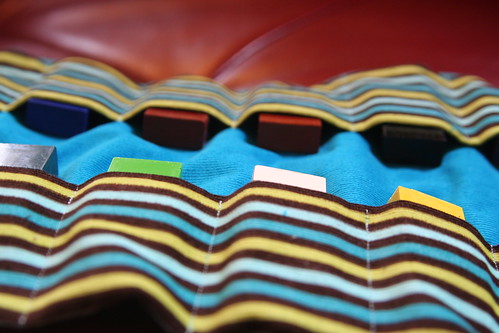
And finally, here is a crayon holder I made for his brand-new birthday block crayons. We have block crayons in this house, but technically they belong to Lucas. I thought Asher might like to have his own and a special place to keep them safe. (I don’t know if he WILL keep them safe, but with the crayon holder’s pockets he COULD.)

Crayon Holder for Asher's 5th Birthday

This item has 22 wee pockets, with six that are empty now so he could add to it later. And to be honest, I still have to sew a ribbon tie on one end of the crayon holder before I can wrap this up. So, I’d better go do that.

Today is for writing, wrapping, baking a cake, and baking a class set of muffins for tomorrow’s Kindergarten celebration. Tonight we’ll have a small family celebration with Asher’s choice of dinners—Daddy’s stir fry with Chinese noodles.

  • About Sara

    Thanks for visiting! I’m Sara, editor and writer, wife to Ian, and mother of two precious boys. I am living each day to the fullest and with as much grace, creativity, and patience as I can muster. This is where I write about living, loving, and engaging fully in family life and the world around me. I let my hair down here. I learn new skills here. I strive to be a better human being here. And I tell the truth.

    Our children attend Waldorf school and we are enriching our home and family life with plenty of Waldorf-inspired festivals, crafts, and stories.

    © 2003–2018 Please do not use my photographs or text without my permission.

    “Love doesn’t just sit there like a stone; it has to be made, like bread, remade all the time, made new.” —Ursula K. LeGuinn

  • Buy Our Festivals E-Books


  • Archives

  • Tags

  • Categories

  •  

  • Meta