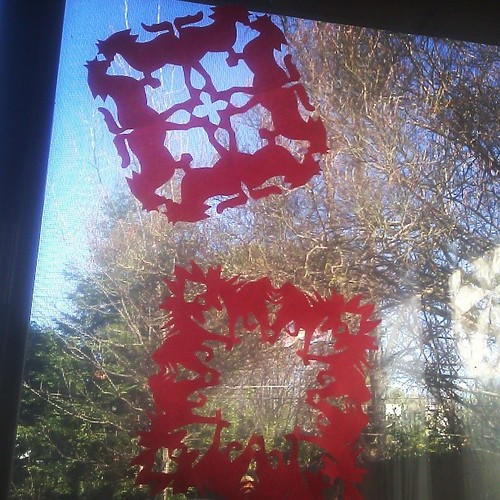
Are you excited about Saint Patrick’s Day? I am because we can do anything we want to celebrate. I’m a big fan of “minor” holidays for this reason. We can be creative and silly and spontaneous, and even do something different every year, if we want.
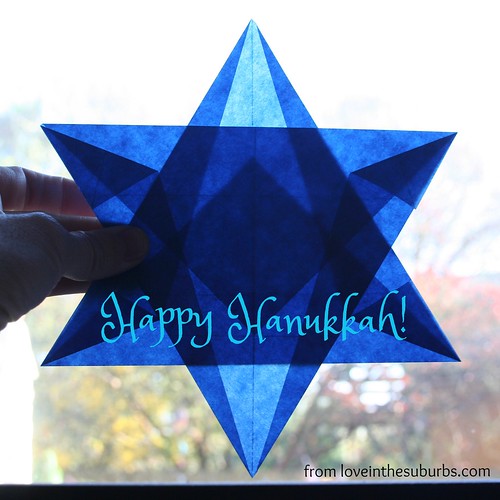
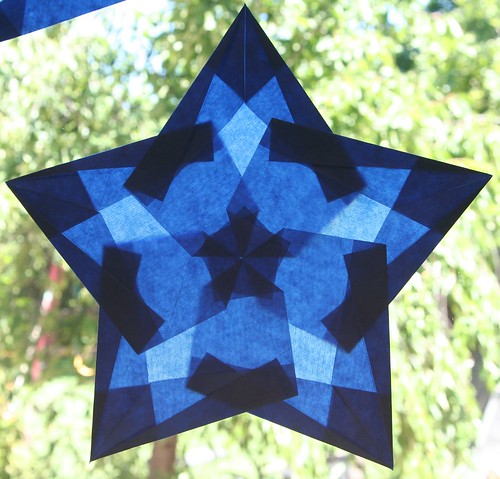
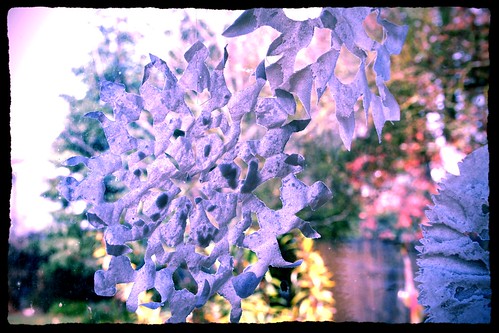
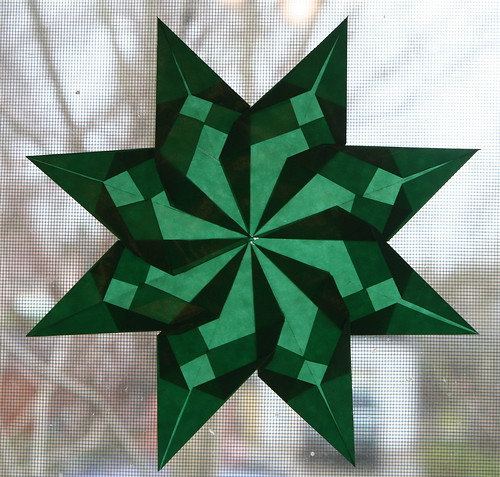
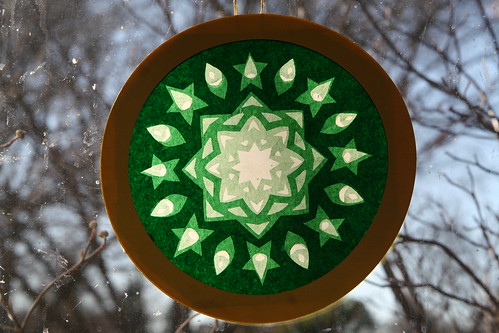
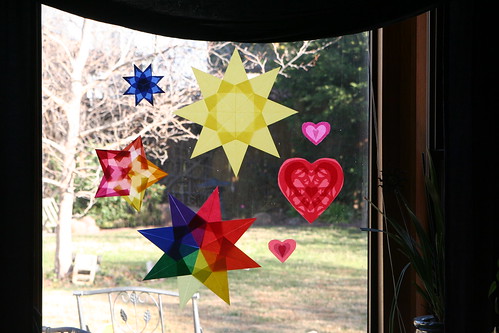
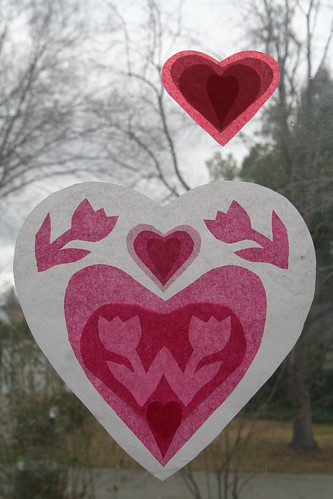
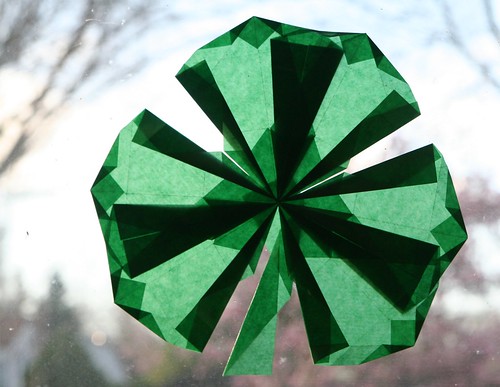
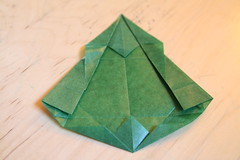
I thought I would share this with you. I made up this shamrock window transparency, building on what I’ve learned from Magical Window Stars by Frédérique Guéret. Although there is a beautiful clover leaf design in the book, this is not it. This design that I’ve created uses the square kite paper that is most commonly available. The basic point I teach below is Guéret’s invention, but the configuration and the assembly of the shamrock was my idea. I hope you like it. In any case, I fully recommend this book if you love window stars like I do.


Materials
- 7 sheets of square kite paper in dark green
- scissors
- glue stick
- tape
- ruler or straight edge for making crisp folds
Tutorial
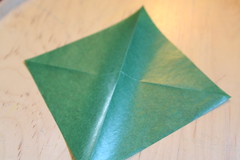
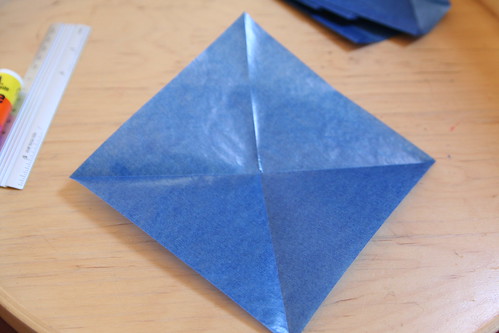
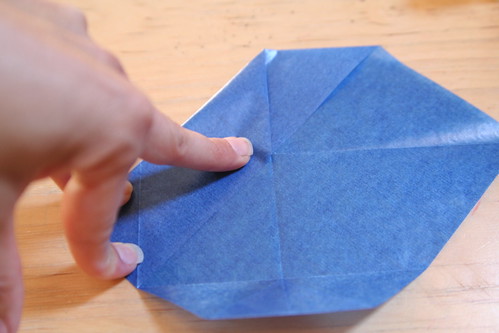
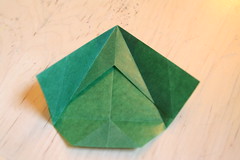
Fold your square into diagonals.
Now fold opposing corners to the center line (photo above). The top is now a horizontal fold that is parallel to your horizontal crease.
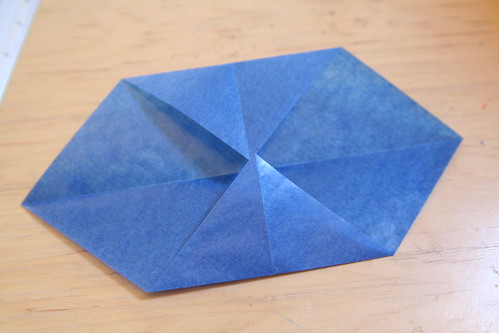
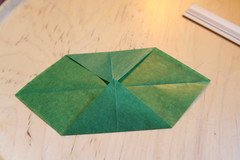
Unfold the bottom corner; the crease you made will be used later. From the top, folded edge, fold the right side down to meet the center horizontal line (photo above).
Do the same to the other side. Now you have a point at the top again (photo above).
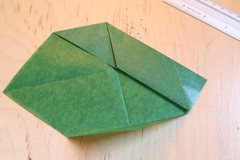
Fold the bottom corner up to the horizontal crease line (photo above).
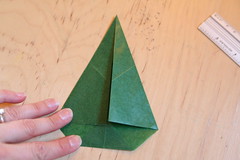
Now fold both sides in to the center vertical crease. This step looks like an airplane or maybe a sailboat. Do your best to keep the top point crisp.
Open those sides out again.
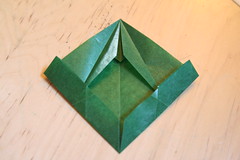
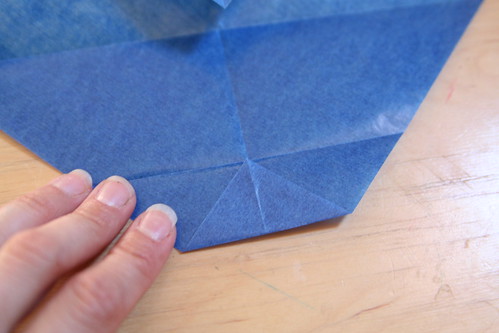
Now fold the bottom sides up so that the flat bottom edge aligns with the center vertical crease (photo above). Unfold those bottom sides again.
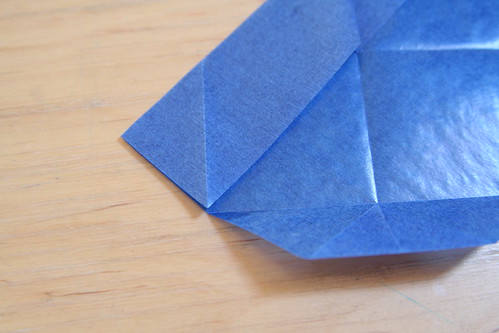
Now fold the left top side in again, allowing the corner to touch the horizontal crease you made in the previous step. Your top point is becoming more acute.
Above is a detail of this step. See where the left edge folds in and meets the crease? The corner touches the horizontal crease.
Now do the same with the right side.
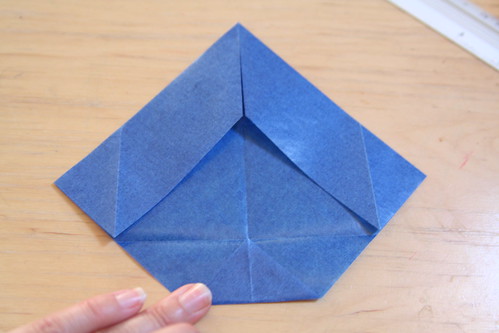
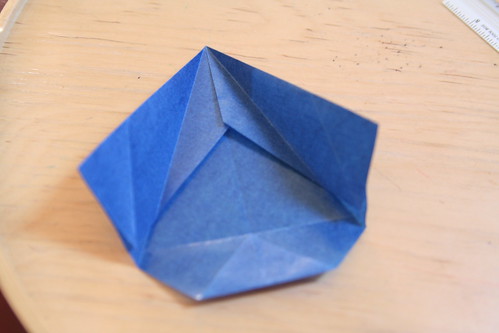
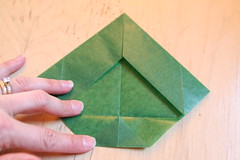
Open out the innermost flaps of the top point, allowing their “wings” to extend beyond the edges of the sides.
From the bottom center, you have two diagonal creases. Fold the very bottom edge on both sides up, aligning the bottom edge with the diagonal creases.

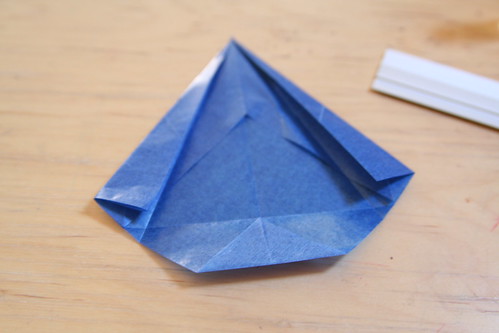
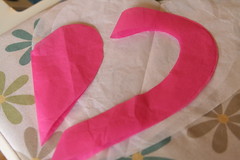
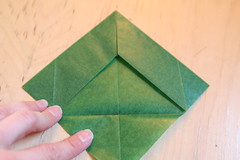
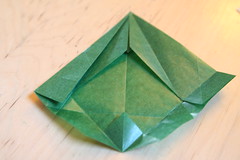
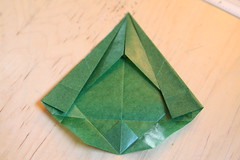
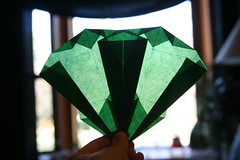
This photo above is a detail of that final fold. Congratulations! You’ve make one point. Now— sorry about this part—you repeat that process five more times, so that you have six of these points. Two points will make one lobe of your shamrock.
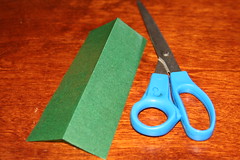
Once you have six of those points, you can make the stem. Take another square of kite paper and fold and cut it in half. Now fold and cut piece in half again and cut along the fold. You should now have a skinny, rectangular strip that is one-quarter the width of the original square.

This long strip is the stem of your shamrock. Fold the bottom of the strip like the photo above.
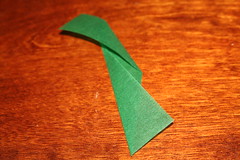
And fold the top of the strip in the opposite direction, like so. This makes it kind of curve. You now have all the pieces you need and you can assemble the shamrock window transparency.
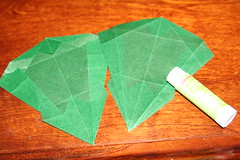
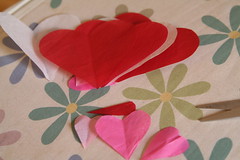
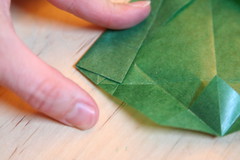
For each lobe of the three-lobed shamrock, you’ll need two points. The sharpest point—what I was calling the top in the photos above— goes in the center. The front side of each piece is the side with the points. If you run your fingers across the front, they will catch on the little triangles created in the folding process. The back side is smooth; your fingers won’t catch on any part. Turn one of the two points over so that the back side is up, as in the picture above. Run your glue stick along the right edge (where the glue end of the glue stick is in the photo above).
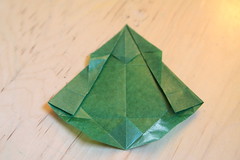
Align the points at the bottom as close together as you can, hold your two points up to the light, and align the darkest edges side by side, as you see in this photo above. They make a very dark upside-down triangle in the middle. The broad (formerly bottom) end of your two points will be overlapping. You now have one lobe of your shamrock done. Do the same thing two more times to make two more lobes of your shamrock.
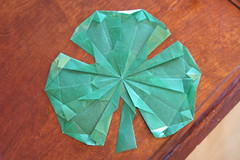
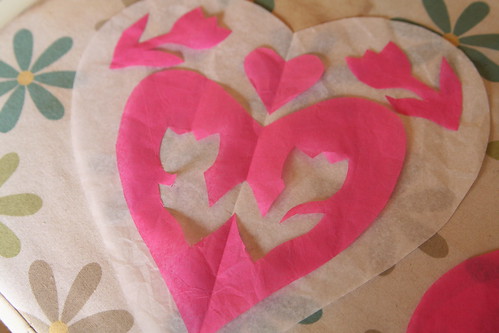
If it helps, hold up each lobe to the light before gluing them together. You should see a medium green triangle in the center when all three points are aligned. Now put all the center points together on top of your stem. Glue them to the stem with your glue stick so that the points of the center are just barely touching and the three lobes are almost touching halfway up, just beyond the edge of that inner triangle. The stem should extend down in the gap between the left and right lobes of the shamrock.
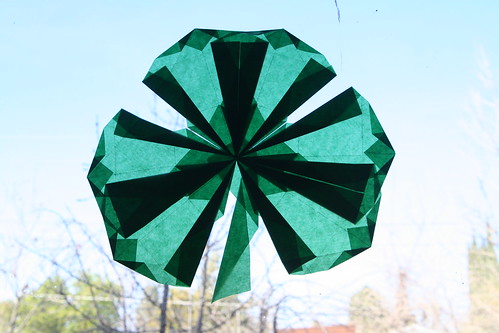
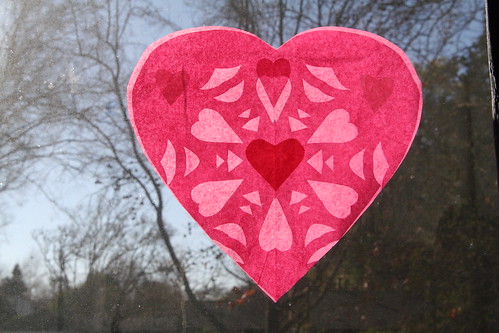
Now you can hang your shamrock in the window. Make three or four loops of tape and put at least one on the back of each lobe to stick it to your window. Perhaps your window shamrock with bring you good luck!
The Dear Little Shamrock
There’s a dear little plant that grows in Ireland.
‘Twas Saint Patrick himself sure that set it.
And the sun on his labor with pleasure did smile.
And a tear from his eyes oft-times wet it.
It grows thro’ the bog, thro’ the brake, and the mireland,
And it’s called the dear little Shamrock of Ireland.
That dear little plant still grows in our land,
Fresh and fair as the daughters of Erin,
Whose smiles can bewitch, and whose eyes can command,
In each climate they ever appear in:
For they shine thro’ the bog, thro’ the brake, and the mireland,
Just like their own dear little Shamrock of Ireland.
That dear little plant that springs from our soil,
When its three little leaves are extended,
Denotes from the stalk we together should toil,
And ourselves by ourselves be befriended.
And still thro’ the bog, thro’ the brake, and the mireland,
From one root should branch, like the Shamrock of Ireland.
—Andrew Cherry